My house and yard are tiny and I needed a place to work.
The garage was originally a double (19' X 19') with 2 overhead single doors but the former owner used 1/2 of one of the car bays to build a new utility room which left me with about a 300 ft² 'L' shaped area (see diagram below).
The former owner also attached some cabinets and benches across the East and and South walls.
The need for space and flexibility forced me to really consider how to use what space I had, vertically as well as horizontally.
My first decision was "everything must be on wheels" so with this in mind I began thinking about what I needed to do.
My second decision was, "what can I put on the ceiling".
The shop frequently undergoes modifications so the pics below don't all have consistent backgrounds.
Some shop pictures.
Clutter clutter everywhere!
You'll notice the shop walls are cluttered (even the ceiling), I have to use every bit of space to store stuff.
Most of my large tools are Jet, I didn't set out to do that, Jet just won most of the functionality to $ trade-offs.
I also have pics and a diagram of my air compressor and water trap.
In 2018 I did a lot of revamp of the shop, and some of the tools.
You'll notice some pics don't show current tools.
In 2021 I did more shop revamp, check out Dust Collection and Automation and Blower Upgrade.
BTW the background for this page is a pic of the concrete floor in the shop!
Click for Larger Pic
Shop Layout

| Looking North and a little West:
Needless to say, I have to move something to do anything in the shop.
Thats why everything is on casters.
You can see the woodworking bench on the right, half in the small East bay.
Note the new 1" foam board added to the overhead door, it makes a huge difference in the temp both winter and summer.
|
Machines
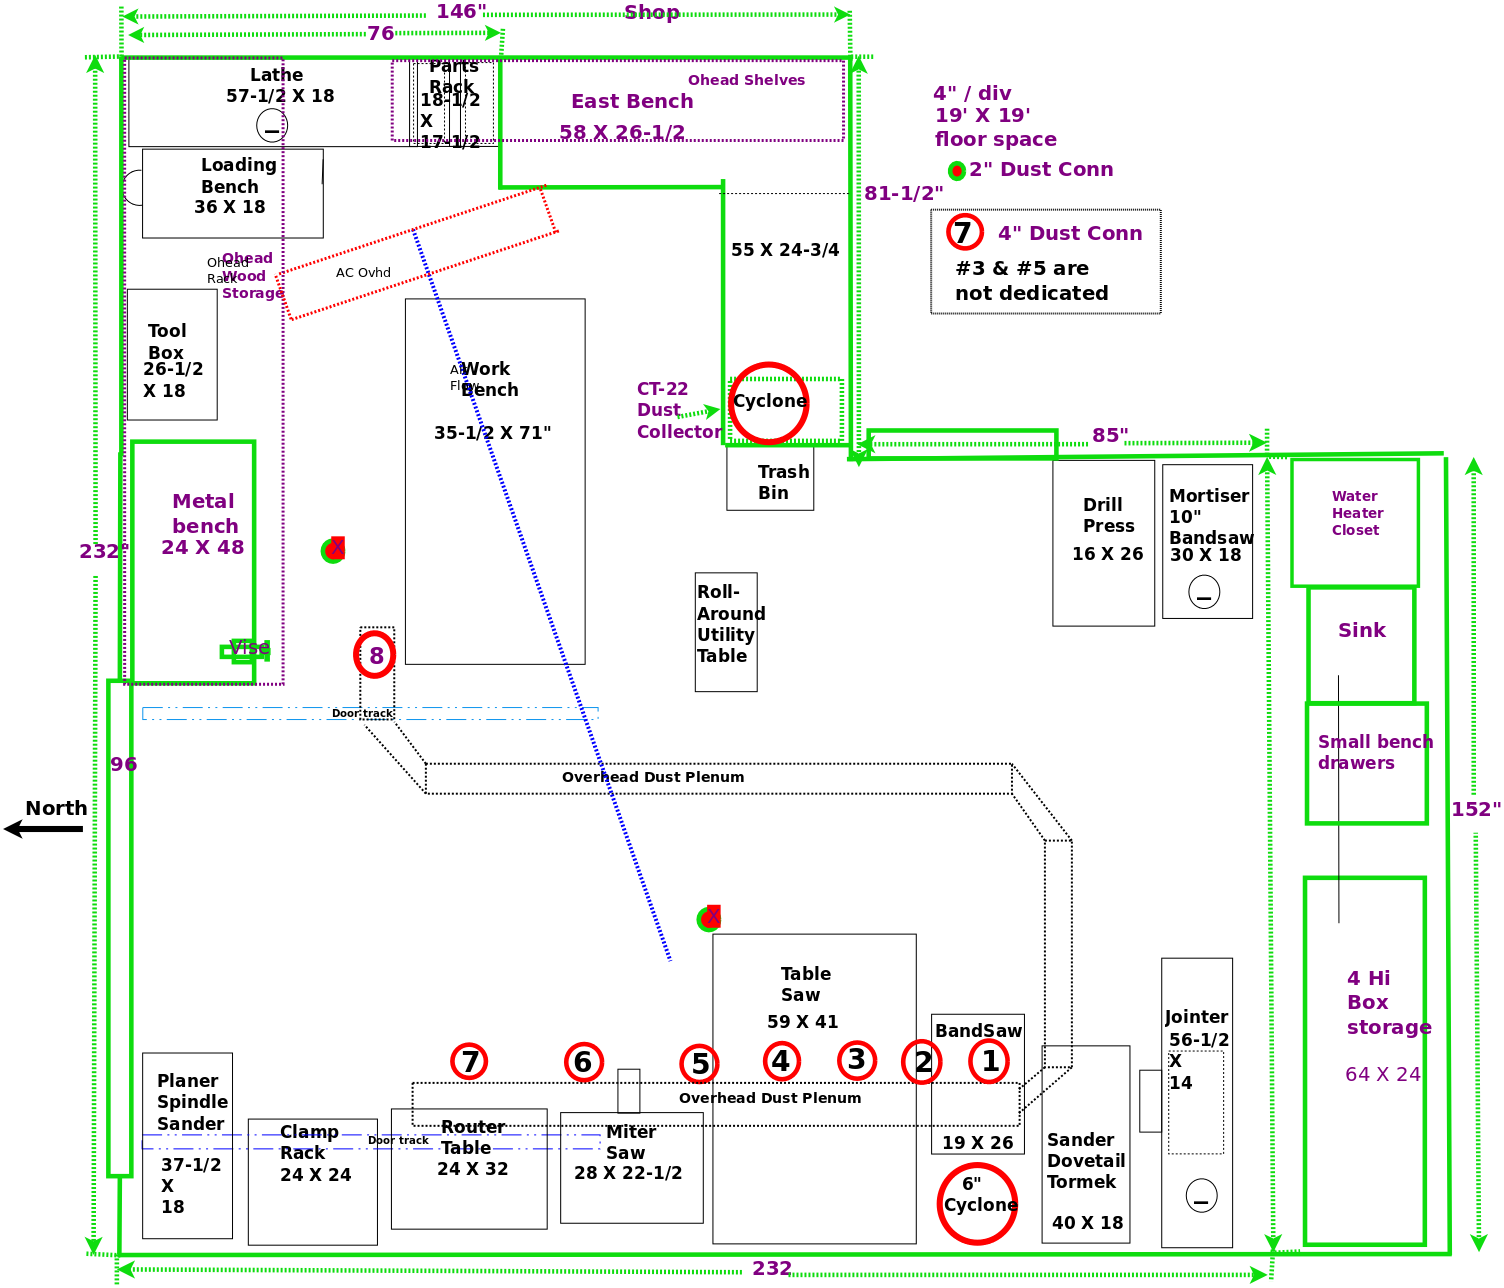
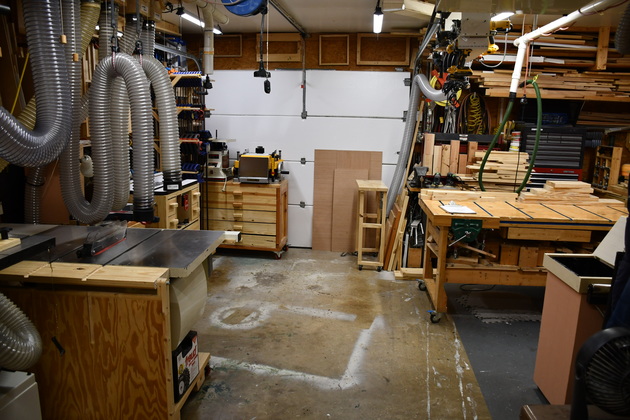
| Looking at the machine line on the West wall.
You can see the 4" and 6" vacuum hoses hanging down from the 6" vacuum plenum , the 6" hose and valve to the bandsaw.
Note above the table saw and to the right of the bandsaw you can see the filter, the cyclone is behind the bandsaw, you can see the Jet blower above the bandsaw.
Left to right are the Jointer, 12" sander (and Dovetail Jig), bandsaw, table saw, miter saw, router table and clamp rack.
The larger machines are on either machine benches or caster bases.
I didn't set out to get only Jet equipment, but when it came to my cost vs quality decision, Jet mostly won.
I recently replaced my Jet JPM-13CS planer with a DeWalt DW-735, the Jet worked great but just took up too much room for my available space.
|
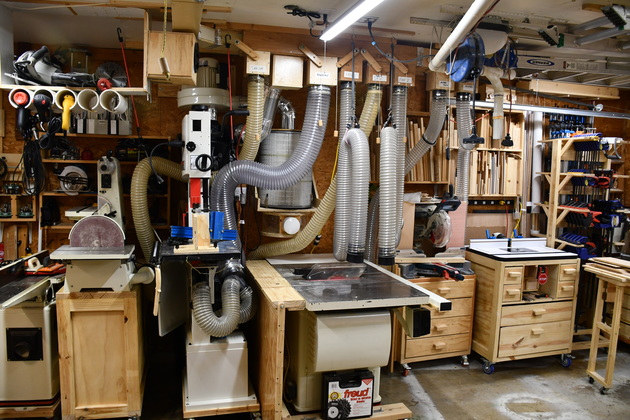
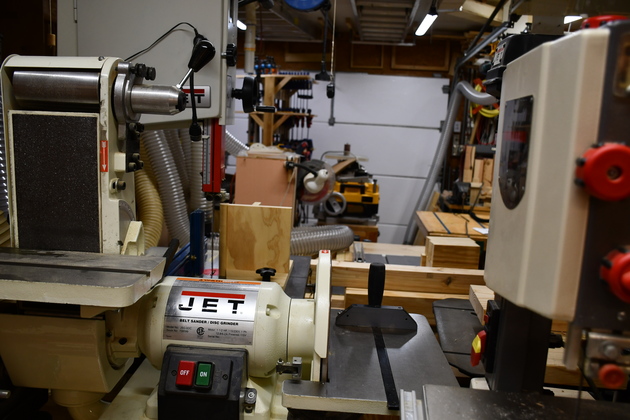
| A little better look at the South West corner, you can see the Jet JJ-6CSDX 6" jointer, 12" sander, and 14" bandsaw.
You can also see the South wall storage bins.
|
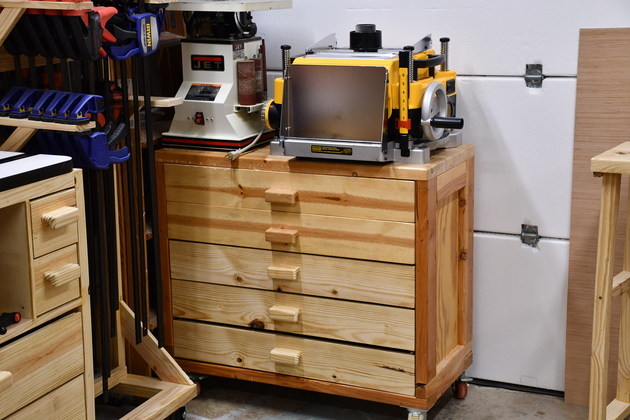
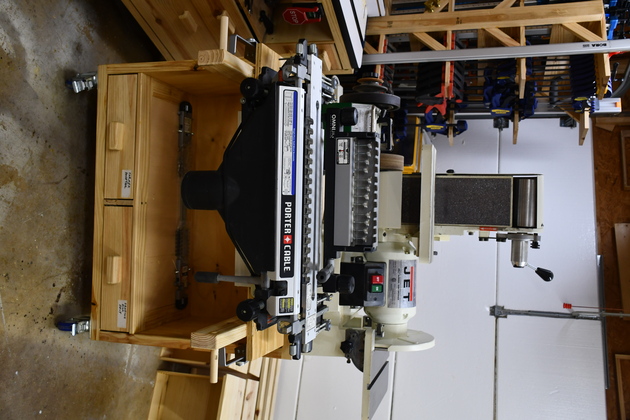
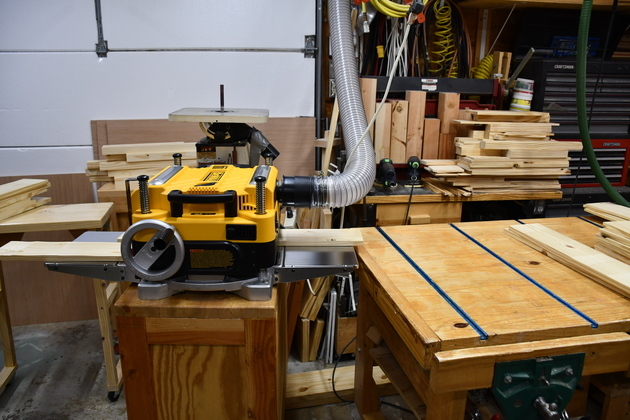
| Planer and Spindle sander bench in the North West corner by the overhead door.
The planer is a DeWalt DW-735, It replaced a Jet JPM-13CS which worked great but was just too big for my shop.
BTW, Note the new drawers for this bench.
|

| Sander bench with dovetail jig stored.
Note Tormek on the sander bench.
I don't use the belt sander thats why there is no belt on it.
I'd love a 12" sander without the belt sander.
I had a 12" Delta sander but it kept breaking and the trunions wouldn't hold the table square with the disk.
|
|
South East Wall
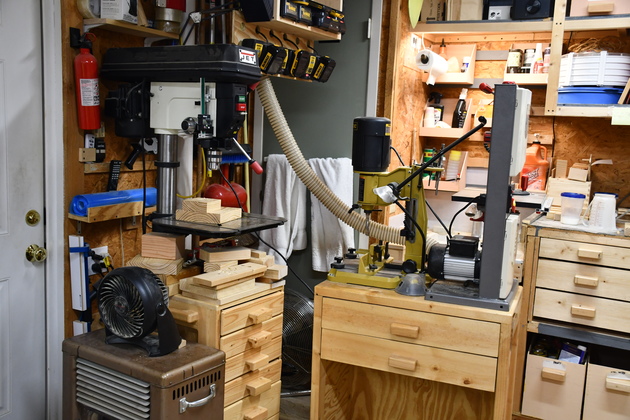
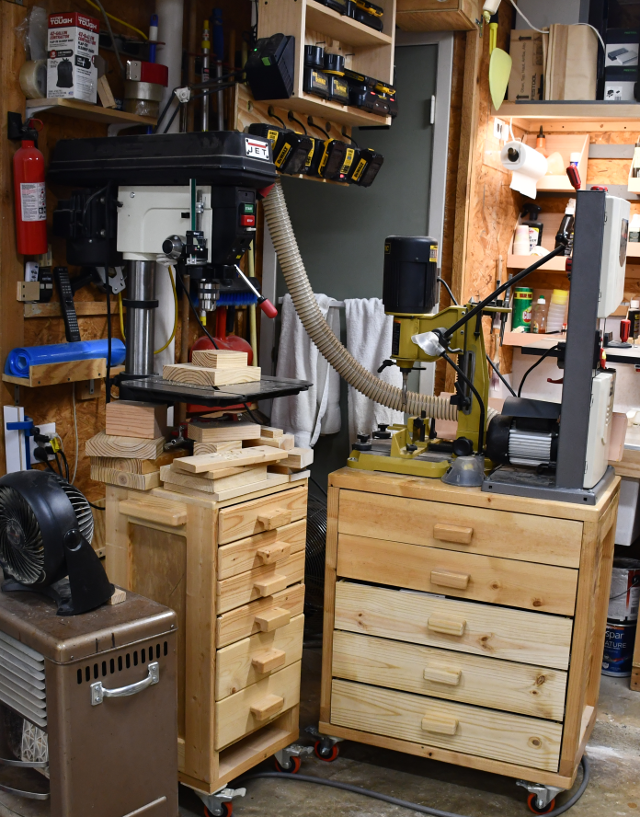
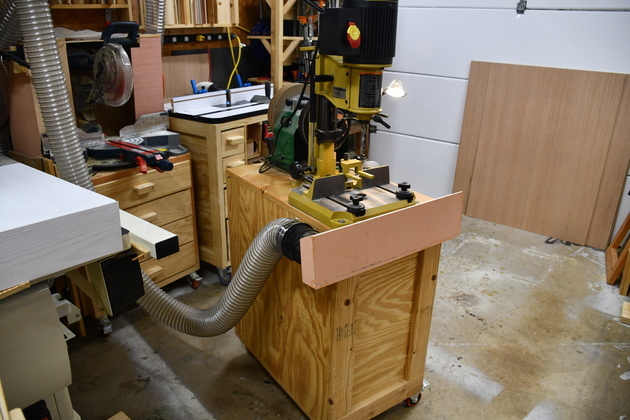
Drill press with bit and accessory storage lift off cabinet and the right bench holds the 10" bandsaw and mortiser.
You can see the 2" dust pipe, coming from the 2" plenum and valves, which serves the bandsaw.
Above the bandsaw you can see the charging station.
|

|
North East Wall
You can see the Power Matic PM2014, lathe, on the left, with loading bench, against the wall, and the roll-around parts rack, in it's stored location at the end of the East bench, in the North East corner under the MiniSplit Air Handler.
Installing the minisplit allowed me to build the two shelves above the loading bench, and saved space in the winter since I don't need the Dearborn stove now.
|
Work Space
|
Looking South.
You can tell its winter, note the Dearborn stove by the drill press (left side).
Note: this is before I installed the mini-split AC!
|
|
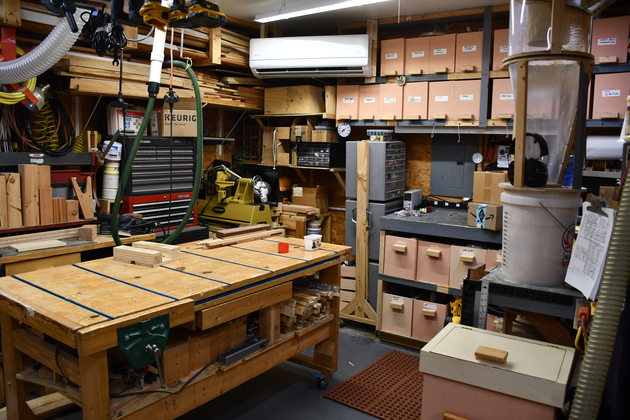
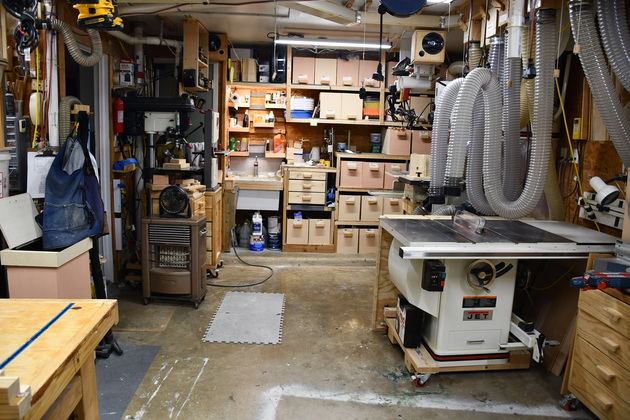
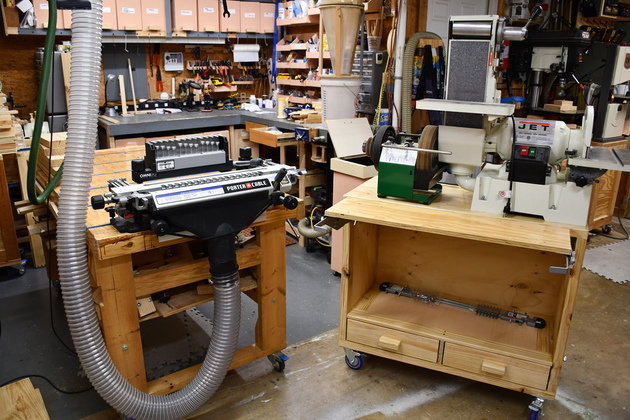
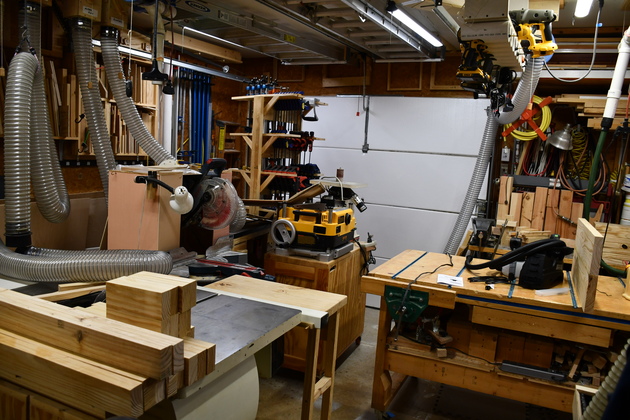
Looking North West, a little better pic of my workspace.
It isn't much but I try to make the most of it.
|

|
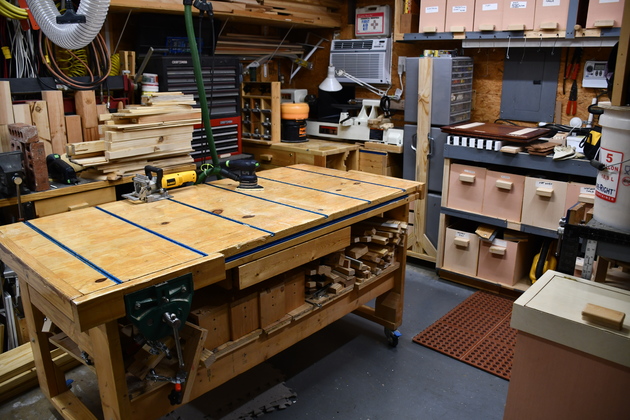
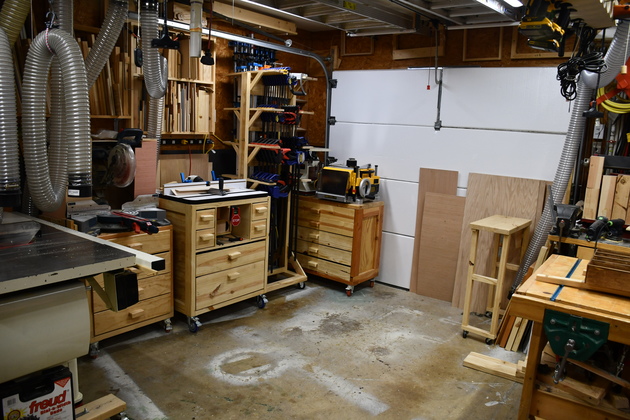
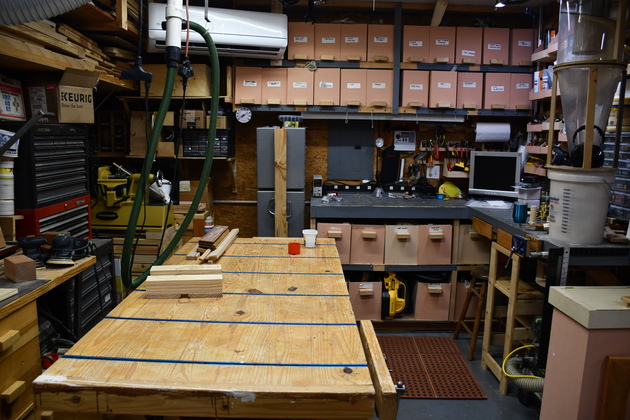
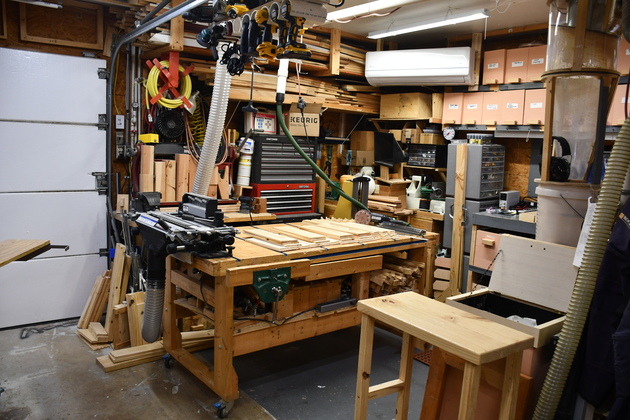
Looking North West from the small bay.
My woodworking bench, its on casters also.
The bench is 72" long, 34" wide and 36" high, with imbedded vises on the front and right side and tee tracks every 12" and on the front.
The bench's 36" height matches the bed on the miter saw, so I can cut long lumber using the woodworking bench as an inflow table.
The tops on most of the work benches are 36" high.
Note the shelf under the bench, it holds the tressels and larger tee track accessories.
There is also a wide and deep drawer for tee track clamps & stuff, in the work bench.
You can also see the new router table in the background against the West wall.
|
|
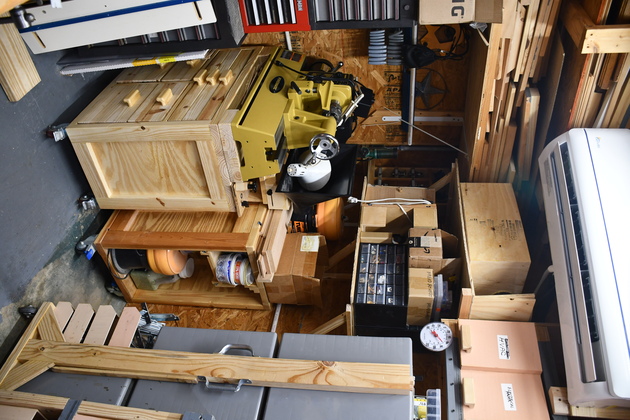
Looking East at the small bay (nook).
I do most of of my work on the workbench in this bay.
In 2018 I removed 1/2 of the bench and shelves, on the East wall, moving the 24" boxes to the South wall, so I could store equipment in this corner.
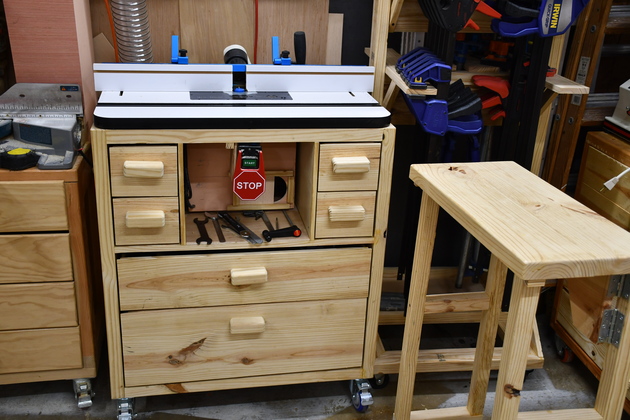
The router table had been attached to this bench, and I moved it to a roll-around bench.
|
|
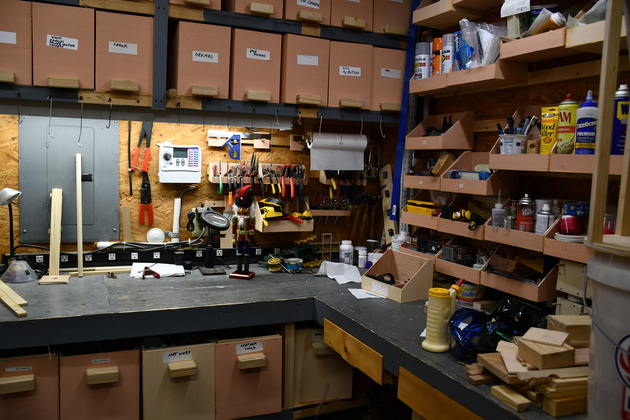
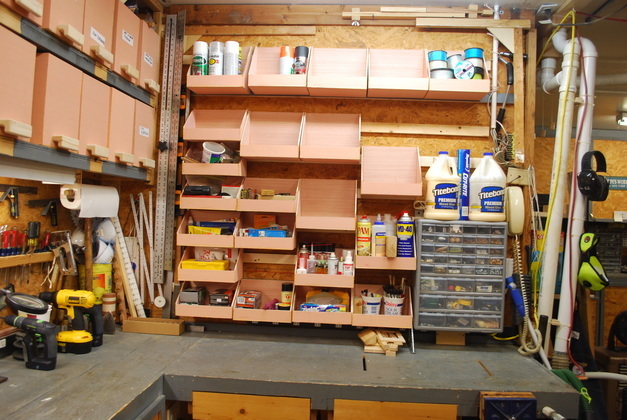
South East of the small bay.
The small tools on french cleats on the East wall below the hi shelves.
Also note storage in small slope front bins, on french cleats, on the right (South wall of small bay).
|
|
A closer look North East, you can see the lathe in the corner under the minisplit air handler and the loading bench against the wall.
|
|
Looking North.
The workbench, on the right, extends into the small bay.
|
Storage
|
Looking South at North side of Utility room, I added sloping front bins on french cleats
Much more flexible and usable.
Also note the bins on shelves above the bench on the left, these were originally cabinets with doors, but again, this is much more usable.
This was made before I built the 2" cyclone.
|
|
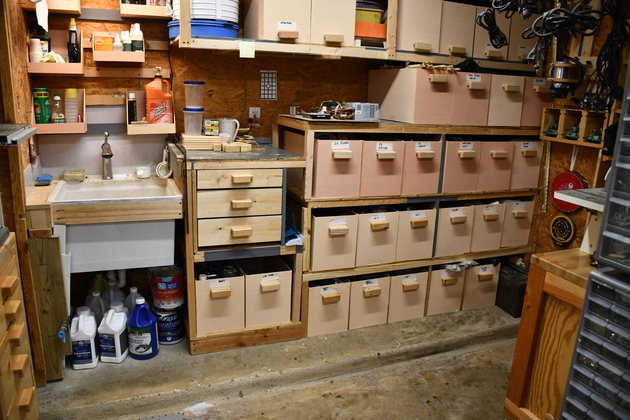
In 2018 I remodeled the sink and storage area on the South wall.
Reworked the sink area: re-routed the sink drain, reframed the sink proper, and added a little splashback.
Also removed a piece of shelf above the sink and added french cleat storage.
When I bought the house these were all cabinets with doors, I removed the doors and added plywood storage bins.
More recently I converted part of the 2 shelf bench, on the right, to a 4 shelf high area for more 24" plywood boxes and to remove boxes from the North end of the East wall.
I'll probably extend two of the french cleats above the drawers.
|
|
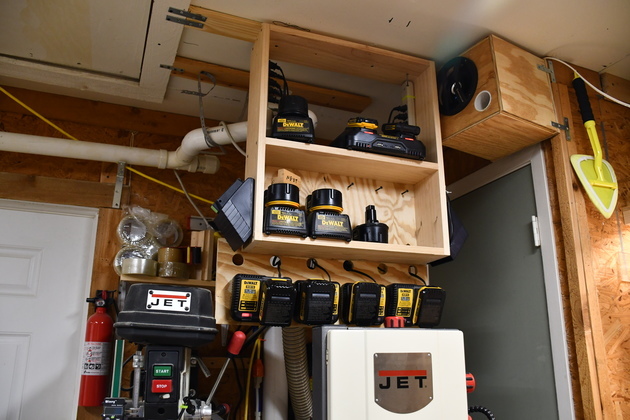
Charging station above the 10" bandsaw and drill press.
I have had the 18 volt DeWalt tools for 12-15 years, they are gradually dying off and being replaced by 20volt DeWalt Max.
With 20 volt adapters, the 18 volt tools still work great.
|
|
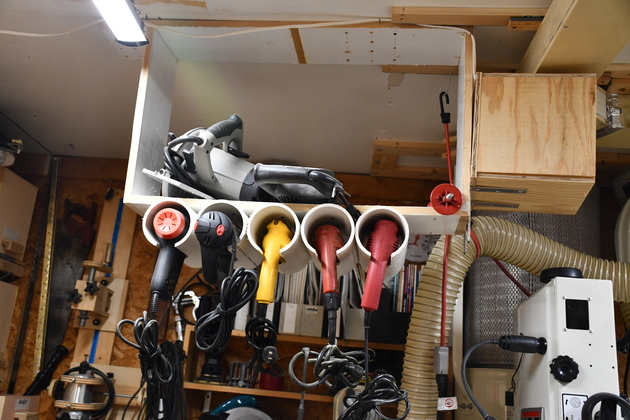
Large Tool Rack above the Sander.
Note the 4" dust plenum extension to the 6th valve passing on the right.
|
|
Cut-Off (wood scraps) storage shelves, on the West wall.
|
|
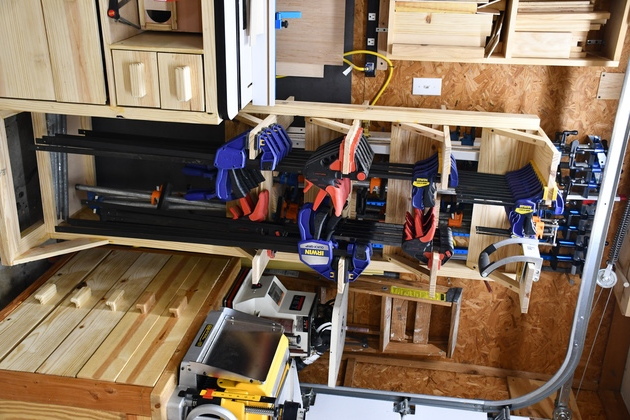
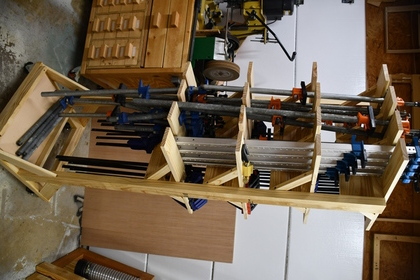
Back of the clamp rack with bar and pipe clamps.
|
|
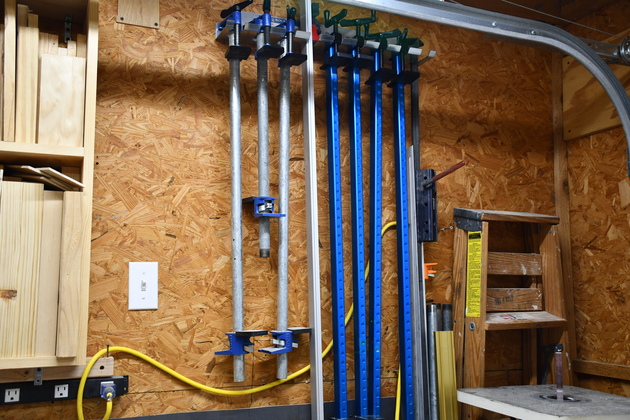
More clamps on the wall behind the clamp rack.
|
Dust Collection

|
To Shop DustCollection Page
The shopvac cyclone on top of the bench and just out of site above the door, the 2" plenum.
The CT-22 2" DC (usually behind a pink trash bin), under this end of the bench.
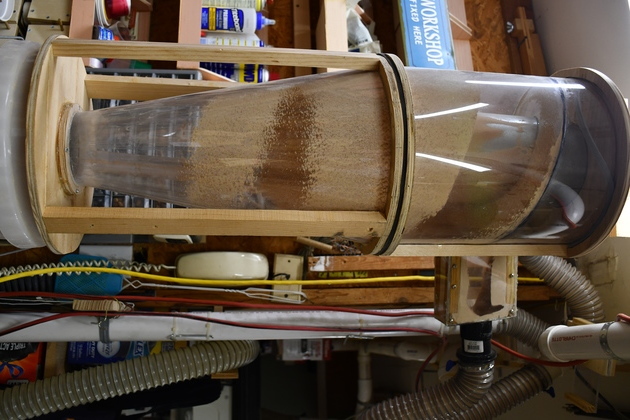
| The cyclone after sanding a lot of fat wood, you can see where the chips travel sprialing down into the dust bucket.
Its interesting, the chips enter at the back top, travel counterclockwise (as seen from above), around one full circle, as they descend, not sticking to the lexan, then start sticking to the lexan.
Then the chips start sticking and show the path of the chips, for about two revolutions, it could be, as they gather centrifugal force there is enough pressure to make them stick.
|
|
|
The 2" DC slide valves, on the ceiling above the door.
You can see the top of the cyclone on the lower left and the AFS-1000 on the upper left.
|
|
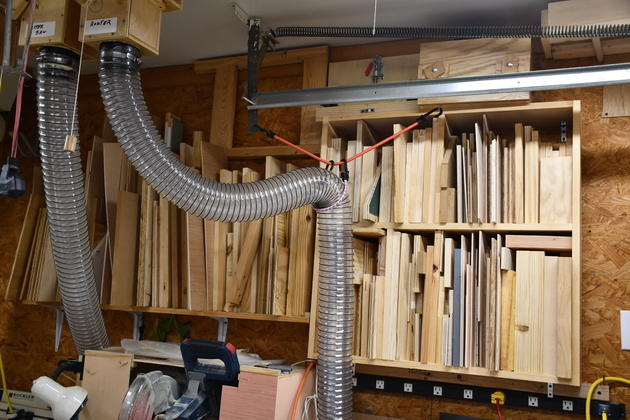
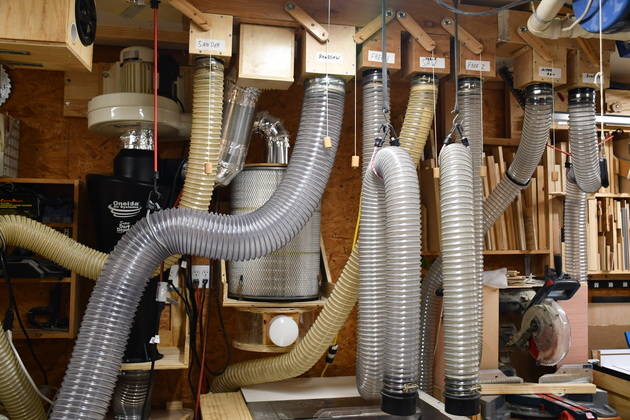
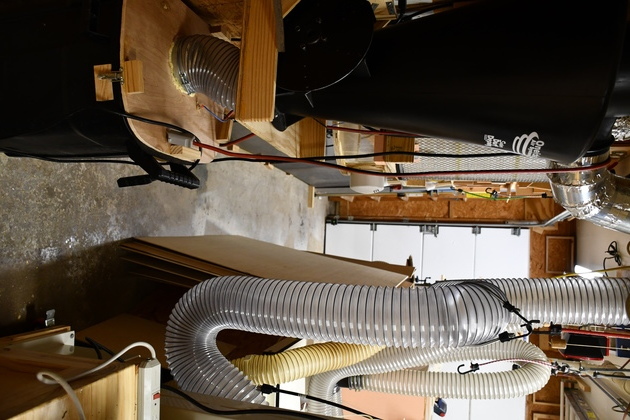
On the West wall ceiling you can see 7 of the valves for the 6"/4" dust collection system.
This is actually a 6" Cyclone, blower, and plenum with 4" drop hoses (except the bandsaw drop is 6").
The DC-1100 impeller/motor the far left with the cyclone and dust bin below and filter to the right.
I have to use flex hose since all my machines have to move in order to be used.
Note: I like to hang the 4" DC flex hoses by bungee cords, makes it easier to move the machines in and out.
This was changed slightly in 2020 when I automated this 6" system.
|
|
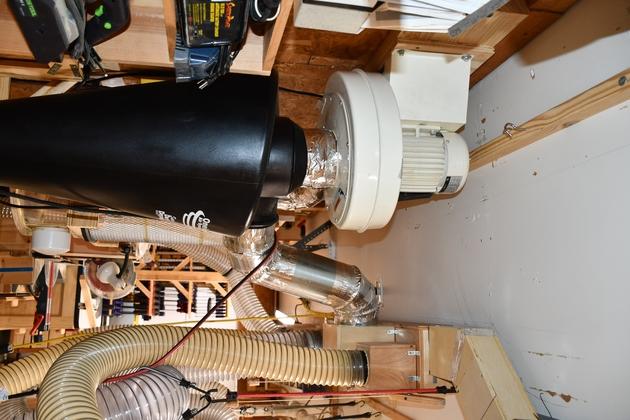
Closer pic of the DC, impeller housing, and cyclone separator, and you can barely see the filter beyond the cyclone.
You can see the cyclone input coming from the 6" pelnum on the ceiling.
We now have 8 of updraft valves (7 4" and one is a 6" valve).
|
|
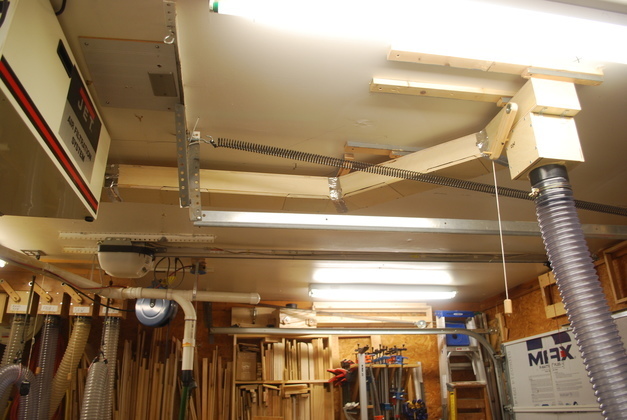
The East 4" extension.
This is before the small tool rack, on the ceiling, was added.
|
|
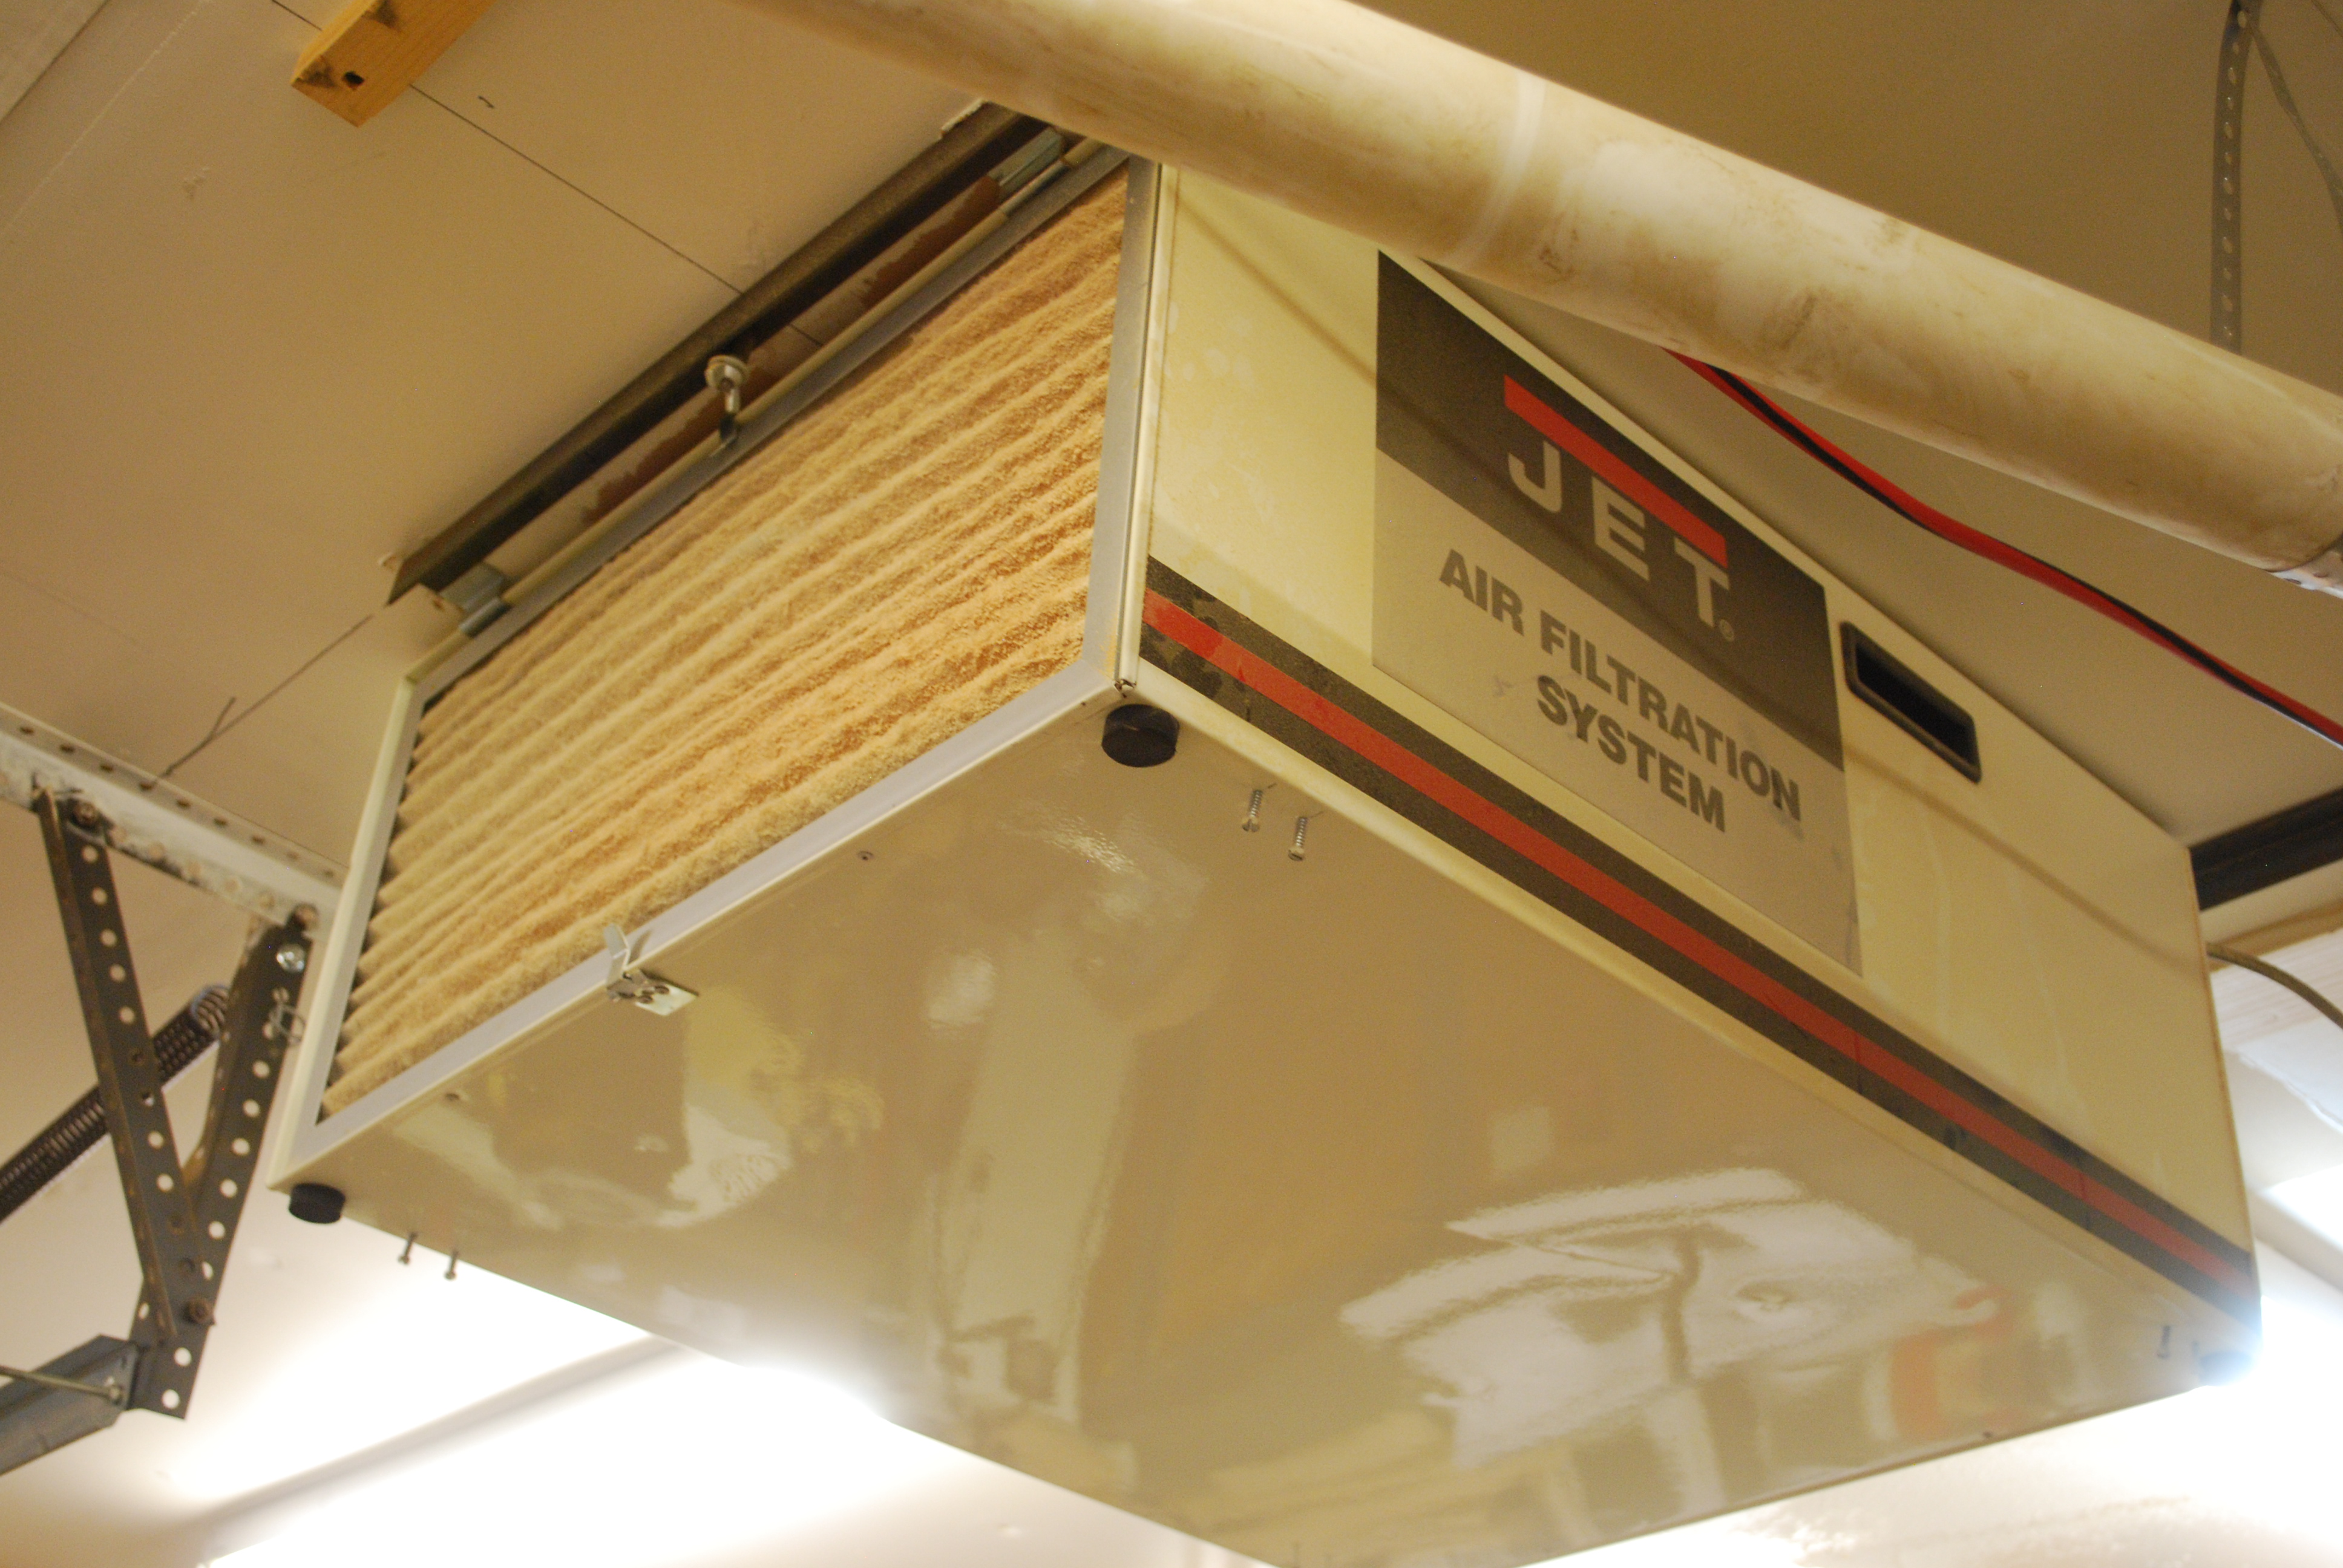
This is the AFS-1000 intake, in the center of the shop, which takes dust particles out of the air.
|
Metal Working
Compressed Air
|
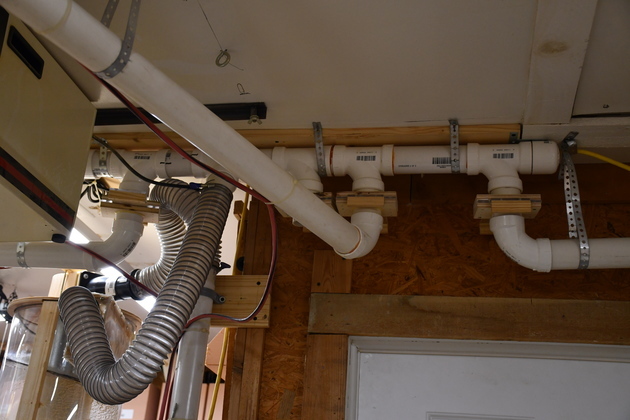
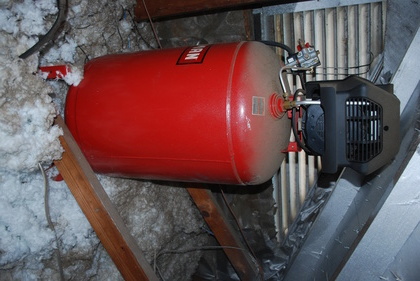
My air compressor (5 HP, 33 gal.) in the attic above the metal working bench.
I built a wooden cradle and bolted it to the joists then bolted the air tank to the cradle.
I took the plug out of the bottom of the air tank and replaced it with a 1/2" bushing, then plumbed with 1/2" PVC over to the wall and down.
When air, containing water vapor, is compressed, the water condenses so a compressed air system must accomodate this liguid collecting.
A low spot must be established so all condensation will drain to it.
Also a water trap for air coming from the air tank will have a chance to loose its water vapor before entering the rest of the system.
By placing the tank in the attic, I not only save floor space but the compressed air is high enough that the water in the compressed air being affected by gravity as well as air flow runs down hill into the water trap.
|

|
Air Tank in Shop Attic
We mounted it with the elongated tank vertical.
The bottom hemisphere had a plug which we replaced with a 1/2" bushing and PVC adapter.
The 1/2" PVC gently angles down to the top of the Water Trap.
|
|
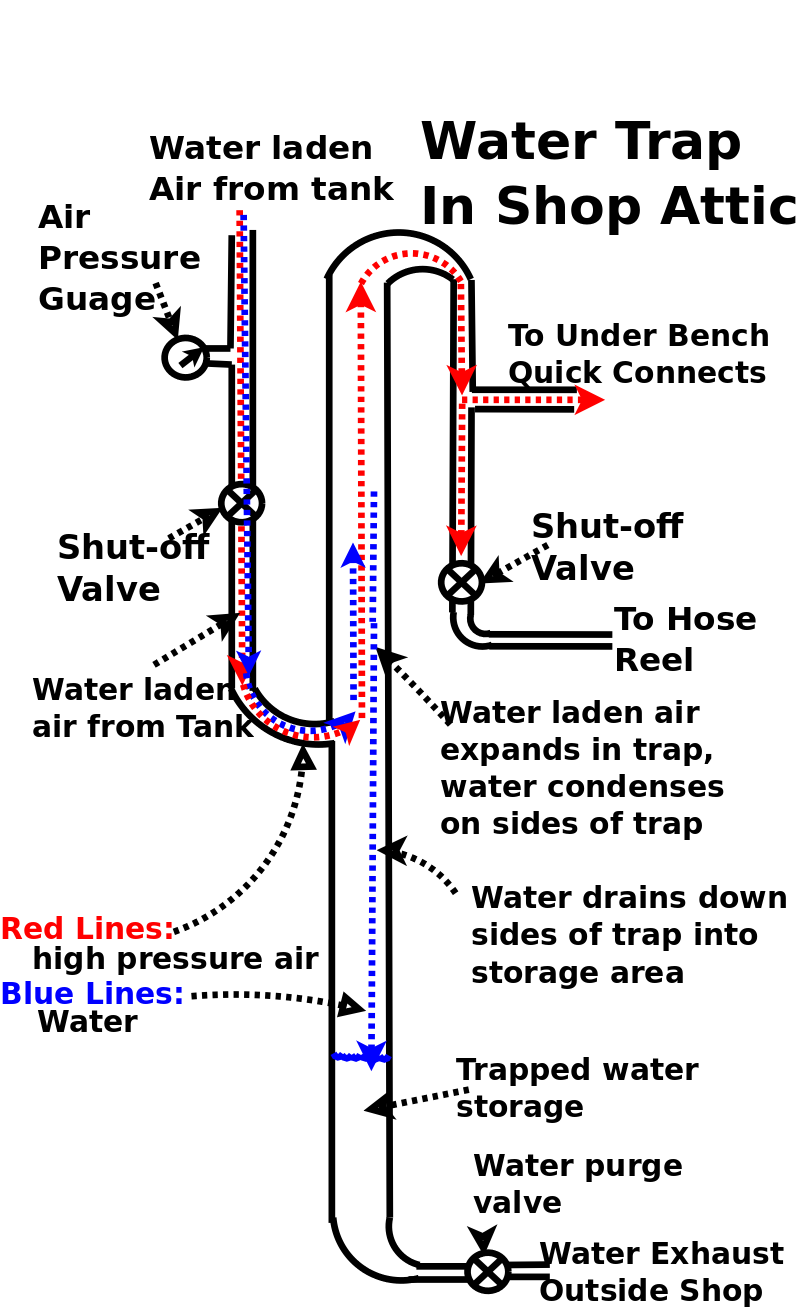
Simple Water Trap.
Click to enlarge then follow the dotted red and blue lines.
The high pressure air flows down from the compressor tank (1/2" PVC), into the water trap (1" PVC), then up through the water trap, at a slower speed (thanks to Bernoulli's Law) and out the top, allowing most of the suspended water to condense on the sides of the water trap and collect in the bottom half.
The water collects in the lower half of the 1" 8ft. tall PVC.
After exiting the top of the water trap, the air goes down through another 1/2" PVC, to the outlets plumbed in the shop under the front of the benches and to a hose reel with it's own cutoff.
At the bottom of the water trap (1" PVC) is a water purge or drain valve and a water exhaust line to the outside.
This drain valve is used periodically to exhaust the water out of the water trap.
Remember, compressed air plumbing is like sewer plumbing, water has to flow smoothly, by gravity, to a chosen low point where it collects.
Click for larger Pic.
|
|
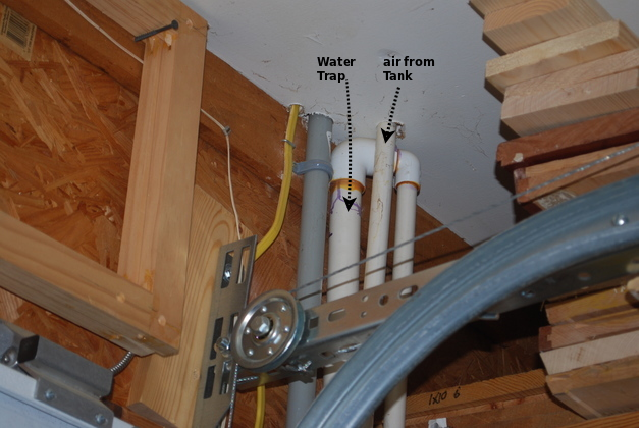
Here you can see the 1/2" PVC coming through the ceiling, and the top end of the water trap (output).
The grey PVC is for electrical power to the outside motion detector lights.
|
|
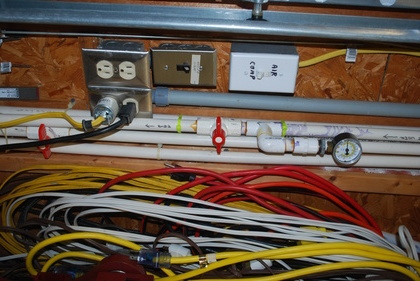
Air guage, main valve (upper red handle), and the other lines running up and down the wall.
My water trap (behind tee and main valve) is almost 8' tall.
Lower red handled valve in the pic, controls air to a hose reel on the ceiling, a cronic leaker, so it has it's own shut-off valve.
Switches on the wall.
The top switch controls the air compressor in the attic, I keep it off most of the time, since I don't use it often.
The bottom switch controls power to the motion controlled car port lights and a motion controlled light in the back yard.
|
Tools Ready For Action
|
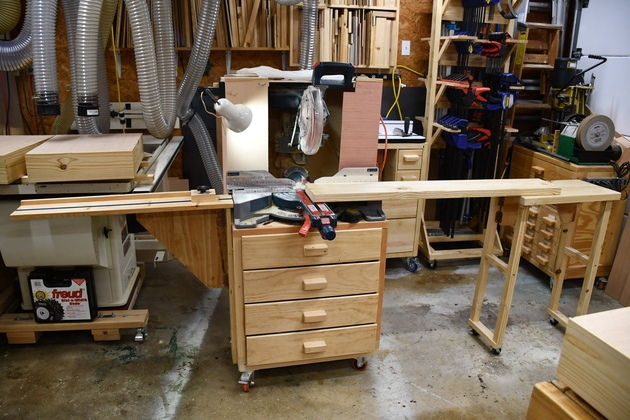
The miter saw ready for action, note the small side table on the right, it acts as an inflow table since its the same height as the saw's table, but it can roll as the piece is fed to the saw.
|
|
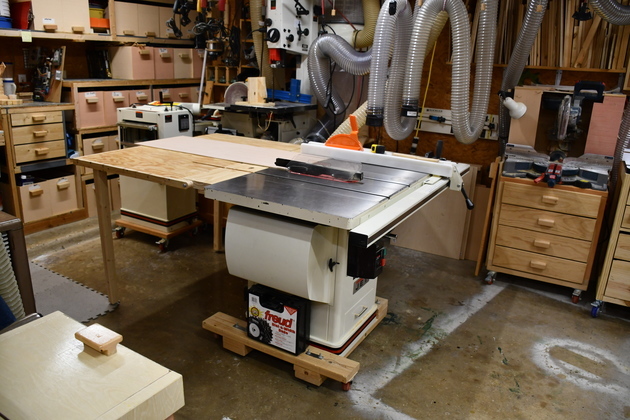
Table saw, on it's caster base, with the outflow table down.
I only have space for long lumber in one direction in the shop.
|
|
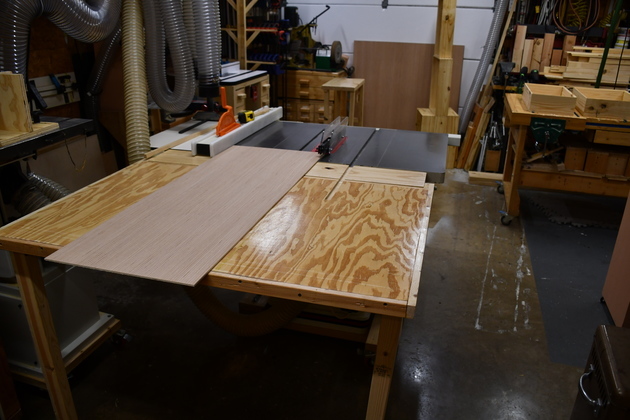
Table saw with outflow table extended.
Even when I'm not ripping something the outflow table makes a nice LARGE work space.
Please take a look at my page on the outflow table
|

|
Bandsaw, on it's caster base, ready to resaw.
|
|
Mortiser ready to use.
The pink box is a dust sweep for the mortiser.
|

| Lathe pulled out in the center of the shop where I normally use it.
Note the dust collector's data terminal above and just behind the arm lamp, makes it convenient to control the DC while using the lathe.
Links: to lathe bench.
|
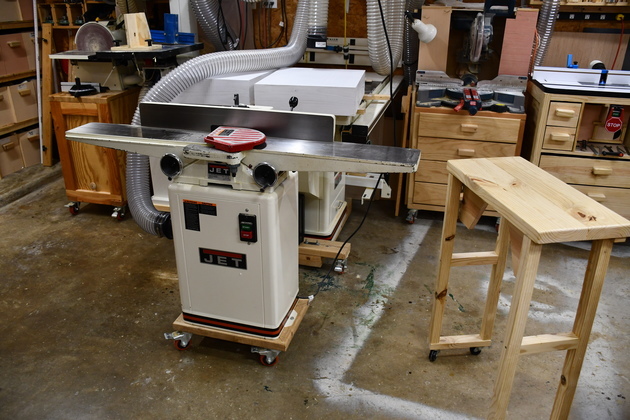
| Jointer pulled out ready for action.
|
|
Sander bench with dovetail jig in raised postion, ready to slide over to the woodworking bench on right.
|
|
Dovetail jig moved into working position on the workbench.
This is an older pic, before I added the lift handles to the dovetail jig storage shelf.
|
|
Dovetail jig mounted on the workbench with drawer sets laid out behind it.
|
|
Planer in action, the spindle sander is on the other end of this bench.
|
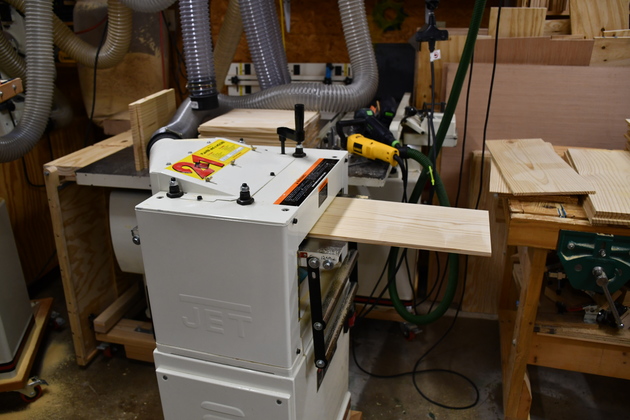
| My old planer is great but after a number of years, I just couldn't afford the space it took up, so I bought the new DeWalt and sold this guy.
|
Quarterly Spraying
| 4 times per year I have the house & shop sprayed for bugs.
So I have to move everything away from the walls so the exterminator can spray all the corners.
This month (Dec. 2019) I took a couple of pics while every thing was out of place.
Looking diagonally NW.
|
| Down the West wall, you can see the 6" cyclone and dust bin in the foreground.
|
|
Looking due North from just in front of the drawers beside the sink.
|