Several times recently, I have needed to cut a door or some other square shape into a panel.
Note the large and small trash bin lids.
I tried to bandsaw each side, then coping saw a corner and finish with a smaller bandsaw, then had to trim the door smaller to give proper clearance.
I thought of using a rotary trimmer to do this but thats a lot of clamping to a very narrow strip along the edge of the panel.
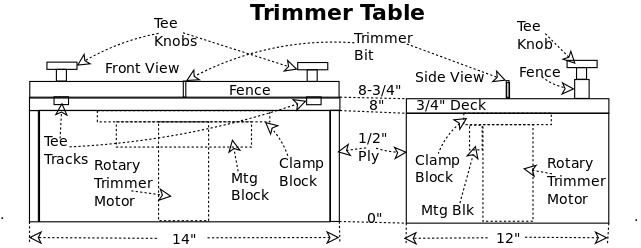
I decided to build a table with a fence that held a rotary trimmer underneath in a vertical position.
I made a tile saw table like this and decided thats the way to go.
Like the tile saw, I needed a 3/4" deck for the tee track, and 1/2" plywood for the rest of the box should work.
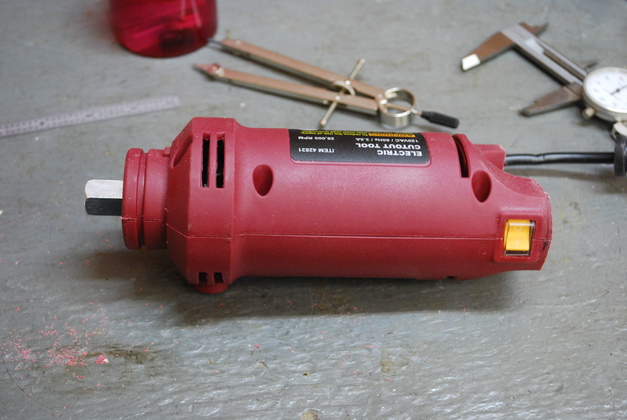
I looked around and found a reasonable ($22.95) rotary trimmer at Harbor Freight that looked like it would fill the bill.
So I bought one, brought it home, dismantled it, and sawed off it's handle to shorten it.
The trimmer's front collar was almost exactly 1-3/4" in diameter so I made a clamp block to hold it.
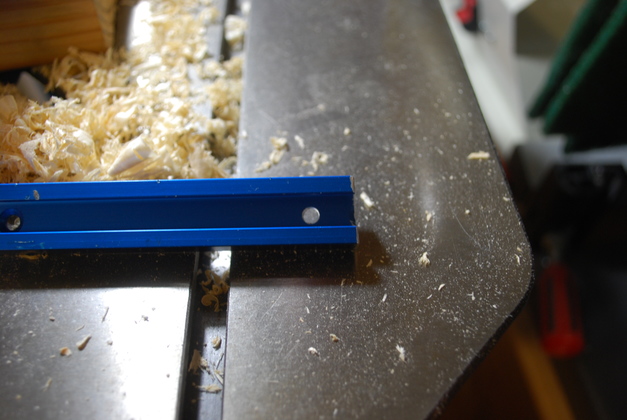
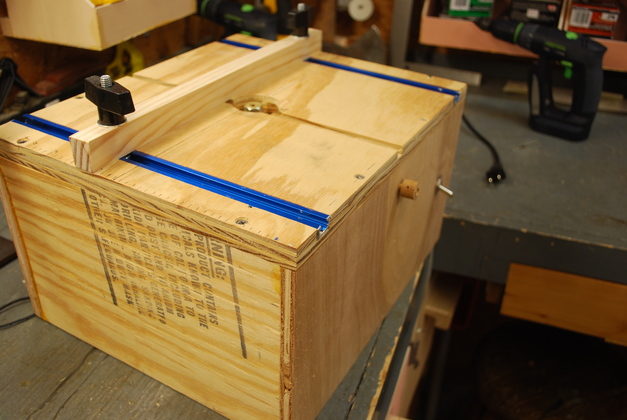
For the fence I routed two tee track slots in the top deck, then used a 1" high by 3/4" wide piece of pine and two tee knobs and bolts.
|
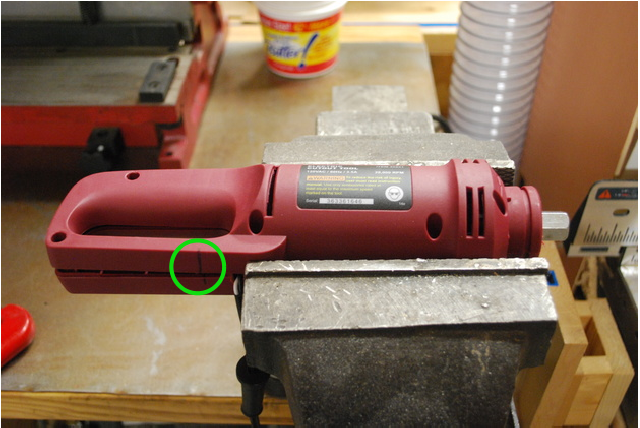
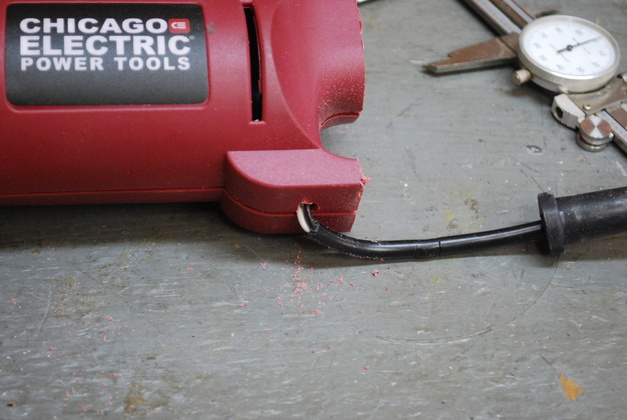
I bought this rotary trimmer from Harbor Freight.
Here I've already taken the plastic guide off the front and removed the black side handle.
Also note I disassembled it and re-routed the power wire out the other side.
You can just see the black mark (in the green circle) I made on the lower part of the handle, Just left of the vise, showing where to saw it off.
|
|
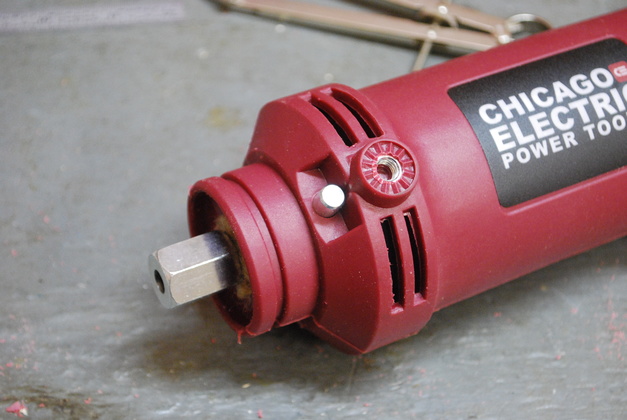
I sawed off the handle, this thing is about 8" long after the handle is gone.
I measured the diameter of the round shoulder just below the tollet, it is very close to 1-3/4" in diameter.
I'm going to use it vertical and didn't need any extra height.
|
|
Power wire rerouted opposite the power switch.
|
|
The side handle mounted in the tapped hole (6mm x 1) just behind the shaft lock button.
|
|
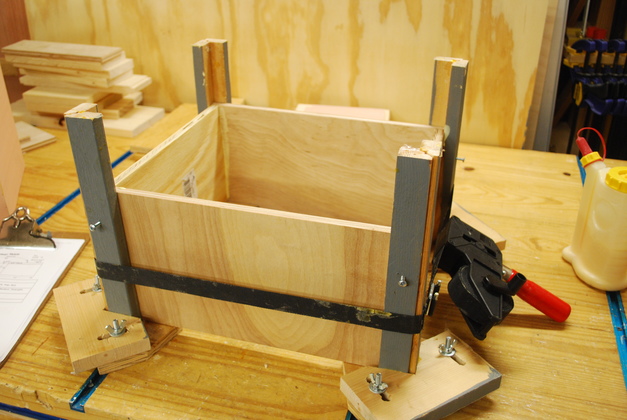
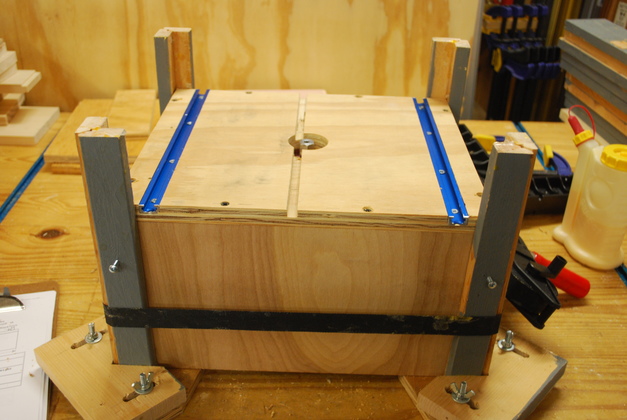
The table frame in the 12" cauls.
Its 8" high out of 1/2" birch plywood.
|
|
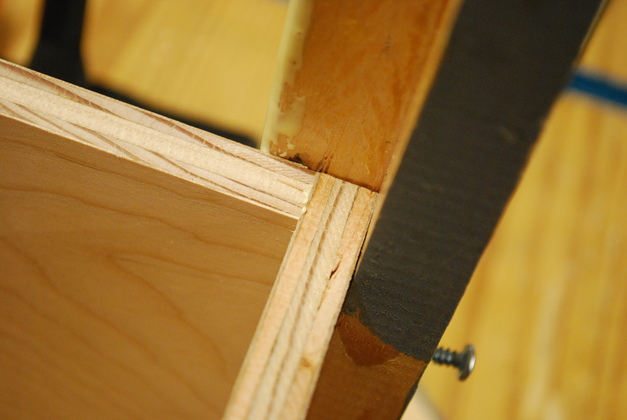
I butt joined the corners, not mitered.
I've done this before and it worked OK, as long as you use TiteBond glue.
|
|
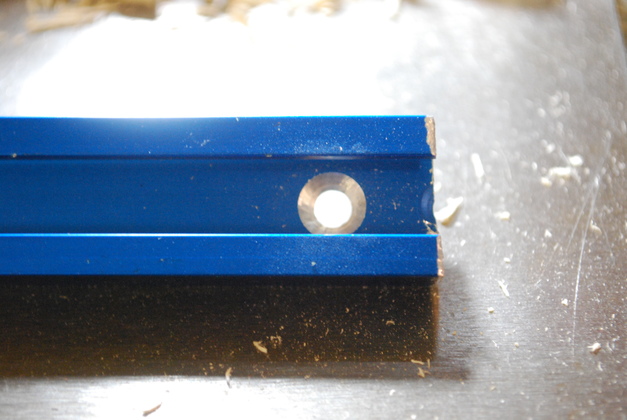
One of the two pieces of Rockler tee track, I sawed them off to 12" then drilled extra mounting holes near each end, there were already two in the middle.
|
|
I counter sunk the new mounting holes.
|
|
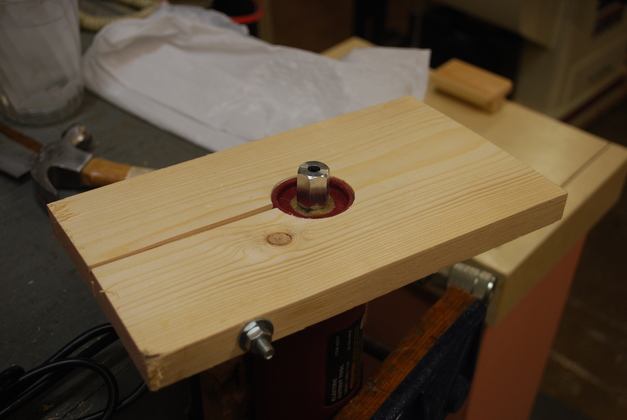
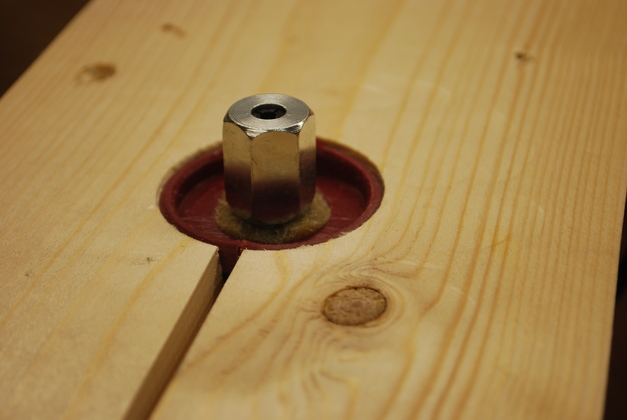
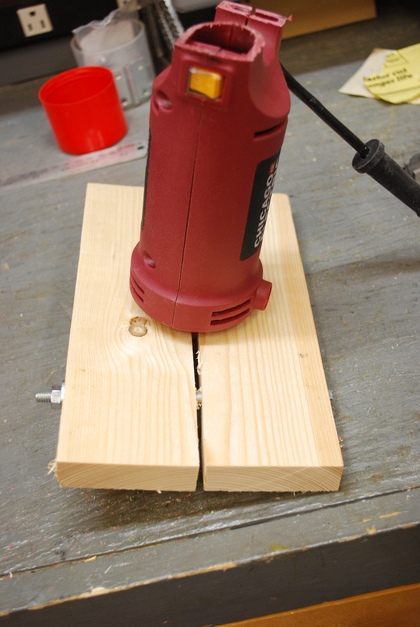
I made a clamp block, form piece of 1x6, I drilled a 1-3/4" hole in the center then sawed a relief slot from the edge to the center hole.
I drilled a 1/4" hole edgewise, completely through, inserted a 1/4" bolt and nut to form a clamp for the trimmer's neck.
Normally I would use a carriage bolt, but I didn't have one long enough, so I used a 6" hex bolt.
|
|
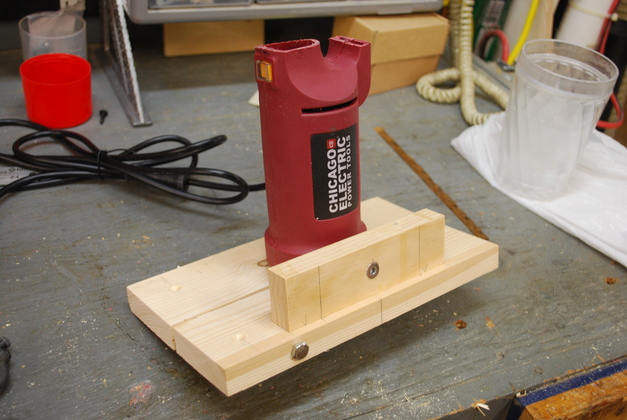
Note the shoulder of the neck of the trimmer is almost exactly flush with the top of the mounting block.
|
|
Bottom side of the mounting block with trimmer installed.
|
|
For the side mounting block, I used a short piece of 1x2.
Drilled a 1/4" hole for the 6mm x 1 bolt, and screwed this second mounting block to the clamp block.
Note the head of the 1/4" hex bolt on this side of the clamp block.
|
|
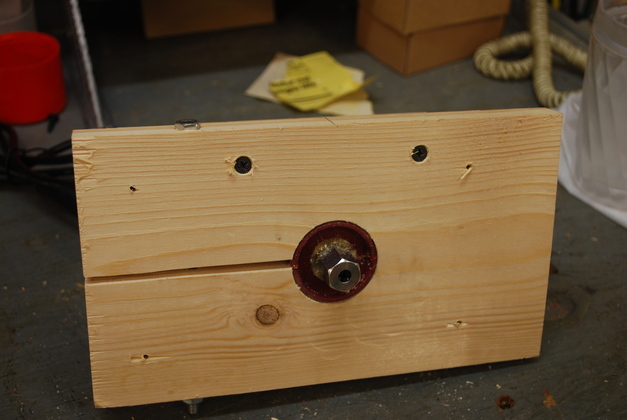
Top side of the mounting block, note the two screws holding the second mounting block.
|
|
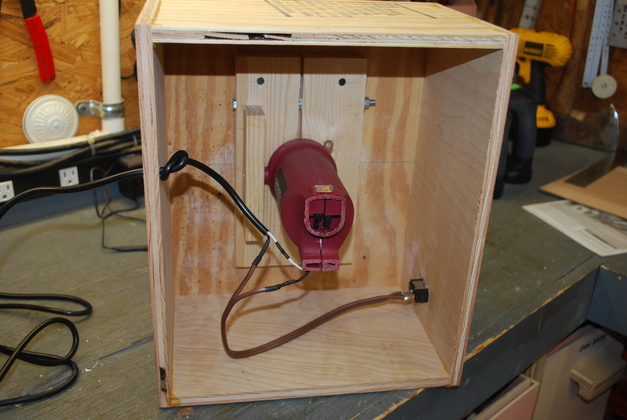
Mounting blocks and trimmer mounted to the underside of the deck.
|
|
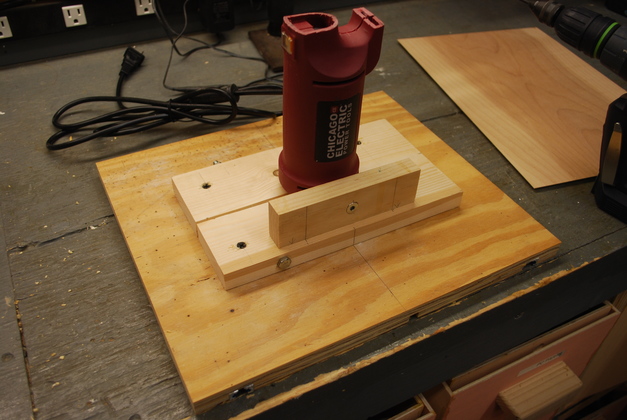
Test fit of top deck onto frame while still in the cauls.
|
|
Under side showing mounted trimmer and wiring.
|

|
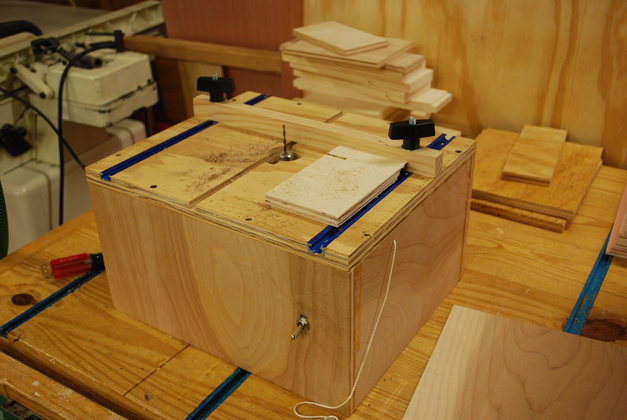
Top deck mounted on frame with tee tracks and fence.
|
|
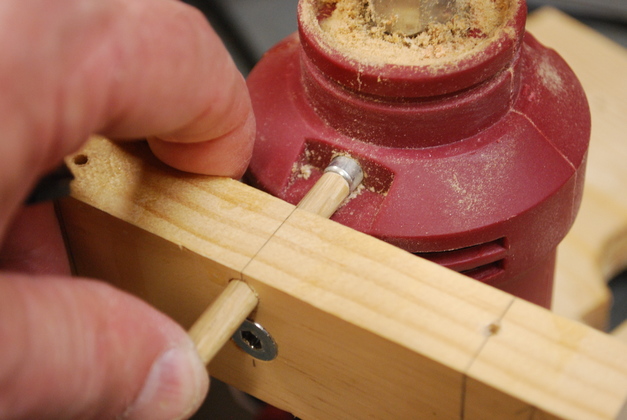
A test, I drilled a 17/64" hole in the support block to line up with the shaft lock button.
Here I'm testing that a 1/4" dowel locks the shaft and moves freely.
|
|
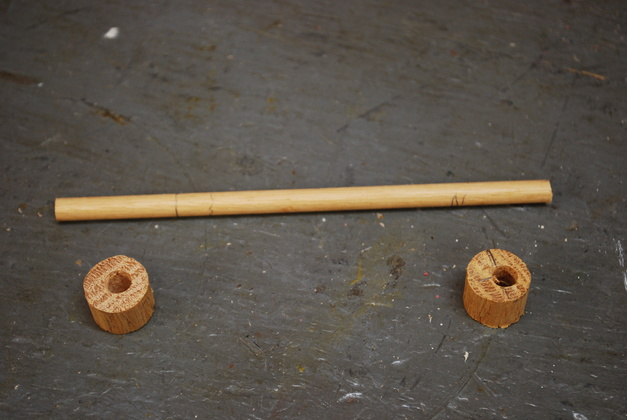
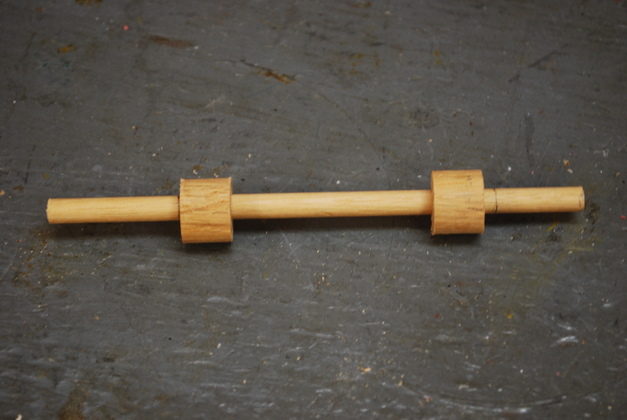
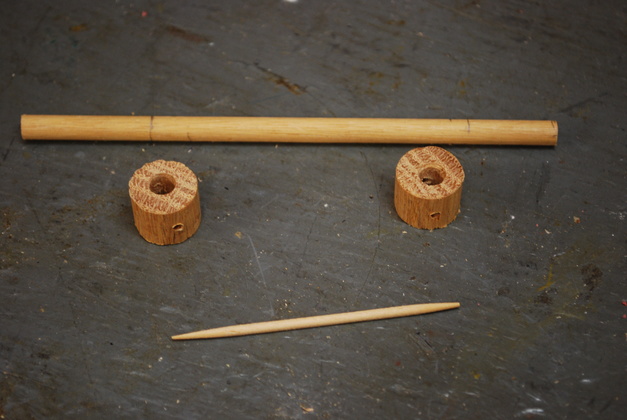
Cut a 1/4" dowel and center (ha, ha) drilled some 5/8" dowel pieces.
|
|
These will be keepers so the dowel doesn't fall out.
|
|
Here I've drilled a #47 (.076" dia) hole so I can pin the keepers in place.
Note the pin material appears stangely like a hardwood toothpick, but it works!
|
|
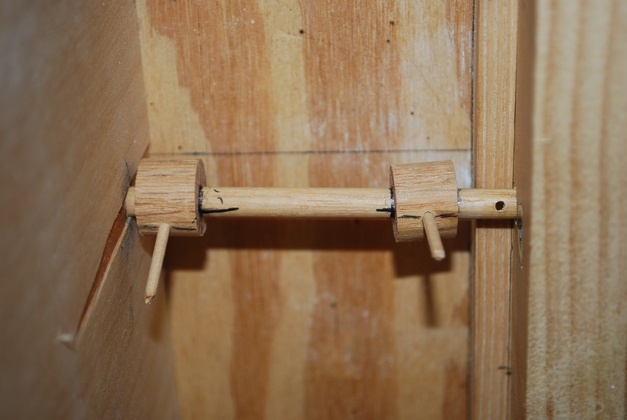
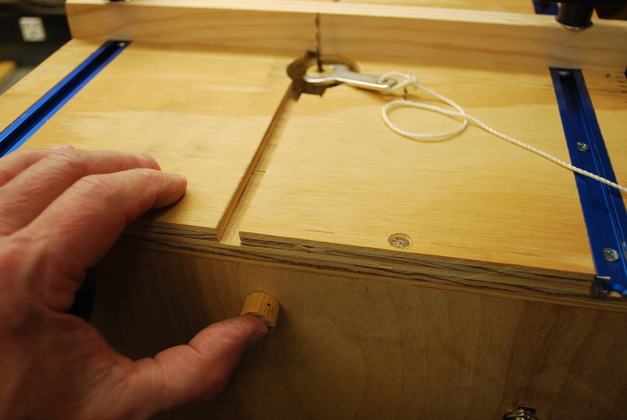
Keepers pinned on the dowel and in place under the trimmer table.
|
|
I center drilled another piece of 5/8 dowel and glued it onto the outside end of the 1/4" dowel as a button.
|
|
Here I am holding the button, locking the shaft, so I can insert and clamp down on a bit.
It works great.
|
|
From the left front quarter.
|
|
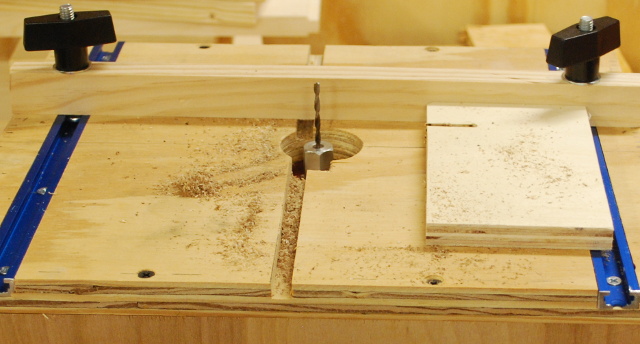
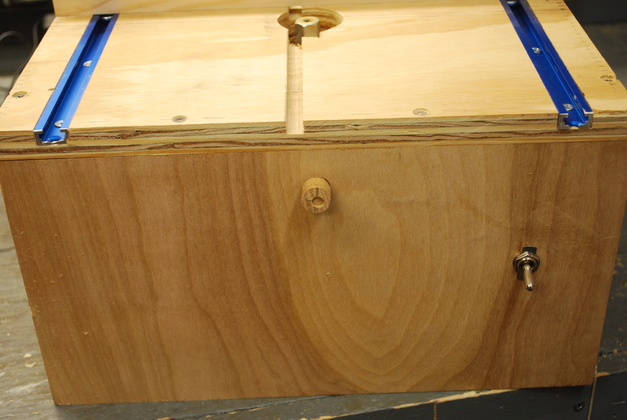
Whole unit being tested.
It cuts a nice straight line on plywood but 1/2" plywood is a little slow.
|