| 
| 
|
|
Clamping Cauls
| ||
|
|
|
|
|
Clamping Cauls
| ||
| Diagram | Mitering Plywood | Storage Bins | Tilt Bins |
| Range Box | Back Bath Vanity | Mini Cauls |
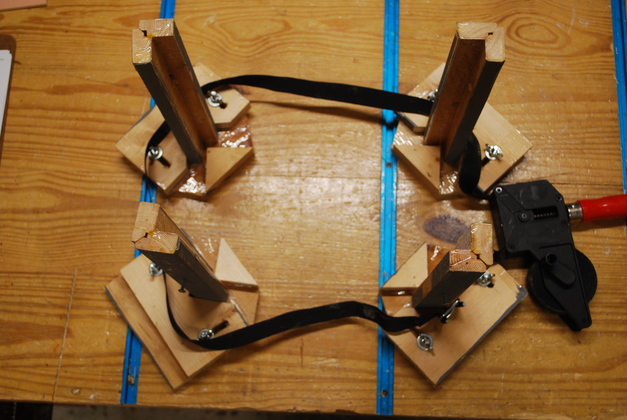
The primary problem with building thin plywood boxes with mitered corners is holding them in place while you assemble and put glue on the edges and then allow the glue to set. Strap clamps work well to keep pressure on the mitered corners while the glue sets. I had tried using the Rockler cauls for box joint boxes but they were too small for larger boxes and the little interdigitated fingers really didn't work well for large boxes with mitered edges. The Rockler cauls depend on the fingers to hold things in place while you clamp, but mitered edges don't work so well like that. I built forms for the inside of some boxes which helped a lot but I had to have a different size for each different size box.
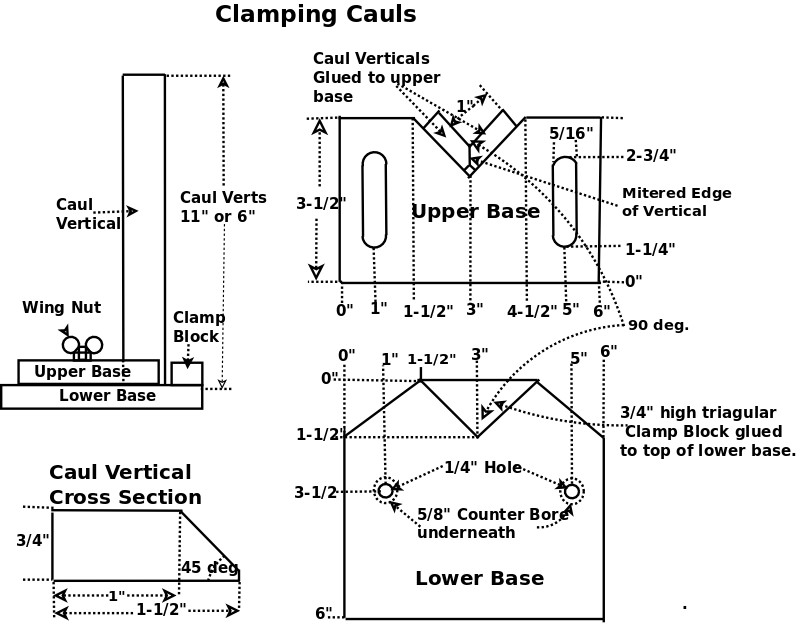
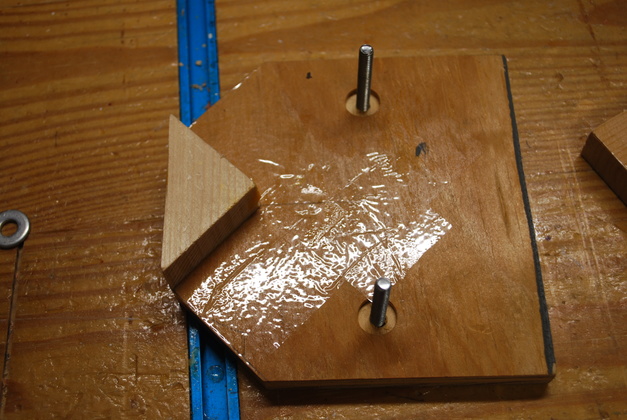
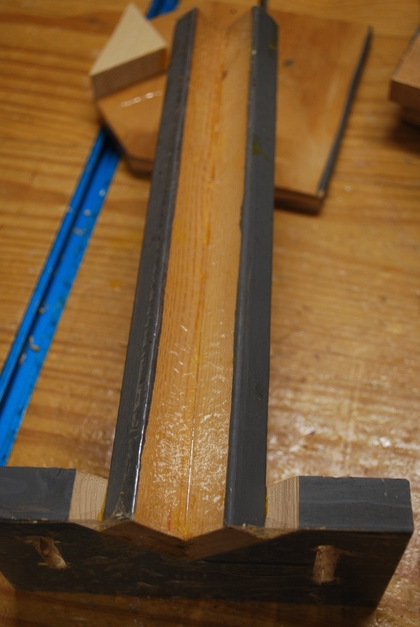
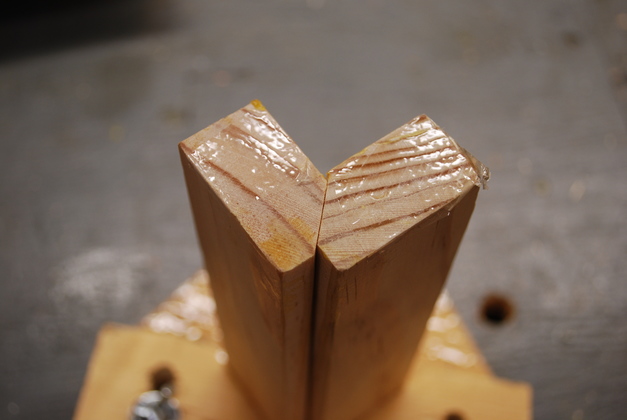
So I came up with cauls with a built in clamp. I made three sizes of caul's vertical 6", 11", and 22" high. Each vertical is two 1x2's mitered and glued to each other then into a 1-1/2" deep notch in one side of the 1x4x6 upper base. The lower base is 5/8" thick plywood, 6x6" with a 1-1/2" high triangle glued to one edge. The triangle can be what was sawed out of the upper base. The lower base has two 1/4-20 carriage bolts sticking up through slots in the upper base to allow the upper base to be adjustable.
I recently hit on another idea: I frequently make boxes with uneven sides which is a problem to get the bottoms to line up. When I glue a box I glue it upside down in the cauls so I can glue the bottom in before the sides are set, this makes sure he box is square. I use spring clamps to hold the shorter sides of the box to the vertical cauls. This makes it easy to line up the bottom edges.
I have recently realized I need a smaller version of the clamping caul since I have been building some small boxes as housings for things like a nano. These small boxes are 1-1/2" X 2", it would make building them much simplified with a mini-clamping caul. I recently did a little project called Nano Mount, that would have benefitted from a set of Mini-Cauls.
Directions:
| position the cauls on a flat bench | |
| place a strap clamp loosely around the 4 cauls | |
| insert the 4 sides top side down, no glue | |
| position 4 cauls on the corners so sides are held in right position | |
| remove one of the sides & put a bead of glue along one side | |
| place side with glue back in it's position in the cauls | |
| do the same with an adjacent side (or end) | |
| repeat till all f4 sides have a glue bead | |
| tighten the strap clamp making sure all 4 side are lined up | |
| run a bead of glue around all 4 sides og the top | |
| place top on other 4 sides, may need a weight |
|
|
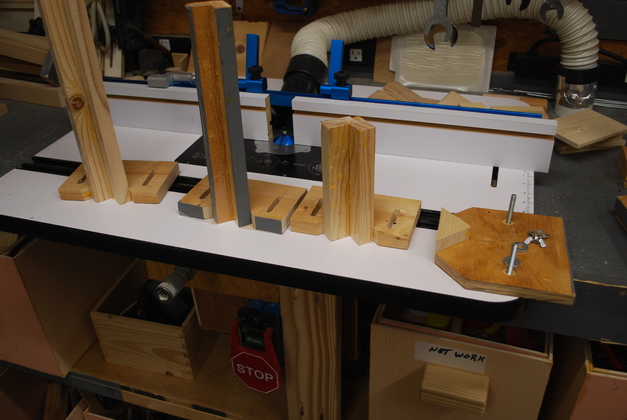
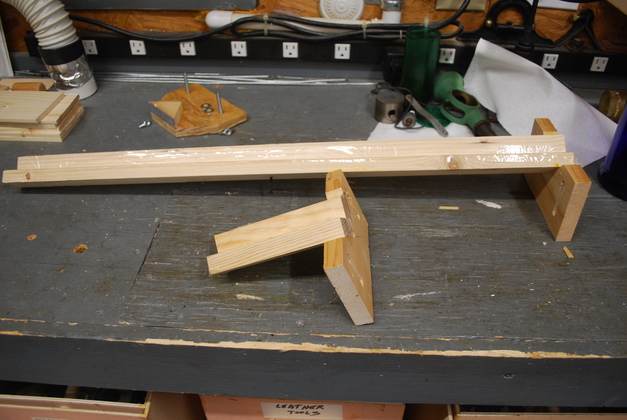
The three sizes of cauls I currently have. You can see the three different height cauls and one lower base on the right. |
|
A 22" and 6" caul. |
|
|
Heres a pic of the lower base. |
|
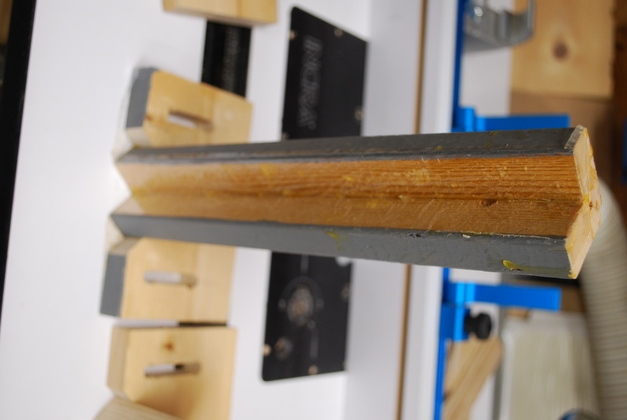
A 12" caul glued to it's upper base. |
|
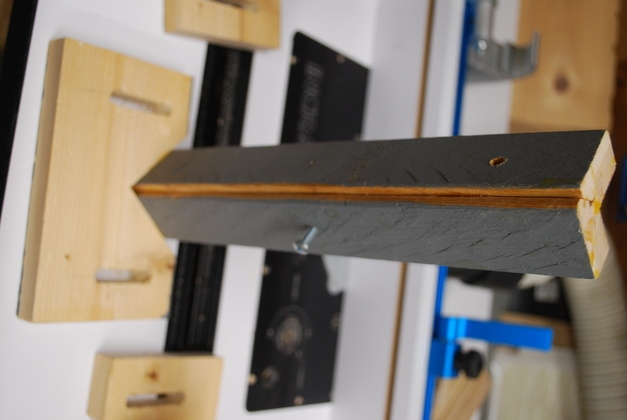
Back side showing one screw which helps keep the strap clamp around the middle. |
|
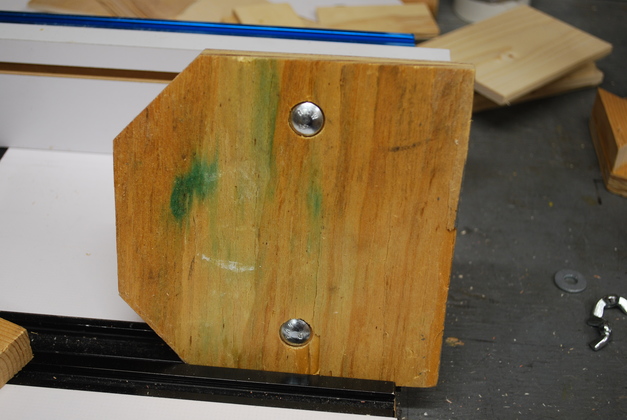
Bottom of a lower base. You can see the heads of the two 1/4-20 carriage bolts. |
|
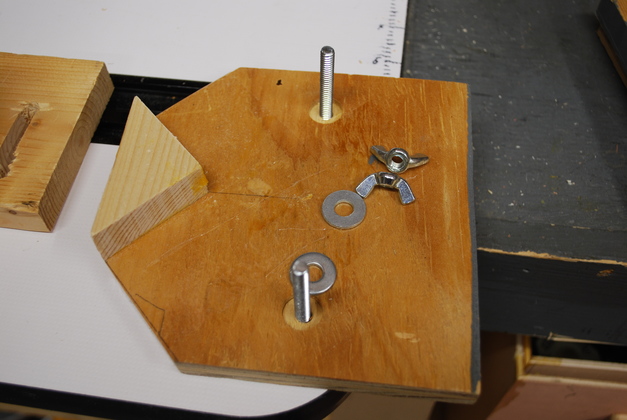
Top of lower base, see the two 1/4-20 carriage bolts and the glued on wedge. Also note the 2" packing tape stuck on the upper side of the base, it keeps glue from sticking. |
|
Here you can see the packing tape stuck on the inside of the angle that holds the corner of the box being glued. Again, it keeps glue from sticking to the caul. |
|
Top of a caul, again you can see he mitered corners and the packing tape. |
|
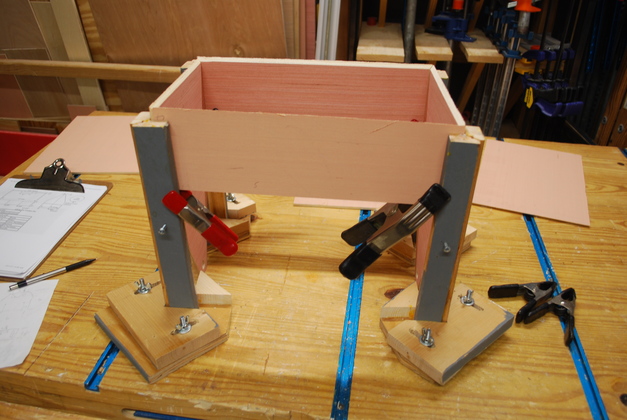
Cauls laid out ready to glue a box. More on the use of clamping cauls. |
|
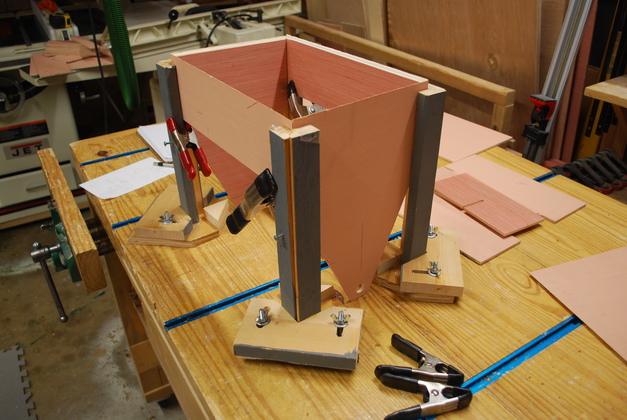
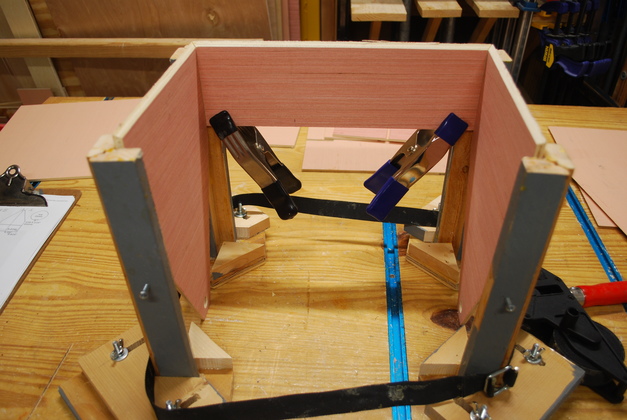
Spring clamps holding the far side of an uneven box so it is flush with the ends. |
|
Clamps holding the near side of a box with uneven sides. |
|
|
Same box a different perspective. This is a 6 x 1L carrier. |
|
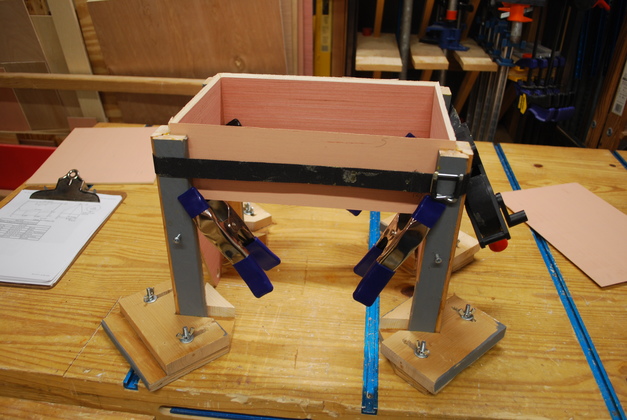
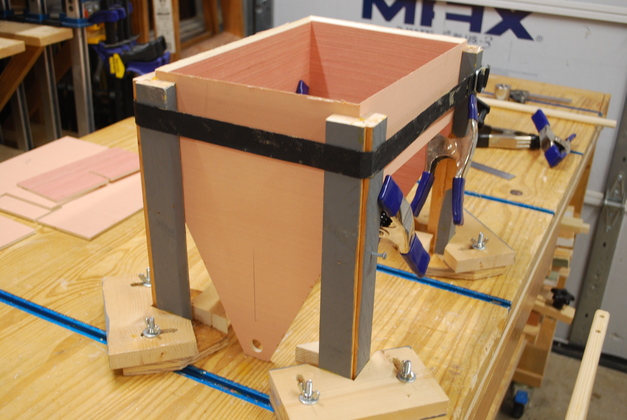
Now I add the strap clamp to place pressure on the mitered edges. |
|
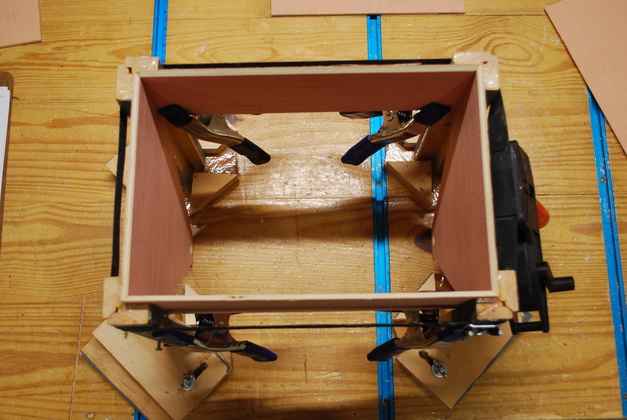
Looking down from above (bottom of the box), ready to glue on the bottom. |
|
End view with strap clamp applied. |
|
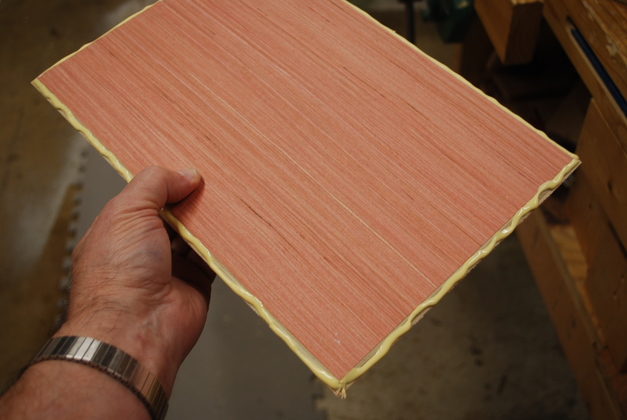
The bottom with glue on it's mitered edges. |
|
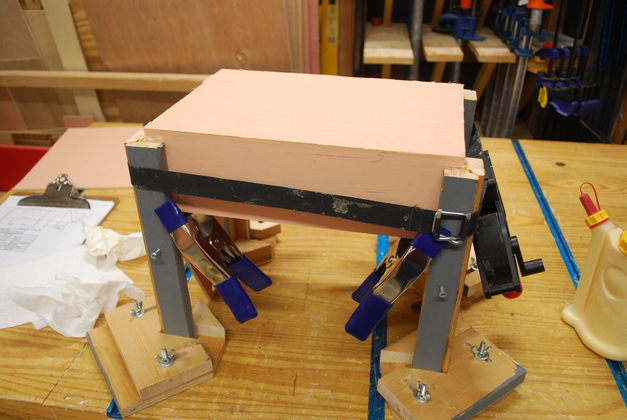
And with bottom on the box. If bottom has a little warp and doesn't fit as well as this one, I have to use a weight. |
|
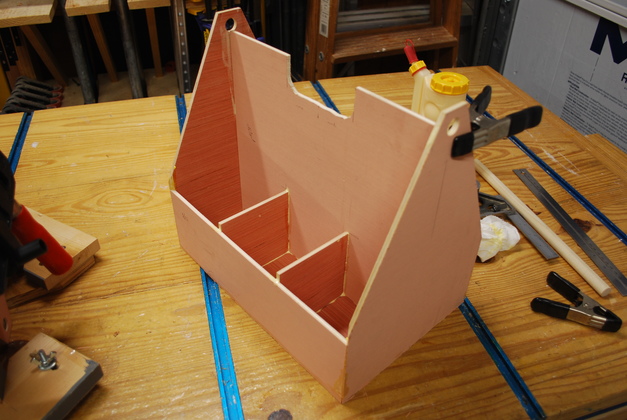
Glued box, ready for partitions. |
|
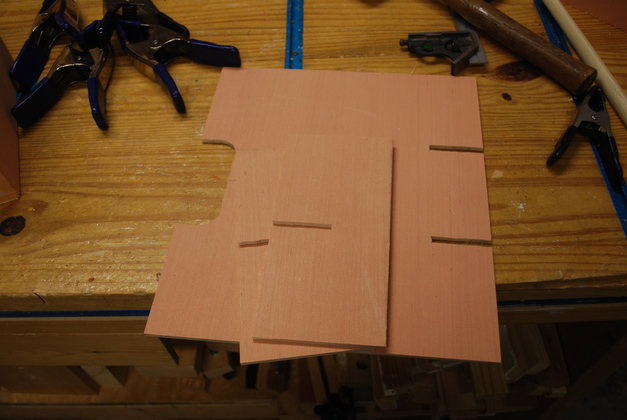
The internal partitions cut out and notched. |
|
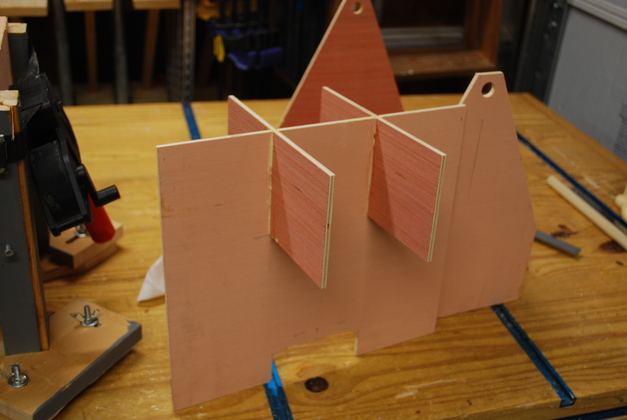
After the box is glued, I glue up the internal partitions. |
|
Then place them (and align them) inside to box. |
|
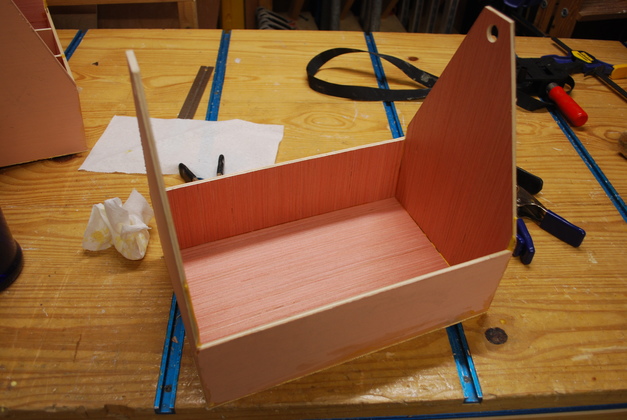
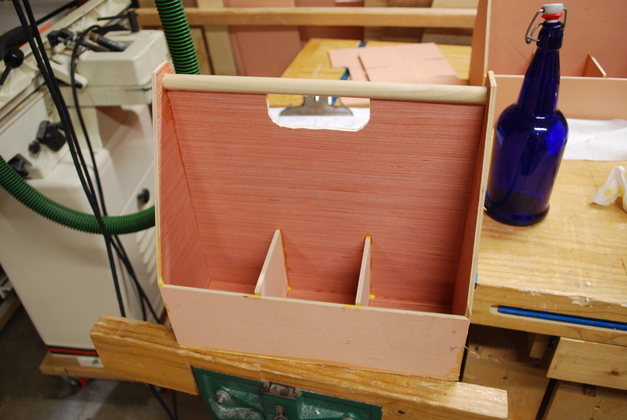
Now the handle has been glued in. The handle has a groove to allow the center partition to be glued into it, this makes the box much stronger to hold 6L of mead. The box is now ready to sand and paint. You can see one of our 1L bottles on the right rear side. |

|
|