Dearborn | 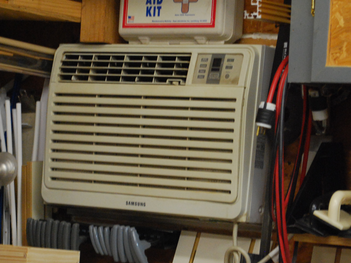
Samsung (2003) | 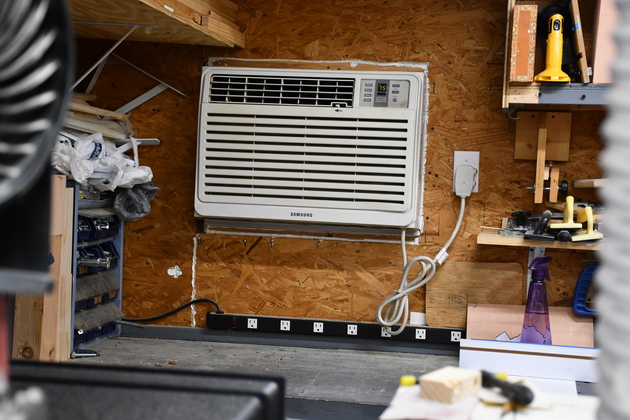
LG (2018) | 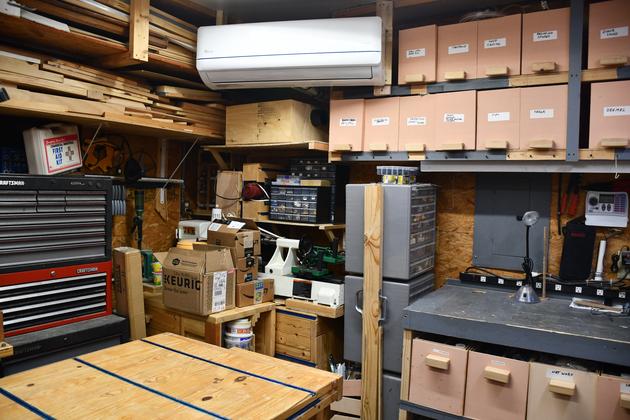
MiniSplit (2020) |
|
Heating and Cooling the Shop
| |||
|
Dearborn |
Samsung (2003) |
LG (2018) |
MiniSplit (2020) |
|
Heating and Cooling the Shop
| |||
| Air Conditioning | Extra Insulation | Dearborn Heater | Dearborn Story |
| Dearborn Info | Mini Split | Thermostat |
My shop is in about 3/4 of an insulated garage so I need to add some AC in the summer and heat in the winter.
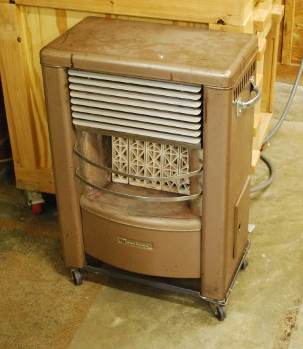
For winter heat I use a Dearborn stove thats been in my family for over 67 years and was already old when we got it.
Each spring I disconnect the gas, clean it up, take out the radiants (they're stored separately) and move it to my storage shed.
Each fall I reverse the operation: get it from the storage shed, install the radiants, clean the whole thing up, connect the gas, and test it.
I realized recently that there must be lots of folks around that don't known anything about old time gas stoves like the Dearborn, so I took pics this fall.
The AC was a window unit from 2003 till 2020.
After I bought the house (2003), I cut and framed a hole in the wall above the bench in the North East Corner of the shop, above a bench (which is no longer there).
It is about 55" above the floor, a little higher than I was comfortable lifting by myself (I'm 76 years old).
My friend Bill Kesler helped me install the origial unit, but Bill now lives in Az. so I had to figure out how to do this by myself.
I built a
Reasons to upgrade to a heat pump:
I have to run a small fan to circulate both warm and cool air in the shop, due to it's Ell shape.
The 12,000 btu LG window AC, has done a good job of cooling even if it's a little slow to get the whole shop cool.
It's condensation pan started rusting the first time I turned it on, and I have rust streaks below the unit (outside).
It's fan doesn't seem to blow very hard, on high speed, so it takes longer to cool the shop.
It's vanes don't do a good job of directing the air flow.
It is fairly effecient 10 SEER.
Mini Split
By going to a mini split heat pump, I can heat and cool the shop with a single unit up off the floor, saving floor space.
I can position the air handler for better circulation in most of the shop.
I need better circulation and high effeciency, the MiniSplit moves it's vanes around to improve both heating and cooling.
See the Mini Split page.
The story of the Dearborn Stove
I love the old Dearborn, mostly because of its history, but it has a pilot which predates safety valves and electric ignition.
A pilot, in a gas stove, is a small flame which burns continuously and lights the main burner when gas is turned on.
A safety valve in a more or less modern gas stove senses the heat from the pilot and if gas is interrupted, shuts down the gas flow to the pilot and to the main valve.
Electric ignition creates a spark, when the main gas valve is first turned on, to ignite the gas in the main burner.
I only use the Dearborn's pilot occasionally, and I'm always aware of needing to turn it off when we will be gone for any time.
I first saw this stove in 1953 (I was 11) sitting in the abandoned 1st National Bank building on the North West corner of the square in Mesquite.
Part of the high school had burned and every available space in town was used to store books and everything else rescued from the burned school.
I was on a pickup crew hauling books from the school library to the old First National Bank building, when I noticed the stove sitting against the wall in the main lobby of the old bank.
About 30 years later I was talking to my dad about heating my garage when he offered me the stove and told me it's story:
He had purchased the boilding after the bank relocated, as an investment, and when the school caught fire, in 1953, he volunteered to let it be used for storage.
Dearborn Pics.
Dearborn stoves were great and, I think, much better that the plain old sheet metal and asbestos stoves (not counting the asbestos problem) that were around when I was a little boy.
There used to be lots of stories, in the paper, about toddlers getting burned on sheet metal stoves.
Dearborns are multi walled and have built-in (convection) air circulation inside to keep the outside surface cool while creating and circulating a lot of hot air into the room.
You can set things on top of a Dearborn while its operating without burning anything, the top of the stove barely gets warm.
You'll notice our stove is rusty and shows much use but remember, its well over 67 years old, I don't know how long it was used in the bank before I saw it (see story below).
Gas stoves were the way most houses were heated when I was a boy so I'm familiar with them.
It doesn't have an automatic lighting system but it does have a pilot light.
You manually light the pilot in the fall so when you turn on the gas the burner lights.
Your only concern is if the gas goes off for some reason, when the gas comes back on the pilot valve is still on and you fill the room with natural gas (not good).
When I was a kid there were frequent stories, in the paper, about gas stoves (and ranges) killing people.
Some time in the dim past, the feds passed laws stating if you had a gas pilot light on anything, you MUST have a gas safety valve.
Gas safety valves were entirelay mechanical, and worked on the heat from the pilot light, if the pilot went out and the sensor got cold, the safety valve would shut off the flow of gas.
When the safety valve was off, you had to hold a match under it's sensor, for a few seconds, so it would allow gas to flow.
I researched gas safety valves and they are avaliable but very pricey.
I remember getting out of bed, at grandpaw's house, and running into the dining room so I could stand before the stove and warm up, grandpaw usually had my clothes laid out on one of the rocking chairs in front of the stove to
I remember getting out of bed, at grandpaw's house, and running into the dining room (that was the family room) so I could stand before the stove and warm up.
Grandpaw usually had my clothes warming on one of the rocking chairs in front of the stove.
I don't know when grandpaw's house was built, I would guess late 1920s orearly 30's, my parent's house was built about 1935 and also had gas heaters, I stayed at grandmaw and grandpaw's most of the time.
AC

|
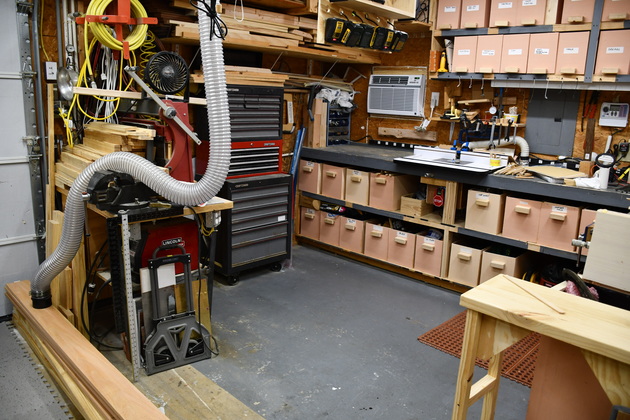
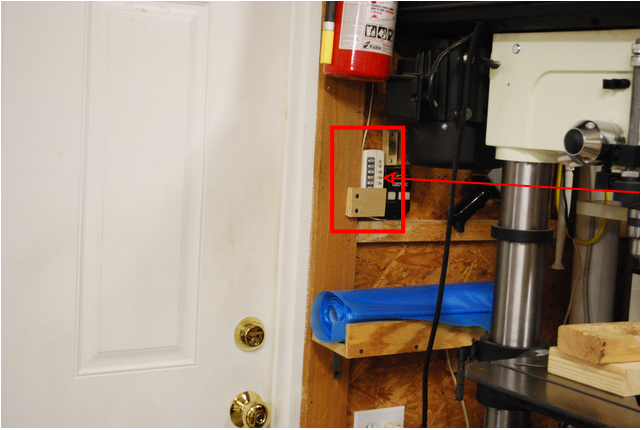
Looking into the small bay, you can see the AC in the wall above the far bench (Red Box). |
|
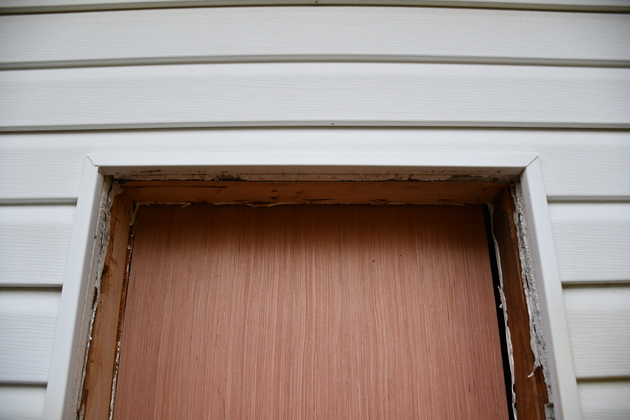
Pic of the upper framing with the AC removed. This was when the Samsung was removed and I had not yet installed the LG. |
|
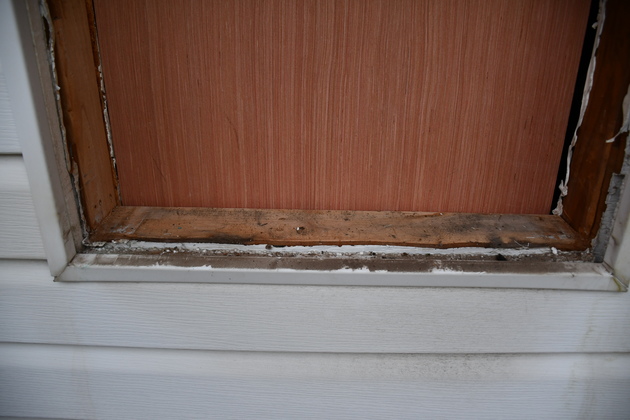
Pic of the lower AC framing. |
|
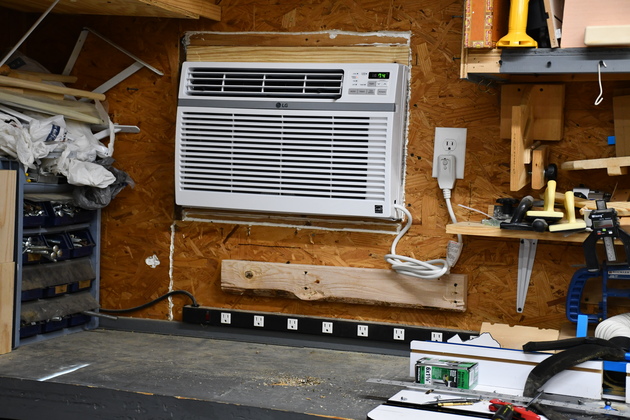
Closer look at the new AC (LG).
I also had to convert the power plug to 120v instead of 240v single phase.
|

|
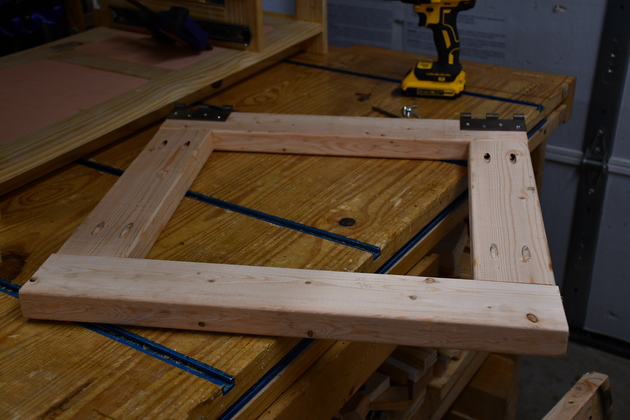
Diagram of the ramp.
A tee brace held the left end up and kept the ramp level while I slide the old AC out, and the new AC in.
|
|
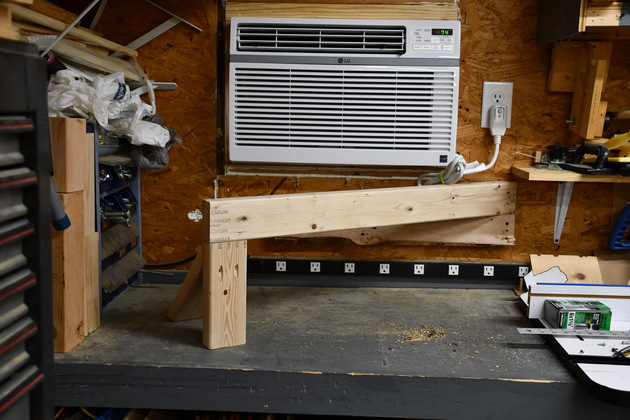
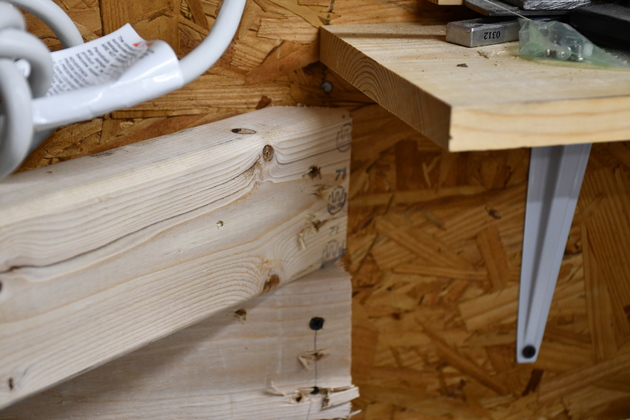
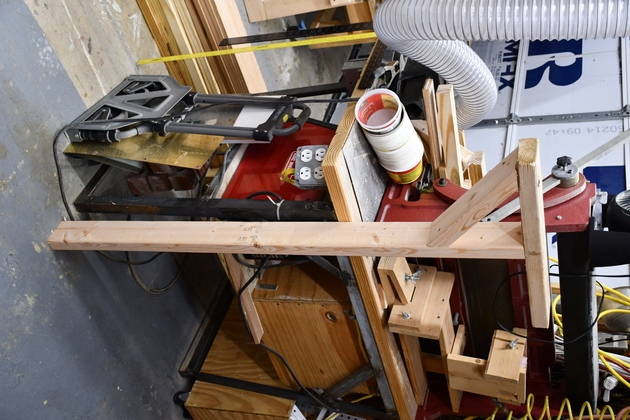
The diagonal ramp support installed. |
|
Close up of the diagonal support and how it is attached to the wall. Also note the 2x4 I screwed to the wall across two studs to hold the end of the support. |
|
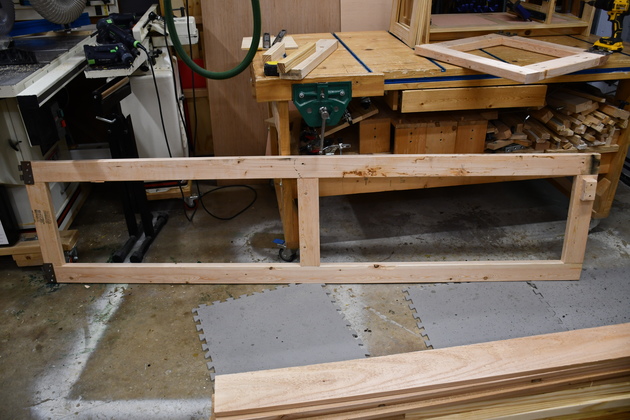
Ramp (underside). You can see the pivot block at the upper right end. The pivot block catches behind the diagonal support so the ramp doesn't slide off. |
|
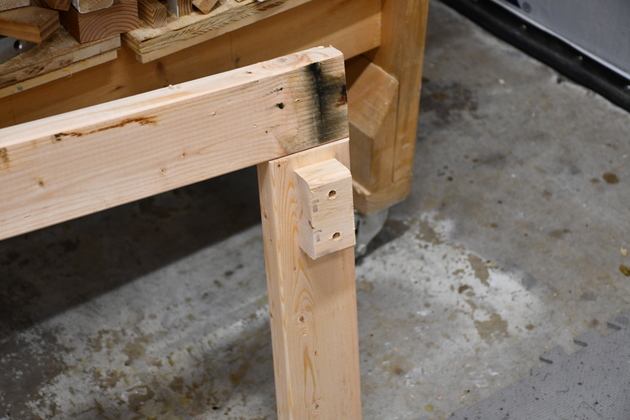
Close up of the pivot block. |
|
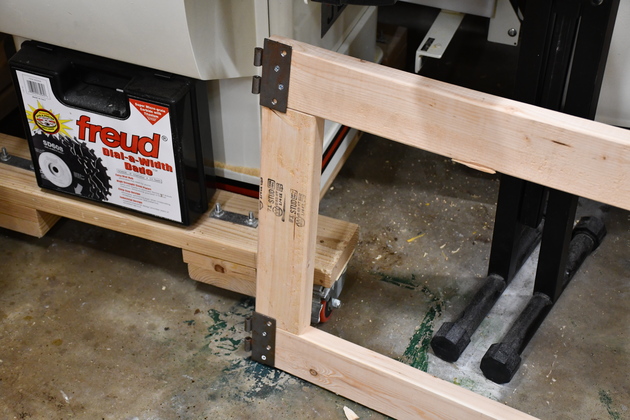
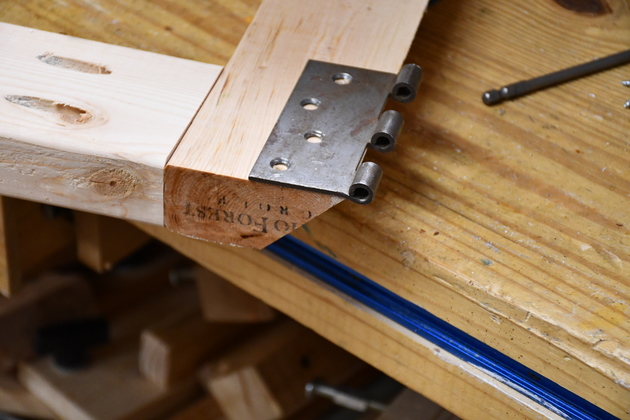
Hinges on the other end. |
|
Ramp extension (underside), you can see the hinges on the far end. The extension was on a roll around so I only had to lift the AC about 30" to set it on this extension. |
|
Close up of the hinges and beveled end of the extension. The bevel allowed the extension to flex since it was lower than the other end of the ramp. |
|
Tee brace against the metal working bench. After installing the AC, I decided to move the metal working bench against the wall on the right. |
|
Pic of the AC right after I installed it, you can see the metal working bench on the left. The roll around table, that supported the ramp extension, is on the right foreground. |
|
AC remote by the door Red Box. I never thought much about remotes on ACs but this one is really handy. |
|
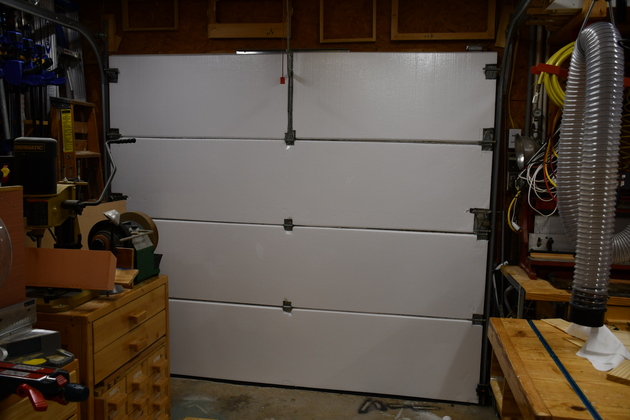
I also added another 1" foam board to the overhead door, covering up most of the metal frame of the panels which already had 3/4" foamboard inset. I beveled the edges of the foam panels 25° on the table saw so they wouldn't bind as the aluminum panels went around the curve at the top. Then I glued them to the aluminum with Loctite Pro Line Premium, a sealer that adheres to foam board and metal. I let it set for 24 hours and before I opened the door, so far the panels are staying. This made a huge difference in the shop's temp, its over 100° outside and the 1Ton AC is cycling. |
|
A pic of the door previously with the 3/4" foam inside the aluminum panels. Note the white strips at the breaks, the center frame pieces, and the side door frame, which isn't seen here, its all metal frame which is exposed compared to above. |
Dearborn Heater
|
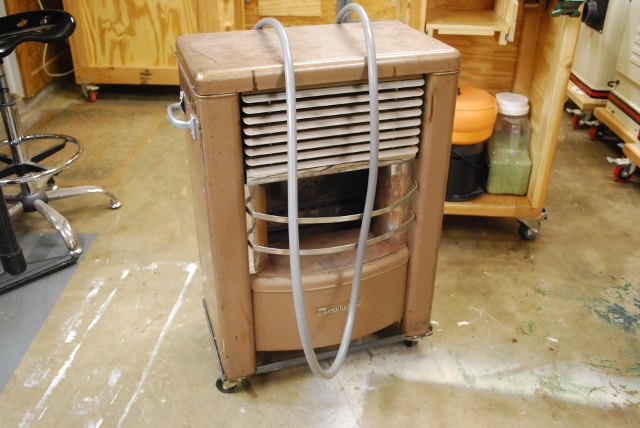
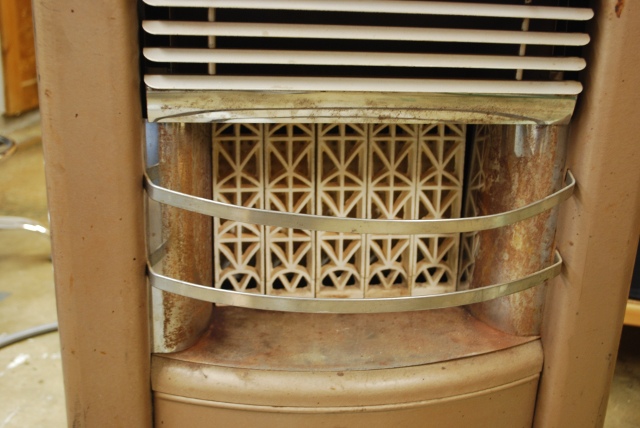
The Dearborn as it came from my storage shed. Note the barbeque hose (weller grill hose) doubled over the top and the welded frame with wheels. |
|
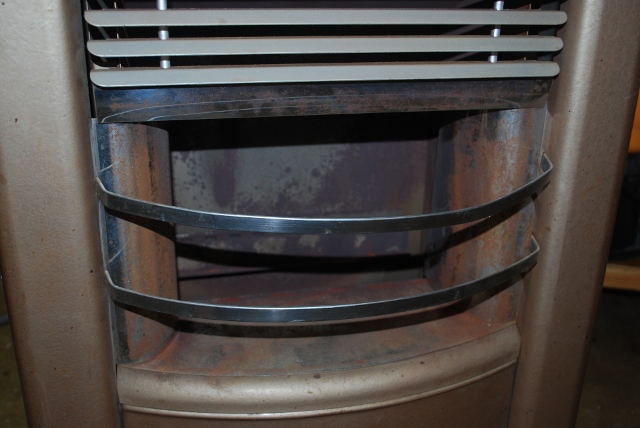
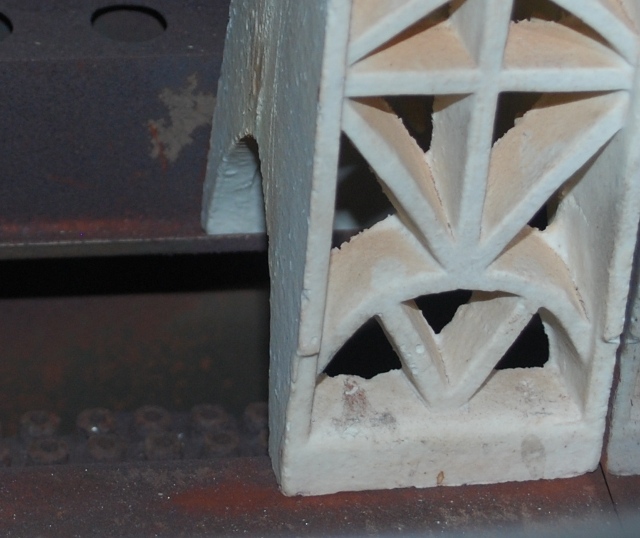
Close up of the stove with no radiants. The radiants are the ceramic elements that actually get hot and radiate heat (hence the name radiant) into the room. |
|
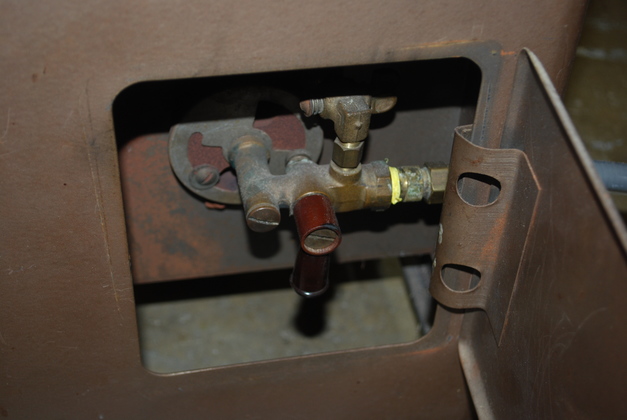
The stove's gas valve, you can just see the BarbQue hose connector at the right side just behind the hinge. Note the gas shutoff valve is off (handle pointing across the flow of gas). The pilot valve is near the top of the opening. |
|
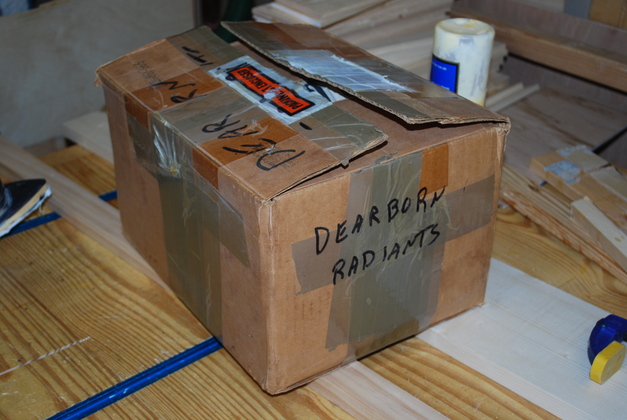
This is how I store the radiants on a shelf in my workshop. |
|
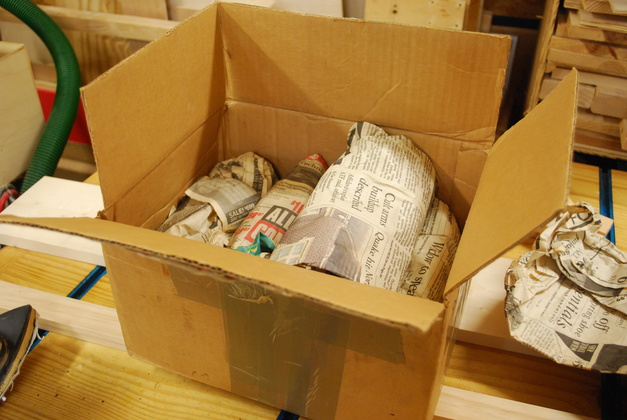
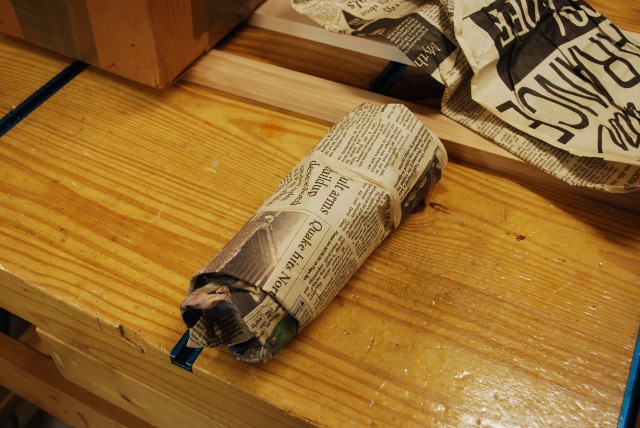
Opened up, the radiants are individually wrapped in newspaper and the box padded with more newspaper. |
|
Each radiant is carefully wrapped when stored in the spring. |

|
One of the radiants unwrapped, this is a bottom side view, it's front is to the right. Each radiant sits on a metal shelf at the front and the back sits in a little metal groove. Note the little "spikes" at the inside rear, they catch the heat and re-radiate it out the front. |
|
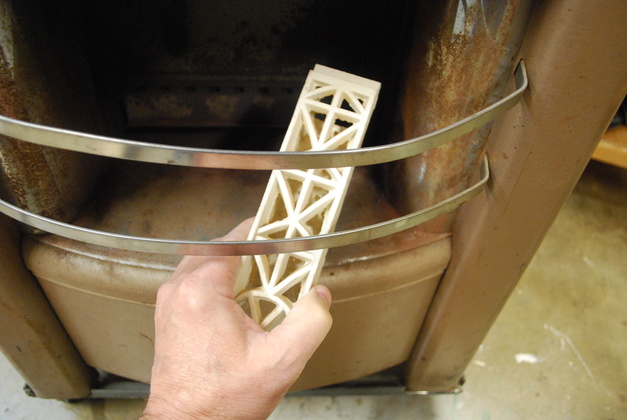
Beginning to insert a radiant into the Dearborn. The radiants are held in by gravity, they just sit there. |
|
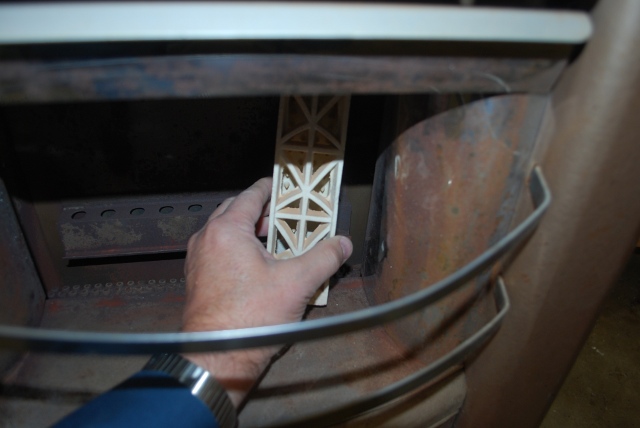
Insert the top up into the stove then move the radiant back until it touches the back of the stove, then set it down so that the back end is caught in the groove. |
|
You can see the radiant with the front on the front deck of the stove, the back in the groove in the rear. You can also see the top of the burner below the radiant area. |
|
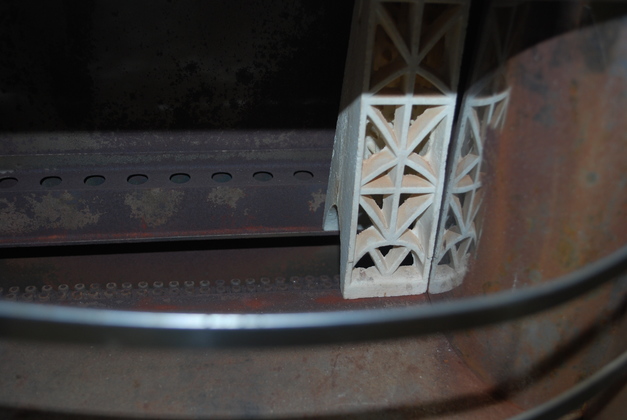
A little closer look at how the radiant sits in the stove. Note: these radiants are the originals, over 60 years old. |
|
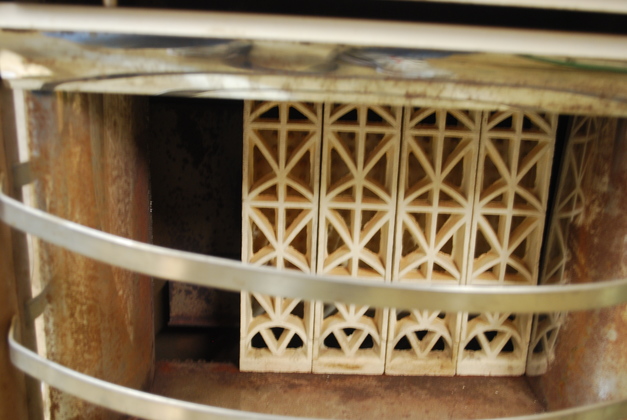
Four radiants installed one to go. |
|
All installed. |
|
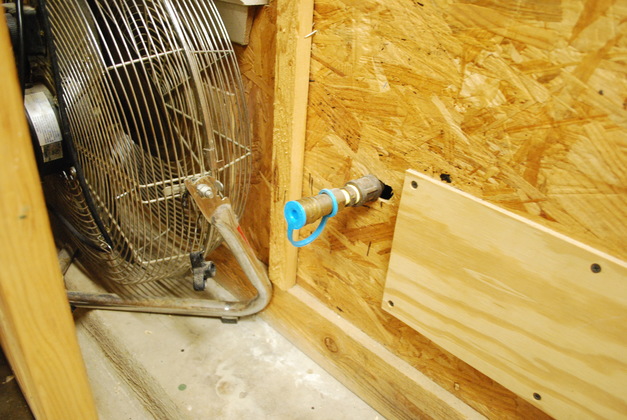
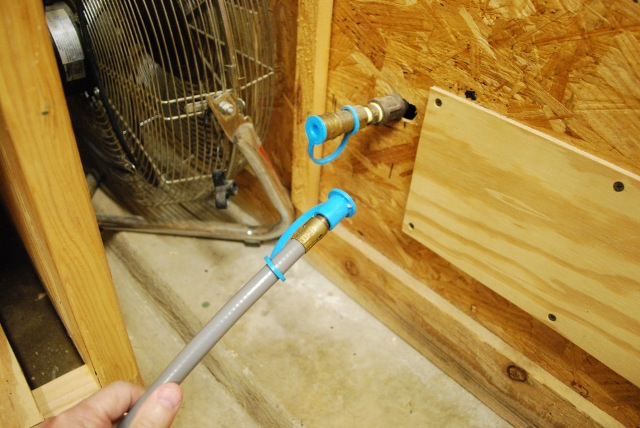
I installed a quick-disconnect for a barbque hose in my shop. I used a Weber hose which came with the quick disconnects, I also have one for my grill on the patio. |
|
The two ends with the caps on as they are stored to keep bugs and dust out. |
|
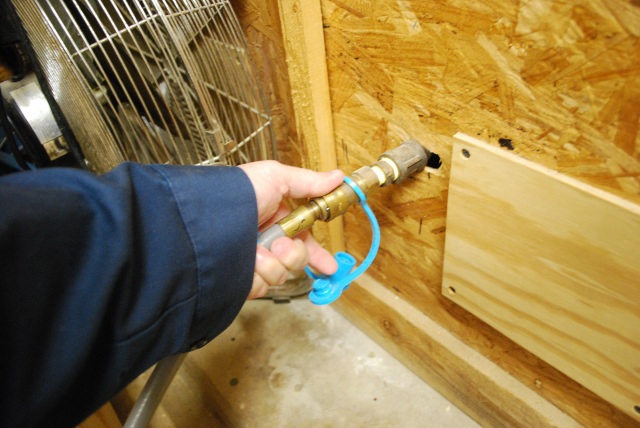
You push back the collar on the receptical and insert the hose end male and make sure the collar snaps full forward. |
|
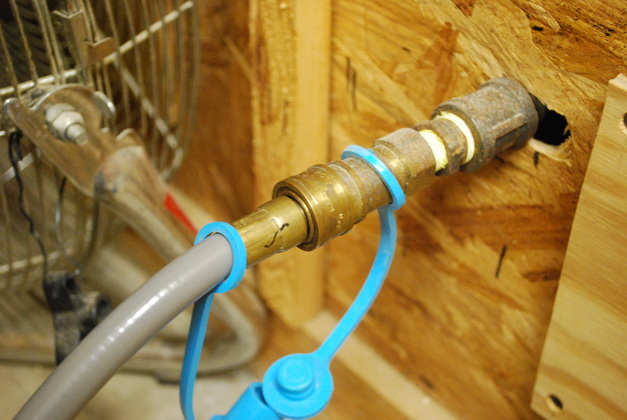
Collar fully closed. That is yellow tape, the pic's exposure just makes it look white, I went out and checked after looking at these pics. |
|
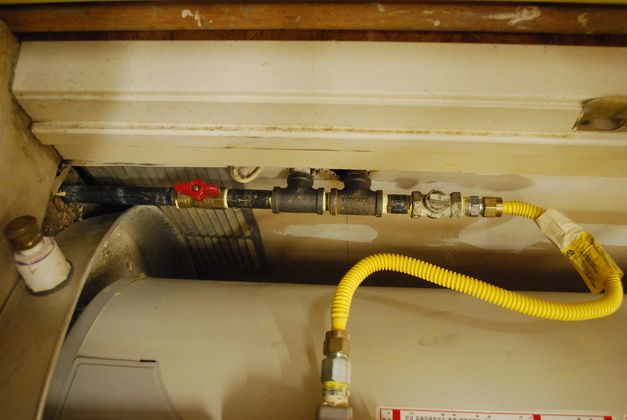
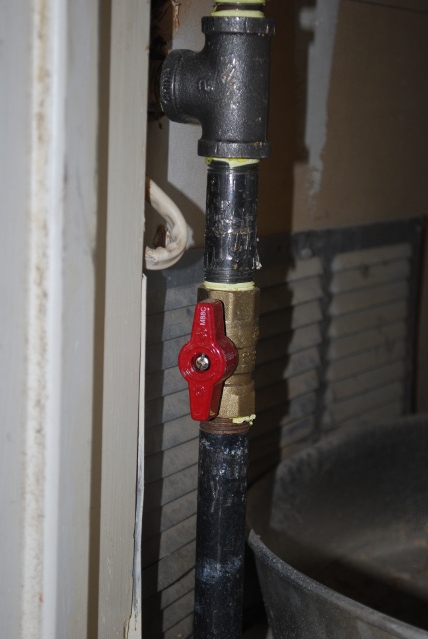
Water heater closet gas connections. The lower valve is for the Dearborn, the upper pipe comming in through the wall is the gas feed, the lower pipe goes to our gas dryer in the adjacent (utility) room. |
|
Close up of gas valve turned on. When the handle is in line with the flow of gas the valve is on. This is the normal way a gas valve is set up, but beware, some of the older gas valves can be modified to be just the opposite, always check before turning gas off or on. Also note the yellow gas tape on all joints, this is the code, at least in our town. |
|
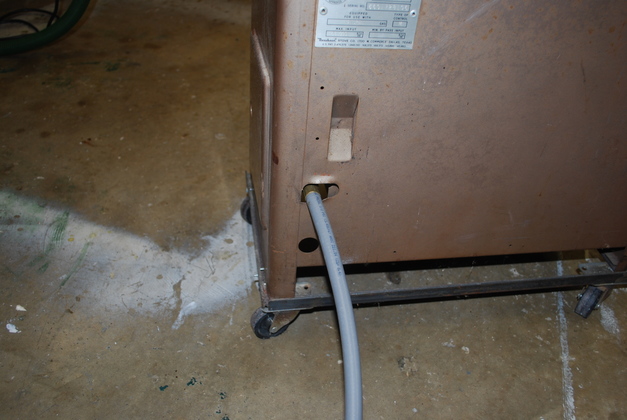
The stove end of the gas hose. This hose is about 3M long which allows me to move the stove around for heating and storage in my shop. |
|
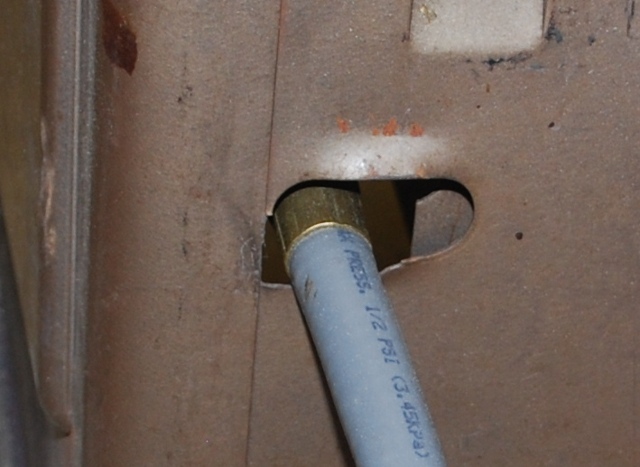
A closer look shows how the hose is protected from the stove's metal housing by it's brass collar. |
|
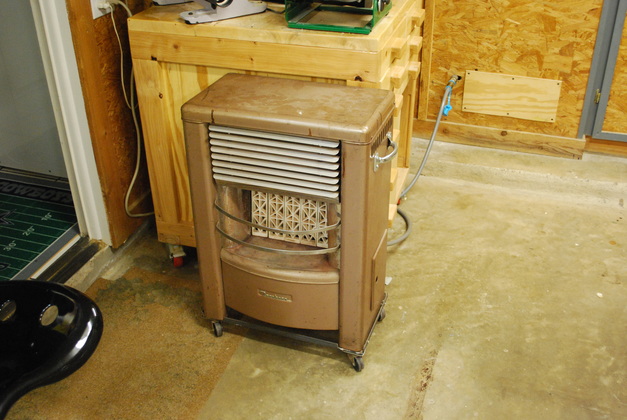
Here is where I store the stove while its connected, notice the hose and connection. |