| | |
|
|
|
|
MiniSplit Thermostat
UNDER CONSTRUCTION
|
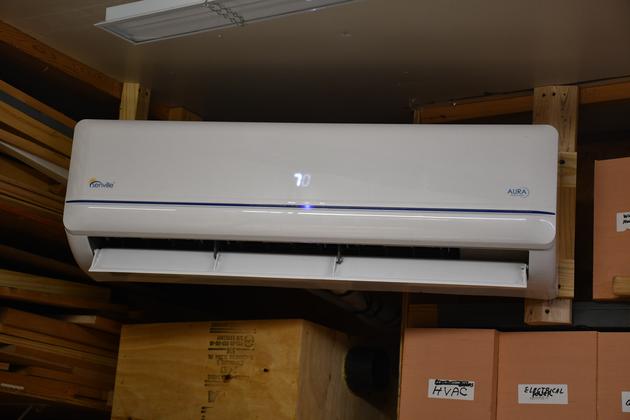
Our Seville mini-split, in the shop, works great, that is, it maintains the set temp well, although it's a little slow when you make large temp change (because of the 20 SEER I suppose), and I haven't tried turbo mode.
It is very quiet, both inside and out.
I was a little disappointed in that the Seville mini-split's remote was limited in it's control: it apparently only has one temp seting, you have to set either heat or cool mode, then set the desired temp.
It does have an 'Auto' mode but it appears that you would heat and cool to the same temp.
The unit does know elapsed time, that is, you can setup events x hours in the future.
The Seville does allow remote monitoring/control via smart phone, but I avoid using smart phones for monitoring/control of anything.
It's temp range is 62°F - 86°F.
New Thermostat (Initial Ideas) For Sennville Mini-Split.
I wanted to be able to query it and change it from our network.
So I thought I would build a smart thermostat that I could interrogate and change from our network.
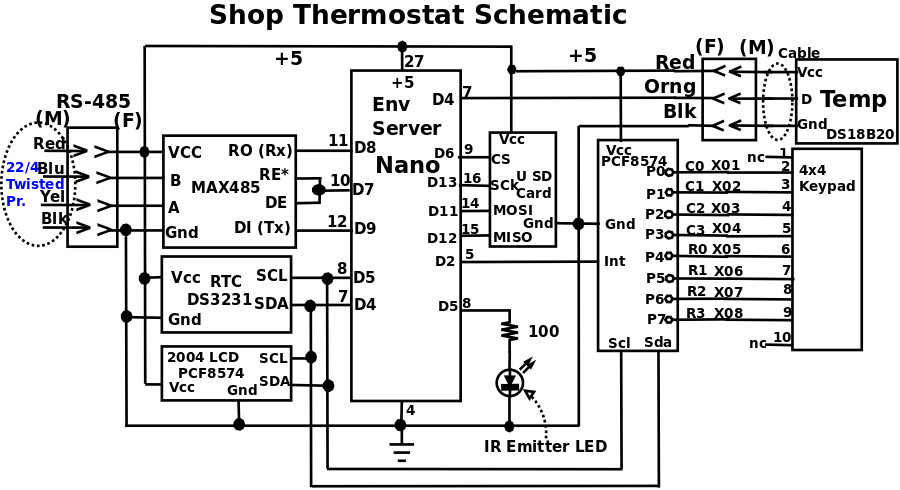
We already have an Arduino gateway with RS485 comm in the shop, so the Thermo will become part of that RS485 net.
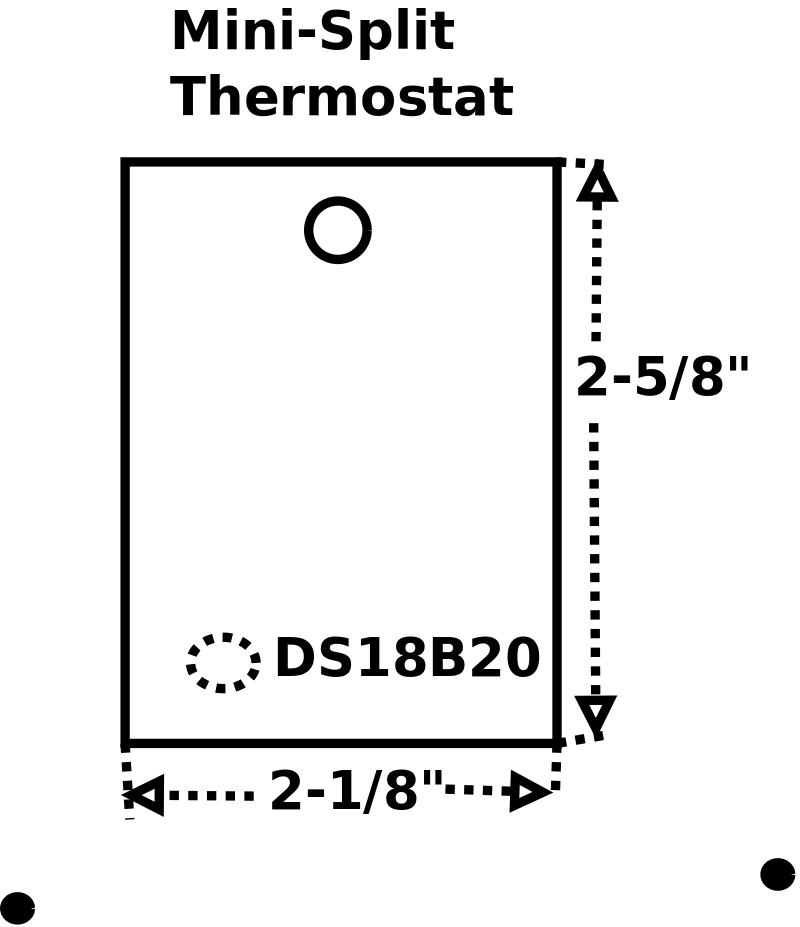
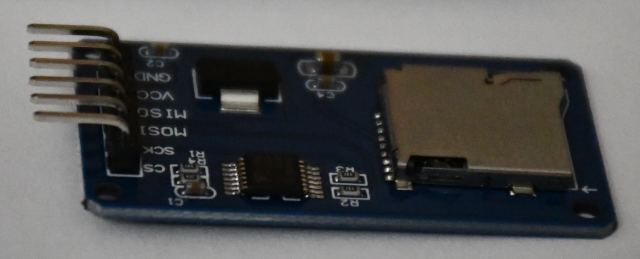
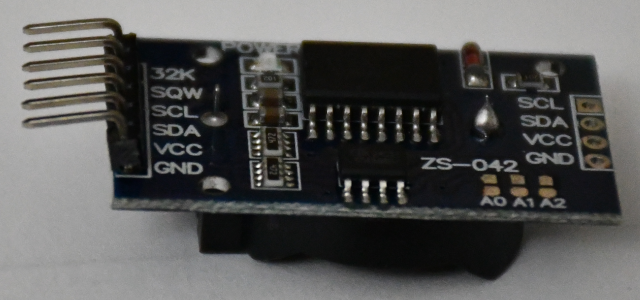
Thermo will have it's own temp sensor (DS18B20), RTC (synced to NTP), and nvram (non-volatile ram micro SD) for settings.
When Thermo comes up it will 1st set it's RTC from ntp, the get settings from nvram.
If there are no settings it will set defaults with mode = OFF.
It will need different settings for heat and cool.
Will need start ahead for heat and cool changes.
Able to alter temp settings which it'll maintain until the next 'set time'.
Have Modes: on, off, heat, cool, Auto, turbo, clean.
Multiple set temps / time.
It should know the time and date, according to ntp (Network Time Protocol).
It will need to know the shop temp (built in LM35).
Multi modes: on, off, heat, cool, cool/eco, auto, turbo, fan, dry, Self clean, LED on/off, Direct, and swing.
Default display is Current Temp and time.
If + or - button pushed temp is temporarily changed to new setting.
Pushing Mode brings up a scrollable menu of Modes, + - scrolls, Sel selects.
Thermostatic Thoughts:
|
|
| loop | constantly, check for in-bound request & respond.
|
| Two requests from master, get settings, and set settings.
|
|
|
| every minute: Two temp settings (below) for each day/time, lo & hi.
|
| At least 2 time / temp settings / day of the week.
|
| Thermo should find current day/time, look up settings for this day/time:
|
| If curTemp < lo set AcTemp, set AcMode heat.
|
| If curTemp > hi, set AcTemp , set AcMode cool.
|
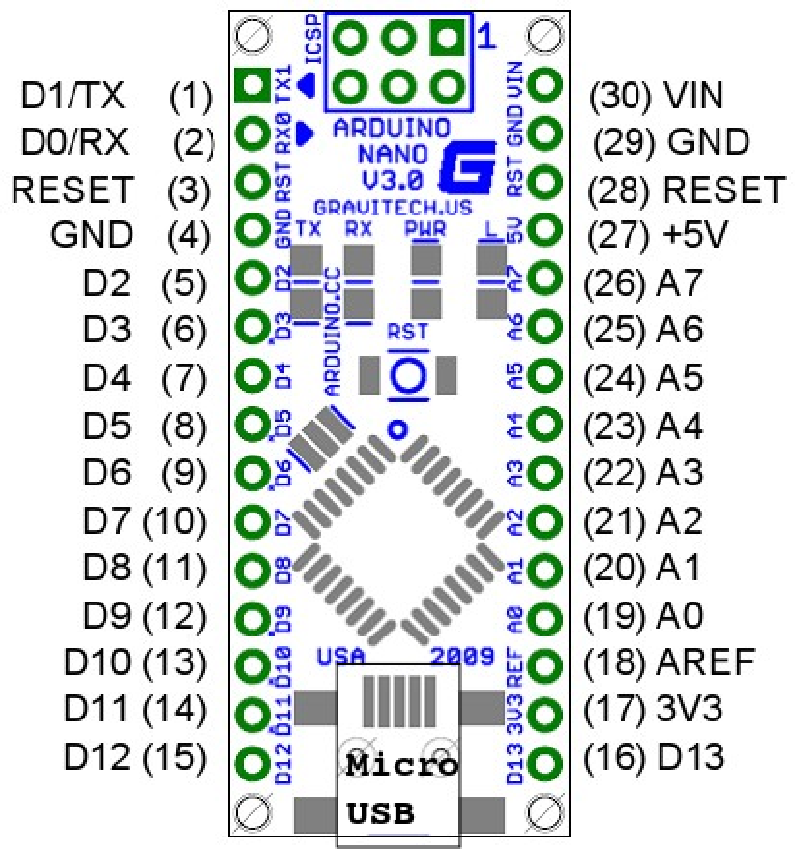
An Arduino Nano should be ideal for this project.
Since it's in the shop, It can join the RS-485 comm system, thus allowing access from our in-home network.
I noticed that when you push + or - temp, the remote doesn't send a + or-, it sends the new setting temp, keen.
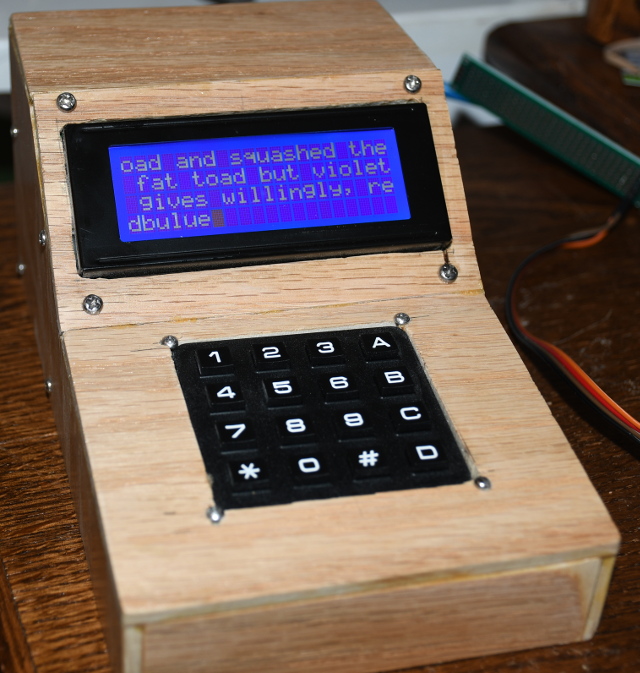
The new thermostat will need a small local front panel, with push buttons, to display and change temps, times, up/down, etc.
Something like the Data Terminal.
Two rows of 16 characters , with 6 pushbuttons,should be OK.
04/02/22: Page Origin
Testing
|
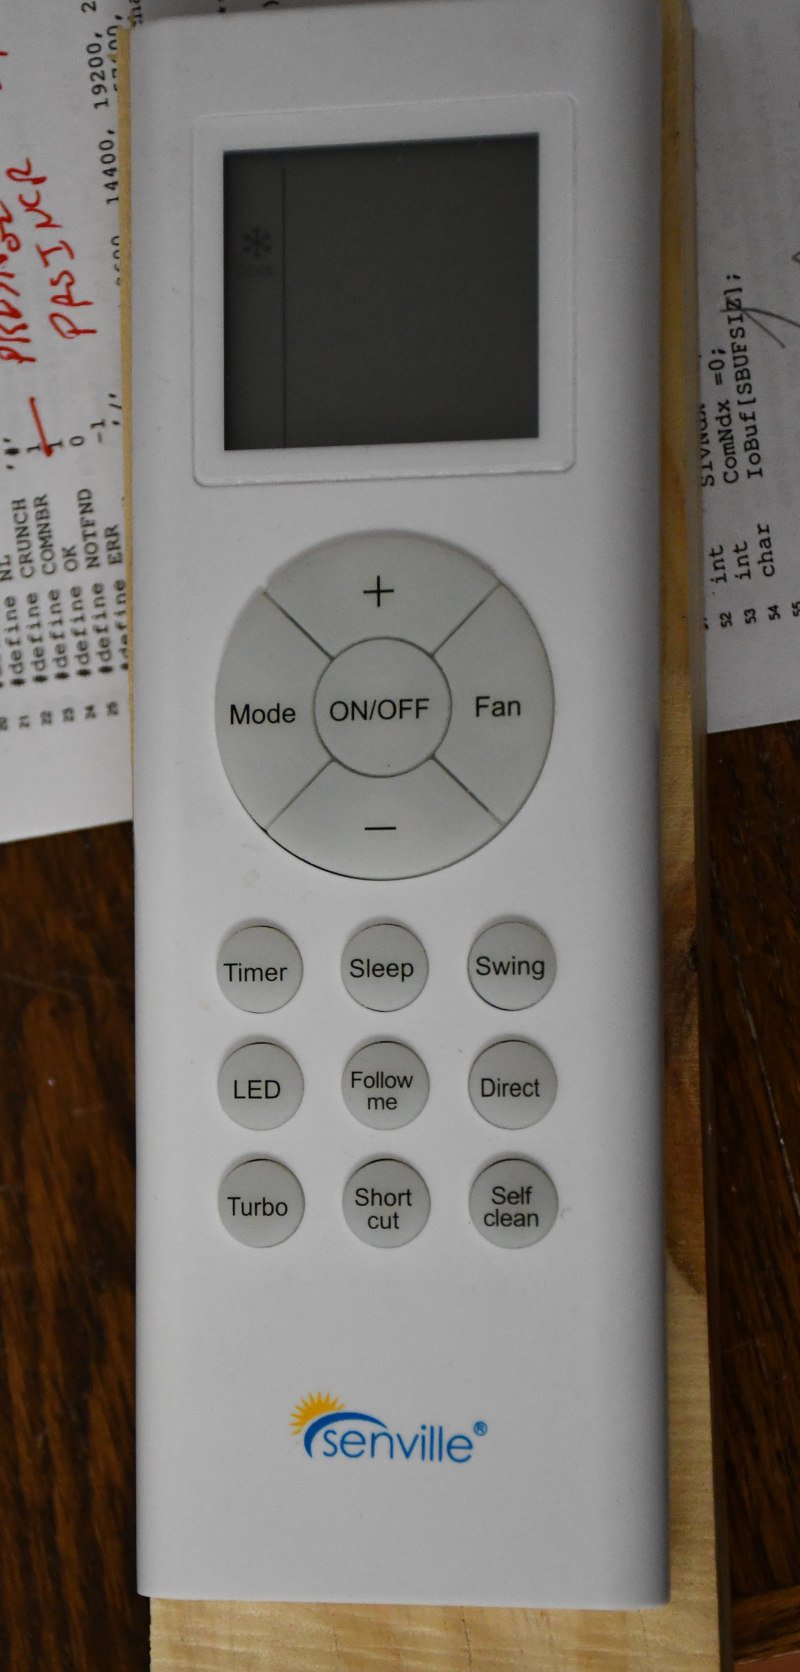
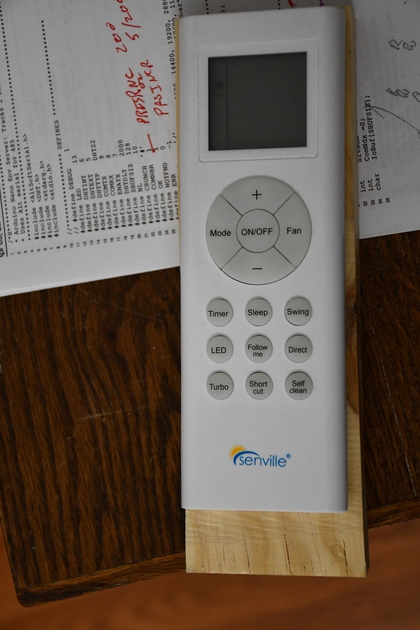
The Senville mini-split remote.
This a good simple remote, but, it doesn't have multiple set points and isn't aware of time of day.
|
|
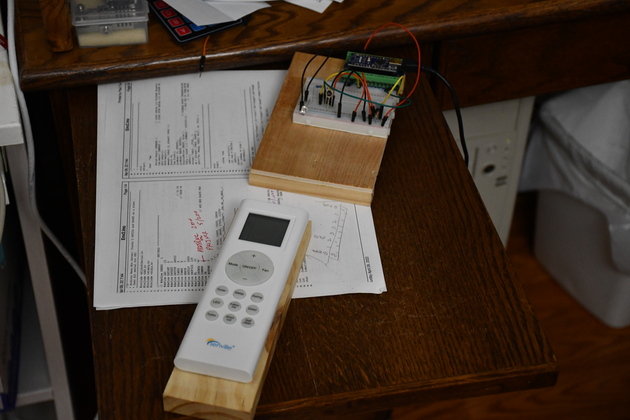
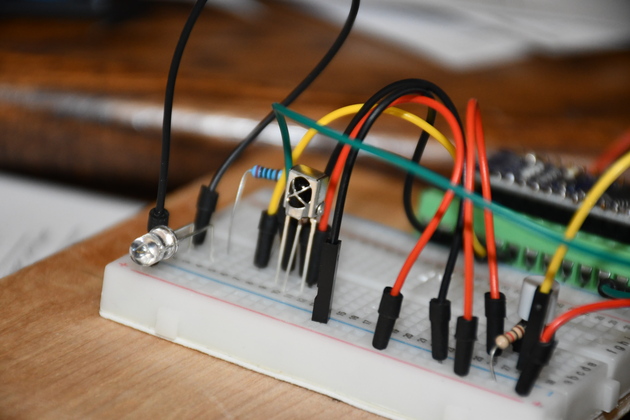
First I had to read the IR codes from the Senville remote.
This is the lash-up I used to read them.
|
|
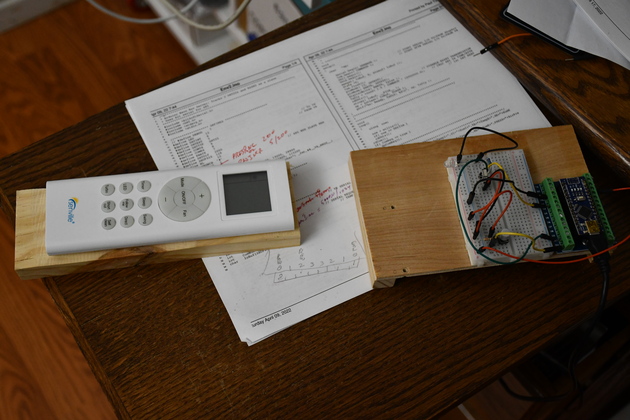
Slightly different angle.
|
|
The breadboard, you can see the sensor LED (center of pic) with 'X' and the clear IR emitter LED (left corner of BB).
Also, note background left of sensor, you can see the dropping resistor for the emitter LED.
|
|
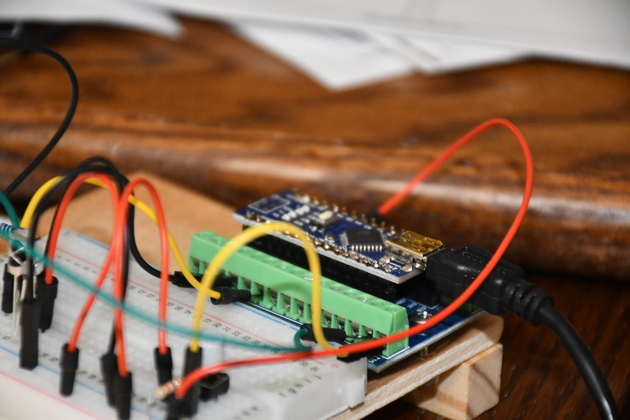
And the mighty little Nano, controlling and powering the lash-up.
|
Move Device Pins