10/26/16: Page Origin.
I make a lot of mitered frames (pictures, drawer fronts, and doors) out of 1x2s and I like to use type FF (Face Frame) biscuits at the corners.
The only slot cutter I could find to cut FF slots is the Porter Cable so I have pretty much dedicated the Porter Cable to type FF biscuits and use my DeWalt for all other biscuits (it has some redeeming characteristics in this area).
Since I frequently cut a biscuit slot in the mitered end of a 1x2 I decided to make a jig to help.
It allows me to accurately cut biscuit slots in the end of 45° mitered pieces without measuring and marking every time.
Some examples: picture frames,
slider fronts, and drawer fronts.
I also make mitered frames with narrower pieces than 1x2.
In that case I use a shim to center the slot.
Recently, I have been using a dowel instead of an FF biscuit.
I came up with a simple attachment to help line things up for doweling.
Please see the Doweling Attachemnt pics.
The base is 1/2" birch plywood, the clamp was purchased from Rockler, as were the tee knobs and tee bolts.
The base is 15" wide and 12" front to back.
The clamp is a little high off the base so I added a piece of 3/8" plywood to suport the front of the jig so the jam block was centered on the clamp's rubber pusher.
The two corner diagonals are 1x4 sawed at 45° on my miter saw as was the jam block.
The whole jig is 3 layers high, base, support pedestal, and corner diagonals, all glued together.
|
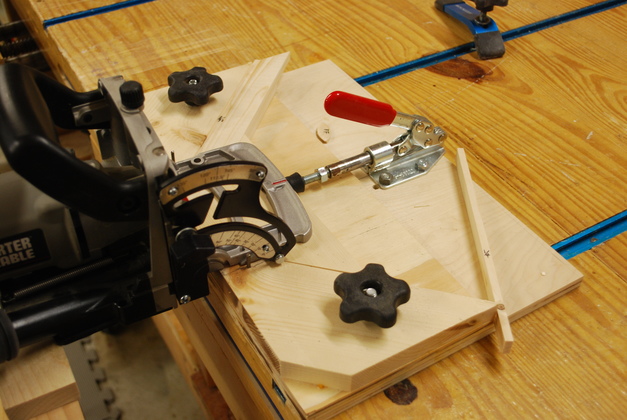
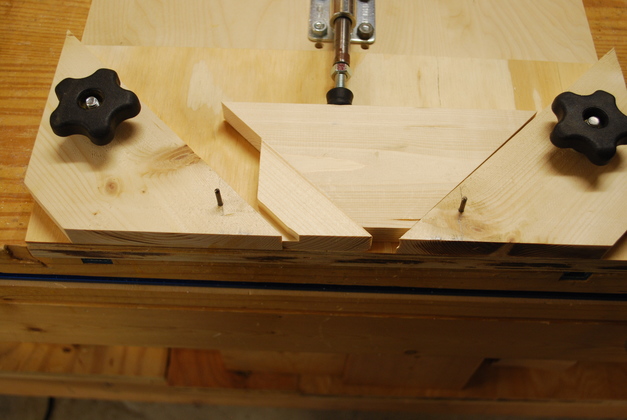
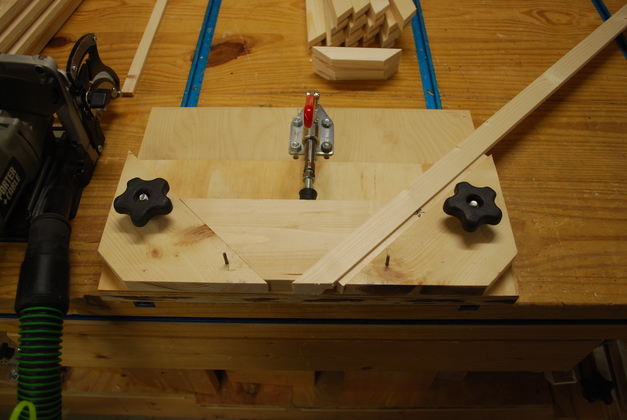
Porter Cable Biscuit Cutter aligned on the Miter Slot Jig.
|
|
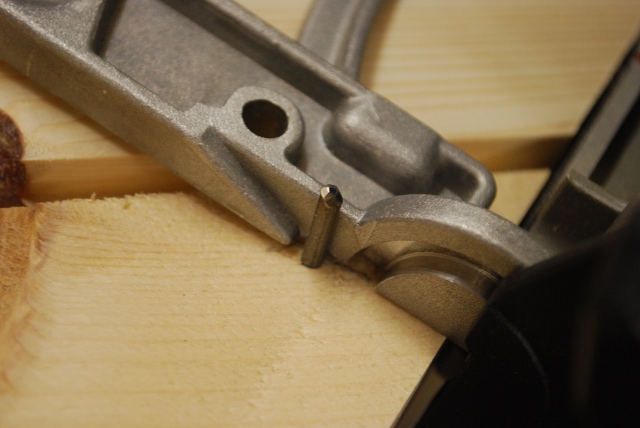
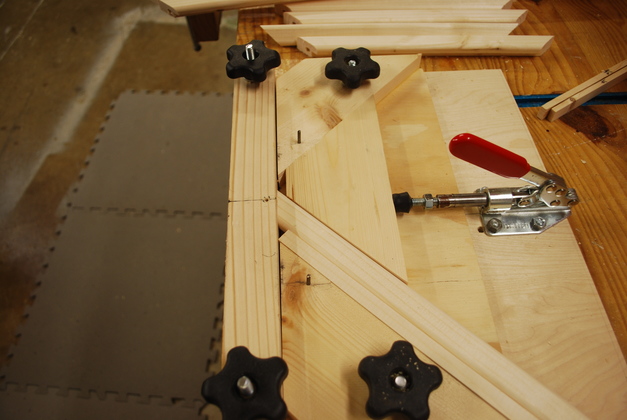
A little closer look at the miter slot clamp.
The triangule shaped piece upper right is a jam block which transfers the clamp's (at the top) pressure to the side of a piece being slotted.
The two small steel pins sticking up near the front are for aligning the Porter Cable slot cutter so the slot is in the center of the piece.
A piece to be slotted is laying on the left, it may be rotated to the right for slotting the other end.
|

|
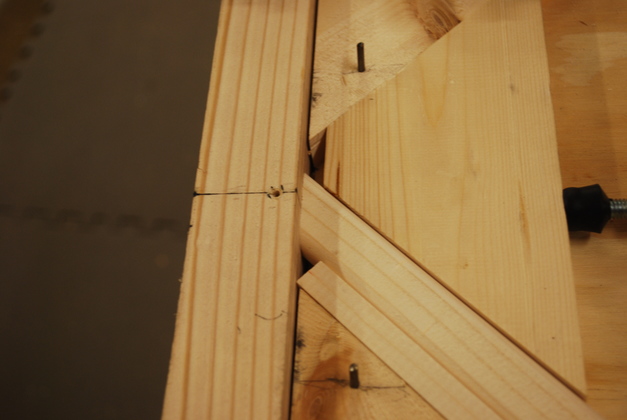
A slot cut in one mitered end of a frame piece.
The jig allows me to quickly cut the slots in exactly the same place on each end with out careful measuring and marking.
You can see the 1/2" base, the 3/8" support pedestal, and the front corner diagonals.
The Base, Support Pedestal, and Corner Diagonal are delineated by red dashed lines,the right side alignment pin is in the green circle.
|
|
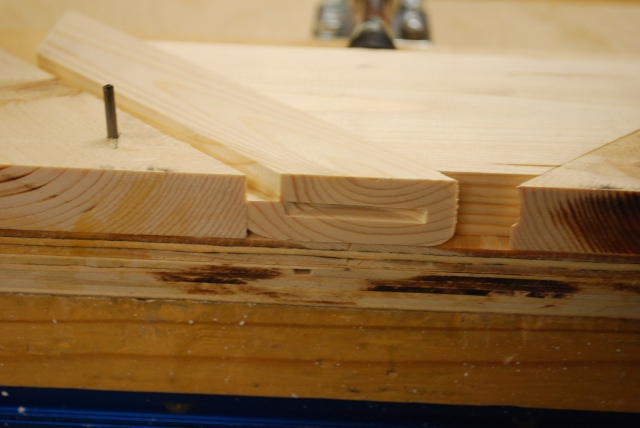
Biscuit slot cut in the other end of the frame piece.
Note I aligned the slot cutter so the top of the slot is level with the bottom of the rabbet so the biscuit doesn't interfear with the panel.
This is a 1x2 piece so there is plenty of room to move the slot around, a 1" wide piece makes this a little tighter.
In these pics the frame bottom us up which will become the reference piece for slot position.
The jig works equally well if you turn the pieces over and adjust the height of the slot, as long as your consistent in placement, the frame will fit.
|
|
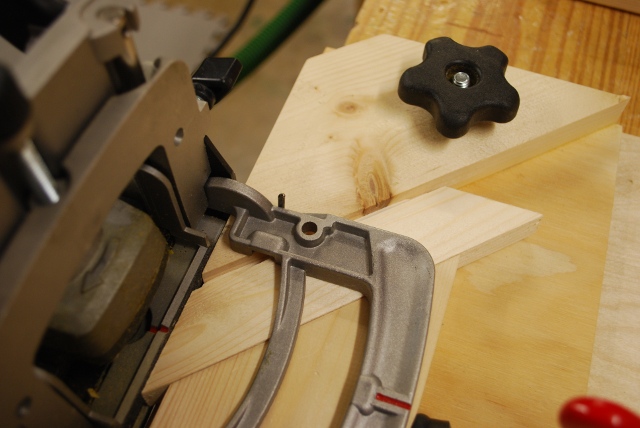
Side view showing one of the alignment pins.
You push the biscuit cutter up flush with the end of the piece and push it sideways against the pin and the alignement is prefect.
|
|
Close up of an alignment pin up against the cutter table slot.
|
|
A really small frame side, but the jig aligns and holds it correctly.
Note the alignment pins on each side that match a slot in the table on the PC biscuit cutter.
|
|
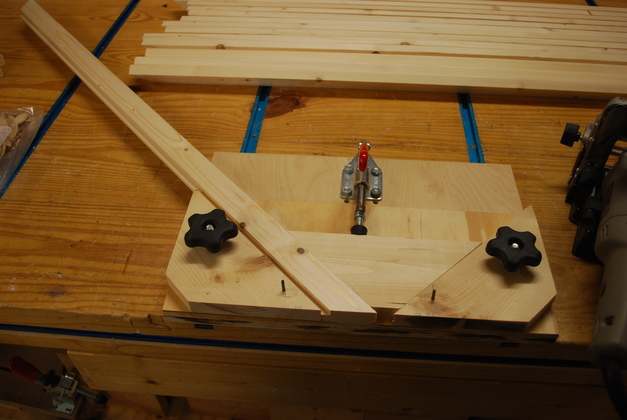
Works on the really long frame pieces too.
|
|
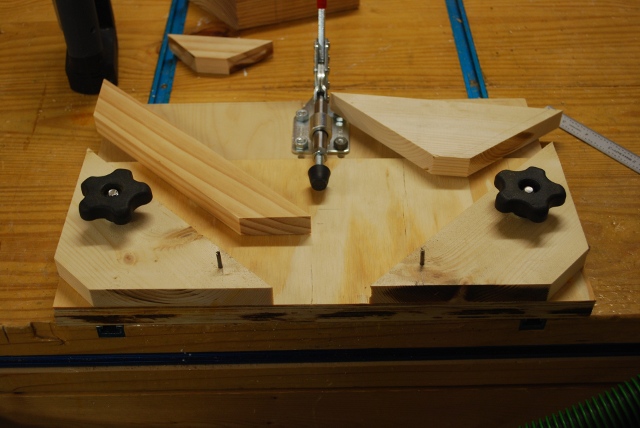
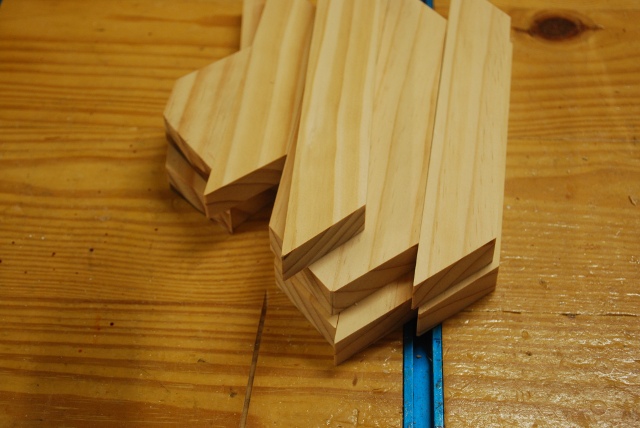
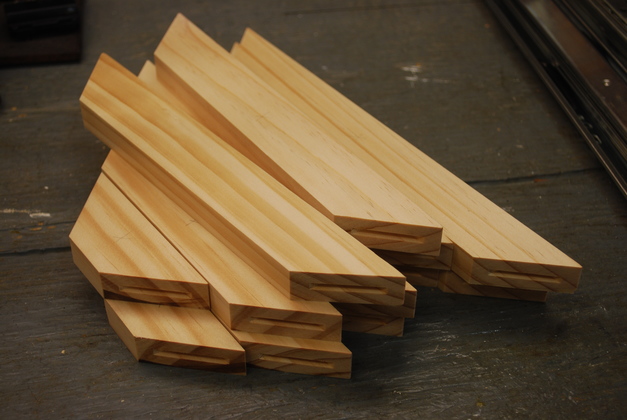
Some frame pieces cut to length and mitered.
|
|
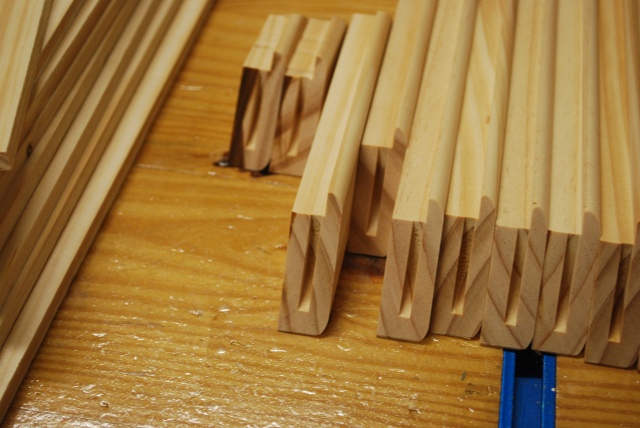
Same pieces after slotting.
|
|
Same pieces after slottting and rounding edges, ready to glue.
|
Narrower Frame Pieces
|
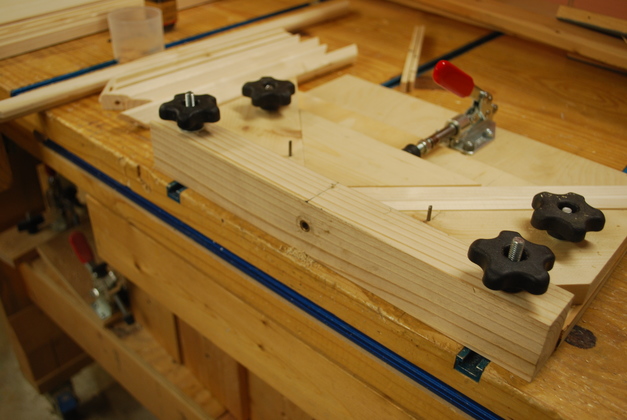
A 1" wide frame piece, very long, clamped.
Note the shim between the frame piece and the corner diagonal on the right.
I use shims for narrower frame pieces to make sure the slot is exactly in the center.
|
|
Closer look at a narrow frame piece, you can see the 9/32" thick shim to the right of the piece.
|
|
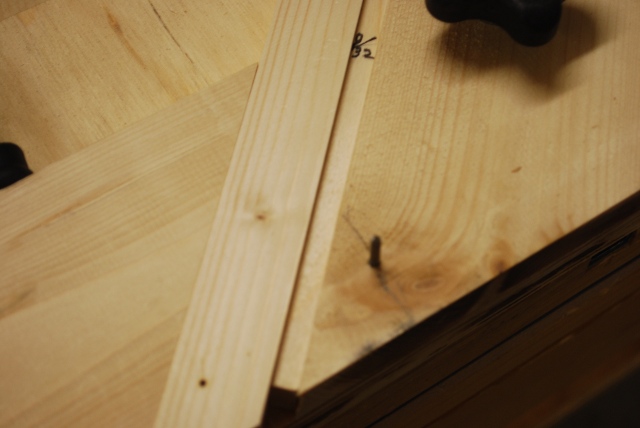
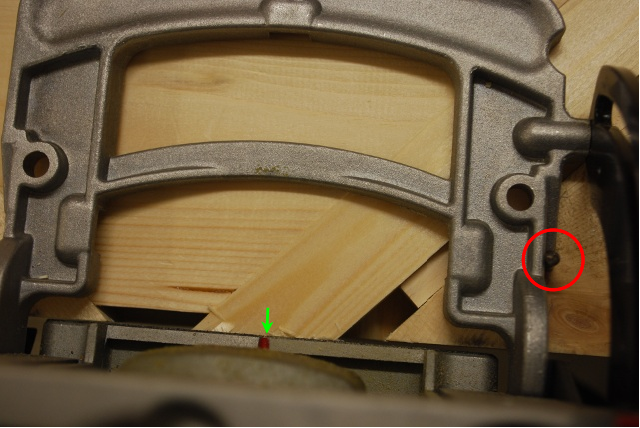
Top view of the slot cutter aligned on the jig ( alignment pin in Red Circle), note the cut mark (Green Arrow) is exactly in the center of the piece being cut.
You can also see the shim.
|
|
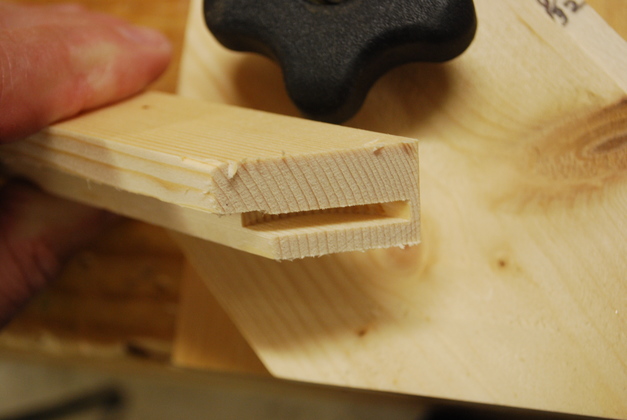
The slotted end of a narrow frame piece.
Note: I could have moved the biscuit into the upper part of the miter but I was a little concerned about what would have happened when I rounded the two upper corners of the frame pieces.
|
|
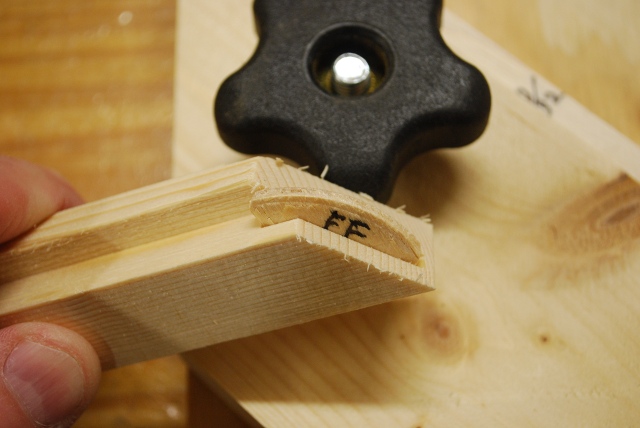
Because I didn't put it in the upper half of the miter, the type FF biscuit will protrude into the panel rabbet, but I'll trim that off once the frame is glued.
A Dremel Tool works great for this.
|
Doweling Attachment
|
Doweling attachment in place, on front of the miter slot cutting jig.
Its just a piece of 2x 157quot; wide, 1-1/;2" thick and 2" high with two tee bolts and nuts.
|
|
Looking from the side.
Notice I cut a new shim so the dowel hole would line up from either end of the mitered piece.
|
|
Closer look at how the piece aligns, the line on the attachment is where the hole will be drilled.
|
|
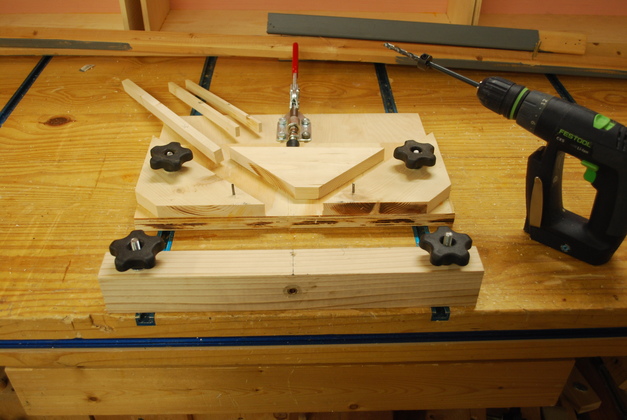
All the pieces.
The shims are on upper left corner of the jig.
|
|
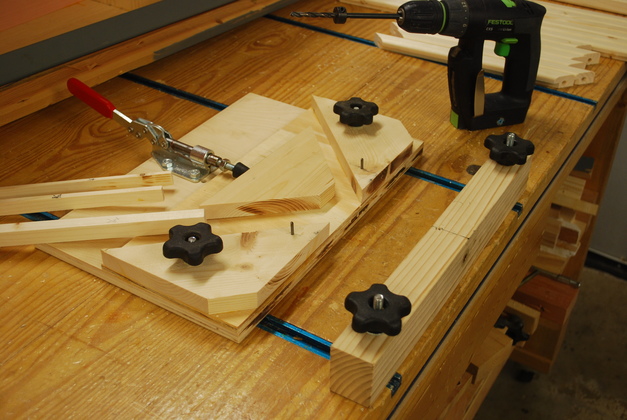
Look from the left side.
|
|
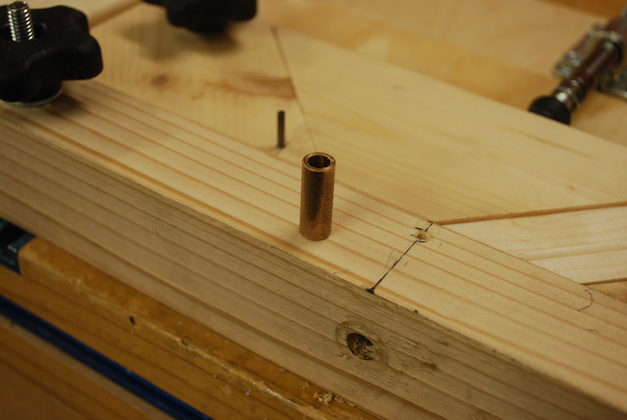
I bought a 1/4" by 3/8" and 1" long bushing (brass bearing) from Lowes, and drilled a 3/8" hole through the jig so it would be in the center of the slot jig.
|
|
Bushing being placed in 3/8 hole.
|
|
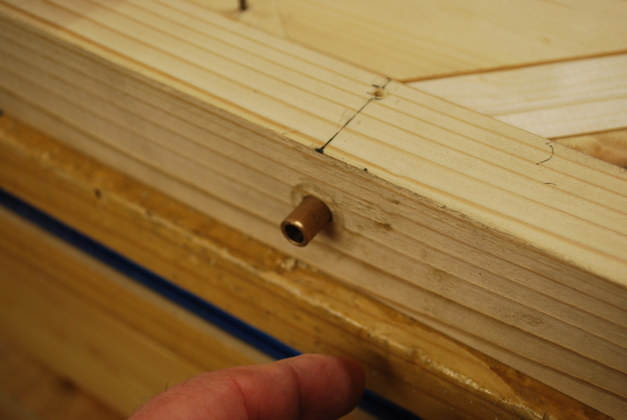
Bushing flush with face of attachment.
|

|
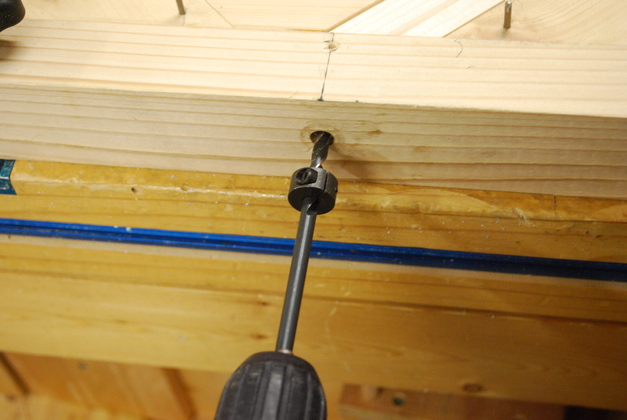
Stop colar on 1/4", 6" long bit.
Sets the depth of the dowel hole.
|
|
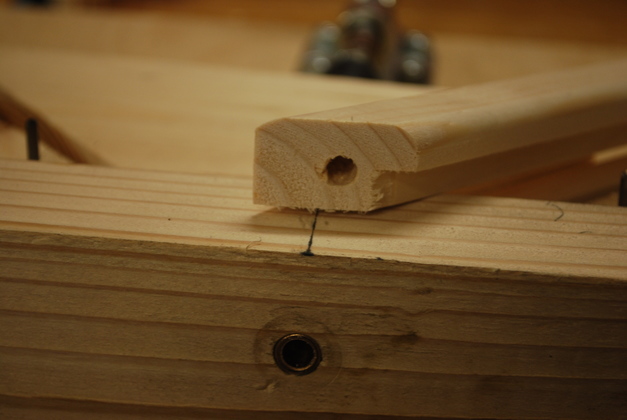
Drilling a dowel hole.
|
|
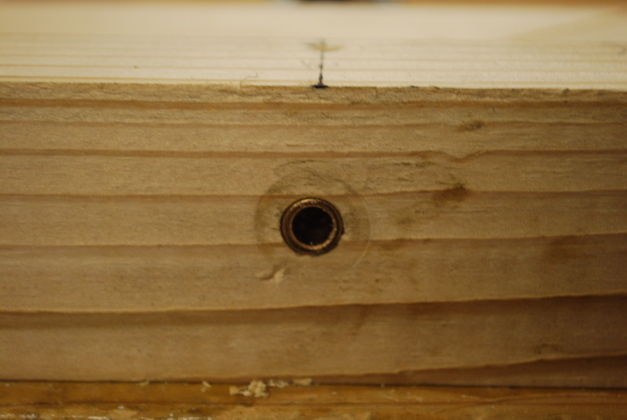
Dowel hole I drilled with the attachemnt.
|
|
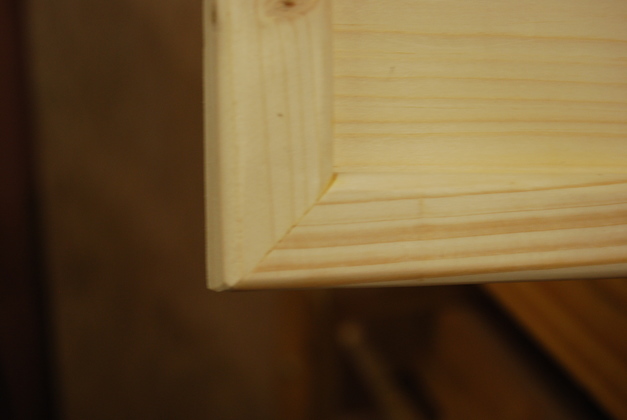
Finished, doweled frame corner.
|

|
Another finished doweled corner.
This is one of my laminated pine panel (backed with 5mm plywood).
|
