For years I have done my prototyping and testing on my roll-top desk, which also has my monitor and keyboard on it, so It is usually cluttered and doesn't have much space to work.
Dust Detector Testing and Data Terminal Testing and Environment Server or the Dust collector Automation.
I needed more space to test new robot, automation, and general electronic devices, and I need storage space for my test gear.
I came up with this roll-around bench, similar to the printer bench.
Since I didn't want the test bench to take up much room when not in use, the 18 X 24" desktop will slide out on drawer slides (giving me knee room), and the keyboard shelf will slide out from under the desktop.
I want to put the monitor and Oscope on top, so I will need a 10" drop leaf on the side of the top to accomodate both.
Drawers in the lower section will accomodate the Oscope, tools, jumpers, soldering iron, parts, and etc.
I wish I had this when doing the Environment Server for the shop or the Dust collector Automation.
Since this is mid-2021 and the COVID_19 pandemic is upon us, and lumber is more than 3x what it was in 2019 I had to modify what lumber I used.
I switched over to 2 X 10 X 8' for this project, since it requires 9" wide top and keyboard tops and 2 x 10 x 8' has the most reasonable price in these days of overinflated lumber (and everything else) prices.
Lately, I have been adding HFrames (Horizontal Frames) to many of my projects, in order to improve strength.
Initially, the HFrames are just a 1 x 3" rectangle, but if I find the structure needs more strength, I glue an inset plywood panel into the center opening of the HFrame.
|
Click For Larger Pic
|

|
Lumber

|
The lumber for the bench's frame.
Note they are all 2 x 10 x 8' SYP.
For more info, please see my Lumber Prep Page.
|

|
Sizing Operation:
Cutting 2x10 to length on the miter saw.
Note the little roll-around table on the right, it makes a dandy support for long lumber being sawn.
|

|
Another look at the sizing operation.
|
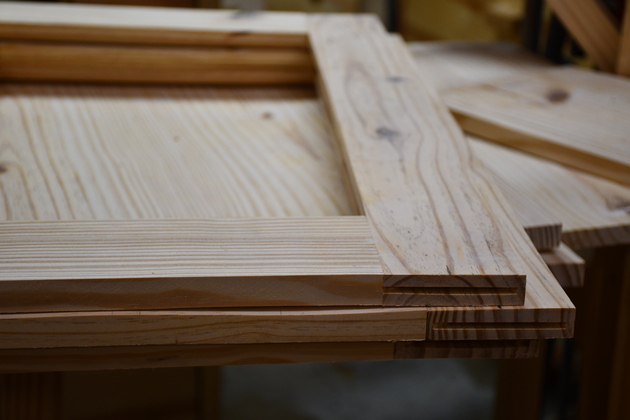
Frame

|
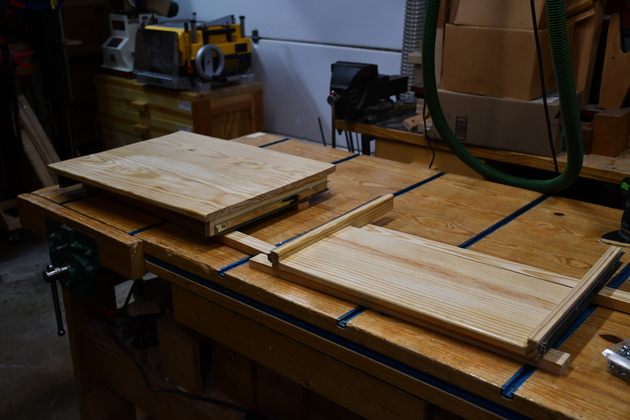
The work top being edge joined.
The two 9" pieces, when joined, will make and 18" deep work top.
All joints use multiple #20 biscuits.
|

|
One of the side frames in the glue clamps.
|

|
The other side frame, ready to sand.
|

|
A top side being glued.
|

|
About to sand two of the HFrame (Horizontal Frame).
|

|
Main cabinet side frames and one HFrame after sanding.
|

|
Work top and keyboard top ready to sand.
|

|
Sanding edges of the work top.
You can see the other 3 tops awaiting their turn.
|

|
Rabbets cut for inset panels.
|
|
Biscuit slots in HFrame ends.
|

|
2x10 cut to length for hutch top.
|

|
Closer look at resawing 2 x 10 x 27-1/2" for hutch top.
|

|
Closer look at sawing down the center line.
|
Inset Panels
These inset panels are made by resawing and planing SYP (Southern Yellow Pine) down to 1/8" thick panels then laminating (gluing) to a 3/16" thich plywood backing.
This makes a solid 5/16" thick panel, with a SYP face, that doesn't crack with time.
I make these laminated panels a little oversize, then trim them after the glue sets.
For more info, please see my laminating page.

|
1/8" SYP panels cut and planed for inset panel faces.
|

|
Edge joining 1/8" SYP face panels before laminating to 3/16" plywood backing.
|

|
Two edge joined face panels.
|

|
Edge of 1/8" SYP face panel.
|

|
Start of edge joining process.
The panels have already been across the jionter, now I apply a bead of glue along one edge.
|

|
First I put just a little bit of pressure on the edges of the panels.
Too much pressure at this point and they will start to buckle.
I place wax paper on top of panels being edge glued.
This keeps the flattener board from being glued to the SYP panels.
|

|
Place the flattener board on top of the waxed paper.
|

|
Place a weight on top of the flattener board.
Crank the bar clamps just a little to place pressure on the edges of the SYP panels, look for just a little squeezout and you'll know its OK.
The flattener board keeps the panel from buckeling when I put a little pressure on the edges.
|

|
I had to edge join one of the 3/16" plywood panels, I use cut-offs or scrap.
The plywood joint will be across the panel grain.
|

|
One of the pine face panels (left) and it's plywood back (right) ready to laminate.
|

|
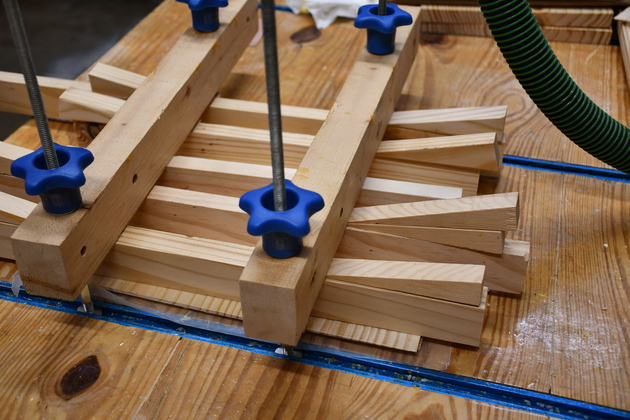
Laminating an inset panel, pine face is on top.
This kluge is my idea of a lamination press, its not very beautiful but it works OK for laminating pine inset panels.
The two 2xs on top provide clamping force via the tee rails in the bench top, and the smaller 1x distribute the pressure.
The little wedges make sure the pressure is uniform on each 1x.
The knobs on the tee bolts are the 5/16" quick release from Rockler.
|

|
Closer look at the small wedges.
I don't keep the longer 1xs around, the ones I use are cut-offs or scrap, so I use the wedges to make sure I get more or less uniform pressure.
The pine face is a little larger than the plywood, I'll trim them both after the glue sets.
I'll leave these laminations under pressure for a couple of hours before I remove the pressure.
I won't do anything else to them until the next day.
|
|
Back side, showing wedges on back side.
|

|
More plywood and pine panels ready to laminate.
|

|
First inset panel coming out of the lamination press.
I'll let it set till tomorrow, then I'll trim it and install it into one of the side frames.
|

|
Back of one of the main frame side with inset panels being glued.
|

|
Front of a main frame side panel inset panels glued in.
|
Hutch Top

|
Last of the top hutch side face panel being laminated.
|

|
Only 3 pressure bars needed and only one needed a wedge.
|

|
Edge of laminated panel, ready to trim and install.
|

|
Gluing a laminated panel into the side of the hutch.
|

|
Front side of hutch side panel.
|

|
Close up of hutch side panel showing front of laminated panel.
Note I rounded the corners off before I glued the inset panel in.
For assembly of hutch parts.
|
Assembly

|
Right main frame with two lower HFrames being glued.
|
|
Looking from the bottom of the frame.
|

|
Note how the ClampIts keep everything square.
|

|
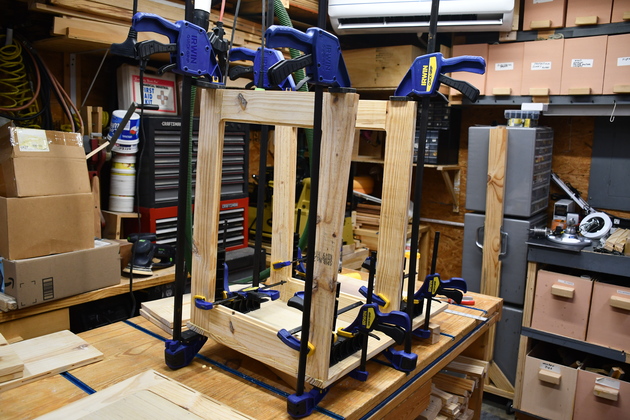
The upper HFrame being glued to the right side.
|

|
Again, the ClampIts at work, keeping everything square.
Note the upper HFrame isn't quite at the top of the side frame, thats where the pull out work surface and keyboard are going.
|

|
All 3 HFrames glued to right side.
|

|
Gluing left side of hutch to it's top.
|
|
|
Gluing the hutch side to the top.
Note, on this end, the hutch top is 2" wider than the sides, so There is room for the drop leaf support.
The main frame is behind the hutch on the workbench.
|
|
|
As usual the ClampIts keep everything square.
|

|
Different angle on gluing the hutch top.
|

|
Hutch top glued.
Note the overhang on the left, thats where a drop leaf will go to extend the hutch top for both the Oscope, and rpi monitor.
|

|
Hutch top glued to frame.
|
|
|
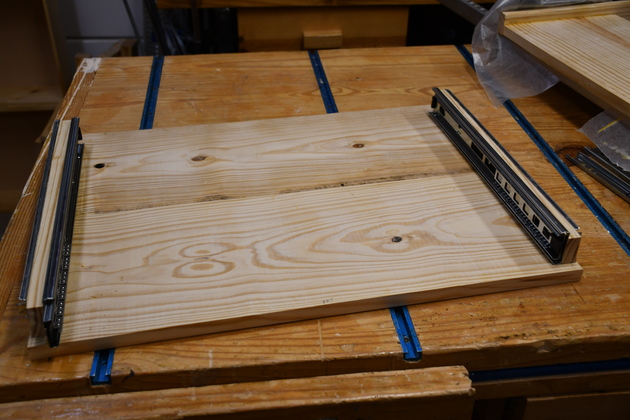
Side rails on the underside of the worktop slider.
Note, I've already attached the slides to the outside of these.
The set of slides on the outside of these side rails will engage the slids on the inside of the cabinet.
I'll attach another set of slides to the inside of these rails and the outside of the keyboard slider's rails.
|

|
Cabinet slides for pull-out workspace on main frame.
|

|
Work top installed on it's slides.
|

|
Work top extended.
|
|
Underside of workspace pullout.
Attaching slides for KB pullout.
|

|
Keyboard pullout in glue clamps.
Note the verticals are on the outside of the frame pieces.
|

|
Test fit of Kbd pull-out into bottom of work surface pull-out.
|

|
Both pull-out worktop and kbd pull-out extended.
|

|
A little closer look at the slides of worktop and kbd tray.
|
|
Work top and Kbd pull-out being painted.
|

|
Cabinet after sealer coat.
|

|
Kbd pull-out beginning to have a little sheen.
|

|
Ditto pull-out work top.
|

|
Inside of the drawers painted and outside of cabinet.
Also you get a good look at the inset panels on the left side.
I like to paint the inside of the drawers in the cabinet, you don't have to spread the out on the workbench.
This cabinet doesn't have a back so air can easily get to the inside of the drawers for drying.
|
Finished
WoodWork finished

|
Almost complete, I still need to fit the drop leaf and add the electrical.
|

|
With the work top pulled out.
|

|
Work top and keyboard pulled out.
|

|
In the office.
|

|
Powered up.
|

|
Different perspecive.
Note the stuff on top of the printer roll-around, on the left, It will all be stored in the new bench drawers.
|
|
|
|
Power Complete.
You can see my little portable monitor on the extension (left).
The little monitor has HDMI input, speakers, folds completely flat, HD 1920x1080
Also note the compact portable wireless keyboard and mouse on the keyboard pull-out.
I really like the keyboard, I never use the keypad (I'm old and only use Vi) so this one is perfect for me.
Amazon doesn't carry this keyboard any more but, I found another one that looks about the same.
|

Monitor folded up.
|
|

|
The Rpi-4, monitor, and switch box.
I plan to install an Arduino IDE so I can download sketches to arduino based projects.
It would also be handy to go to the shop and upgrade software on installed Arduinos.
You get a better look at the keyboard and mouse here.
|

|
Test power plug strip.
|

|
Rpi with main and computer plug strips behind.
|

|
Work top extended.
|

|
Kbd pull-out extended.
|

|
With Rpi booted.
|
|
|
Monitor on the Extension.
|

|
Drawer #1, small handtools.
|

|
Drawer #2, almost empty, test bench power supply and a little hook-up wire.
I eventua
|

|
Drawer #3, DuPont wires, power supplies (several different voltages), and test jigs.
|

|
Drawer #4, Oscope and probes, test parts & pieces, soldering irons, digital microscope, lighted magnifyer, remote camera for looking in tight spots.
|
In Use

|
Replacing pins on small adapter board.
|

|
Closer view of the action area.
Note the desk top is pulled out, lights on, and magnifyer is in place.
|

|
From the right side.
|

|
Magnifyer light on.
|

|
Looking through the magnifyer, replacing pins on a PCF8574.
|

|
Closer view, from the right, showing the PCF8574 in the clamp.
|


