
|

|

|

|
|
Test Bench Drawers
| |||
|
|
|
|
|
|
Test Bench Drawers
| |||
| Back to Woodworking | Drawer Page | Resawing | Lumber Prep |
| Dovetailing | Storing The Jig | Gluing Drawer Frame | Gluing Bottoms |
| Painting | Dovetail Jig | Screw Up |

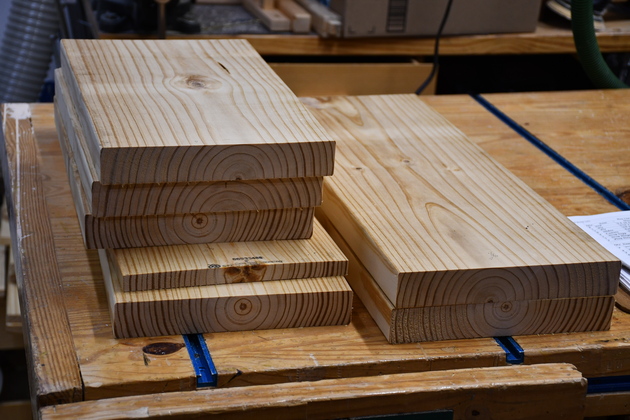
| 2x10s cut to length. Note one is already resawn, it was left over from the bench frame. |

| I usually mark each with it's length to help id them when I start marking for resawing. |
| Now there all ripped to length. The first cut, I take off about 1/8" from one edge to make sure it's square, then rip the widths I need. |

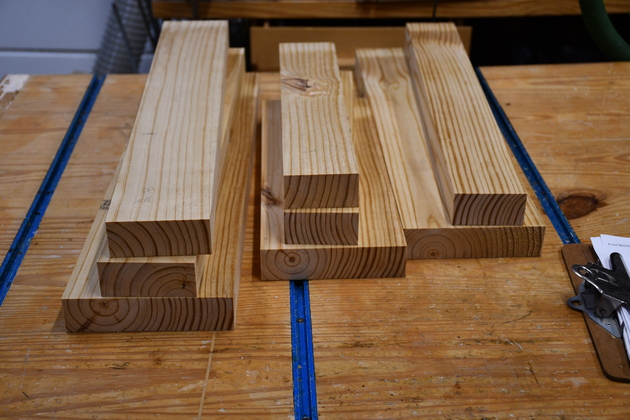
| Marked for resawng, this one will be a drawer front so I'm sawing it in half. When I resaw a 2x board in half, I only get two pieces 11/16" thick due to the bandsaw's kerf and planing. |

| This is going to be a drawer side or back, in other words 3/8" thick, note the 2 resaw marks. The first mark is using the digital width marker above. |

| After I make the groove with the digital marking tool, I trace each groove with a pencil to make it a little easier to see when I'm sawing. 3/8" is .375" and I add 1/16" (tot: .4375) for planing, I have a little extra space in the center so, as you can see, I resaw a little extra. |
| Drawer sides and backs marked for resawing. |
| The fronts ready to resaw. |

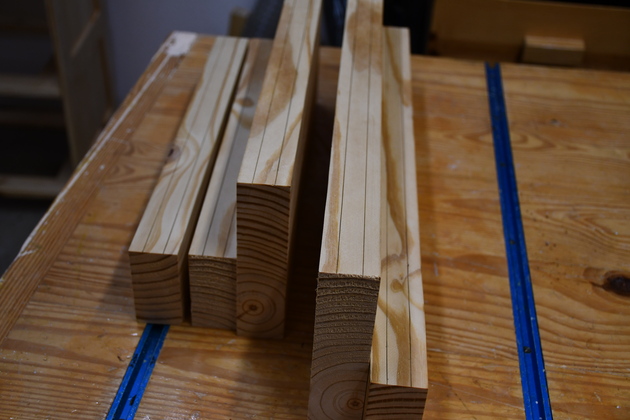
| All the resawing and planing done, ready to dovetail. The two stacks on the right are drawer fronts(11/16" thick), the 3 stacks on the left are sides and backs (3/8" thick). |

| The farther two are drawer fronts (11/16" thick), the nearer 4 are sides (3/8" thick). Next I'll route a rabbet along the bottom of each piece for the drawer bottom, then I'll route a rabbet across the end of the fronts to conceal the slides. |

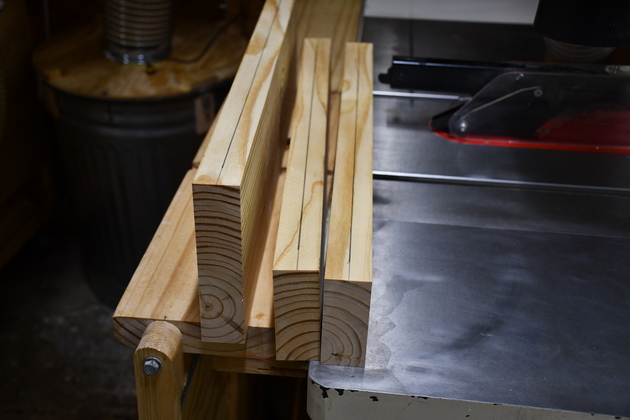
| I have the drawer parts laid out in sets, a set is sides, front, and backs for one drawer. Drawer 1,3 sides, backs, and fronts rabbeted. You can see the bottom side rabbets, for drawer bottom, and the rabbet across the end of the fronts (bottom piece). |
|
| All drawer sets, rabbeted. Rabbeting helps me keep track of the piece's orientation in the dovetail jig. The bottom rabbet always goes against the outside alignment stop. |

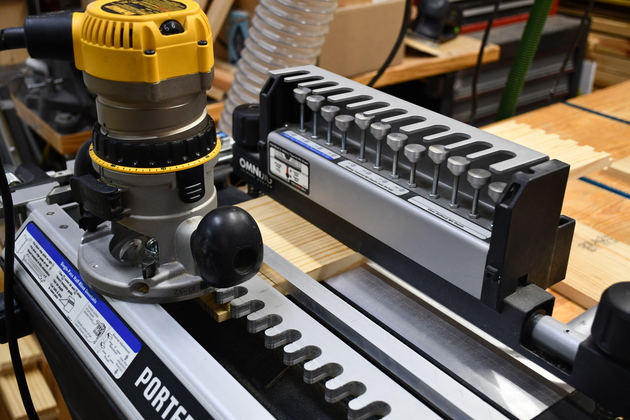
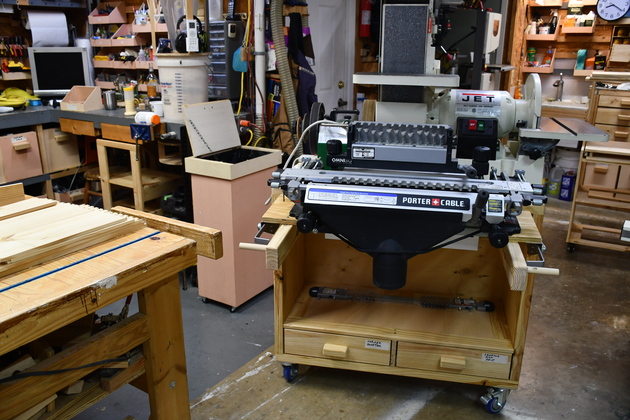
| Porter Cable 16" dovetail jig mounted on end of workbench with router setup and ready. This is a keen dovetail jig, unfortunately, Porter Cable no longer sells it, but I have been able to find router bits for it. |

| Having the drawer sets on the workbench also makes it convenient. Since I have to adjust the jig top holddown between fronts and backs, I do all the fronts at the same time, then adjust the top holddown and do sides and backs. Note the jig is connected to Valve-8 of the DustCollection Automation system. If I used an extension, I could plug the router into the V8 Isensor and have the valve automatically open and the DC start up when I turned on the router. If I used an extension, I could plug the router into the V8 Isensor and have the valve automatically open and the DC start up when I turned on the router, but I didn't take the time. |
| One of the tall fronts, lined up to dovetail on it's left. |

| Drawer front with cut dovetails cut. |

| The right end of the front. Remember, we're looking at the back of the front piece. |

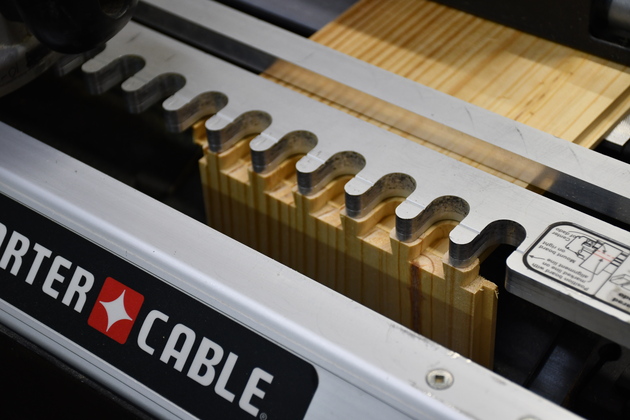
| A little closer look at a drawer front in the dovetail jig. Note the bottom rabbet is against the outside of the alignment stops on the right. |

| Dovetailing the other end of the front, note the bottom rabbet is against the outside (left) alignment stops. |

| All the fonts dovetailed. |

| Closer look at a dovetailed front, note the end rabbet and the bottom rabbets. |
|
| A back (on top) and a side (in the front) lined up ready to cut dovetails. |

| Closer look at a back and side clamped in the jig, ready to cut dovetails. Again note the bottom rabbets against the side alignment stops. |
| Back and side after cutting their dovetails. |

| A completely dovetailed drawer set. |

| The second side, ready to cut the dovetails, lined up with the back. |

| First step in back side. Put the side in the jig, with it's rabbet against the outside stop, and butted up against the hold down. |

| Second step, push the back against the side and against the outside alignment stop, the clamp, note bottom rabbets on the same side. Cut the tails. |

| The othe side up against the hold down, and it's bottom rabbet against the side alignment stop. |

| Tails cut in second side. Last of the 4 drawer sets dovetailed. |

| Bring the sander bench dovetail storage, near the workbench and raise the dovetail jig storage shelf up and locked. This shelf uses a Rockler Mixer Lift, by Rev-a-Shelf. All I have to do to store the jig is lift the jig a little, pivot right, and set it on the storage shelf. |
| Dovetail jig moved to it's storage shelf. |

| Then squeze both locks and let it down into it's stored position. |

| All four drawer sets ready to glued |

| One of the wide drawer fronts ready to apply glue. Note the small Rockler round glue brush, left ot the drawer front. That little round brush is ideal for spreadig glue inside the tails. |

| Using the GluBot, I apply a small bit of glue to each dovetail on this drawer front, hi and lo. |
| I use Rockler's little round brush, spread glue on the tops and twirl the brush in the tail slot, and I get a uniform distribution of glue. The pins will fit into these tails. |

| Same procedure on the drawer back. |

| After glue spread with round glue brush (on the left). |

| Assemble the drawer in the bar clamps. |

| Two taller drawers in the glue clamps. |
|
| Now I add the ClampIts, to make sure the drawer frame is square. |

| A look from the other side. |

| Close look at a drawer corner in the glue clamps with ClampIts. |

| The two taller drawer frames glued. |

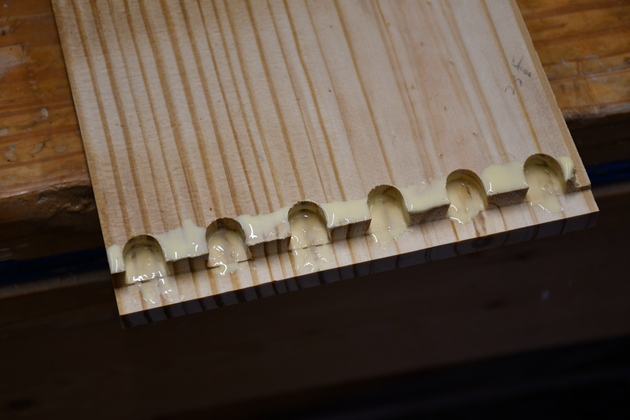
| The rabbets for drawer bottom. |

| The two smaller drawers in the glue clamps. |

| Closer look from another angle. CalmpIts are keeping the frame square. |

| The two small drawer frames glued. |

| The two larger drawer frames glued. |

| Two smaller drawer frames, upside down, ready to glue bottoms. Its about here that I sand the outside of the drawer frames. |

| Close look at drawer bottom rabbets. |

| Drawer bottom cut out, ready to glue. |

| Close up of bottom rabbet. |

| Glue bead in rabbet. |

| Another shot of the glue bead. |

| Drawer bottom glued, this is one of the wire nails I use to hold the bottom down in the rabbet while the glue sets. |

| Another wire nail in the drawer bottom. |

| Drawer bottom glued in. |

| Bottom glued in all 4 drawers. Stacked while bottom glue sets. |

| Drawer bottoms being painted. I like to paint the outside of the drawers, spread out, on the bench and the inside after the drawers are installed in the cabinet. It saves space, I don't have to spread the drawers out again while painting the insides. |

| Handles installed. |
|
| Drawer front and handle being painted. I usually put extra coats on the front. |

| Ready to install in the cabinet. |

|
Drawers installed in cabinet, note my screw up, I made Dwr-4's front too short.
After considering it I think I'll make drawer 3 taller (5-11/16") and move it down. On tall drawers, I frequently make the sides/backs shorter than the front. |

| Dwr 3 getting an extension to it's top. |

| Dwr 3 with new fron extension. |

| Dwr 3 painted with handle attached. |
|
| In my office, with taller Drawer 3 installed. |

| Lots of new drawer space. |

|