Small Rack | 
Large Rack | 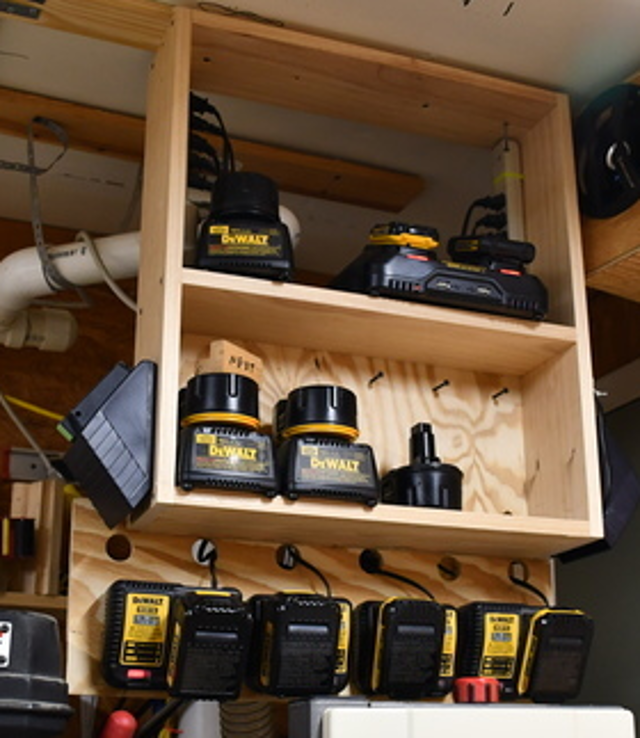
Charging Rack | |
| Tool Storage & Charging Rack & Charging Rack | |||
|
Small Rack |
Large Rack |
Charging Rack | |
| Tool Storage & Charging Rack & Charging Rack | |||
| Small Tubes | Small Rack | Large Tubes | Large Rack |
| Charging Rack | Old Wall Rack |
Almost immediately after moving to this house I built a hand tool storage rack on the West wall of my shop. I have recently thought better of this idea as I have to move a bench tool away to access the hand tools.
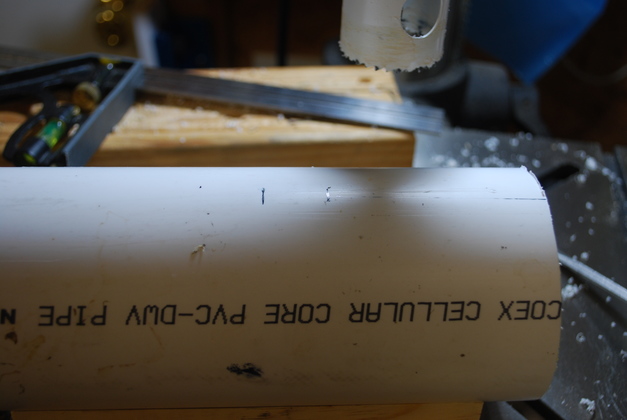
I decided to build some cheap and dirty racks that hang from the ceiling for small hand tools like drills etc. I have seen pics on the web about using 3" PVC tube, cut in about 8" lengths with slots on the bottom to hold drills etc. and decided that was the quickest way to go.
I also found some of my hand tools wouldn't fit in a 3" tube but would fit in a 4" tube so the large tubes and rack were needed.
|
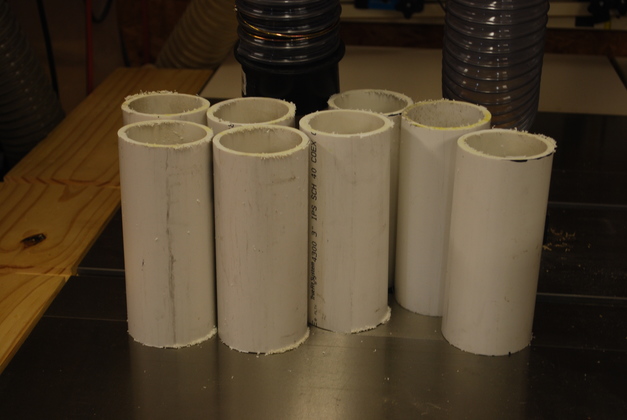
3" PVC cut into 8" lengths. |
|
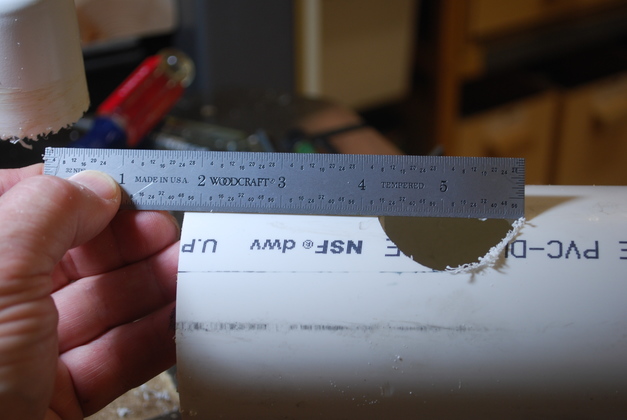
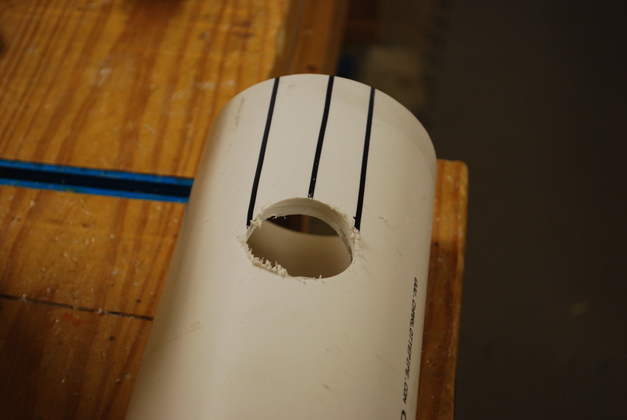
I marked a spot for the 1-3/4" hole. |

|
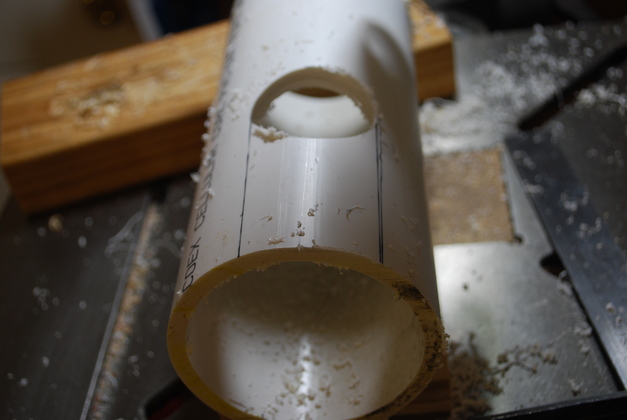
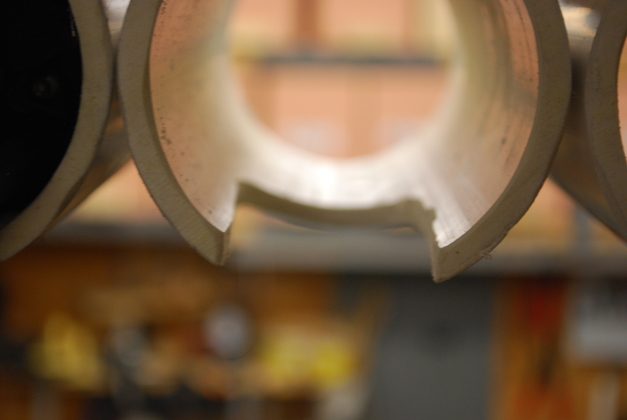
I drilled a 1-3/4" hole, with a hole saw, so the back side of the hole would be about 4" from the front of the tube (on the left in pic). |

|
I nailed two angle stips to a 1x4 to make this little fixture to hold the tube while I drilled it. |
|
This one is a little more than 4" but it'll work fine. |
|
Marked parallel lines from the edge of the hole to the front of the tube. |
|
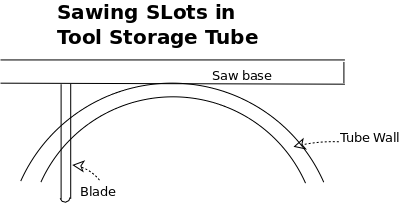
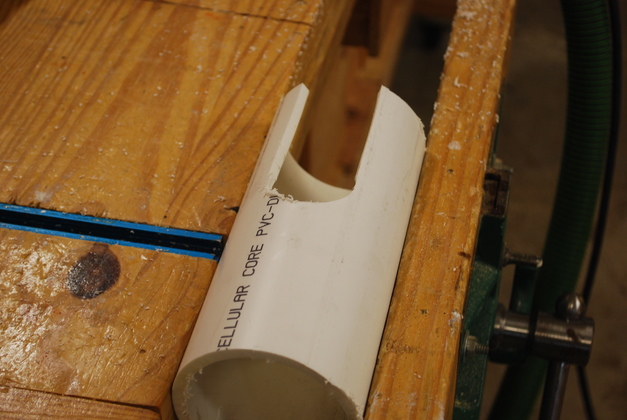
Next, I sawed the lines with a jig saw to make a slot.
BTW, you have to hold the jig saw vertical not against the side of the tube or you have to drill a 2" hole.
|
|
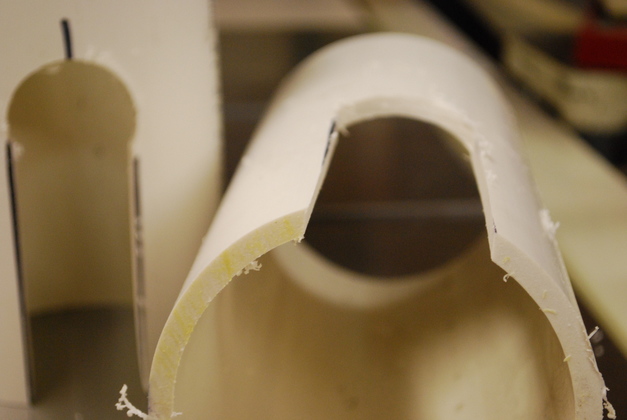
Here you can see the vertical slot edges, not to the center of the tube. By vertical, I mean vertical when the tube is mounted. |

|
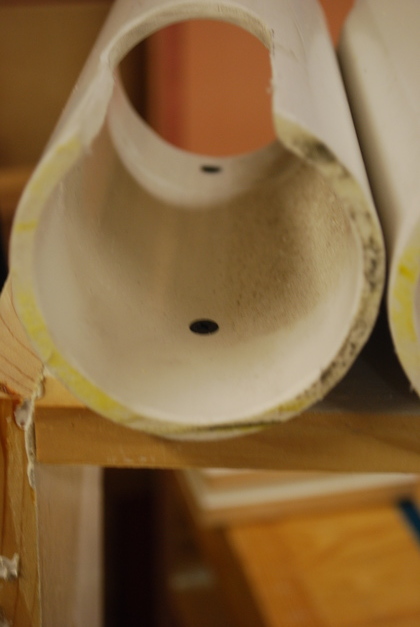
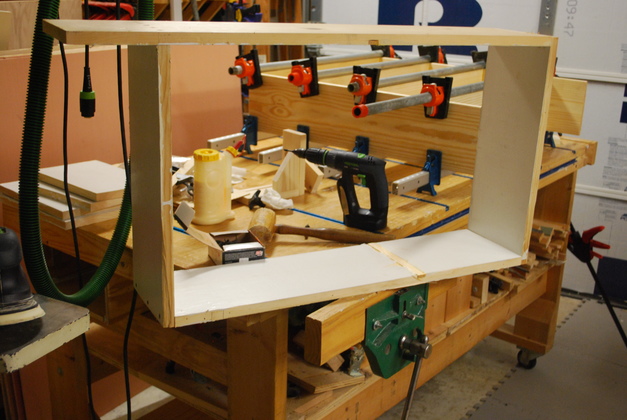
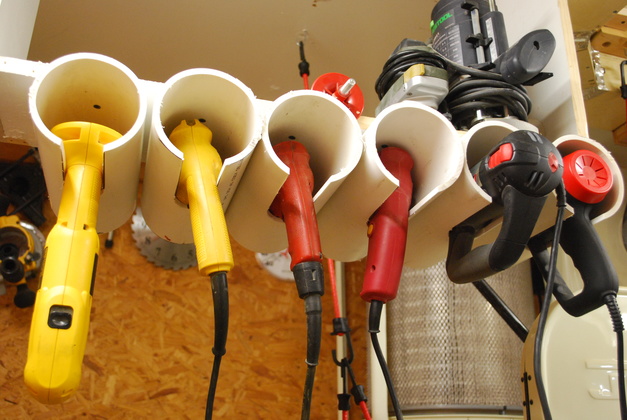
After drilling two holes in the top of each tube, I screwed them to the bottom of this rack. This rack is made from 1x8s left over from old bookcases I recently removed from the master bed room. Its 16" high and 36" wide. |
|
Closer look at the two screws holding the tube to the rack. You can also see the vertical edges of the slots. |

|
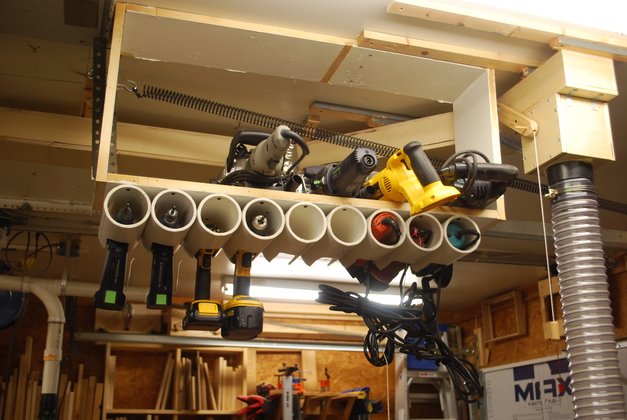
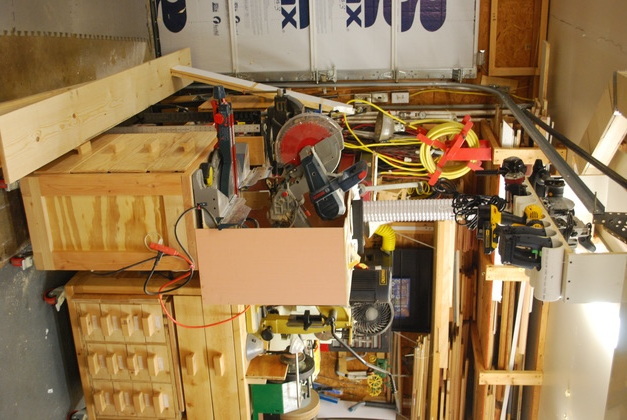
Screwed the rack to the ceiling joists and loaded it up. Notice, I put larger hand tools on top of the bottom shelf. |
|
The small rack is above my miter saw which is convenient from every where. |
|
|
From the back side, you can access the larger tools from here. Also note, I left room for the 4" vacuum valve to work and you can still see it from most of the shop. |

|
4" PVC marked at 10" intervals. |
|
Preparing to drill 1-3/4" holes in 4" PVC tubes. |
|
1-3/4" hole sawed and lines for slot marked. |
|
Note the vertical sides of the slot. |
|
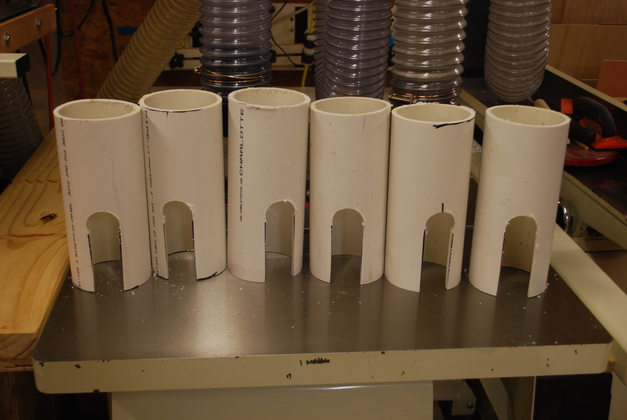
Six large tubes, I need to drill the mounting holes in the top and they'll be ready to mount. |
|
The large rack. The extra piece on the top will fit under the light fixture. Again made from remnants of a bookcase I removed from the master bed room. |
|
|
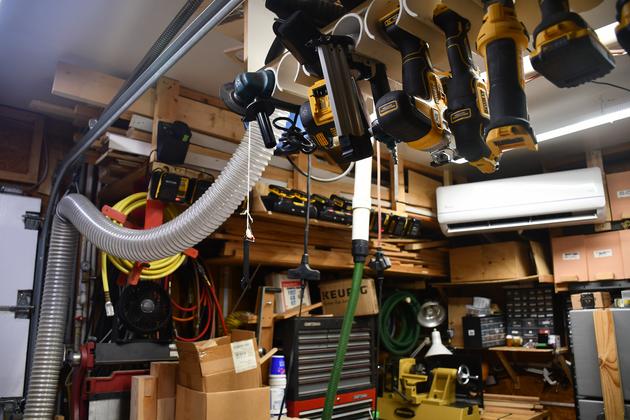
The large tube rack installed and loaded. |
|
Closer look at the large tubes. |
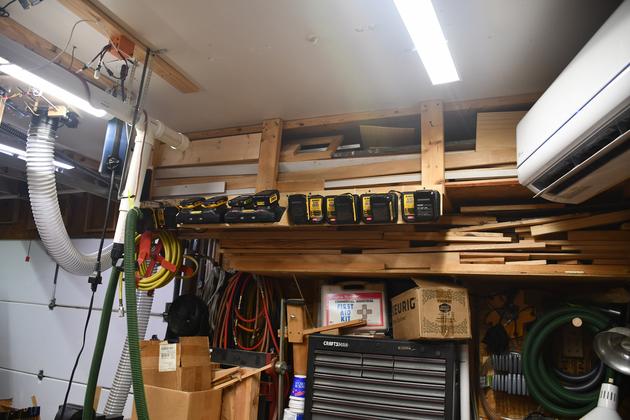
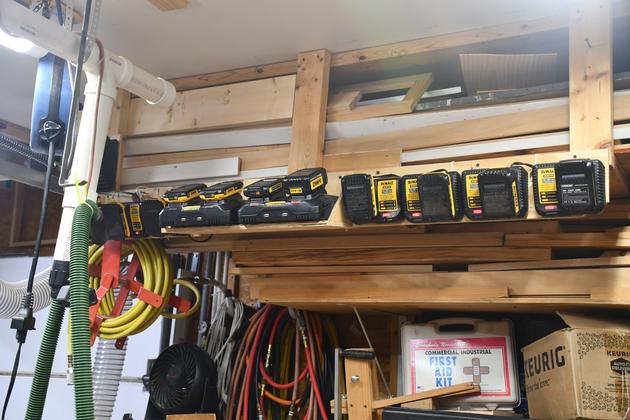
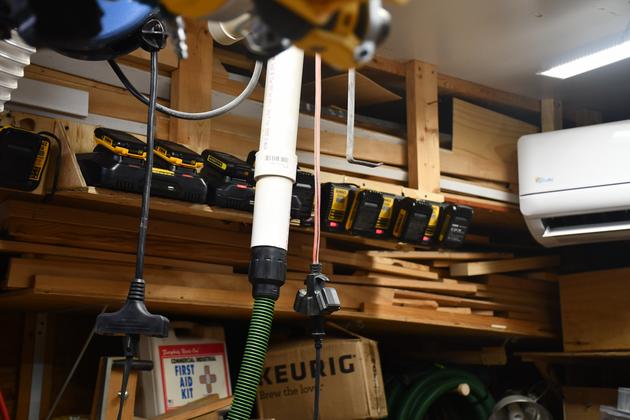
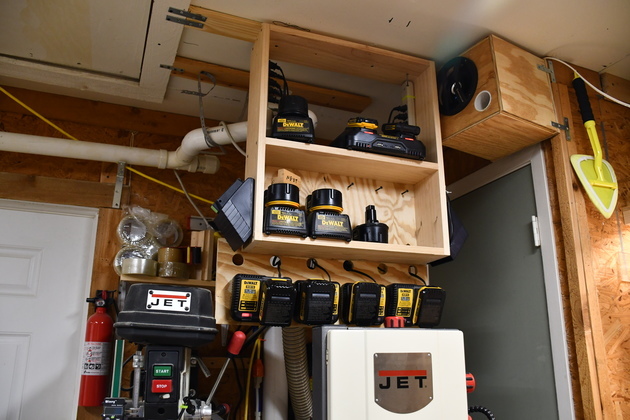
I finally realized my original charging rack was in a bad place, so I reconsidered. I noticed a long narrow space at the edge of the overhead lumber racks. So I pounced.
|
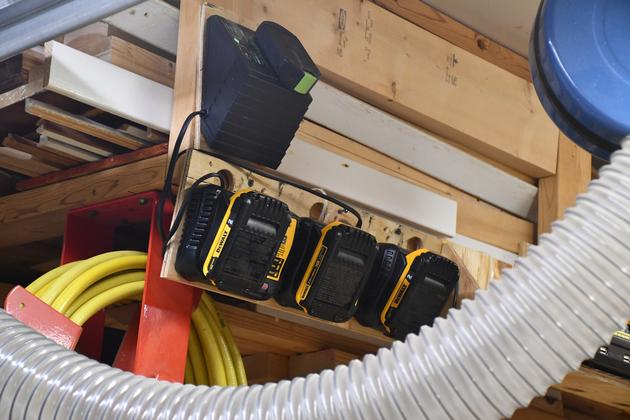
Charging Rack -2, right view, on the edge of the overhead lumber storage racks. |
|
Closer look at right side. These are all DeWalt 20V Max chargers. |
|
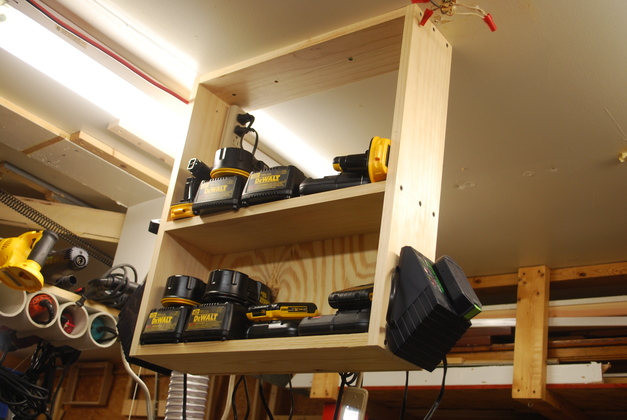
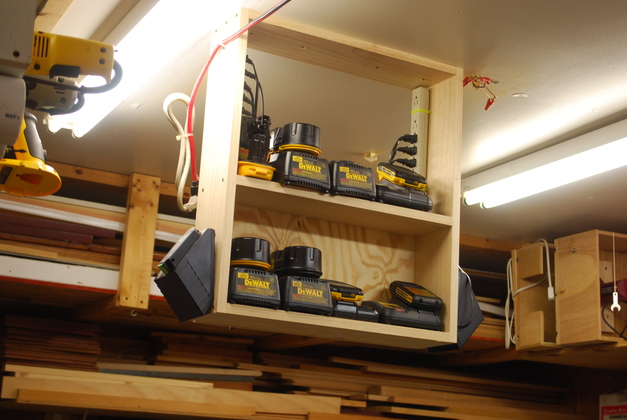
From the other angle, sorry about 4" dust hose #8, and the small hand-tool rack is also in the way. |
|
A little zoom from the left angle. |
|
On the far left end is the Festool charger for the Festool CXS, small drill driver. |
|
While I was building ceiling racks I built this charging station. I have DeWalt 18 and 20 Volt batteries and Fesstool batteries. I had a charging shelf earlier, but it was difficult to access so I made this and moved all the chargers here. |
|
Its in the small East bay behind the small tube rack. It took two plug strips to plug everything in. |
|
I moved the charging station when I moved the workbench to the East Bay. Also I have added an extension for the 20Volt chargers hanging down. |

|
|