|
| ||||||
|
Dc2 ShopVac Cyclone
| |||||||
|
|
| ||||||
|
Dc2 ShopVac Cyclone
| |||||||
| Dust Collection Page | Construction Info | 2" System Tweaks | P |
Currently my 2" DC is a Festool CT-22. I consider this a single stage system even though Festool calls it a two stage (paper bag and HEPA filter). I've had the CT-22 a long time (Festool is no longer selling them), and they are charging a lot for the paper bags ($8.00)and HEPA filters ($72.00). the CT-26 is $700.00 to replace my CT-22 At some point I'll need to replace the CT-22, but, now that I have the cyclone, I doubt seriously I'll get another Festool. Instead I'll probably get a much cheaper ShopVac of about the same power with a paper bag and pleated filter hehind my cyclone. I do however like the current sensing switch and have wired my shop so when I turn on a device needing 2" vacuum, the CT-22 turns on. I'll either re-use the switch from the CT-22 or build a current sensor and DC Switch like I did for the DustAuto system. Maybe that would be a good time to automate the 2" system!
I will say this about Festool, they were the only game in town when I started and they got me started using DC on most of my tools, I do appreciate it. Getting some Festool parts can be a problem. I have learned by my Festool experience but when I replace a Festool I'll know what to look for and also choose something more economical.
In the mean time, I need to extend the life of my CT-22 and reduce the number of bags/filters I need by building a 2" cyclone and make this system a true two stage.
Previously, I tried a Dust Deputy for the CT-22 and was very disappointed in it's performance. I think the Oneida Super Dust Deputy is just a little small for a 2-1/4" shop vac. I saw a contest between a Clear Vue Mini and the Dust Deputy and was convinced the Clear Vue is greatly superior. But, the Mini CV06 is out of stock and ClearVue doesn't have a firm date for it's availability.
Wood Cyclone
I saw a video on YouTube by Michael Olson (BigDaddyOworkshop.com) and he had great results from a cyclone he built from a single 2x4 (1-1/4" wide by 1/4" thick slices (staves)), so I thought I would try one.
I tried it and couldn't fold the slats into a cone, made a terrific mess, and ended up in the trash bin.
Tin Cyclone
I attemtped making a cyclone from galvanized tin, from Lowes, to the same dimensions as Michael's but it collapsed the first time I tried it.
I should have braced it better or used thicker metal.
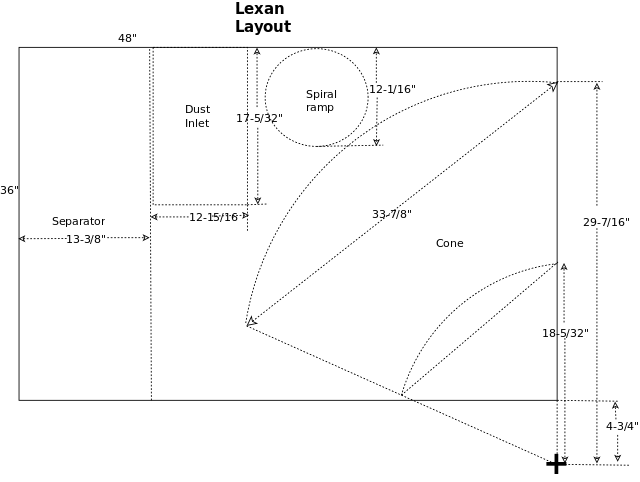
.093" Lexan Cyclone
I spent a lot of time on Bill Pentz's site and learned a whole lot.
I downloaded his spread sheet and entered the specifics for my shopvac (CT-22).
This design made a lot of sense especially his inlet and outlets.
This cyclone has a much larger separator and after all, thats where the magic happens, or at least begins.
Bill said a lot about durability of the material, a wooden cyclone would work well for a short time but deteriorate rapidly due to the sand blasting effect of particle laden air and the fact the earlier design had higher speeds of air movement.
I'm going to try build this with polycarbonate (Lexan) or acrylic (Plexiglass like Duraplex).
However the Lexan at Lowes is .093 thick which means it going to be hard to bend without heat.
I won't even try to make the outlet (6" diameter cyclender) from this Lexan, so I'll use a metal pipe for that and the dust chute.
As for glue, I'll use clear PVC adhesive for Lexan to Lexan and silicone sealer for Lexan to wood or metal also the Lexan to wood will have screws.
I tested clear PVC adhesive and it works OK on Lexan to Lexan, probably not as well as methylene chloride but easier to get and I know how to use it.
NOTE: The clear PVC adhesive didn't hold up well, so I am using clear Silicone sealer which holds up better and seals great.
Nuther Note: Be very careful about leaks, they will greatly reduce you vacuum.
So be sure you get every part of the cyclone sealed well (air/vacuum tight).
What I understand after reading from Bill Pentz's information about cyclones:
Dust laden air, moving fast, in the 2" duct, slows when it moves into the larger rectangular inlet (Bernoulli's Law) then flows into the spiral ramp (same cross sectional area) which starts the air circulating downward with a minimum of turbulence.
This dust laden air flows around the separator undergoing Inertial deposition (the particles are forced to the outside of the cylender) as the air flows in a circular motion (particles want to go straight).
This continues as the air enters the cone and circulates in a tighter and tighter circle.
However, as most of the particles are traveling along the outer circumfrence the air in the center begins to move up the center outlet.
As this air enters the large outlet, it slows (according to Bernoulli's law again) not lifting the remaining particles (letting them drop into the lower part of the cone and, hopefully, the dust bucket).
The CA (cross sectional area) of the inlet and spiral ramp is 16.5 in³, the CA of the outlet is 28.2 in³, hence the same volume of air moves slower through the outlet.
I used Bernoulii's principle in as I did in my compressed air water trap and several other projects.
After a year of use I have a few observations:
The cyclone is great, when folks come into my shop when its in use, they stand and stare at the wood particles rapidly spiralling down into the dust bucket.
Two of the main problems with building a cyclone is getting it air tight and making it strong enough not to flex when the vacuum is turned on, especially the inlet port and dust bucket.
The .093" thick lexan works great in the separator and cone (anywhere there are curved edges) but I should have made a couple of changes in the construction of the dust inlet so it's sides (straight edges) don't flex when the vacuum hits it, which soon breaks the silicone sealer seal and starts leaking air.
In 2018 I made some modifications to the inlet port.
Please see the 2018 pics of this rework.
I added 3/4 X 3/4 pine "glue blocks" to the insides of the inlet port.
I used my table saw to cut the wooden strips with 45° angle on one side, so the cross section is a triangle.
Then drilled screw holes in the Lexan at the corners of the inlet port, and marked the wooden strips.
Then I applied silicone sealer to the two sides of the strips and screwed them into the corners of the inlet port.
This greatly improved the inlet port it doesn't flex when the vacuum hits it and I have much better vacuum and particle action in the seperator and cone.
Finally, I replaced the metal 6" to 2-1/2" reducers with a single wooden right angle reducer.
This allowed me to move the cyclong from it's pedestal to the bench top just above the Ct-22 DC, thus giving me just a little more floorspace in the shop.

|
|
In 2018 I replaced the old top vacuum port adapters) with a new, right angle home made reducer that allowed me to place the cyclone on the bench above the CT-22.
I also reinforced the inlet port box with corner "glue blocks".
This freed up more floor space in the shop.
|
|
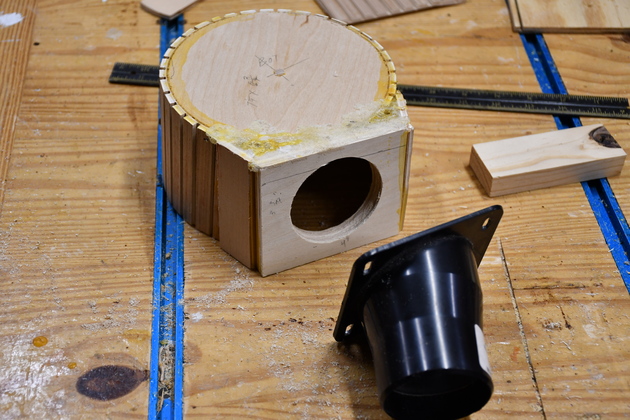
Pic of the right angle reducer while I was building it. Its top and bottom are 6" circles of 1/2" plywood, with a 3/16 plywood wrapper. The plywood wrapper was slotted every 1/2" for its length to allow it to bend in a 3" radius. |
|
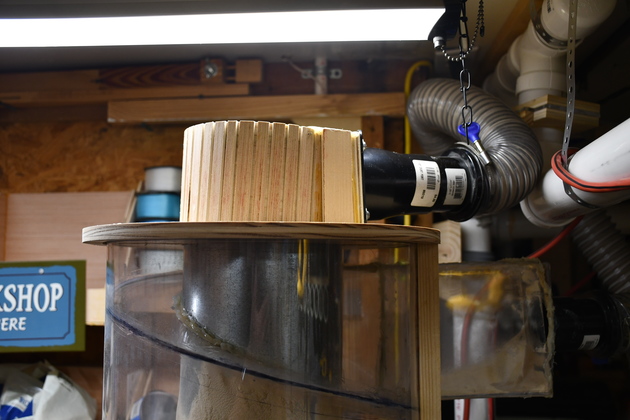
New 6" to 2-1/4" right angle top. Its kind of a kluge but it works! |
|
I had also noticed that the input port (rectangular box) was leaking.
The long flat sides would flex each time the vacuum was applied which broke the silicone sealer loose at the joints, it just wasn't strong enough to withstand the vacuum pressure.
|
|
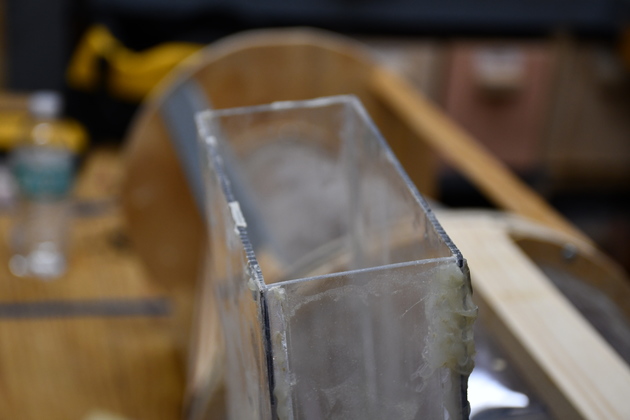
Here is the end cap of the input port after gluing / screwing in the corner glue strips. Note I still used the silicone sealer on all the joints and under the reinforcing wood strips. The wooden strips were ripped on the table saw at 45° making them triangular glue blocks. I didn't want them to intrude too greatly into the air flow space. |
|
Different angle showing the entire length of the corner strips. Note I even added short wood strips to the top and bottom edges of the inlet port end cap. Since the input box is just a little wider than the 2" inlet pipe, I didn't have room to add strips on each long edge of the end cap. You can't really see it here but the reinforcing strips are mitered 45° on the inside surface to reduce the intrusion into the input port's cross sectional area. This would have been a good place for aluminum angle, if I had some. |
|
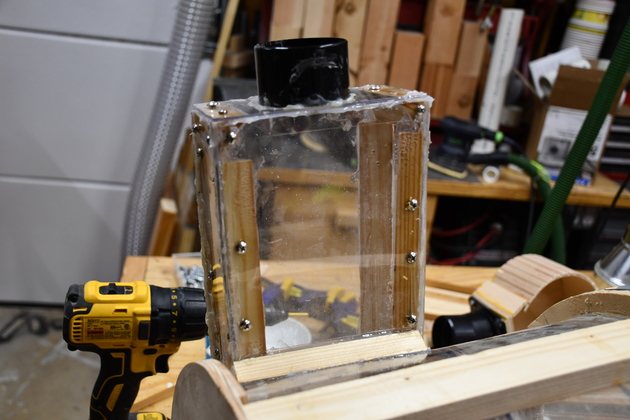
Here is the rebuilt input port with the new top vacuum reducer. |
|
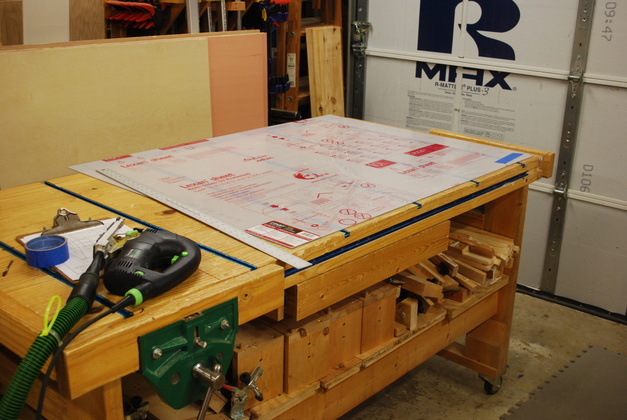
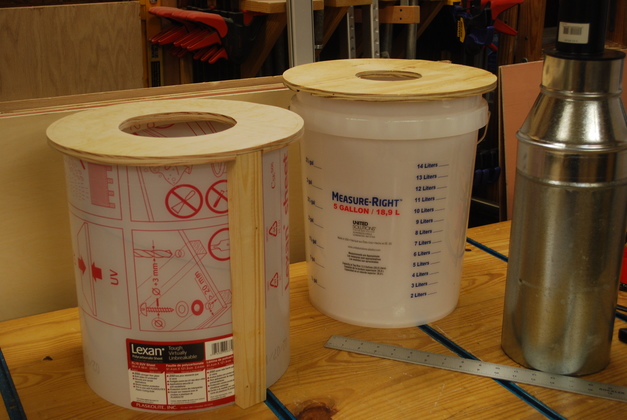
Lexan sheet on the workbench. |
|
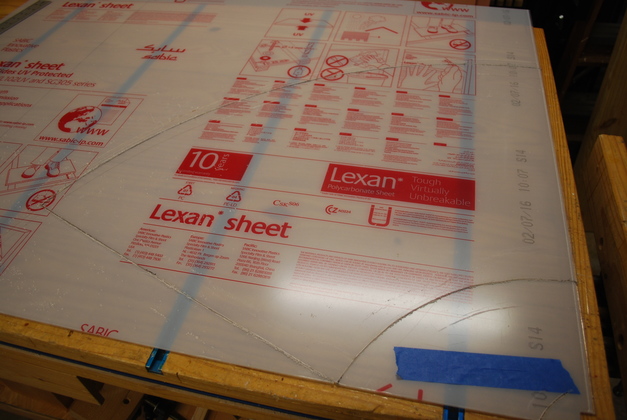
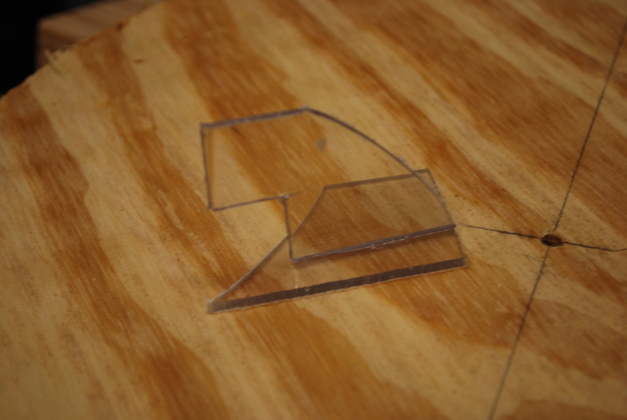
Layout of cone on Lexan. |
|
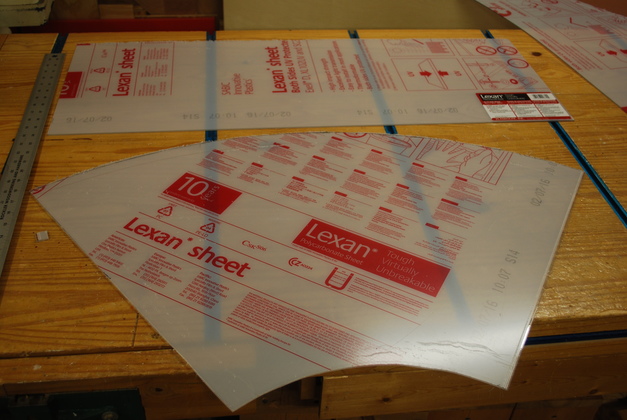
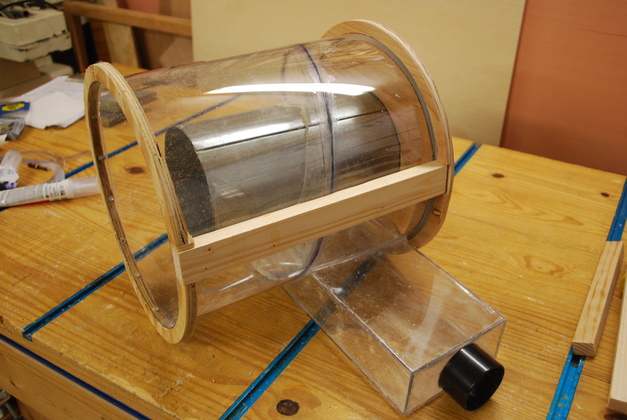
Separator (top) and cone cut out. |
|
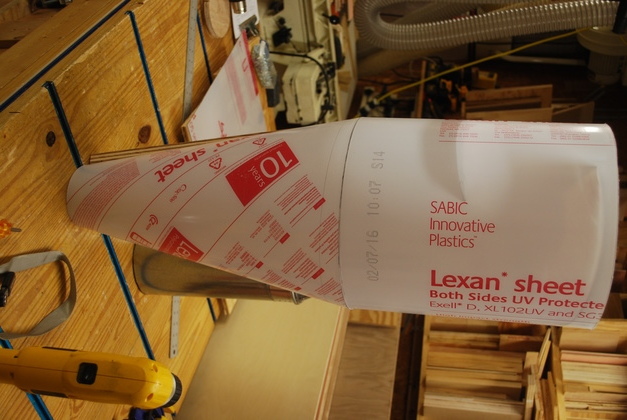
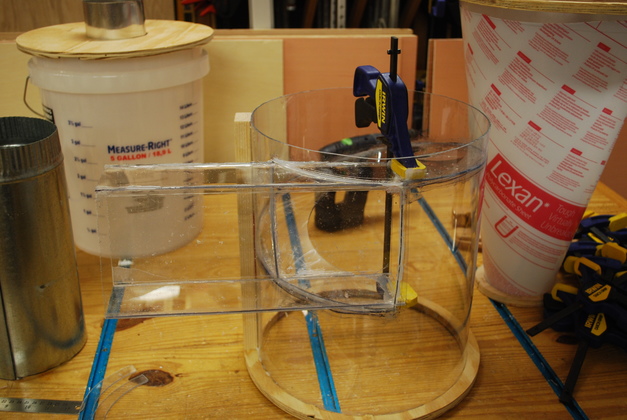
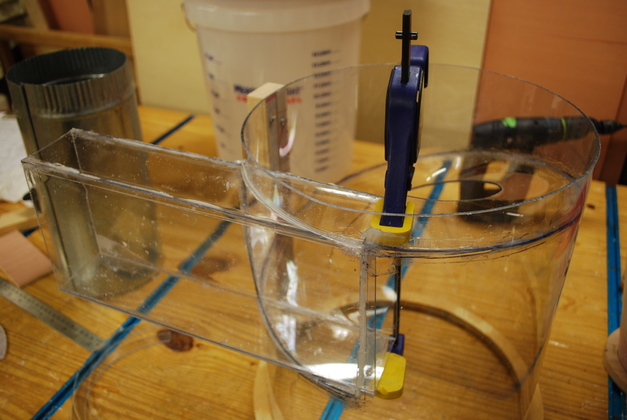
Separator on top of cone, test fit. |
|
Separator beside dust bucket, also note the metal outlet on the right with 6 to 2 reducers. You'll also note the wooden strip on the separator, the lexan is screwed to it to hold it's shape. |
|
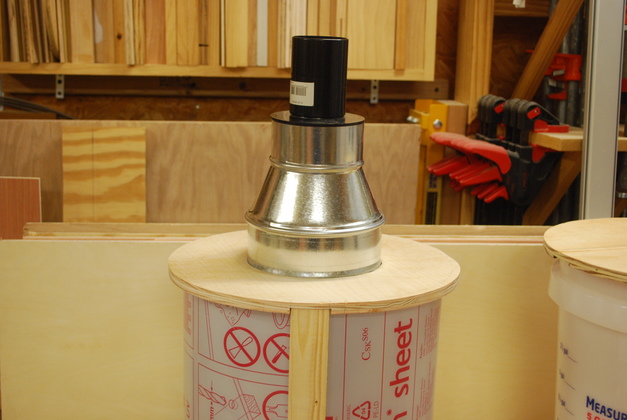
Outlet tube test fit on separator lid. I have since replaced both reducers with a right angle 6" to 2-1/4" reducer. Please see the 2018 pics. |
|
Dust chute test fit on the bottom of the cone. This chute extends through the dust bucket lid. |
|
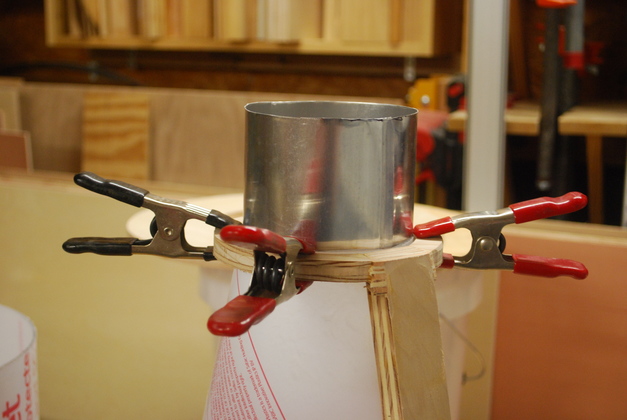
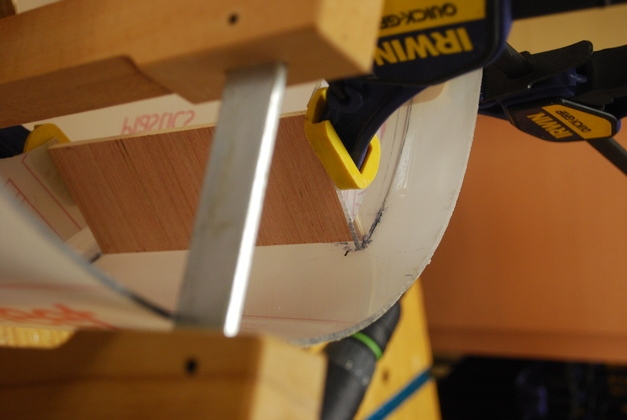
Gluing in the spiral ramp. |
|
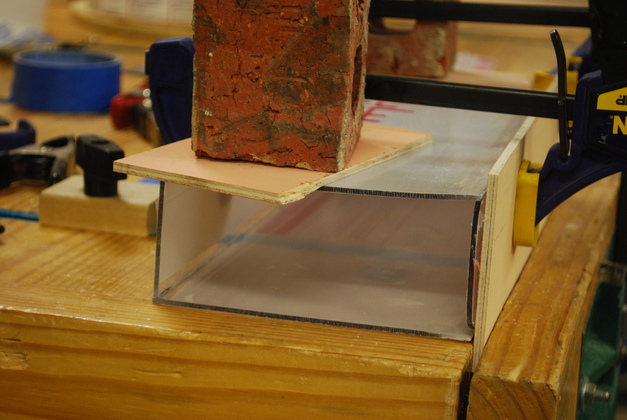
Clamped a 2-3/4" by 5-3/4" block to hold the ends of the spiral ramp in the correct postion while the glue sets. |
|
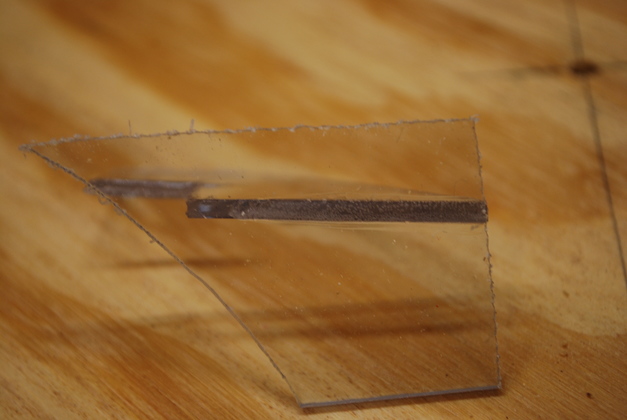
My clear PCV glue test. |
|
Looking at the bottom of the glue joint through the Lexan. Its not a great weld but it'll do for now. |
|
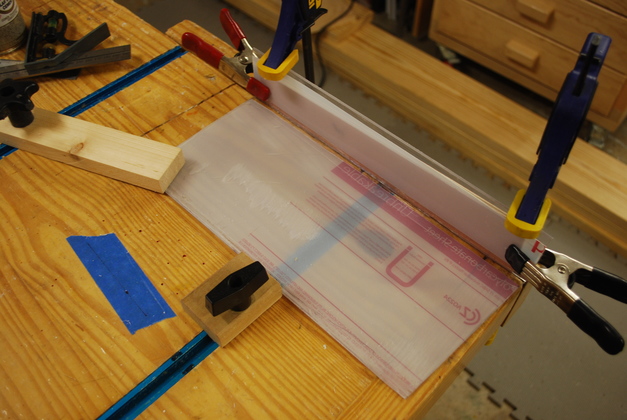
Inlet box, on it' side, being glued. I tried bending thie but I couldn't get the bends sharp enough to make good seals in the separator so I'm gluing it up from flat pieces. |

|
The 3/16" plywood is clamped in the bench vise and acts as a 90° stop to position the vertical piece here. |
|
Last piece of the inlet box being glued.
This end will have a 2-1/4" socket for the hose, just like the one on a shop vac.
|
|
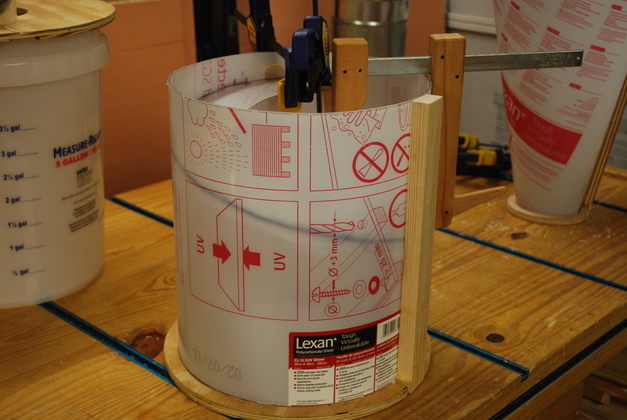
The inlet hole has been cut into the separator.
The wooden panel is still clamped in place to position the spiral ramp in it's correct place.
When the inlet box is glued in it will exactly replace the wooden panel positioning the spiral ramp.
|
|
Looking right down the barrel where the inlet box will be glued. |
|
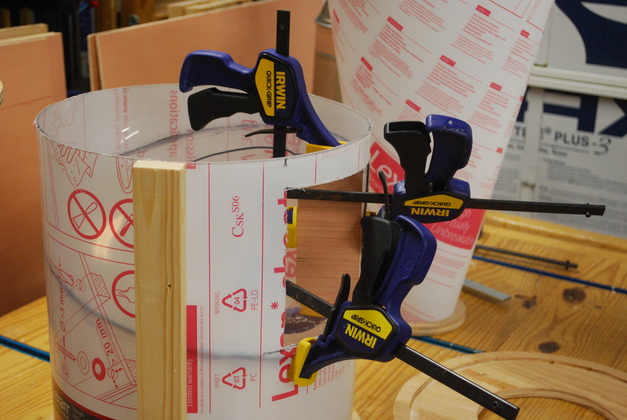
Separator with Lexar film removed and inlet glued in. |
|
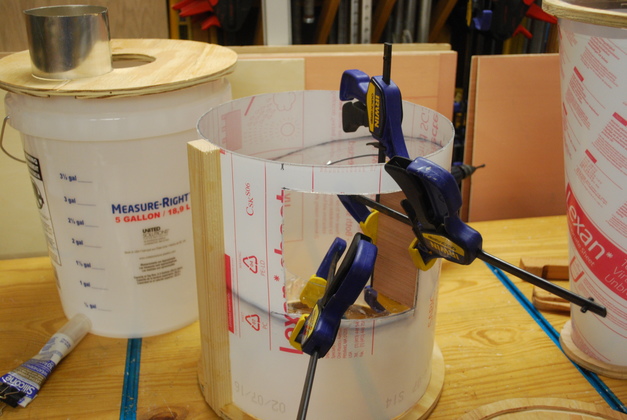
Still using one clamp while the glue sets on top of the spiral ramp. |
|
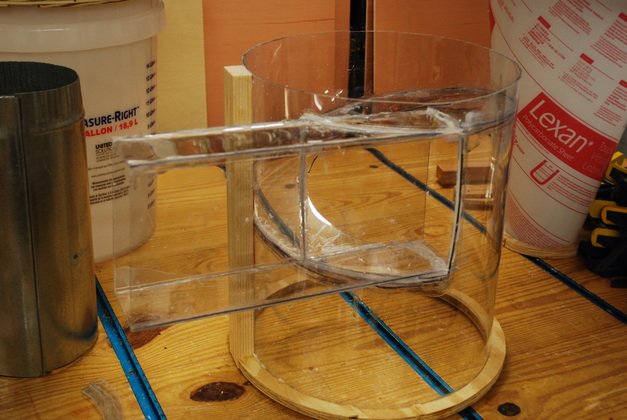
Separator all done. |
|
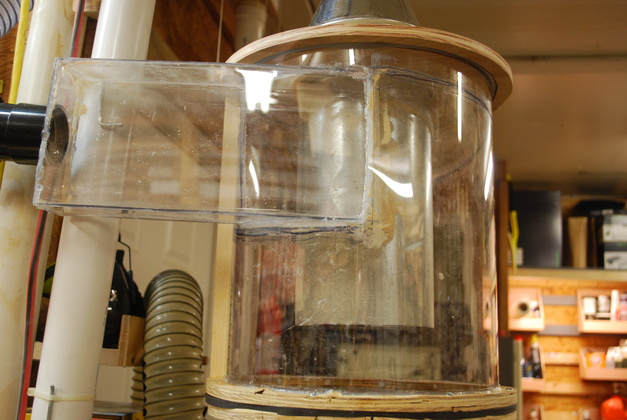
Cyclone assembled after first test. Had a couple of small leaks but other wise it works great. Leak fixes next. It's really interesting to watch this thing work, I'll try and get pics. |
|
The cone on it's side while I'm working on new gaskets. |
|
The separator. |
|
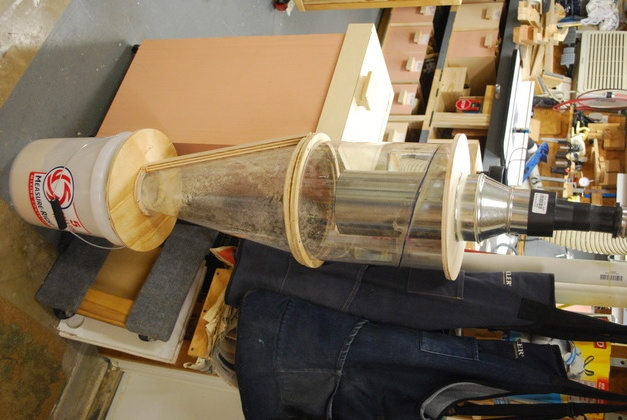
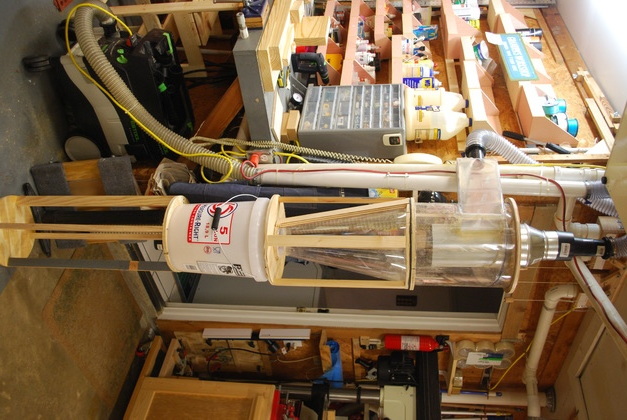
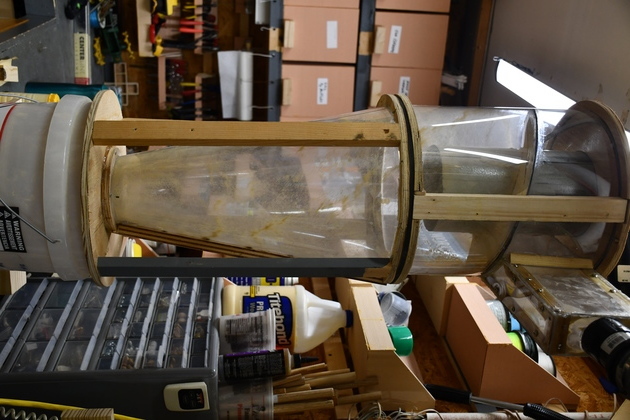
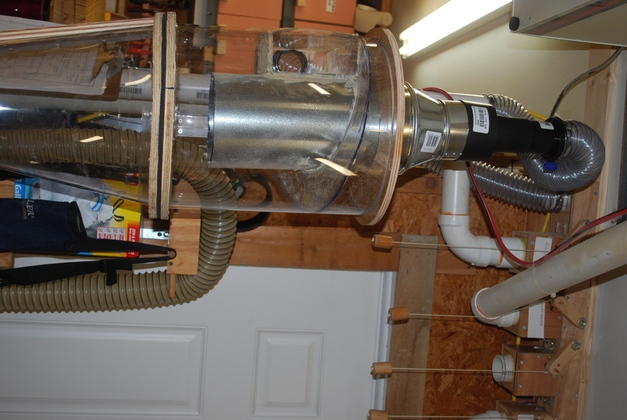
Installed. Note the inlet and right angled outlet connections at the top. Originally, I had the cyclone on a pedestal, but that took up a lot of room so I moved it to the bench anove the CT-22. |
|
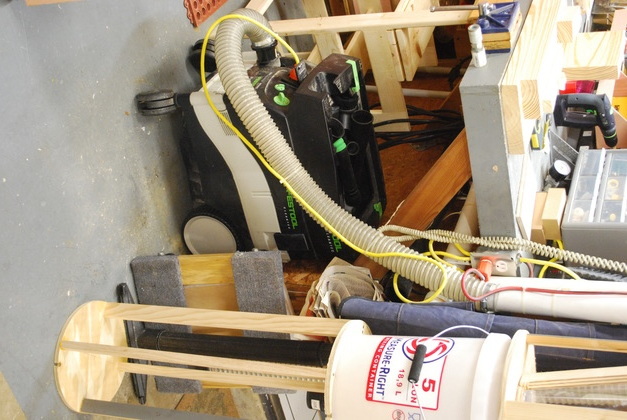
The CT-22. Note the pedestal, I have since moved the cyclone to the bench above the CT-22 to save room in the shop. |
|
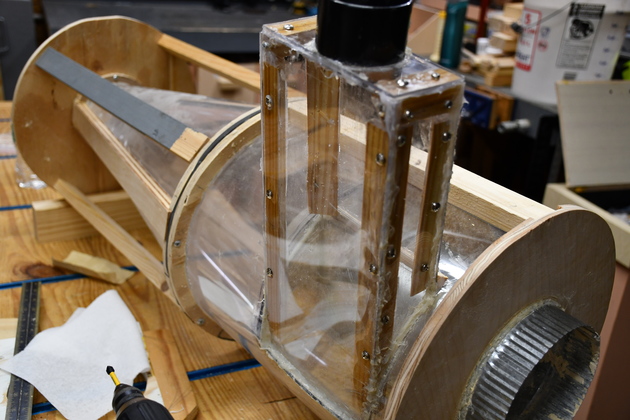
Separator and cone, also a good look at the inlet box. |

|
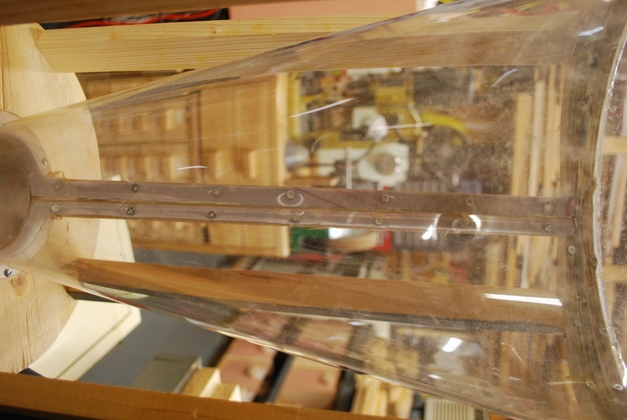
Pretty good look at the spiral ramp. |
|
You can see the screws holding the lexan to the wooden brace. |
|
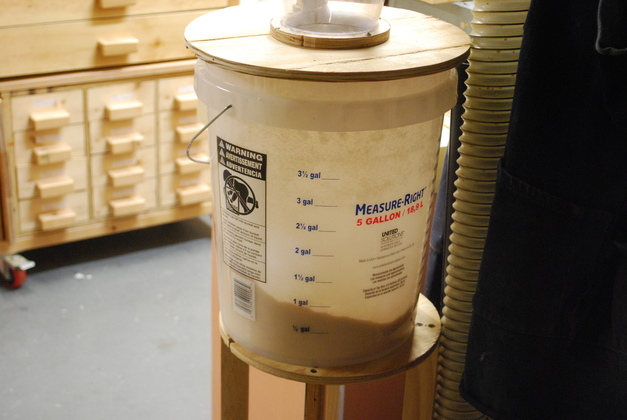
The catch bucket is just translucent enough to see where the saw dust is.
It seems to be catching most of the dust that would have filled the CT-22's bag.
|
|
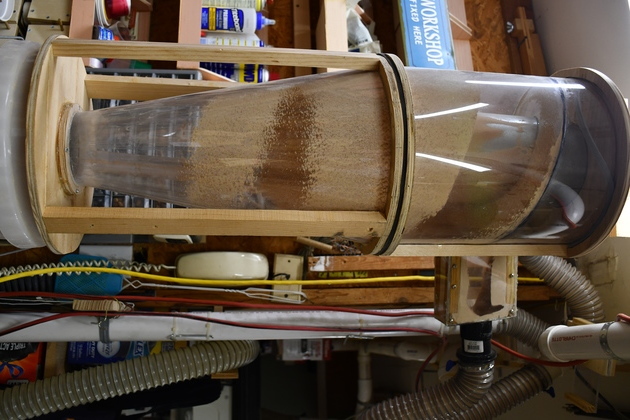
Working, you can see the spiralling dust in this pic. |
|
Closer look at the spiralling dust. You can actually see the spirals. |
|
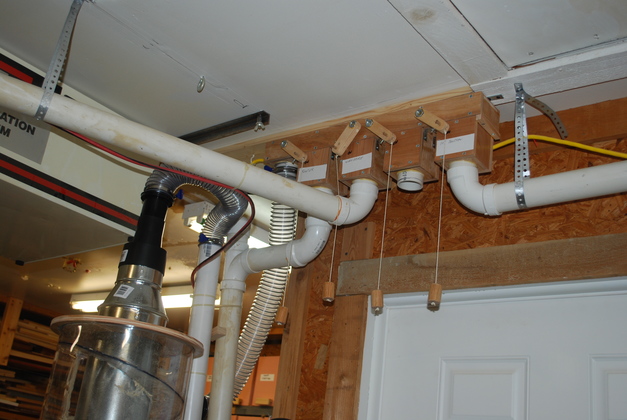
You can see the two" valves above the door and the connections to the cyclone. Over time these accumulated too much fine dust and have since been replaced with slide valves. This was before I built the right angle reducer for the top of the cyclone. |
|
Closer look at the connections, the 2" dust plenum's outlet on the left connected to the the cyclone's inlet and the cyclone's outlet connected to the down tube to the DC. |
|
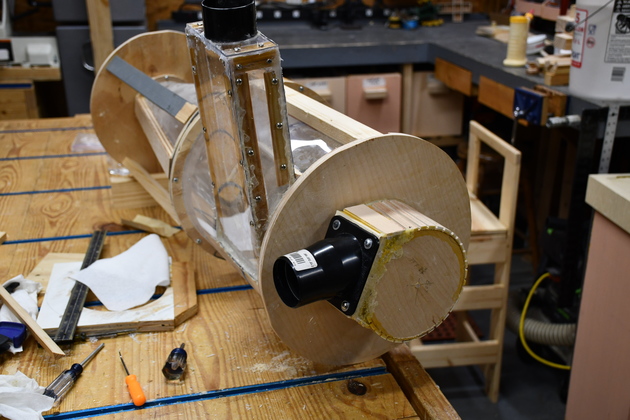
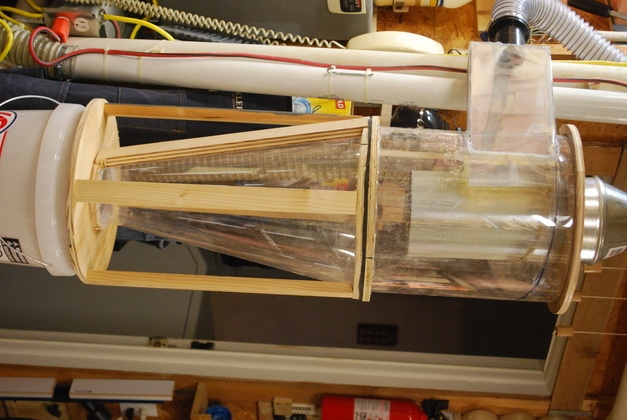
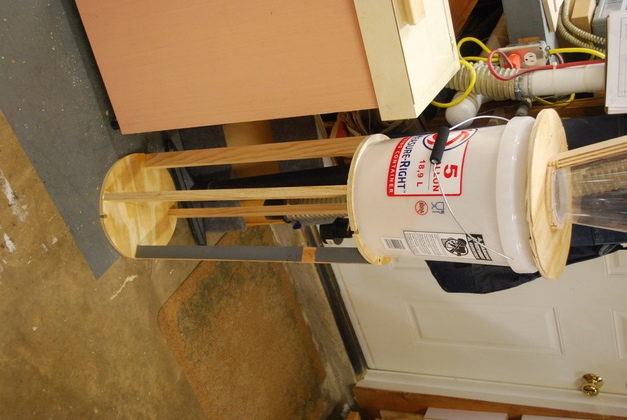
Closer look at the cyclone's dust bucket and pedestal, I just happened to have the two circular pieces of plywood they were the centers of the rings at the top of the cone and bottom of the separator. |
|
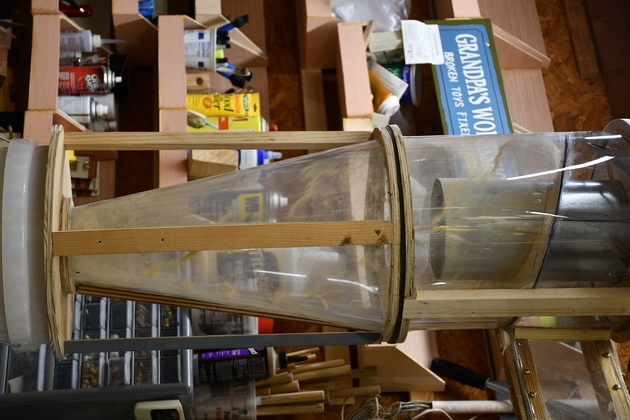
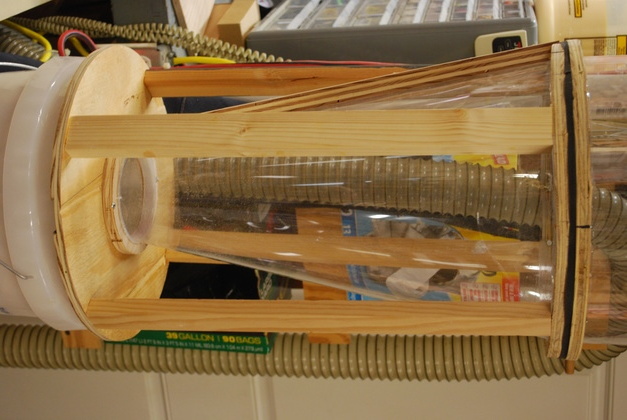
I added 4 vertical supports to the cone, it was a little unstable holding itself and the separator on a 4" circle at it's bottom. |
|
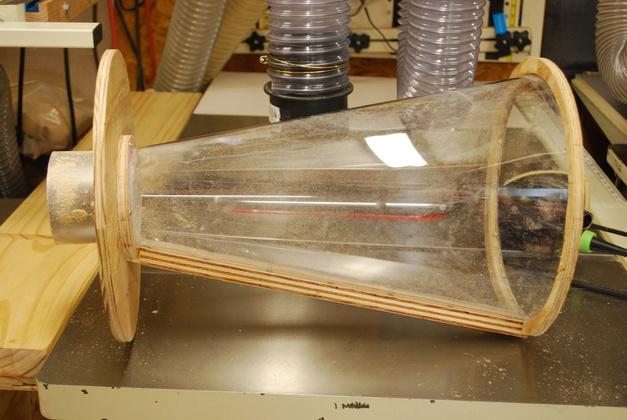
After sealing air leaks and using the cyclone about a year, and sanding lots of "fat" wood, you get stripes.
I have been sanding a lot of SYP (Southern Yellow Pine, AKA Fat wood) and these stripes appeared.
I'll clean them off next time I empty the dust bucket.
|