| |
|

| 
|
|
Die and Shell Plate Rack
for RCBS Pro2000
|
07/03/15: Put links in table near top.
09/03/13: Add 4X3 Rack.
07/20/13: Split out Small Home Rack and Prototype Rack to a separate page.
07/11/13: Split into three pages, this one, Pegs, and Home Rack.
07/04/13: Last pics, tweak diagram dimensions.
06/25/13: Building more racks for Southwest Ammo, better pegs, as suggested before, add pics.
11/09/12: recalculated die slot width to add 1/16" more space.
If anybody has a comment or question, please contact me at  .
.
I like to build tools and jigs to help in whatever I'm doing, so when I got an RCBS Pro 2000, I needed some where to store them.
The Pro 2000 has both a shell plate to hold the cases as they progress around the 5 positions, and a die plate to hold the dies.
Changing die and/or shellplate allows another caliber to be loaded.
As with single stage and turret presses, there is not a one to one correspondence between shellplates and die plates.
The rails sticking out the sides of the Pro 2000 die plates are only 1/4" long and 3/8" high, which means close tolerances on the slots and verticals.
I cut the die plate rail slots 7/16" high and 5/16" deep, then placed the verticals 3-5/8" apart.
I clamped the verticals between the two horizontal pieces, checked clearances then drilled pilot holes and coutersinks for each screw and installed the screws before I removed the clamps.
P.S. I still clamp the verticals between the horizontals but I cut 3-5/8" spacers to position them, which makes assemble MUCH EASIER.
I built a prototype of this with a different scheme for holding the shell plates, but I didn't like it.
You might also want to see the turret storage rack page.
I have been asked by Harry Beil at Southwest Ammo to build a Pro 2000 Die/Shell plate rack for the store.
Southwest has a demo loading bench in the store and about 10 dies and shell plates so he needed a place to store them other than just in a pile.
I thought this would be a good time to figure out how to store the shell plates so Harry and I had a talk and decided to just use pegs to store them on.
Harry also wanted a 5" clearance above the bench top so he could store his balance scale under the rack and not waste any bench space.
This rack doesn't have a base and should be attached to a wall.
I'm allowing 4-1/4" vertical space for each die plate since Harry only sells RCBS and some Lee dies (Hornadys are about 3/4 of an inch taller).
The shell plates with stars need 4" X 4" space, and since the sides are 1x4s (3 1/2" wide) I centered the pegs verticaly (in a 4" space), 2" from the back (1-1/2" from front edge), and 2" from the bottom (they stick out the front just a little).
I'll also build a smaller rack for here at home to replace the temp rack already pictured here.
I am adding the pics as I build it.
Harry also noted the shell plates some time come off the pegs due to vibration of the loading bench, I am working on that in the newest design.
Harry at Southwest Ammo wants more racks to sell and I have accumulated more die plates so I am now making a new home rack that holds 9 die plates and Harry's racks.
I am also going to make different pegs to hold the shellplates, originally I used a 3/8" oak dowell, but on this project I'll use a 1/4" dowell with a 3/8" cap.
New Pegs
Some time ago I started making things like this and built a slot jig to cut slots on a router table.
Here is my jig for cuting slots.
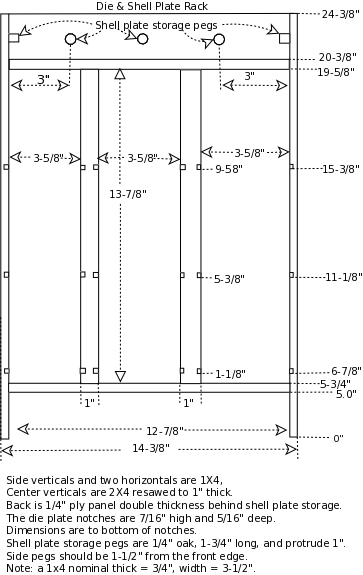
Page with diagrams and cut list, or click on diagrams below
You don't have to resaw the two center verticals to 1", you can use 2x4s but you have to add 1" to the length of the horizontals and overall width on both racks.
Currently the width of both racks is 14-3/8" and the width between the outside verticals is 12-7/8".
A standard 2x4 is 1-1/2" thick and 3-1/2" wide.
If you don't resaw the center verticals leaving them 1-1/2" thick the width between the outside verticals becomes 13-7/8" and the overall width is 15-3/8".
This rack is primarily for RCBS and Lee dies, if you want to use Hornady (they're taller), add 3/4 inch to the slot spacing and 3/4 inch to the overall height for each additional taller slot.
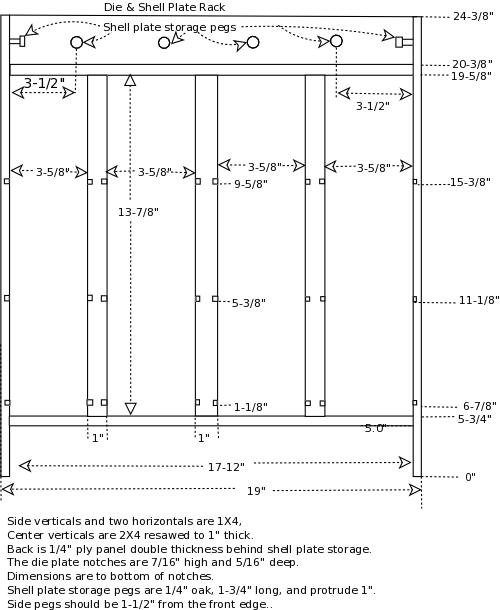
Page with diagrams and cut list
Southwest Ammo Die/Shell Plate Rack, (Holds 9 die plates)

|
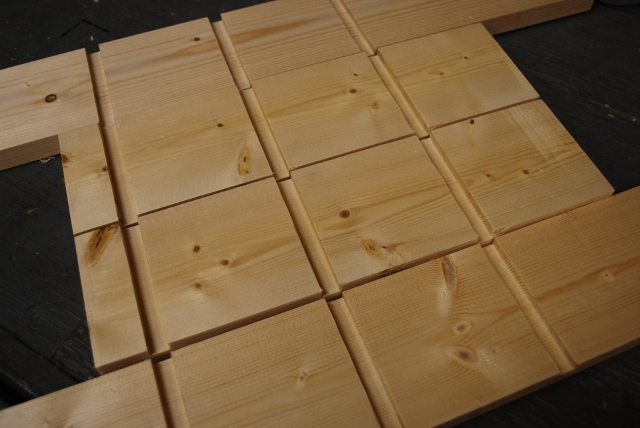
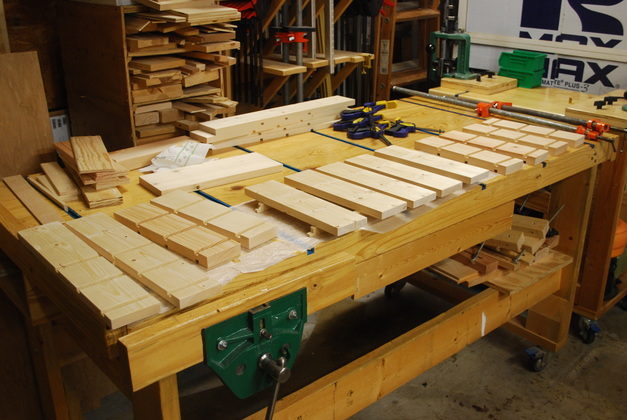
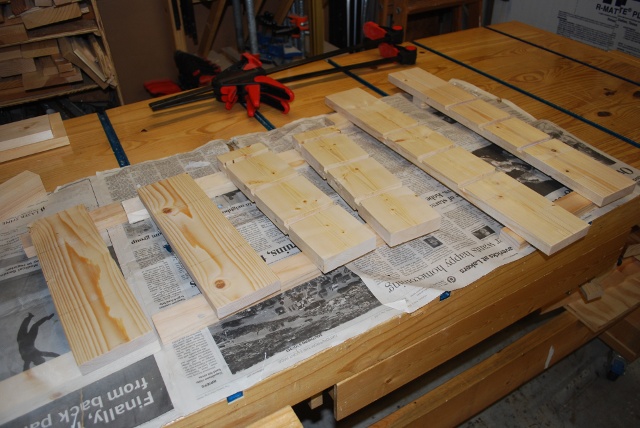
Lumber for 2 Southwest Ammo Racks and one Home Rack cut out.
The 2x4s for the center verticals are on the right.
|
|
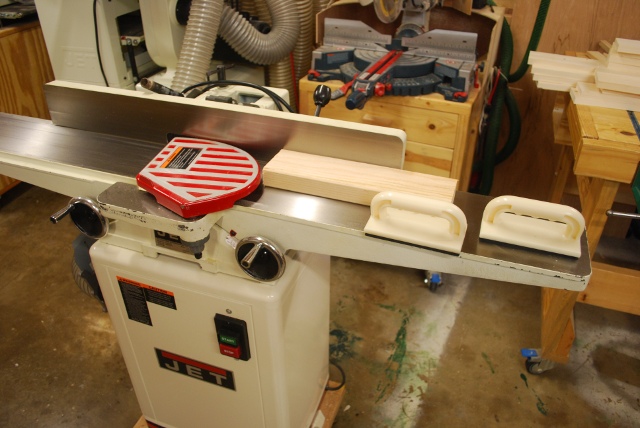
Machining one side of a center vertical with a jointer.
|
|
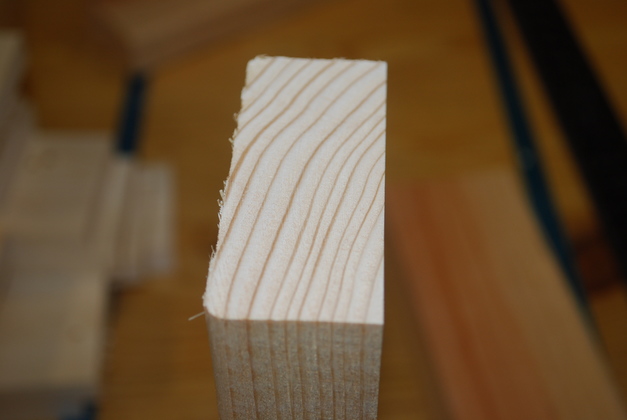
Center vertical with one side (right side) machined to remove rounded corners and make it very straight and flat.
The verticals need to be really flat since the spacing tolerance is close because the lips on the die plates are only 1/4".
Next I'll resaw it to 1-1/32" then run the sawed surface across the jointer to get it flat, and leaving the vertical exactly 1" thick.
|

|
Center vertical marked for resawing.
I marked it 1-1/32" (1/32" wider than 1") so I could take one cut off with the jointer to smooth out the bandsaw marks.
|
|
|
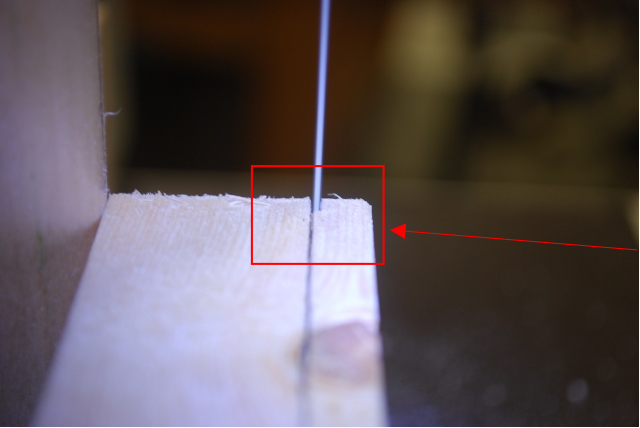
Start resawing a center vertical.
Note how only the left edge of the blade is in the center of the line.
|
| |
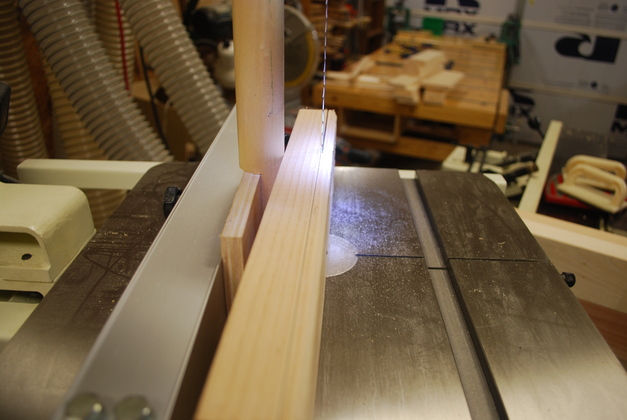
My Resaw Guide is what makes this possible.
|
|
|
Resawing a center vertical.
|
|
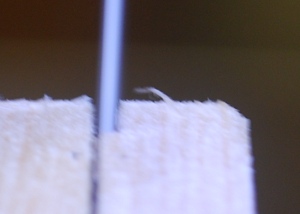
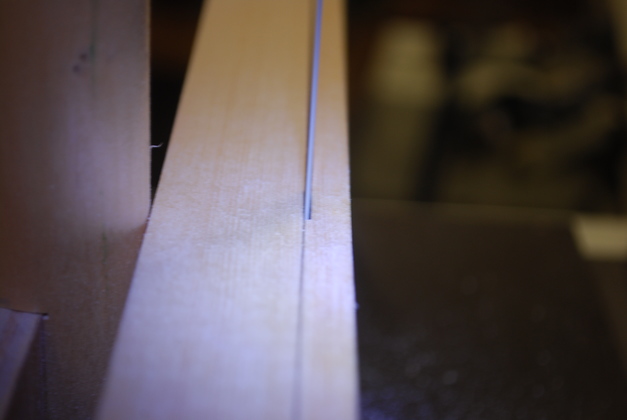
Closer look at resaw operation, note I'm just taking the center of the line with the side of my blade
The line is 1/2mm or .01845", (blade is .025" wide, kerf is about .035" wide).
|
|
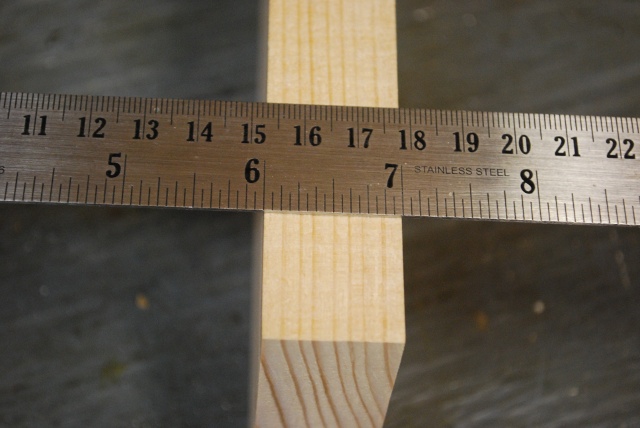
After machining (on jointer) the center vertical ends up exactly 1" wide.
All dimensions must be accurate since we have a close tolerance for the die plate guide slots separation and this is made of pine/fir.
|
|
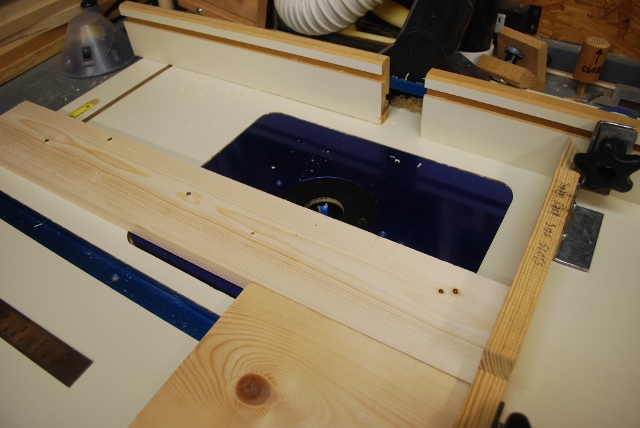
About to cut a slot in an outside vertical.
|
|
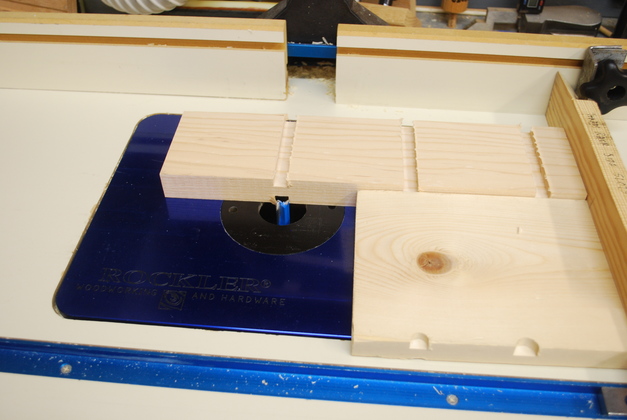
Cutting a slot in an inside vertical (1" thick, slots on both sides).
|
|
All verticals slotted.
|
|
Cross pieces and internal verticals painted.
Mostly this paint step is to be sure the inside of the slots get sealed, they're difficlut to paint after the rack is assembled.
|
|
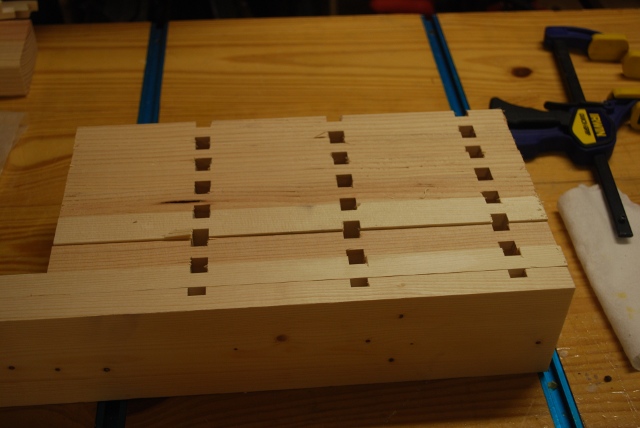
Here are the sides and center matched up to show the accuracy of the slot cutting jig.
The center vertical sections are 2x4s resawn to 1" thick since they have to have a notch on each side, the outside verticals are 1x4s.
|
|
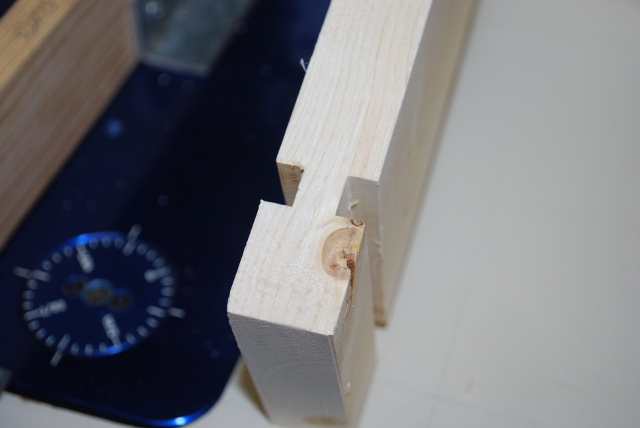
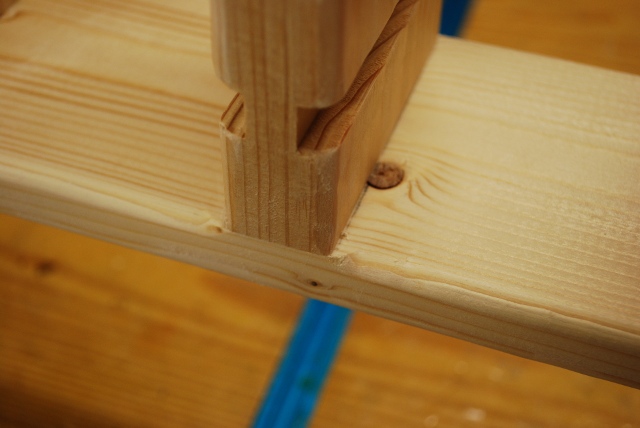
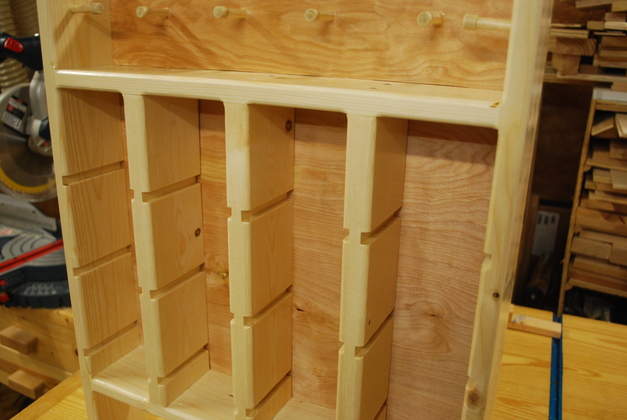
One of the center verticals showing the opposing slots.
As I said above this was a 2x4 resawn to 1" to allow opposing slots and still have strength.
The notches are 5/16" deep and 7/16" high.
|
|
All the pieces with one coat of paint, drying.
I paint and sand the inside of the slots before assembly, its a lot easier then and I get a better coat of paint inside the slots.
BTW, I use water based polyeruethane (made by Rustoleum) for floors, its tough, dries fast and doesn't smell when wet.
Its about $40 / gal. at the Depot and comes in a plastic jug with a screw on cap.
|
|
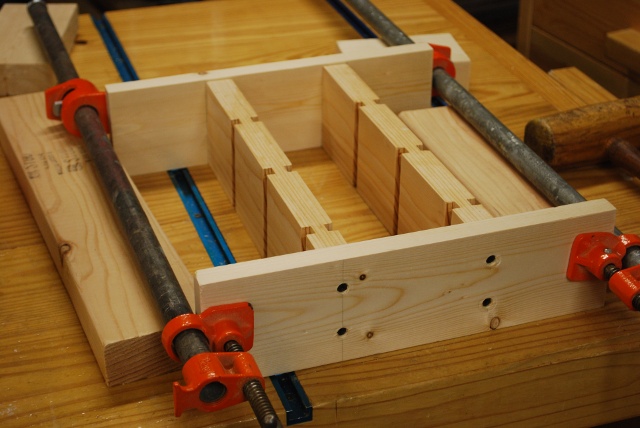
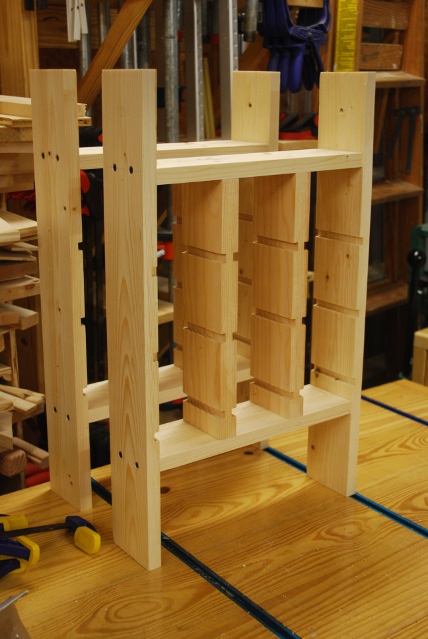
Central frame members screwed together.
The clamps hold everything in place while I drill then screw the pieces together.
|
|
Central frame with clamps off.
|
|
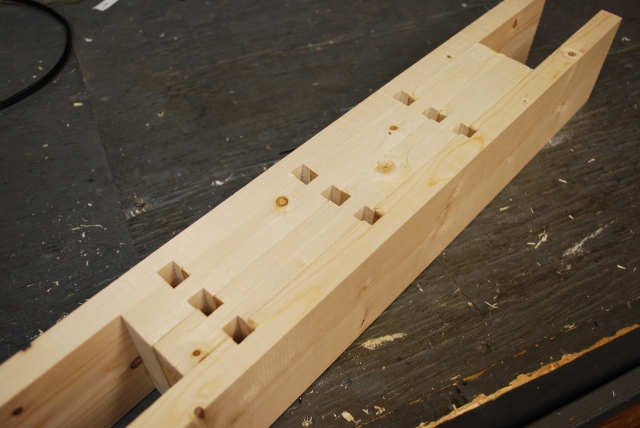
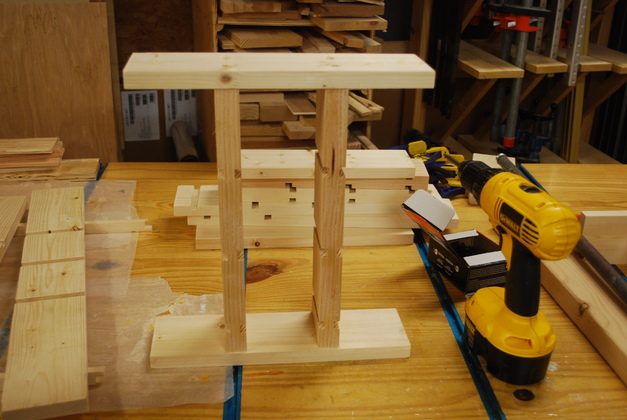
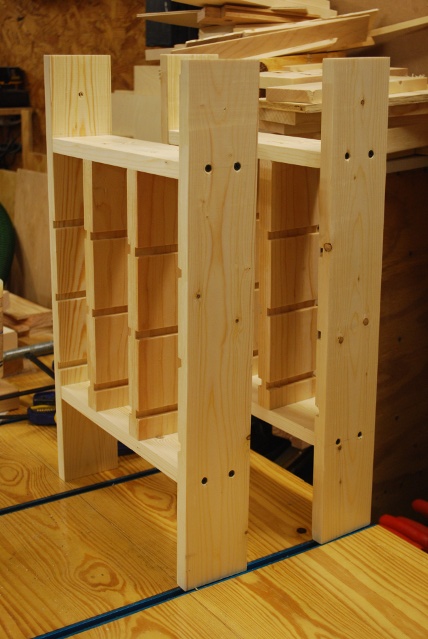
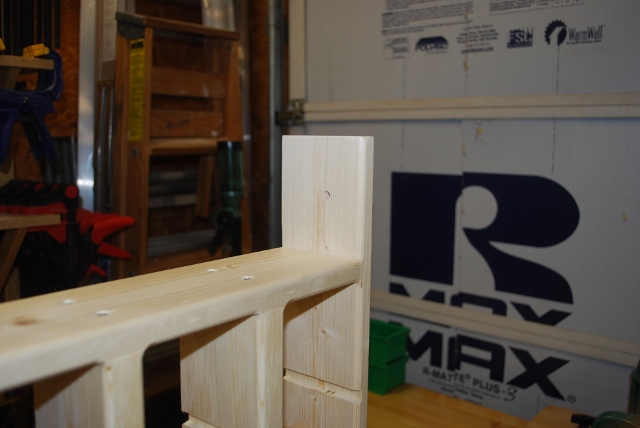
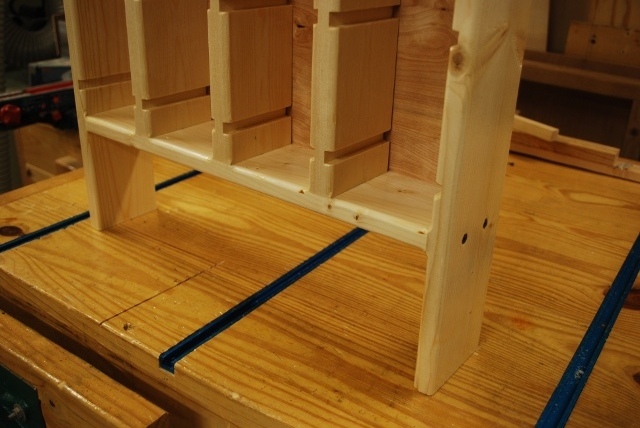
Sides of rack frame screwed to center, completing the frame.
You can see the peg holes drilled in the top of the side piece.
This rack will be attached to the wall and the bench top, so it doesn't have a base like the home rack does.
The space underneath is for an RCBS scale.
|
|
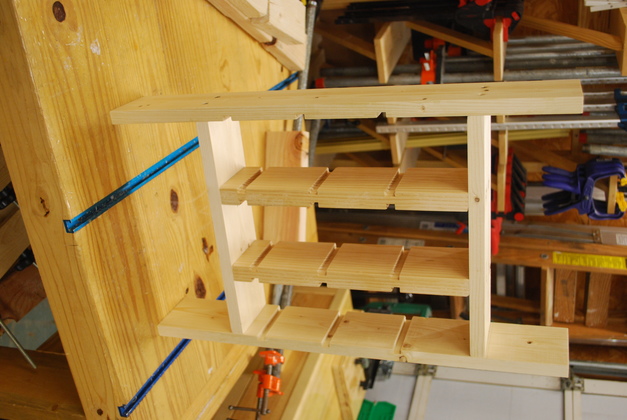
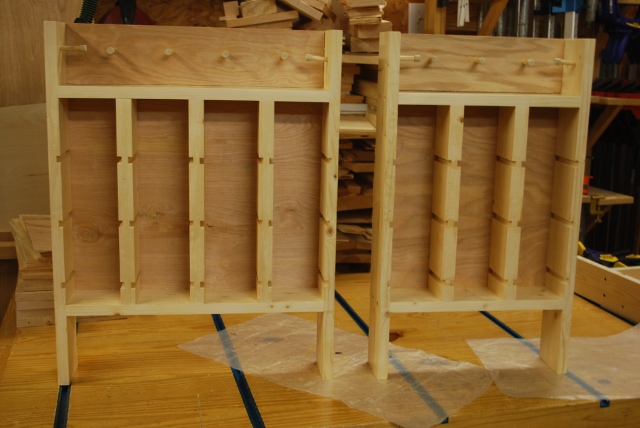
The two Southwest Ammo frames.
|
|
Side view of Southwest Ammo's frames, you can see the countersunk screws holding the horizontals.
|
|
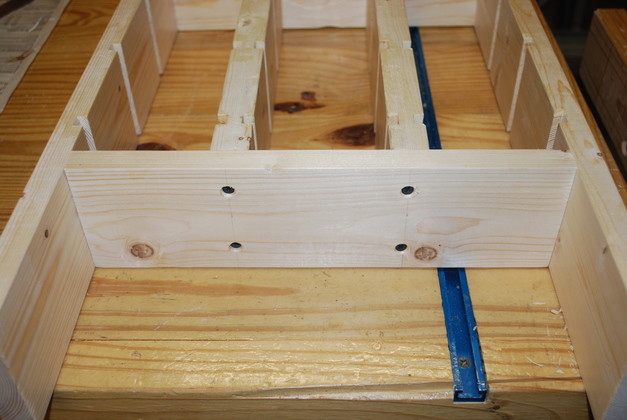
Countersunk screws holding center verticals.
Since the tolerances are pretty close on this, I clamped the center pieces in, made sure the die plates would fit, drilled the countersink and pilot holes, then put in the screws.
|
|
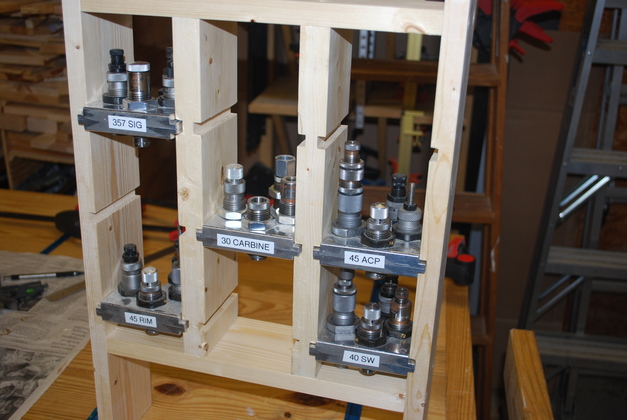
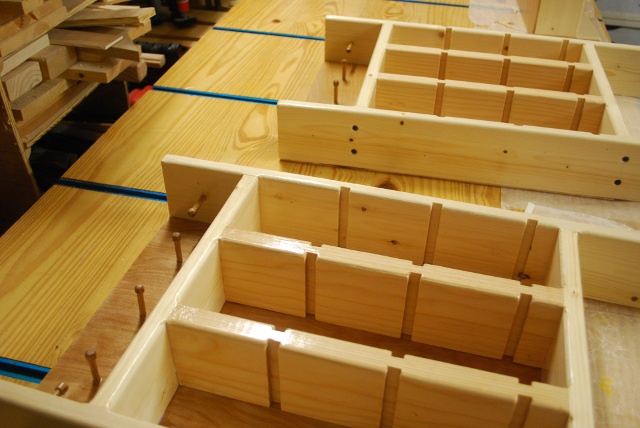
Test fit of die plates into slots.
|
|
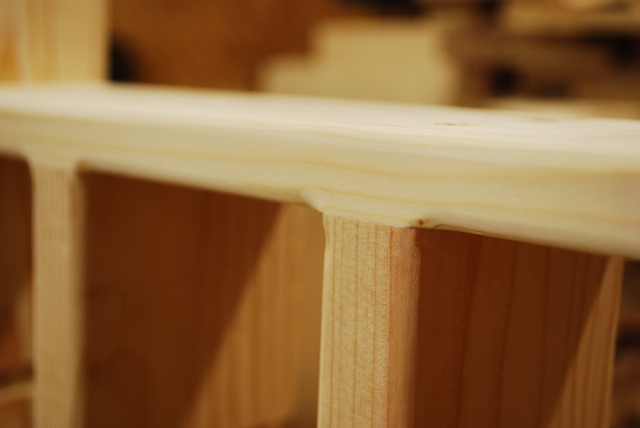
I rounded the edges, it makes them look a little nicer I think.
|
|
Another look at the rounded edges.
|
|
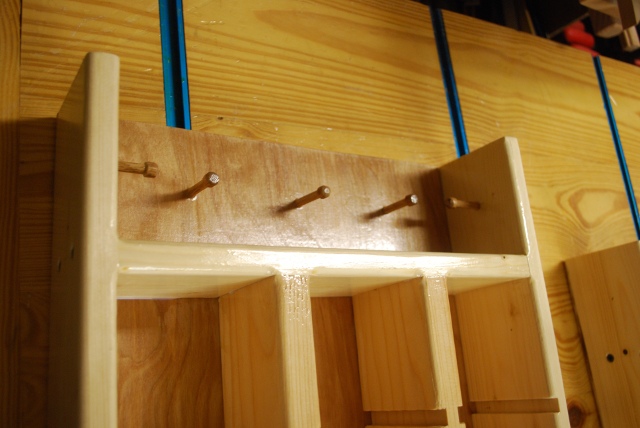
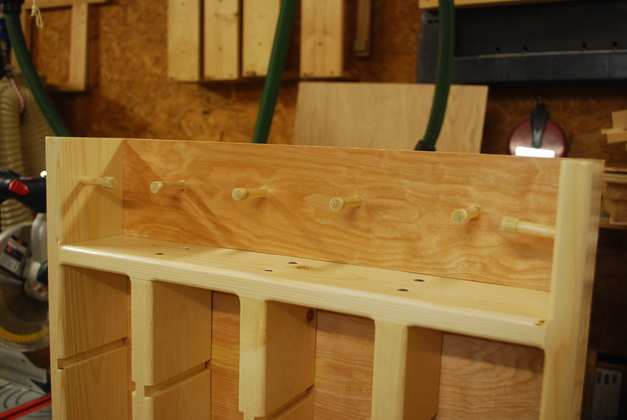
Peg hole drilled into frame side piece.
|

|
Backs and reinforcer glued in, peg holes drilled.
|
|
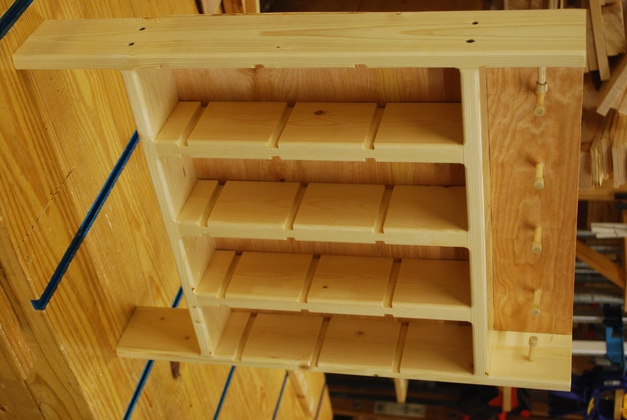
Rack with back and reinforcer glued in, waiting for pegs and paint.
|
|
Pegs installed and racks painted.
|
|
Closer look at shell plate area and pegs.
|
|
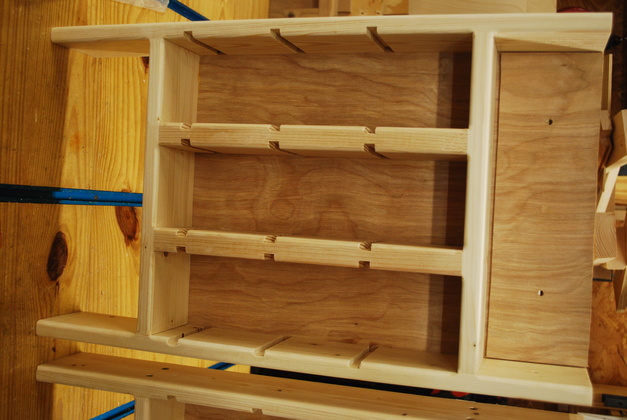
Finished Southewest Ammo rack.
|

|
With a few shellplates.
|
|
|
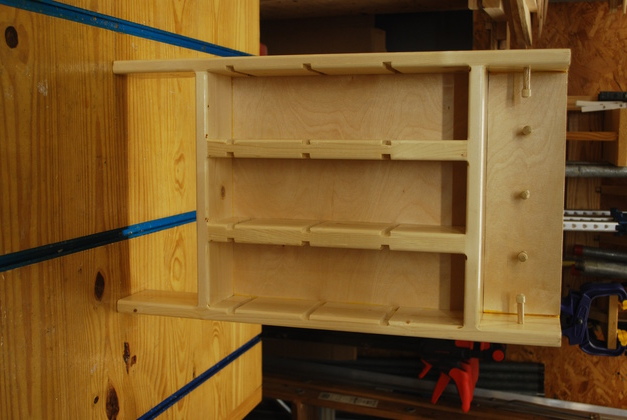
3x3 with some dieplates and shellplates.
|
|
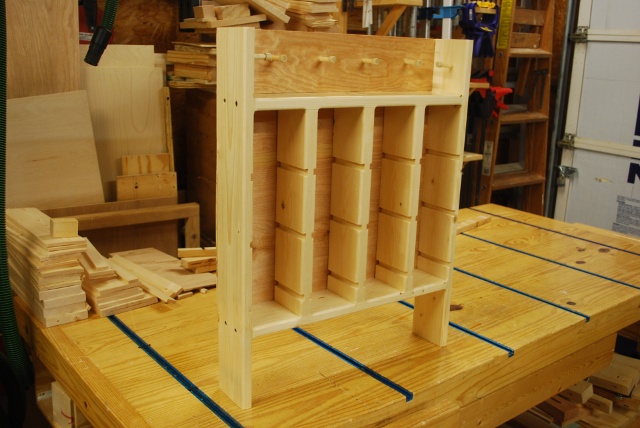
A 4 x 3 rack.
|
|
4x3 beside a 3x3.
|
|
Finished 4x3 ready to deliver.
|
|
4 x 3's shell plate storage area.
|
|
A little closer look at the 4x3's storage areas.
|
|
4x3's scale storage area.
Note if this were a Home Rack style (with a base plate and top cover) you could store the scale on top.
|