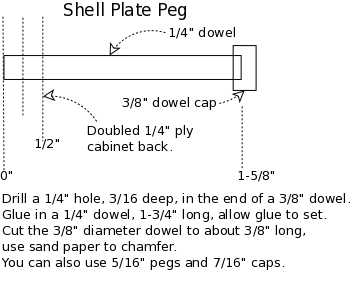
Making Small Pegs with Caps
07/19/13: Add link to dieplate and shellplate rack.
07/10/13: Page Origin, split from Shell Plate Rack page.
If anybody has a comment or question, please contact me at  .
.
I like to make things to help in my other hobbies.
I needed some small pegs to store shellplates for the RCBS Pro2000, I tried oak dowels but the shellplates vibrated off, then I tried smaller pegs with caps (1/4"), and I though they should be a little tougher, so I tried 5/16" pegs and it worked.
Link up to dieplate and shellplate rack.
Making a Shell Plate Peg
Making Better Pegs:
The 3/8" smooth oak dowel didn't hold the shellplates well if the box was vibrated or bumped, so I tried several new approaches, I angled the pegs up but it really didn't help then I tried putting a cap on the end and voilla, success.
The hole in the shellplate is 1/2" so the peg holding it must be samller than 1/2" at is't largest dimension.
Heres how I made the new shellplate pegs:
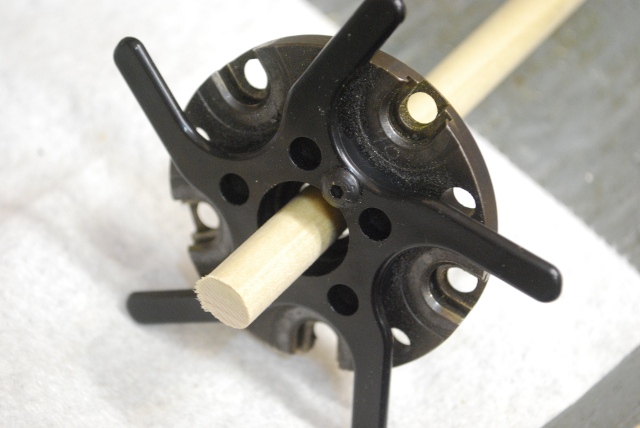
I cut a 1/4" dowel to a length of 1-5/8".
I drilled a 1/4" hole in the center of the end of a 3/8" dowel about 1/8" deep.
I glued the smaller 1/4" dowel into the hole in the 3/8" dowel and allowed the glue to set.
I cut off the end of the 3/8" dowel so there was just enough for a cap and chamfered it using a sanding wheel.
I've been thinking, a 5/16" dowel with a 7/16" cap would work, the odd size dowels are hard to find around here in oak.
The 1/8" difference in diameter yields a 1/16" difference in radius or a 1/16" lip to keep things from slipping off the peg.
BTW: a slightly larger version of this would work well for pegs on a hat rack etc.
If your careful you could even turn the cap to make it look very fancy!
|
A 7/16" dowel is inserted through the center hole in a Pro2K shellplate.
The peg cap needs to be just small enough to fit through the 1/2" hole in a shellplate.
|
|
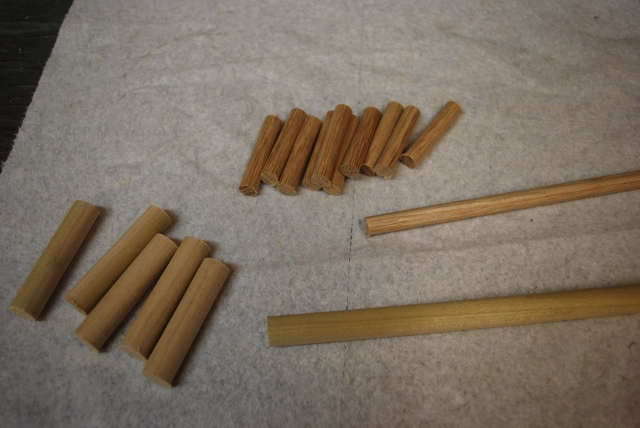
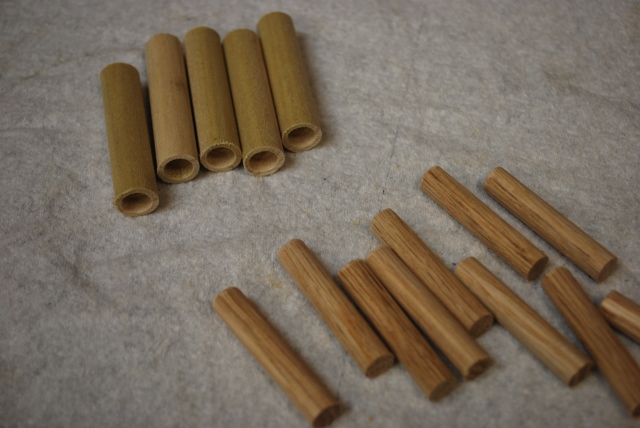
5/16" dowels cut to 1-5/8" for pegs, and 7/16" dowels cut for caps.
I cut the larger dowels to 2" long, plenty to chuck up in my lathe with enough for several caps.
|
|
These new pegs will consist of a 5/16" dowel with a 7/16" diameter cap on the end giving a 1/16" lip so the shellplates stay on.
Its difficult to drill a hole in something as small as the cap so I drilled the hole in the end of a long dowel, glued the smaller dowel into the hole, and cut the cap dowel to the length I needed.
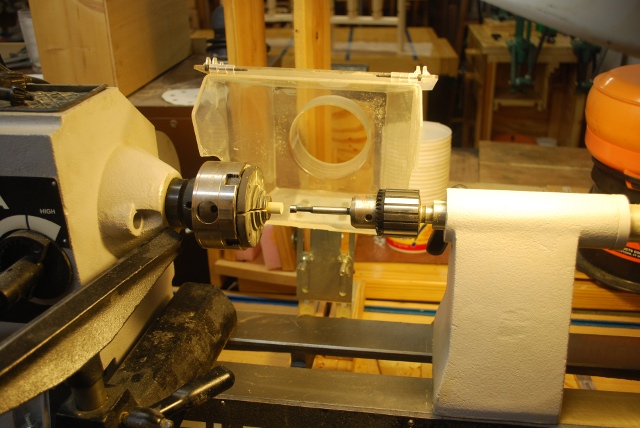
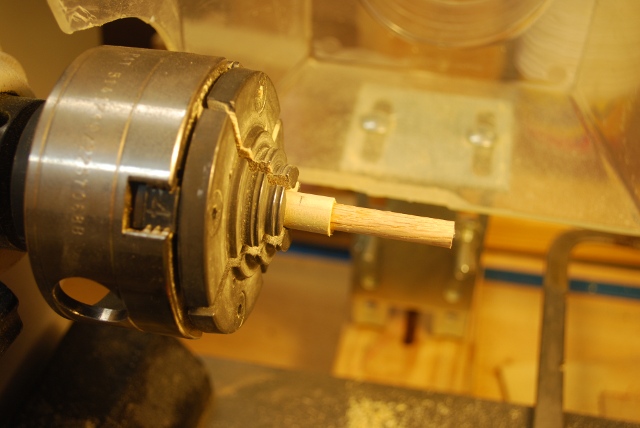
I needed to drill a 5/16" hole exactly in the center of a 7/16" dowel so I set it up on the lathe which is great for working on anything round.
Using a lathe to drill a hole in something is a keen idea, instead of turning the drill bit you turn the piece being drilled and the drill bit stays still.
You'll see later that I can also saw using a lathe.
|
|
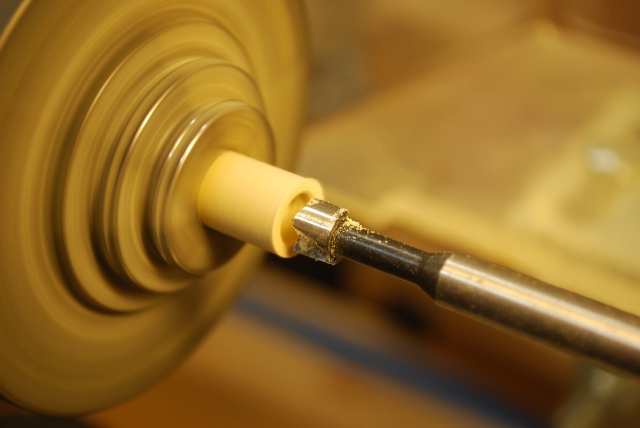
Closer look at a hole drilled in the center of a small dowel using lathe.
The hole is 5/16" in diameter and about 3/16" deep.
You could do this on even smaller pieces if you have a smaller chuck or another 1/2" drill chuck, this is the One Way Talon with their #1 jaws.
You'll note I am using a Forsner bit which doesn't put as much outward pressure on the piece being drilled as something like a brad point drill would.
I also did this with 1/4" pegs and 3/8" caps but I wanted, and could use, a larger peg.
|
|
7/16" dowels drilled for caps and 5/16" pegs, ready go glue.
|
|
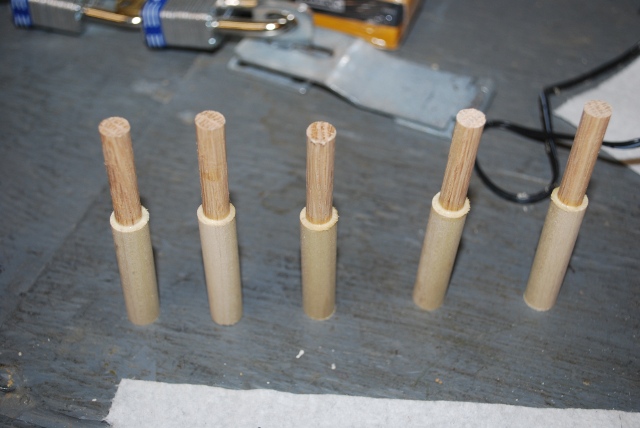
5/16" pegs glued into 7/16" dowels for caps.
The 1/8" difference in diameter yields a 1/16" difference in radius or a 1/16" lip to keep things from slipping off the peg.
In order to make sure the two dowels are lined up, I laid a piece of 3/16" plywood next to a piece of 1/4" plywood (1/16" different in their height) and rolled the fresh glued dowel pair down the center.
You could also rechuck in the lathe and quickly straighten them, remember, a lathe is all about concentricity (a common center).
Make sure you have good glue coverage over the hole in the larger dowel then gently push the small dowel into the larger, twisting, to force out the excess glue, then wipe the excess off and let set.
|
|
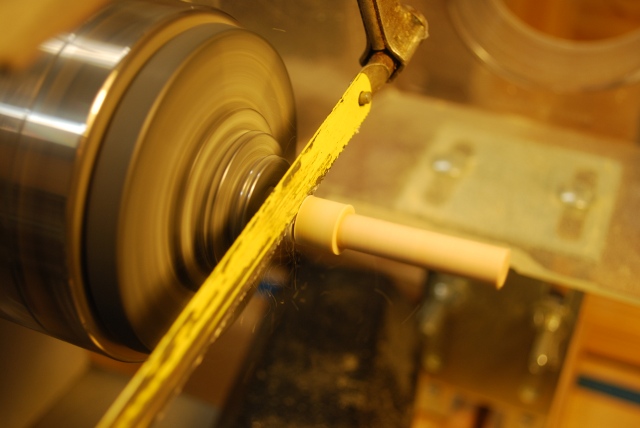
Peg glued into cap, now ready to saw off extra cap length.
|
|
Sawing on the lathe, you still need to move the saw back and forth but slowly.
|
|
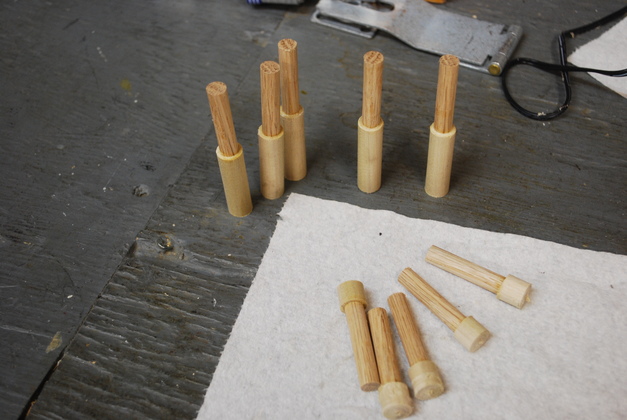
One set sawed, another set ready to saw.
|
|
Two sets ready to chamfer on the sanding disk.
|
|
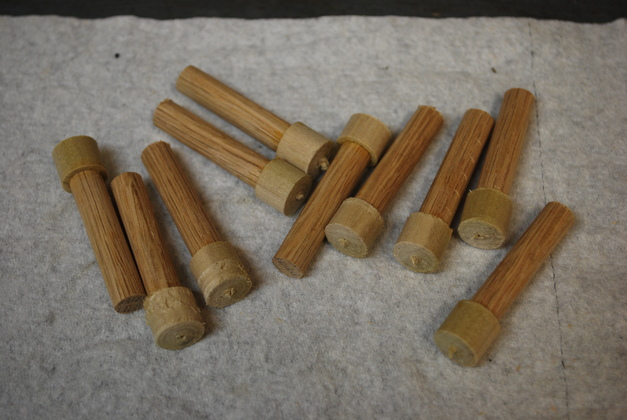
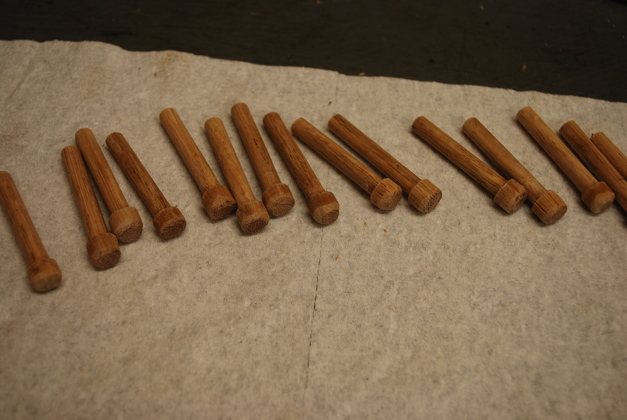
Pegs after chamfering caps on a sanding disk.
Ready to install and paint.
|
|
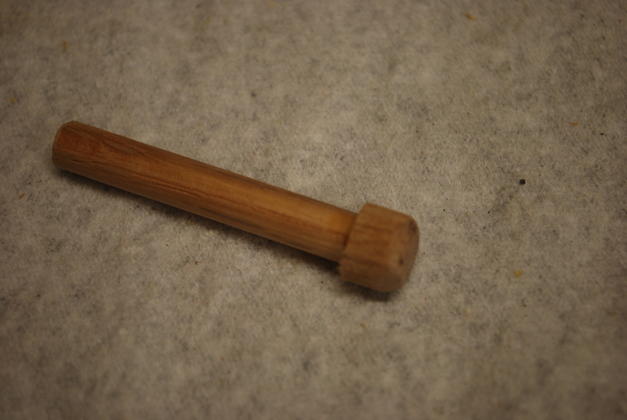
Closer look at finished peg with it's cap.
|
|
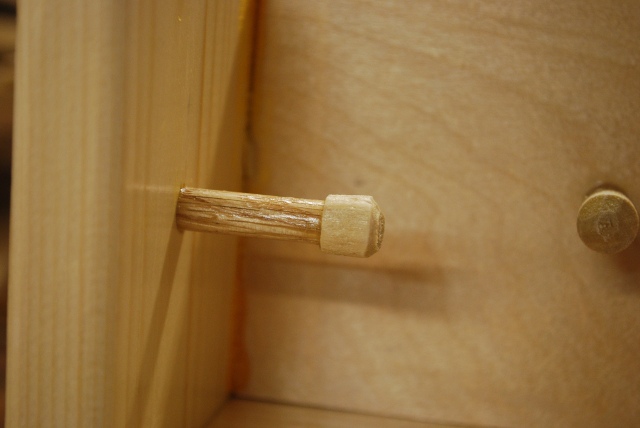
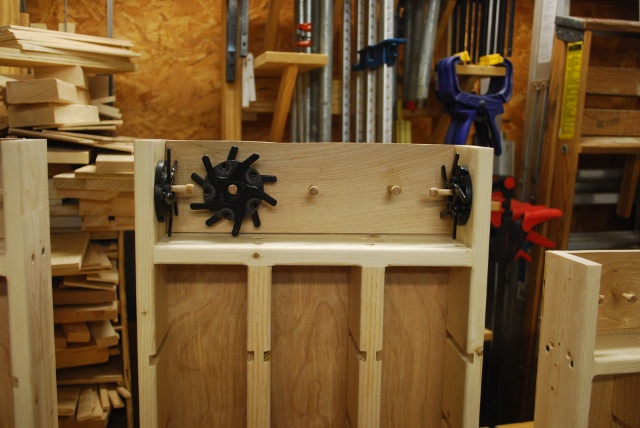
Pegs glued into Southwest Ammo rack.
|
|
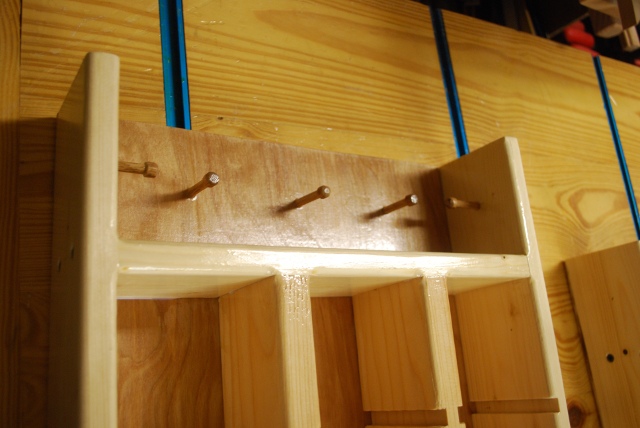
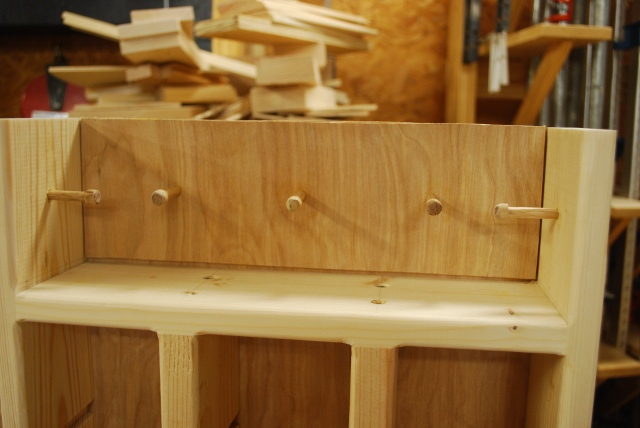
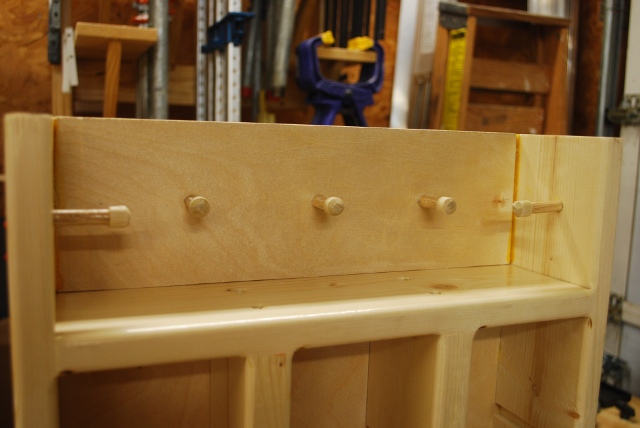
Close up of new style pegs glued into shellplate storage area.
|
|
The whole shellplate storage area.
|
|
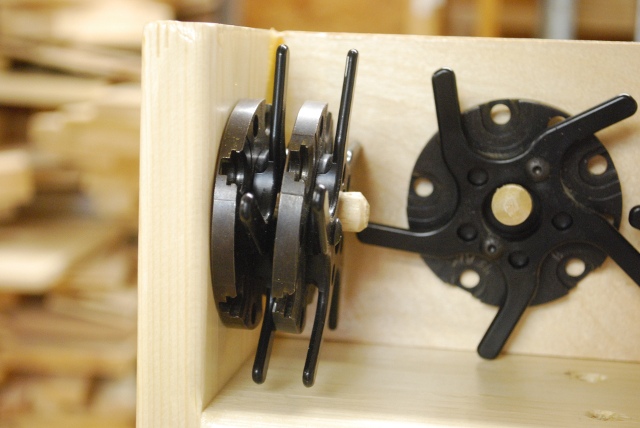
Shellplates hung singly and doubled on new pegs.
Shaking the whole rack doesn't dislodge the shellplates.
|
|
Another look at 4 shellplates stored.
Each peg will hold two shellplates for a total of 10 shellplates stored.
Shellplates, like shellholders, are used for more than one caliber, so you usually need more dieplates than shellplates (for instance: .45ACP, .458 SOCOM, and .308 Win. all use a #3 shellplate).
This would probably be enough to handle 12 or 15 dieplates, depending on calibers.
|