| |
|
| 
|
|
Mortise and Tenons
|
06/20/15: Add PowerMatic pics and link to die plate rack.
06/17/15: Add New Cam Clamp
01/24/15: Add diagonal brace tenons.
08/03/14: Page Origin.
Mortise and Tenon construction is one of the oldest (about 7000 years, according to Wikipedia) and strongest techniques for woodworking and has been used for many many years.
Originaly tenons were sawed on the end of a beam then a mortise (socket) was chiseled into the beam to be joined.
Today, there are other types of tenons available like loose tenons also called biscuit or plates, and Festool's Dominos.
I use all of these (cut and loose: biscuit and Domino) from time to time.
Note my page on Biscuit Gluing.
I cut tenons on my router table using this tenoning jig I made.
I made the jig mostly from 3/4" MDF with some small pieces of pine and three 3/8" carriage bolts, washers, and wing nuts.
The most important thing in making a jig like this is all angles must be square (right angles) and the slots and slides must move smothly without a lot of side to side slop.
I was showing this to Bill yesterday and I told him I got the shape of the handle by tracing the handle of one of my grandfather's hand saws.
I have realized that I need the ability to cut tenons on the end of mitered pieces, in other words at a 45° angle.
So my next project will be a jig to cut tenons at 45°.
Some diagonal tenons I have made in the past.
New Cam Clamp
One of the most time consuming parts of using this jig is loosening and tightening the clamp wing nuts between shoulder cuts.
I started thinking of using some kind of toggle clamp but I noticed the cam clamps and decided to try it.
The cam clamp is much faster to use than the wing nut clamp, I just need to find a way to hold it in place!
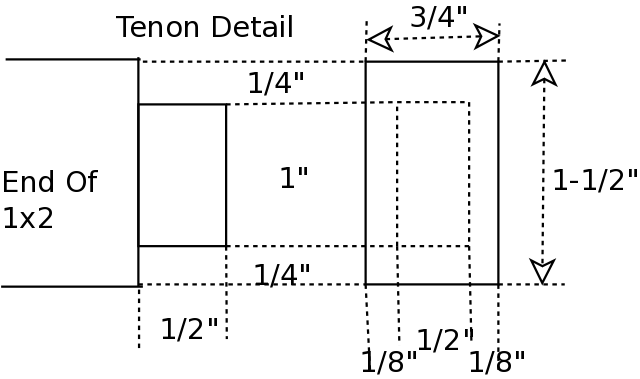
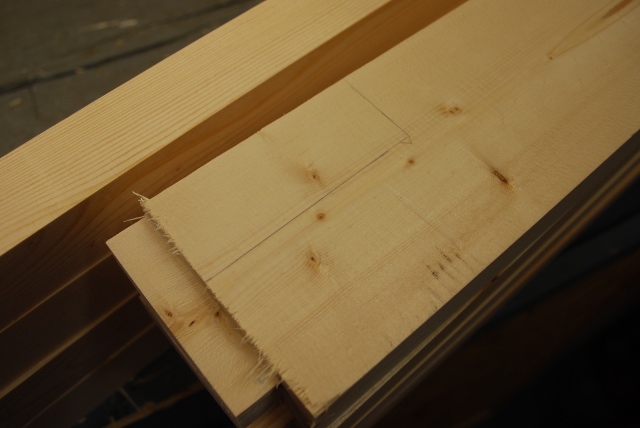
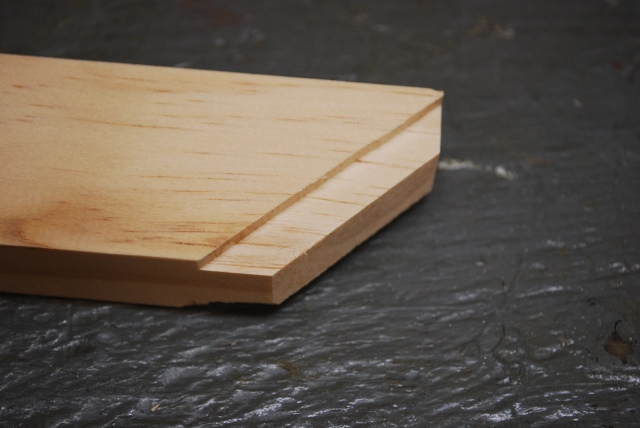
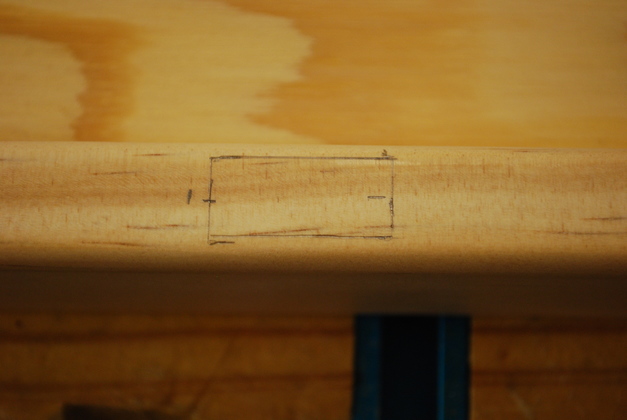
Below is a diagram of one of the tenons I cut using this jig.
It shows the depth of all 4 shoulder cuts and the length of the tenon itself.
Note: the workpiece must be long enough to cut the tenons and still have the desired distance between tenon shoulders which sets the spacing between the frame pieces.
Also, these will be blind tenons, that is, the mortise doesn't go completely through the board so the tenon must be shorter than the thickness of the board containing the mortise.
In this case (this diagram) the tenon is 1/2" long, the mortise is 5/8" deep, and the frame piece (with the mortise) is 3/4" thick.
The blind mortise is sometime called a "stub" mortise.
Below are some pics of my tenon and mortise making.
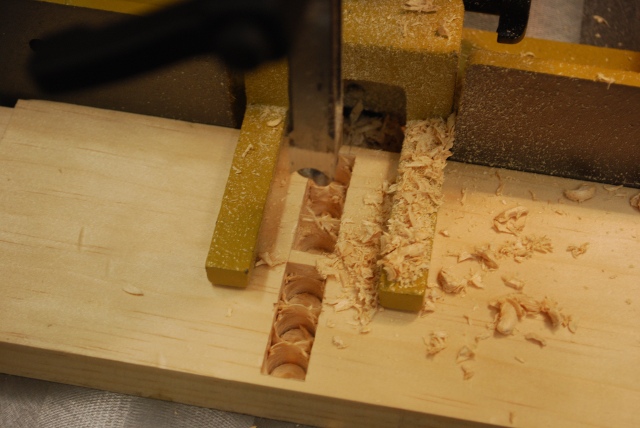
Tenons
Recently, I have begun to use my table saw to set the tenon's shoulder.
This makes the tenon's shoulder very consistent so I don't get any kind of a crack, on one or more sides, at the tenon joint.
For examples please see my Tenoning Jig page.
|
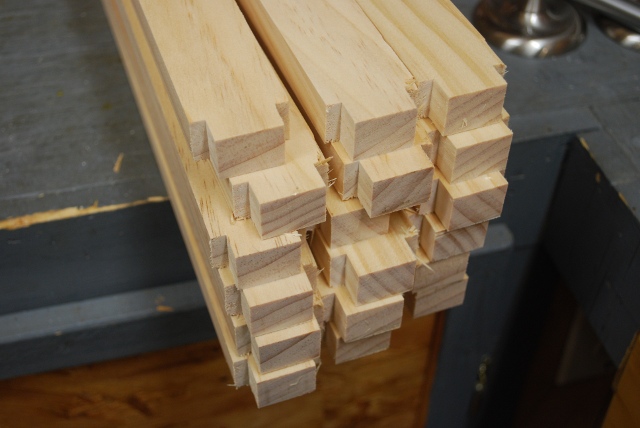
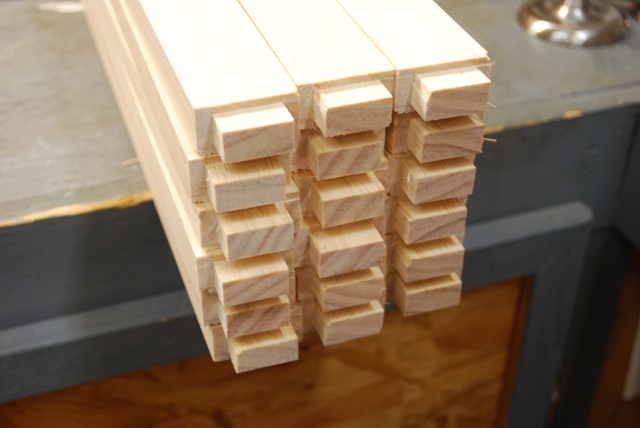
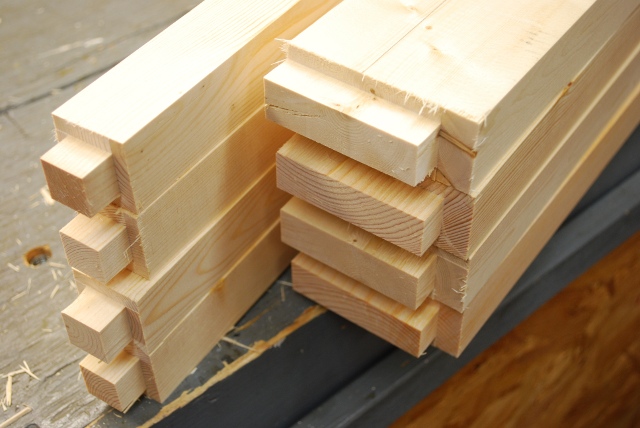
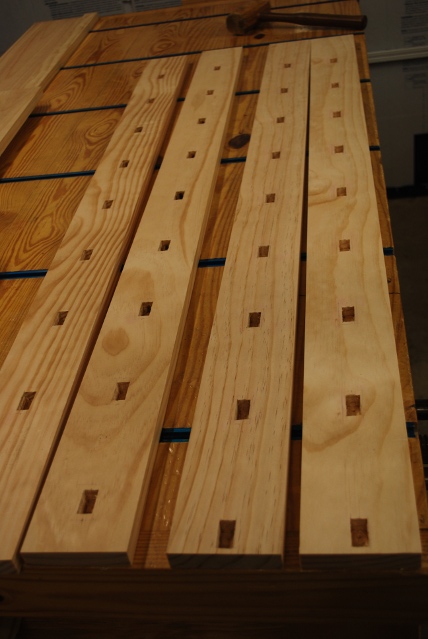
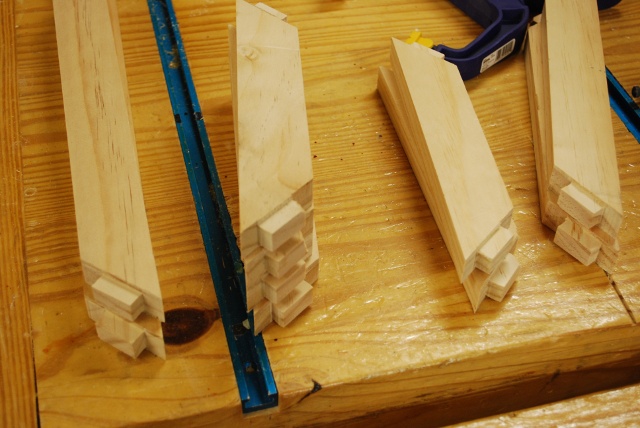
Stack of wine rack support bar tenons with one shoulder cut.
|
|
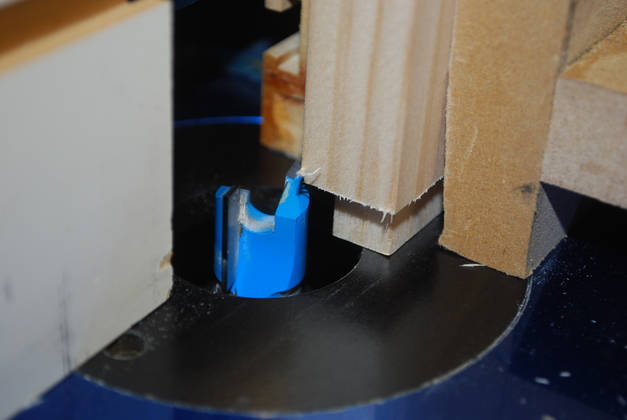
Cutting the second shoulder on a tenon.
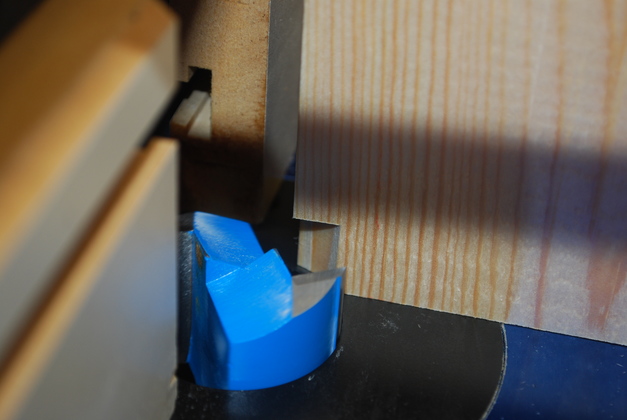
An important part of tenon making is being sure the shoulders are all the exact same height.
The solution is to set the height of the cutter bit (shown here) and don't change it during the cutting operation (all four sides).
Interesting note that bit is turning at about 20,000 rpm, the flash stopped it as though it wasn't running!
|
|
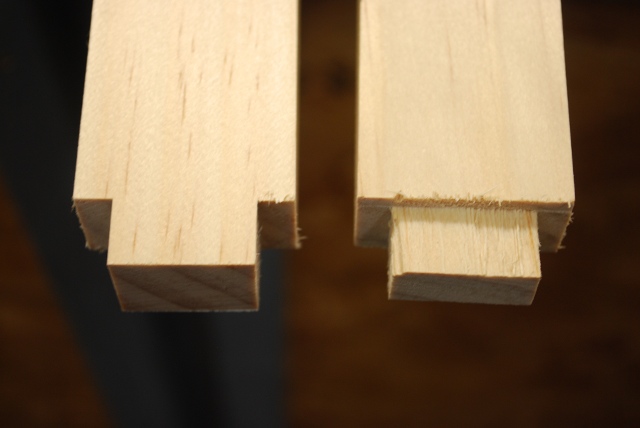
Showing a tenon with two shoulders cut and the final tenon with four shoulders cut.
|
|
Stack of wine bottle support bars with all tenon shoulders cut.
|
|
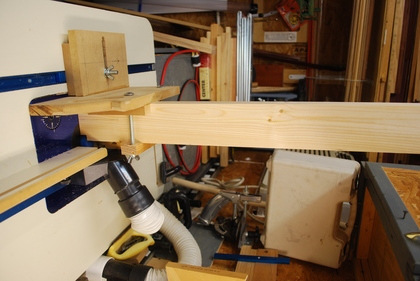
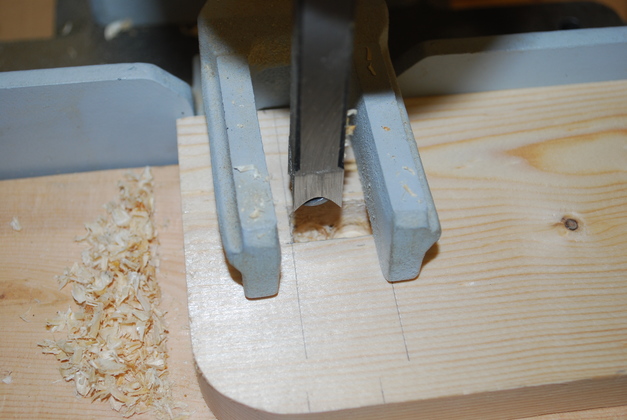
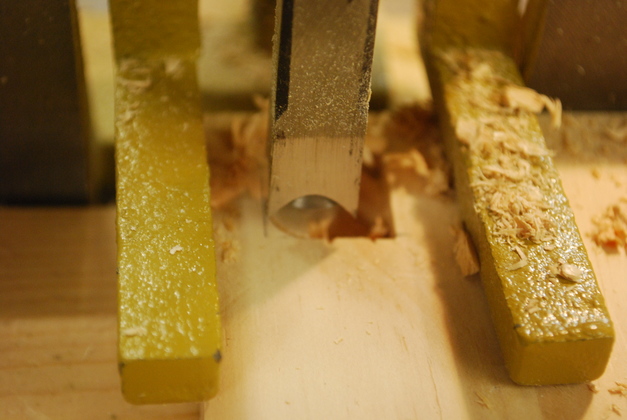
Heres a tenon being cut into a 2x4 with a larger bit.
Again the bit is rotating at about 20,000 RPM, but the flash makes it look like it is at rest.
Link to Bill's Computer Table Page where these tenons were used.
|
|
Cutting a tenon on the end of a 2x4 horizontal frame member for a desk.
|
|
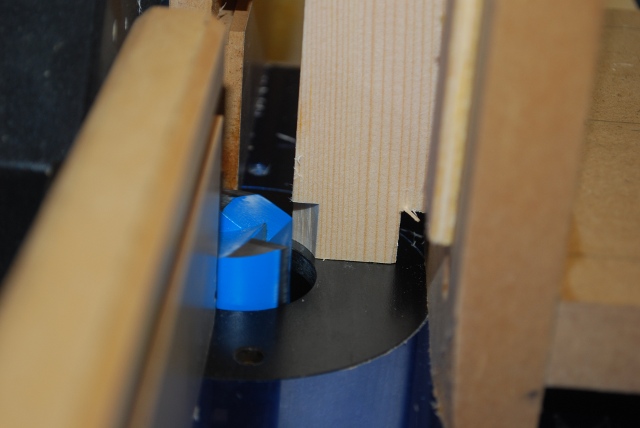
This is a tenon being cut on the end of a 2x2 frame member.
|
|
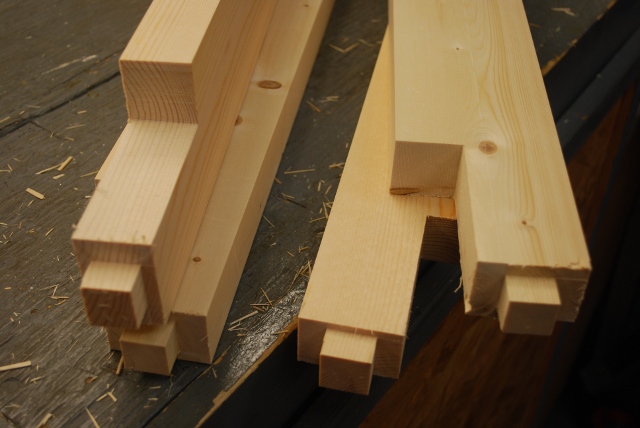
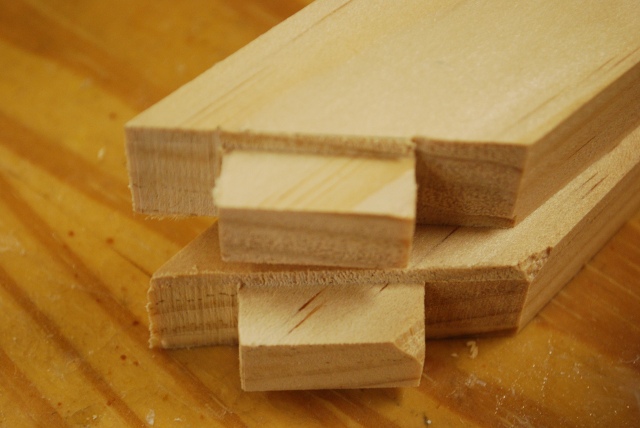
Tenons on 2x2s and 3 of 4 cuts on the end of a 2x4.
The tenons on the 2x2s are 3/4" square, the tenon on the 2x4 will be 1" square.
After machining the 2x2s are really 1-3/8" square, and the 2x4 is now 1-3/8" X 3-3/8".
|
|
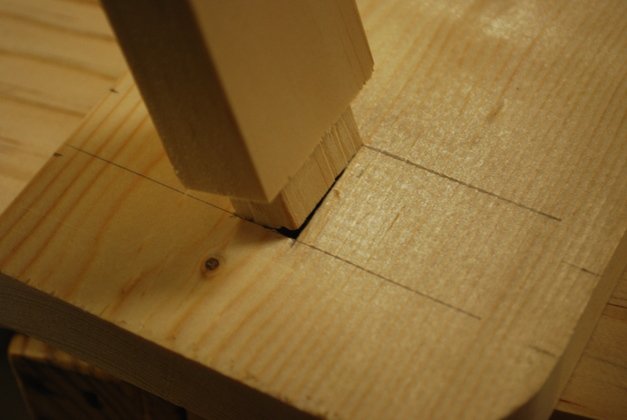
Note the notch marked on the end of the 2x4.
I'll bandsaw that out then cut the last shoulder of the tenon on my jig.
|
|
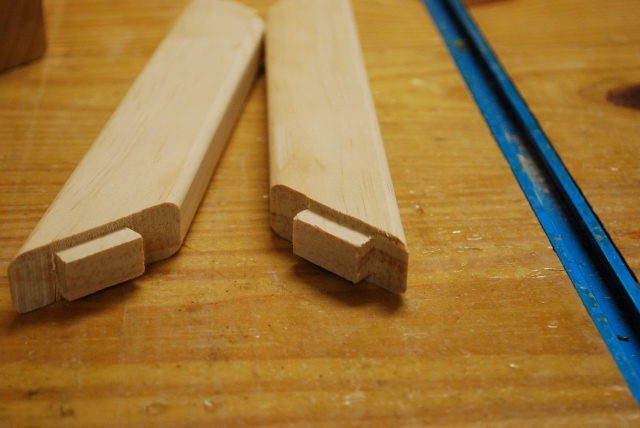
After the notch was bandsawed out and the tenon's last shoulder cut.
Thats a 1" X 1" tenon.
|
Mortises
|
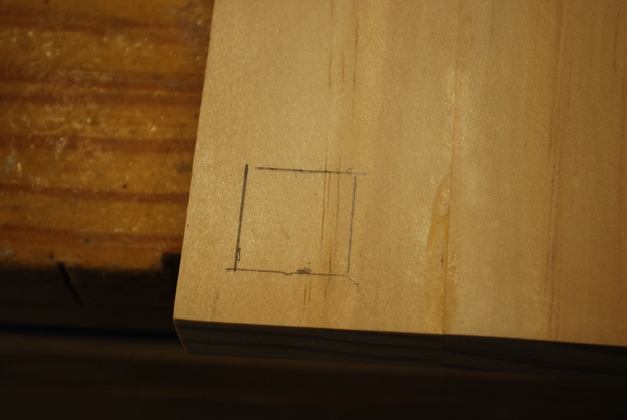
Marking the position for mortises.
You normally plan the position of the top of a bar, so you have to remember the size of the tenon's shoulders in order to mark where the mortise needs to be.
|
|
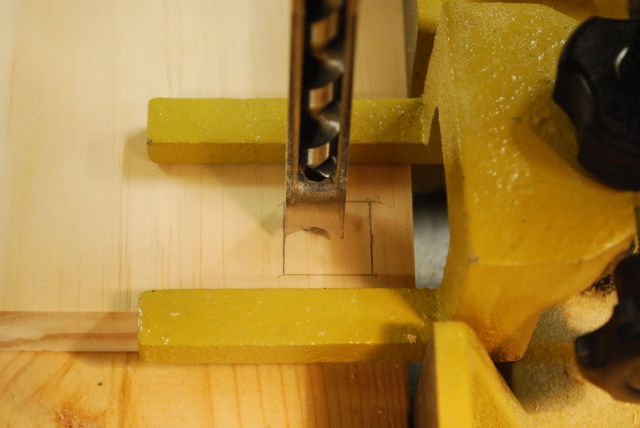
Drilling a test mortise.
|
|
And then test fitting one of the tenons into it.
|
|
|
All snug, dimensions of my setup are correct.
|
|
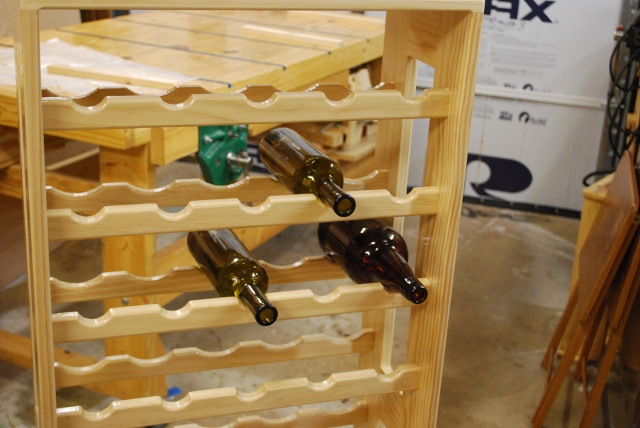
Mortising one of the verticals for a wine rack.
|
|
Using a 1/2" mortising bit and making a 1" by 1/2" mortise, so I have to drill twice for an entire mortise.
I'm drilling the second part of a mortise you can see the first square hole to the left of the bit.
|
|
This is what it looks like after you use a mortising drill.
You'll note the bottom isn't clean and sometime the sides aren't very clean.
|
|
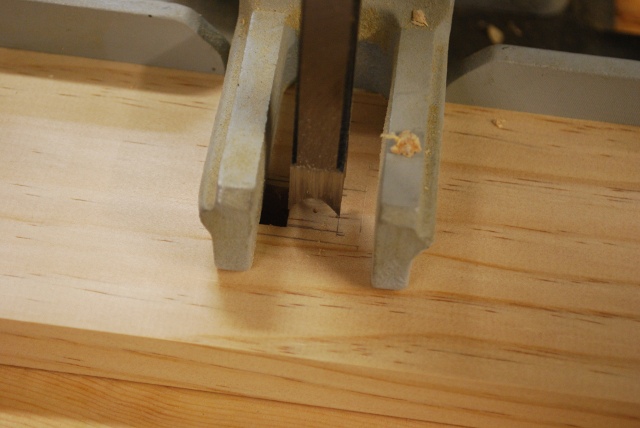
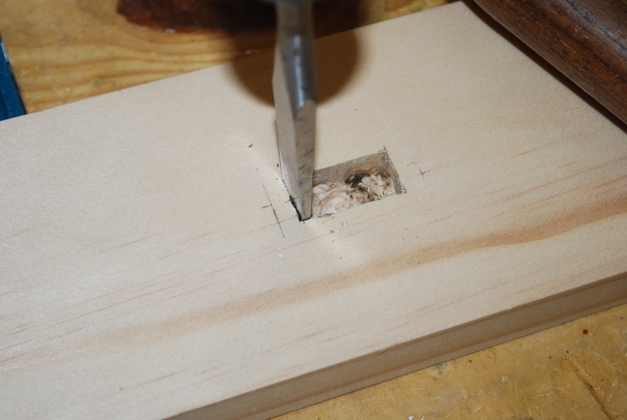
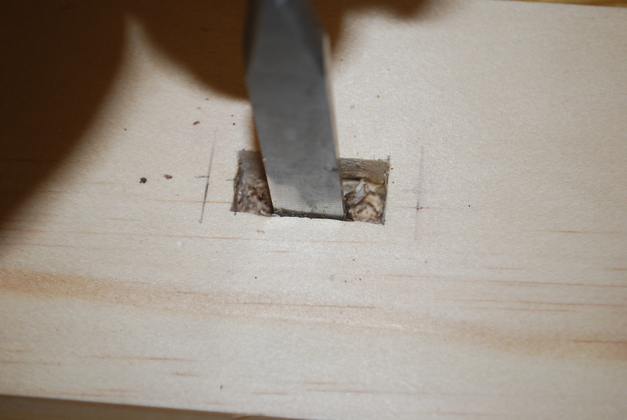
So you clean it out with a chisel.
I'm using a 1/2" chisel on a 1/2" wide mortise, so its very easy and quick.
A tap on each end..
|
|
... , a couple on each side.
This 1/2" by 1" mortise is my favorite because its easy to drill and clean out.
|
|
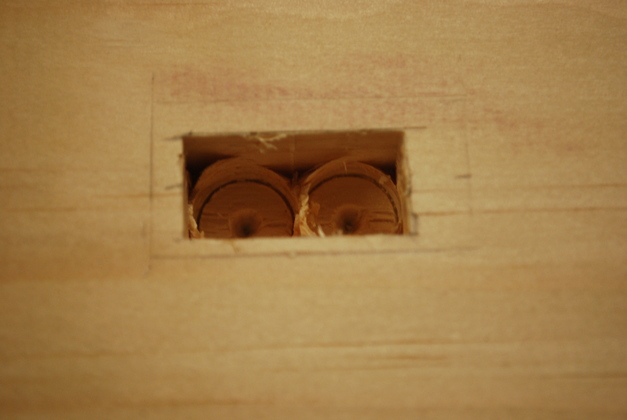
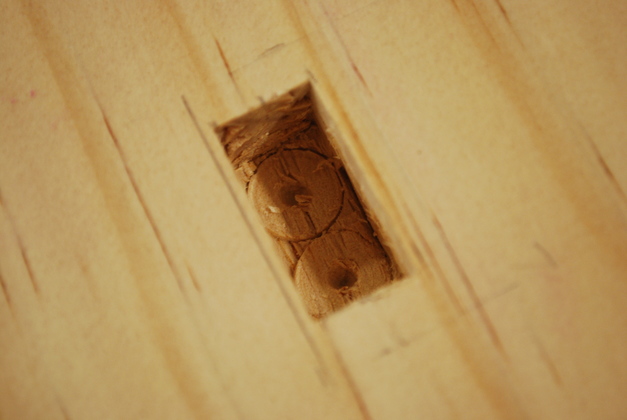
Vacuum it out and it should look more like this.
Note about gluing:
When I glue a tenon into a mortise, it starts out as you see it here, facing upward.
I put a bead of glue all the way around the top edge allowing it to run down, coating the sides fairly evenly, and puddle in the bottom just a little, ready for the tenon.
Usually, I'm gluing 16 or more tenons into mortises at the same time so I'm pretty busy, but I'll try to get a pic next time I do it.
When you glue tenons into mortises, like all glue jionts, you must keep everything square until the glue sets.
|
|
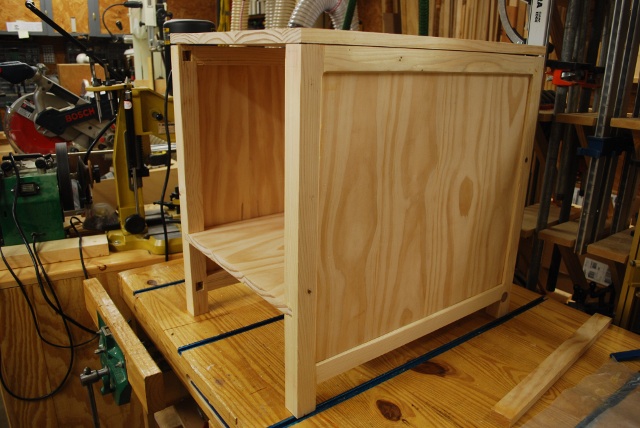
Here are all the front (on left) and back (on right) verticals for a wine rack.
|
|
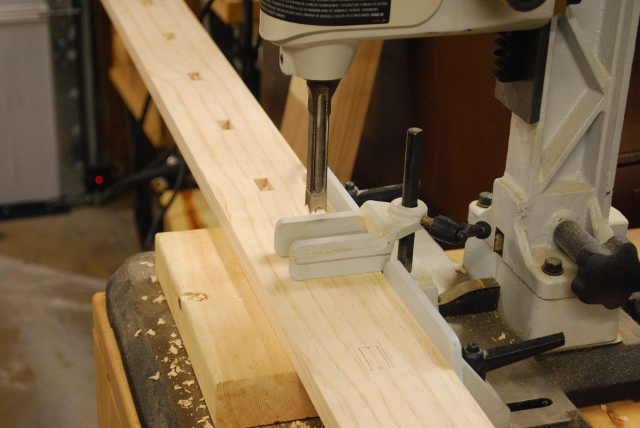
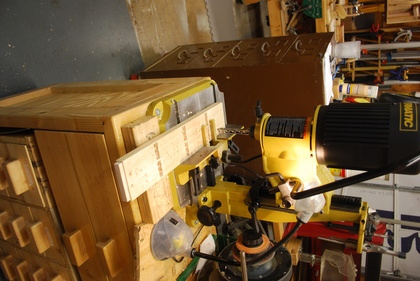
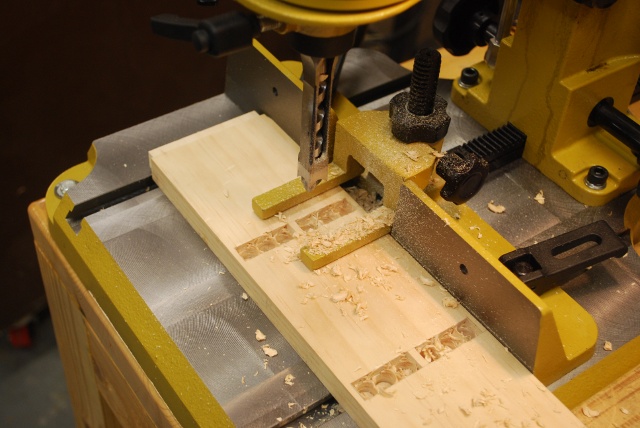
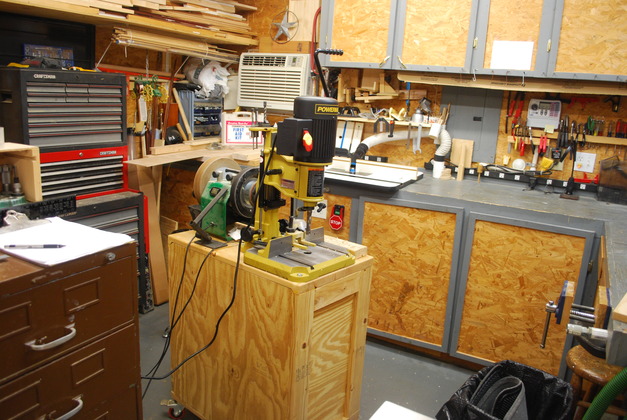
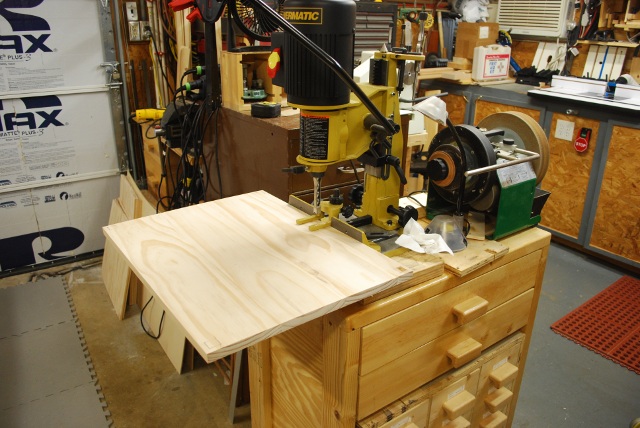
Cutting some long mortises with my new PowerMatic mortiser.
Here I'm cutting a 1/2" wide mortise across a 1x4, this is an inside horizontal for a die plate rack.
Notice the tenon on the end of the horizontal, the entire frame of the die plate rack is mortise and tenon construction.
|
|
Closer look at long mortise on the PowerMatic.
|
|
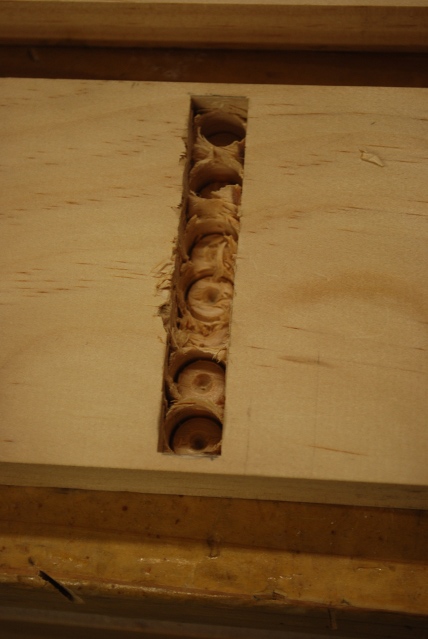
Long mortise ready to clean out.
|
|
My mortising bench pulled out to the middle of the small East bay in the shop.
|
Table Top To Frame
|
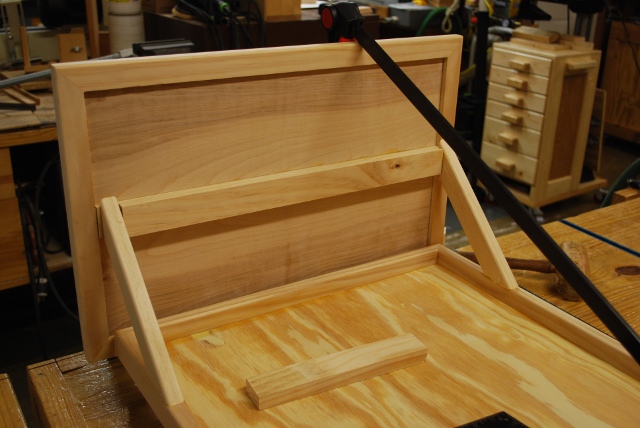
Table top edge joined, ready to drill mortises.
This is an end table for the den.
You might want to click on the Construction link.
|
|
Mortise hole marked in underside of top.
|
|
Mortiser lined up to drill.
|
|
Drilling mortise.
|
|
Mortise tenon test fit.
|

|
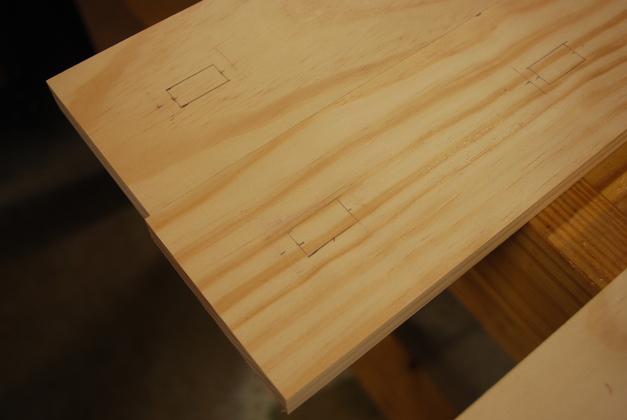
Tenons, mortises, and biscuit slots in both frame and underside of top.
When I glue something like this, I run a bead all around the edges to be glued, letting some run down into the biscuit mortises, then I use a silicone brush to smoothe out the glue getting a uniform coat on the flat surface.
Next I insert the biscuits, tap them down with a mallet, and run a bead along the top of each one.
Finally I put the top on, pushing it down onto the tenons and biscuits then place clamps all along each side and tighten them until I get squeeze out every where.
|
|
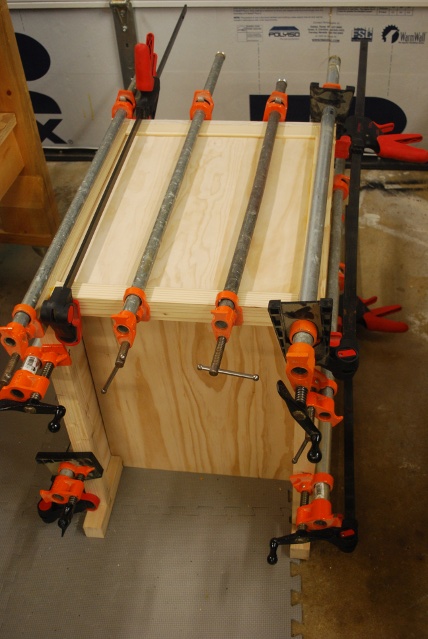
While I'm gluing it on, there are 12 long bar clamps, top to bottom,
I should get a little squeeze out (of glue) all along each glued joint.
|
|
After gluing, to to frame fit.
|
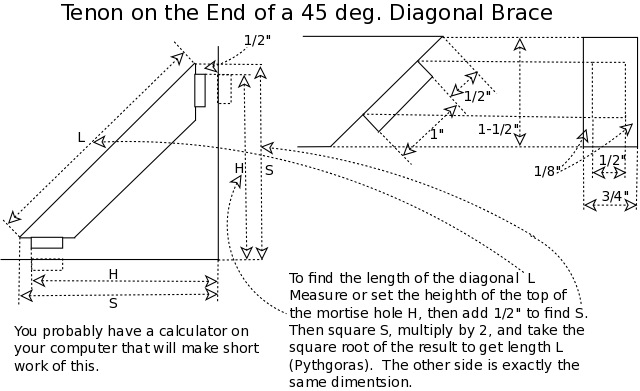
Diagonal Tenons
|
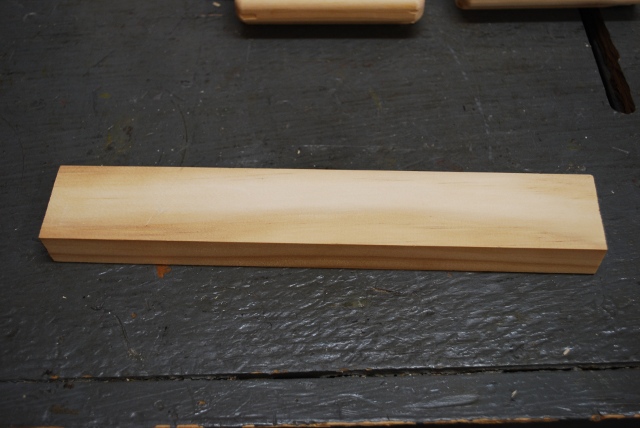
Here is a 1x2 sawed to length.
|
|
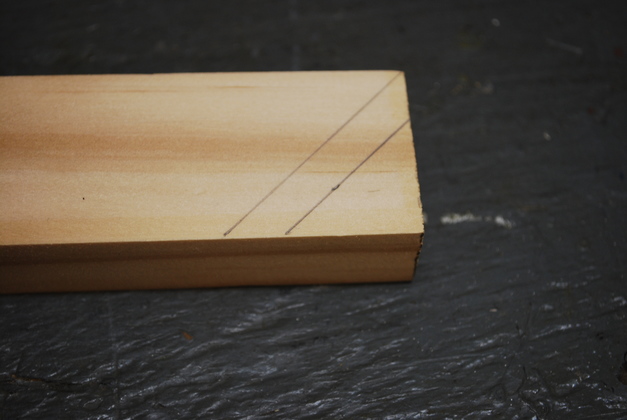
The tenon will be 5/16" high.
Mark a 45° at the corner and another 45°, 5/16" from the corner diagonal.
This will be the bottom of the tenon.
|
|
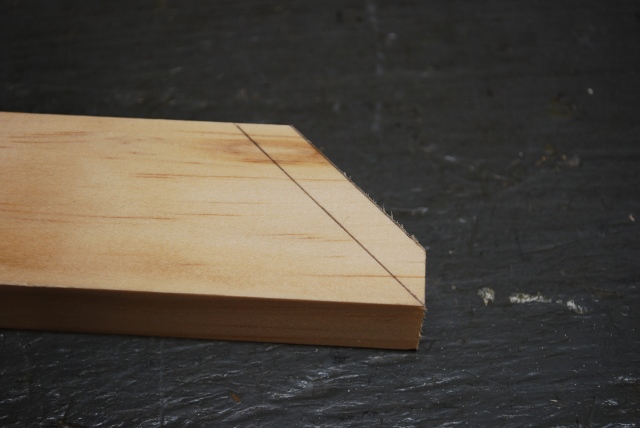
I saw off the corner at the end of the tenon.
|
|
Then machine off 1/8" deep by 5/16" wide on each side using my router table and a miter guage.
To cut this I adjusted the the rabbet bit height to 1/8" the router table fence to 5/16" (I could have used a bearing on top of the rabbet bit), and layed the tenon on it's side, using a miter guage set to 45°.
|

|
Both sides after machining.
The shoulder of the tenon is now clearly visible.
|

|
Mark the top and bottom of the tenon.
The length of the 45° cut at the corner is slightly over 2" and I wanted a 1" tenon, so I marked 1/2" from the point, then another inch to define the top and bottom of the tenon (See Diagram).
By not placing it exactly in the center I avoid a lot of tedious measuring and calculating.
|

|
Using the bandsaw, I cut by the marks down to the shoulder.
Next I'll cut along the shoulder leaving nothing but the tenon sticking out.
Using the machined shoulders as a guide makes the sawing simpler and the end tenon looks better.
|
|
Here are the diagonal supports after cutting the tenons.
My tenon jig, doesn't do 45° so (I need to work on that), I sawed out the ends and used the router to cut the 1/8" off the top and bottom side (in this pic).
The tenons are 1/2" by 1".
|
|
Closer look at tenons on the end of 1x2 diagonals.
These are not as clean as my tenon jig, but the angle is a problem for the jig, so I use my router table for the sides then sawed the top and bottom with my bandsaw.
|
|
Tenon sawed and corners rounded on the diagonals.
|
Projects
|
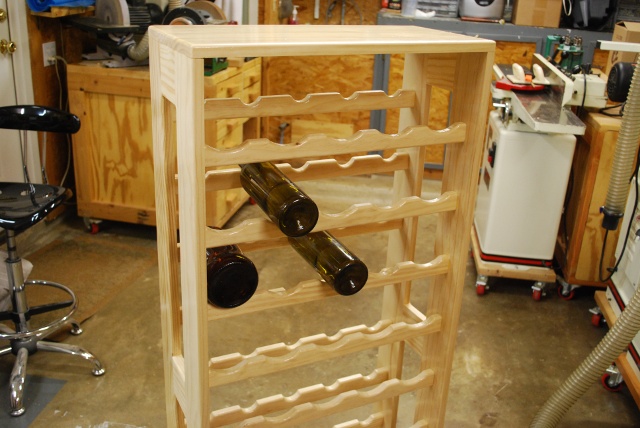
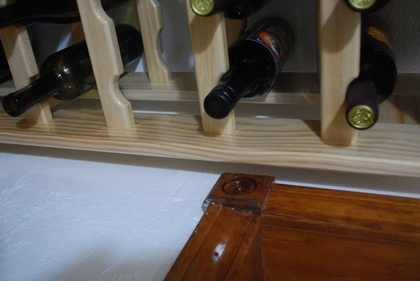
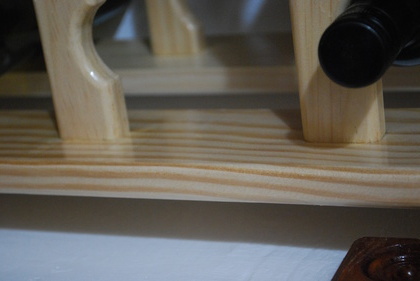
One of the neat things about blind tenons is, nothing shows on the oppsite side of the mortise, note the outside of the vertical supports.
|
|
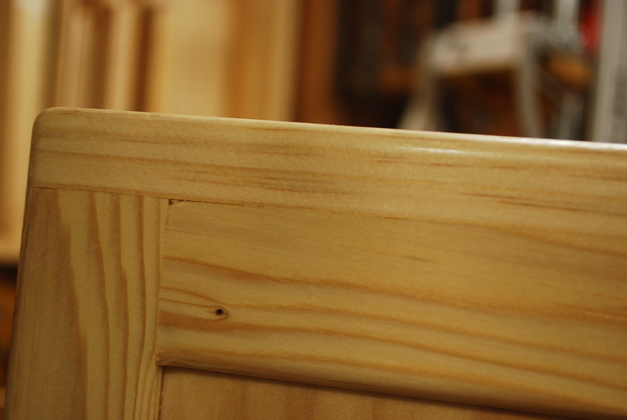
Note how neat the tenoned bars join the corner verticals.
|
|
Closer view of mortise and tenon joints.
I made this rack out of number one pine (straight grain, no knots), there are no visible screws etc. and it'll hold 45 Liters of mead or about 98 Lbs of weight.
As I said before, the mortise and tenon joint is one of the strongest in woodworking.
|
Diagonal Mortise Projects
|
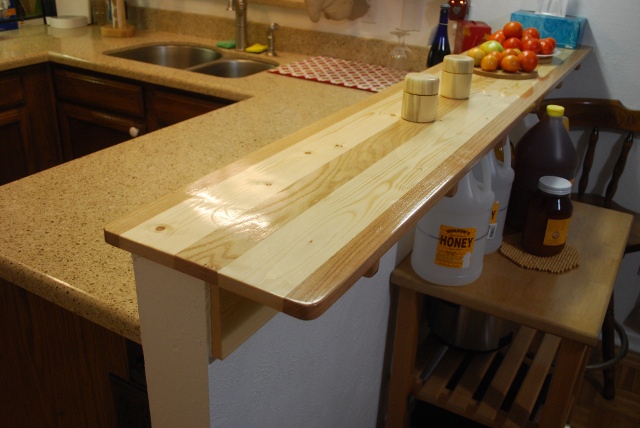
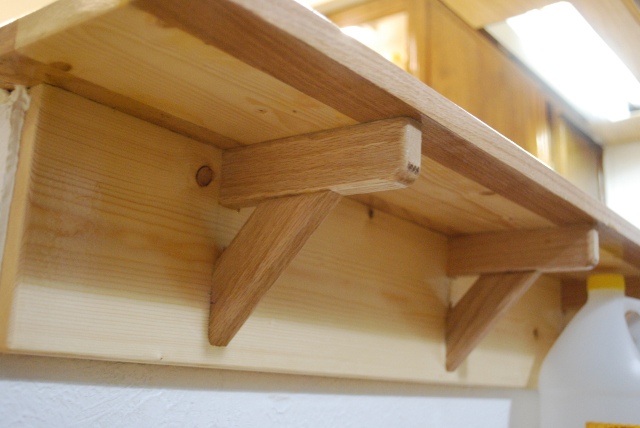
We built a new oak and pine bar top with oak braces under it.
|
|
Since this is made of different kinds of wood and glued to the bar frame of the house I flelt it needed the oak horizontal braces and diagonals.
The oak horizontals run the entire width of the bar top.
The diagonals are made as shown above with mortise and tenons.
|
|
A little closer look, you can see where the oak horizontal runs through the vertical face piece.
|

|
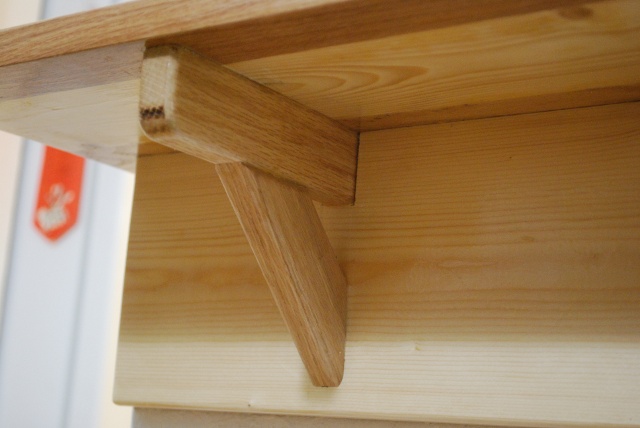
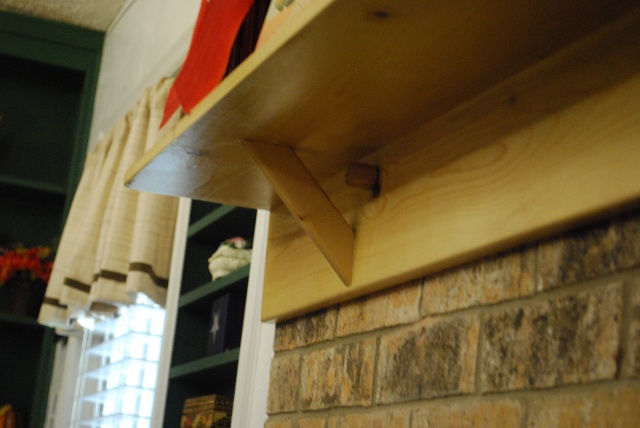
The mantle over the fire place made of pine with diagonal braces.
|

|
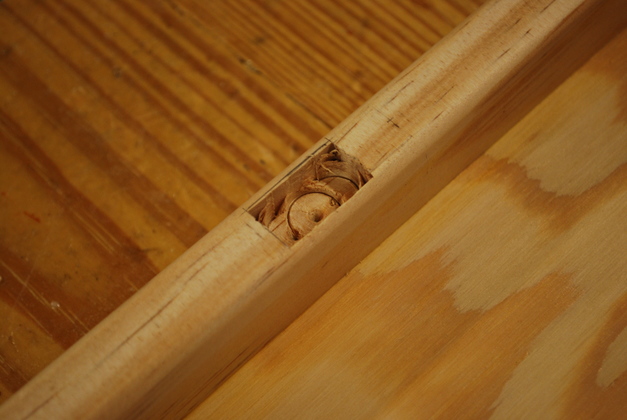
Each diagona has a tenon into a mortise on each end.
|
|
An end tenon, you can also see one of the knobs that hold the mantle to the brick face.
This is donumented on my mantle page.
|
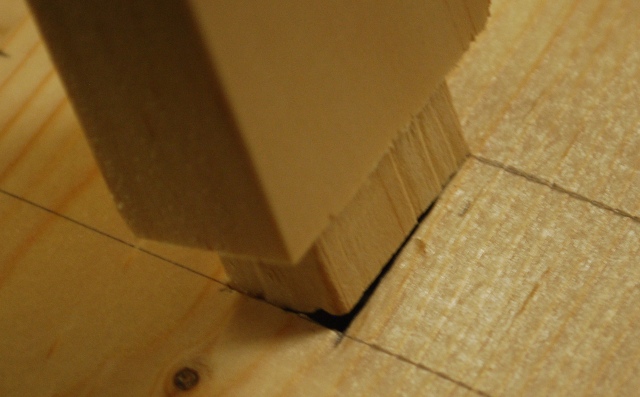
Diagonal Supports for Sliding Shelf Fronts
|
Mortise location marked on top edge of shelf frame.
|
|
Mortise drilled (but not cleaned out yet) on top edge of sliding shelf frame.
|

|
Closer look at fit of tenon into mortise on top edge of 1x2 frame of sliding shelf.
|