Mortise and Tenon construction is one of the oldest (about 7000 years, according to Wikipedia) and strongest techniques for woodworking and has been used for many many years.
Originaly tenons were sawed on the end of a beam then a mortise (socket) was chiseled into the beam to be joined.
Today, there are other types of tenons available like loose tenons also called biscuit or plates, and Festool's Dominos.
I use all of these (cut and loose: biscuit and Domino) from time to time.
Note my page on Biscuit Gluing.
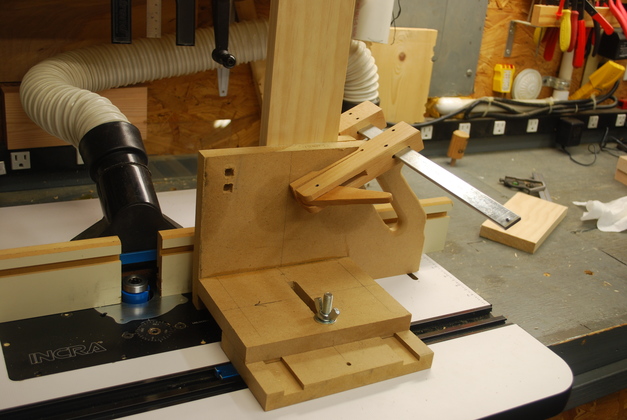
I cut tenons on my router table using this tenoning jig I made.
I made the jig mostly from 3/4" MDF with some small pieces of pine and three 3/8" carriage bolts, washers, and wing nuts.
The most important thing in making a jig like this is all angles must be square (right angles) and the slots and slides must move smothly without a lot of side to side slop.
I was showing this to Bill yesterday and I told him I got the shape of the handle by tracing the handle of one of my grandfather's hand saws.
I have realized that I need the ability to cut tenons on the end of mitered pieces, usually at a 45° angle.
So my next project will be a jig to cut tenons at 45°.
New Cam Clamp
One of the most time consuming parts of using this jig is loosening and tightening the clamp wing nuts between shoulder cuts.
I started thinking of using some kind of toggle clamp but I noticed the cam clamps and decided to try it.
The cam clamp is much faster to use than the wing nut clamp, I just need to find a way to hold it in place!
/P>
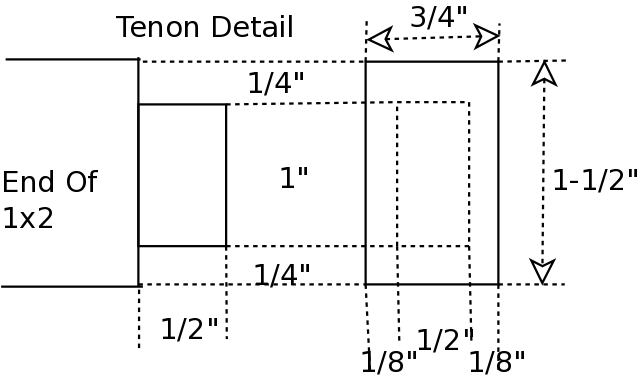
Below is a diagram of one of the tenons I cut using this jig.
It shows the depth of all 4 shoulder cuts and the length of the tenon itself.
Note: the workpiece must be long enough to cut the tenons and still have the desired distance between tenon shoulders which sets the spacing between the frame pieces.
Also, these will be blind tenons, that is, the mortise doesn't go completely through the board so the tenon must be shorter than the thickness of the board containing the mortise.
In this case (this diagram) the tenon is 1/2" long, the mortise is 5/8" deep, and the frame piece (with the mortise) is 3/4" thick.
The blind mortise is sometime called a "stub" mortise.
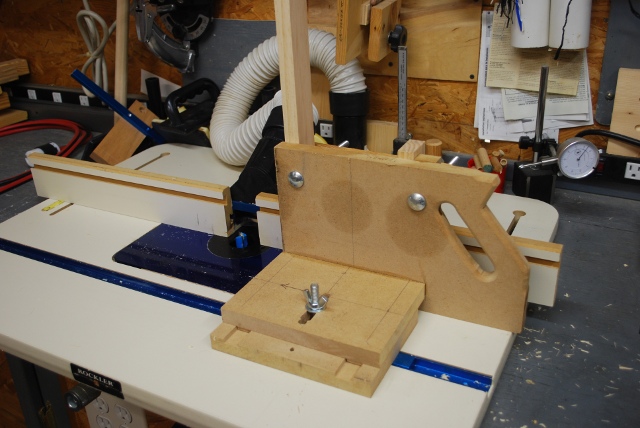
The Jig
|
I made this tenon jig a few years ago, I don't even remember the project I was working on, but here it is.
|
|
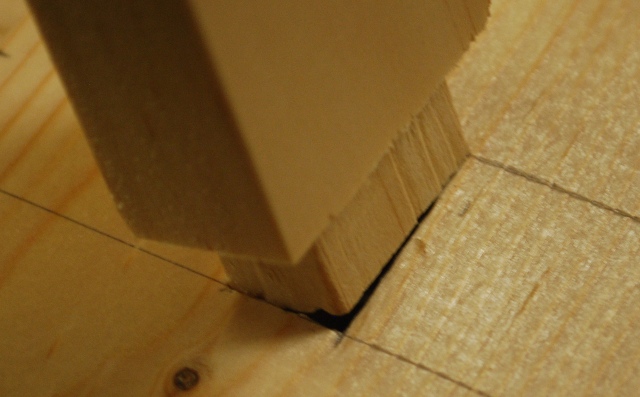
Cutting the tenon on one end of a wine bottle support bar.
Note the work piece is clamped to the vertical.
Tenons usually have 4 shoulders so it takes 4 cuts, this one has identical shoulders on opposite sides, but the adjacent sides are different depths.
|
|
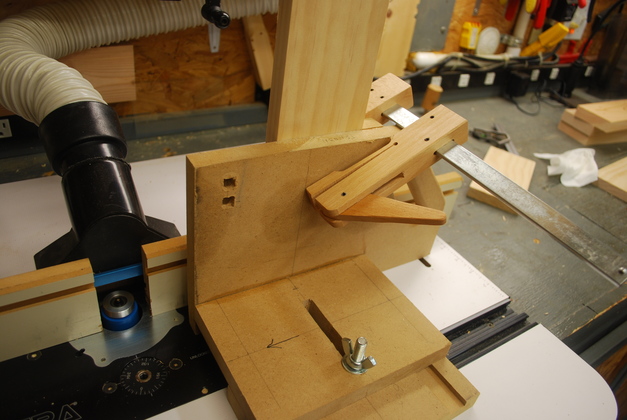
The top horizontal is adjustable with respect to the bottom horizontal (slides in and out) which is referenced to the miter slot on the router table.
Adjusting the top horizontal adjusts the depth of the tenon's shoulder.
I set the fence on the router table to adjust the depth of cut just as I would for a rabbet.
Then I place a piece in the clamp on the jig and push the piece against the fence, before tightening the wing nut show here.
|
|
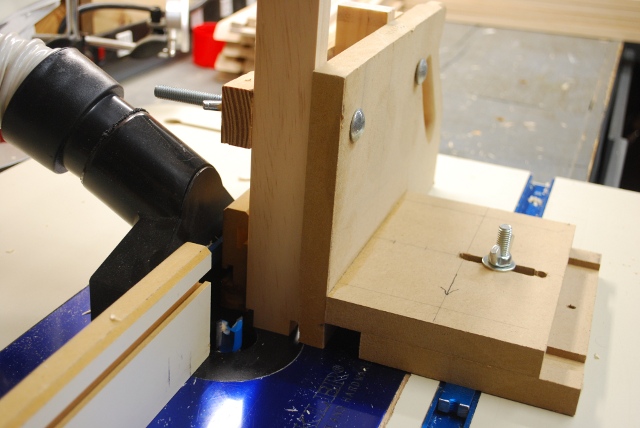
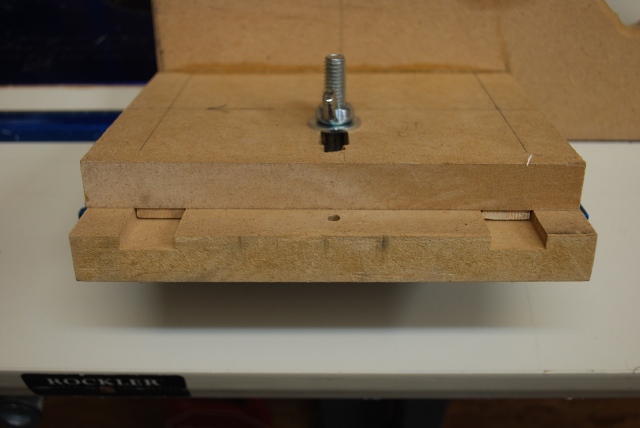
Here i've removed the wing nut and folded the top section of the jig back so you can see how the two sections adjust.
I was careful when I machined the slots and cut the rails so it fit close and was aligned correctly.
You can also see the top of the flat head screws holding the miter bar (slides in the miter slot on the router table).
The two flat heads are countersunk slightly below the milled slot so they don't interfear with the slides.
|
|
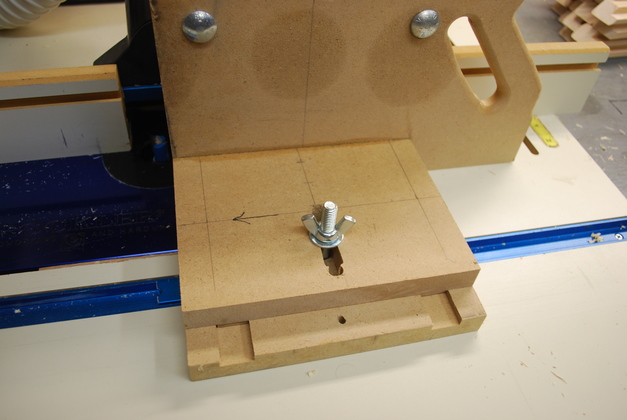
Back together again, you can see how the sliders fit into the milled slots.
The closer the fit the more repeatable the tenons.
|
|
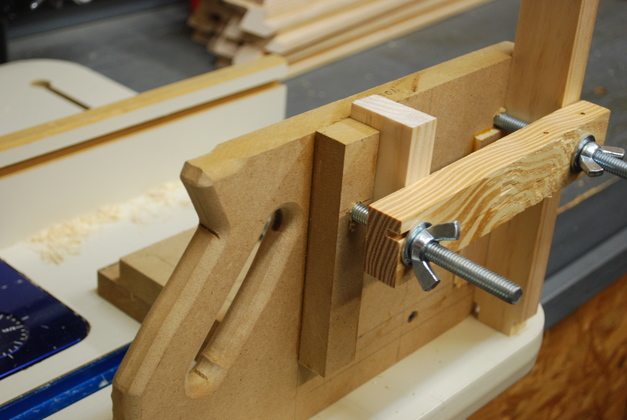
Here is the back side, note the two 3/8" carriage bolts and wing nuts, with the pine clamp bar that holds the piece being machined.
Note the back vertical fence bar(with the carriage bolt passing through it), keeps the piece being machined aligned vertically.
There is another thinner front fence under the carriage bolt on the right side to align small work pieces.
You'll notice the small block, on this side, under the clamp bar, it is the same thickness as the piece being machined and makes the clamp pressure more even on the workpiece, at the far end.
The work piece, at the far end, has already had the shoulders of it's tenon cut.
New Cam Clamp.
|
|
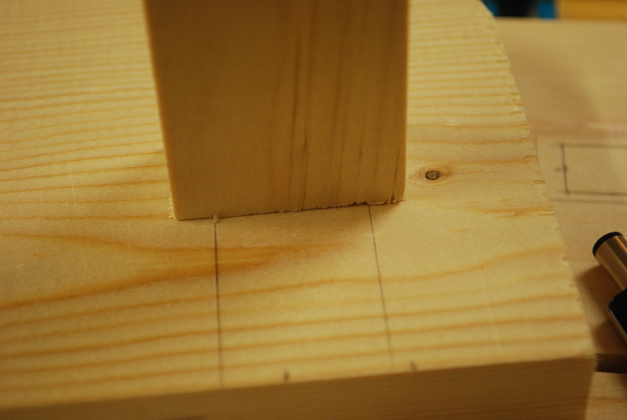
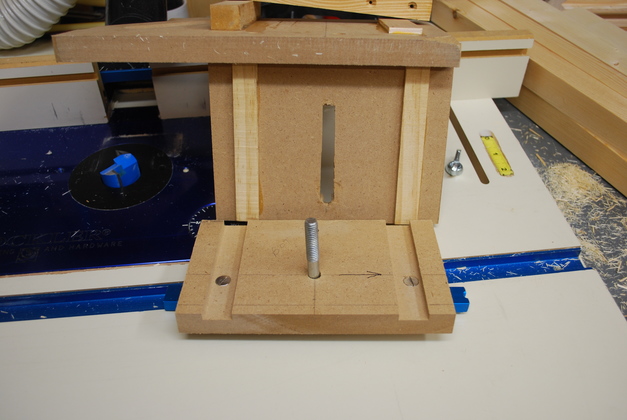
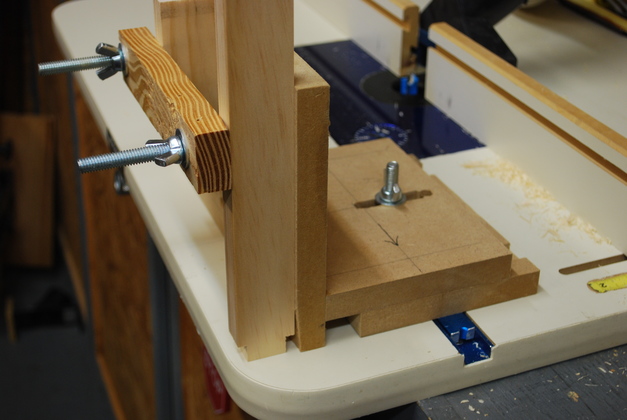
With the jig reversed in the miter bar, you can see the workpiece clamped with two shoulders already cut.
|
|
You can see the front alignment fence that keeps smaller workpieces vertical while being machined.
You can also clamp a wider piece between the two carriage bolts.
|
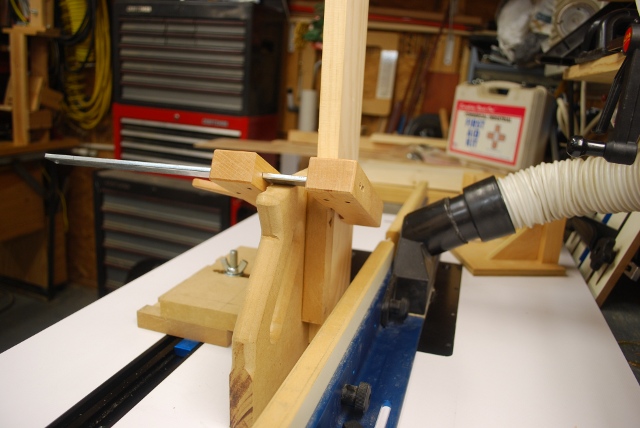
New Cam Clamp
|
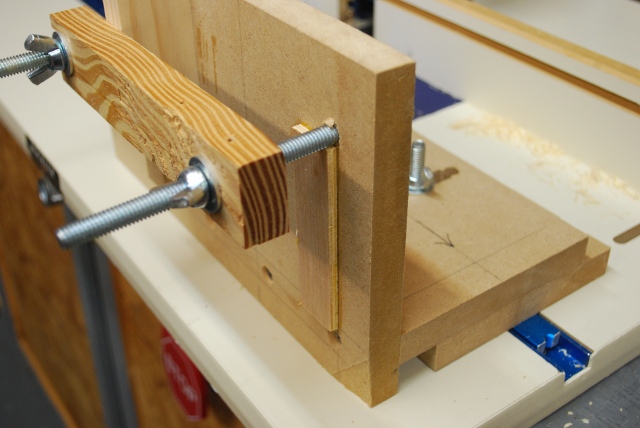
Jig using new Cam Clamp instead of old carriage bolt clamp.
Link to the old clamp.
|
|
Look from back of cam clamp on tenon jig.
|

|
A look from the edge of the new tenon.
|