| 
| 
|
|
King Storage Bed
|
||
|
|
|
|
|
King Storage Bed
|
||
| Construction Info | Lumber Prep | Main Box | Head Box |
| Pegs | Drawers | Panels | Finished |
| Box Number Legend |
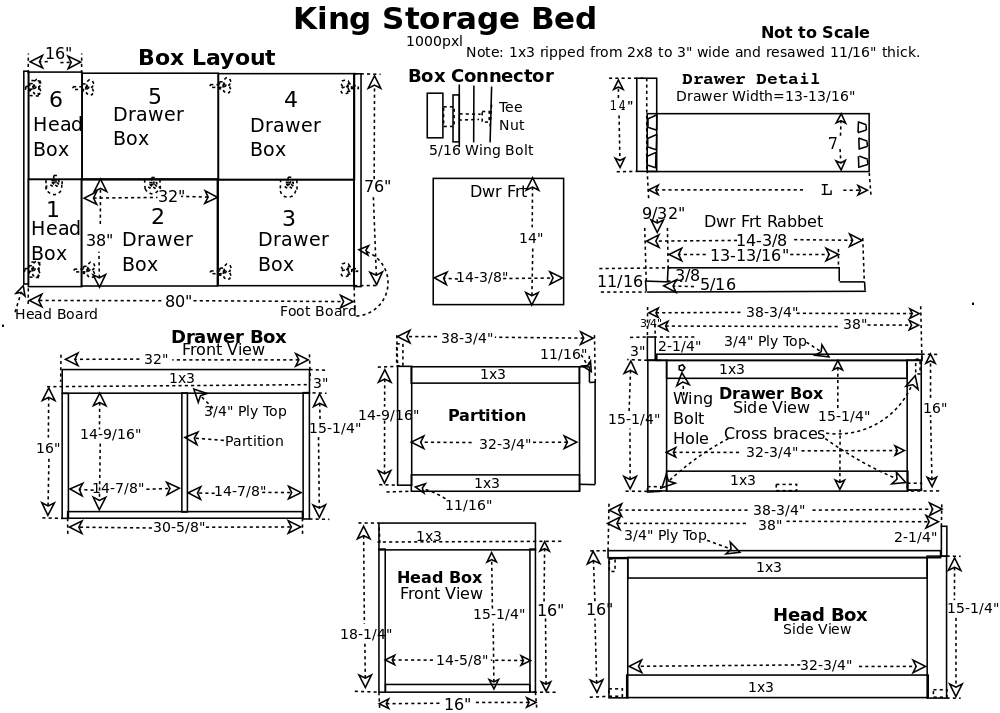
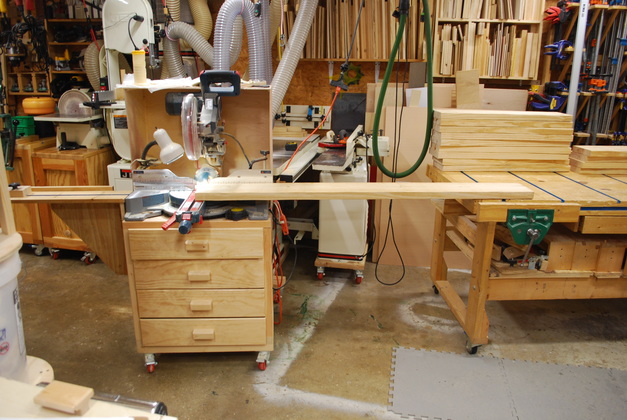
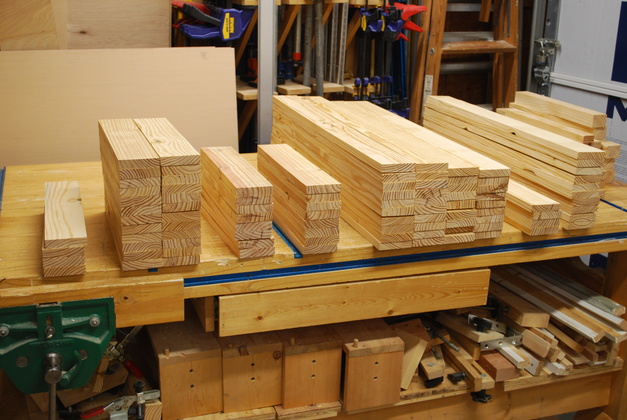
Cindy decided she wanted a storage bed for her king, but she wanted to use her existing headboards, so... Her corner bed posts are 5"X5" square making the outer width 81" and the inner width 71", between posts. There is a 9" clearance above the floor and below the foot board, which means I'll have to make panels on the two foot boxes so they will have a nice appearance under the footboard.
|
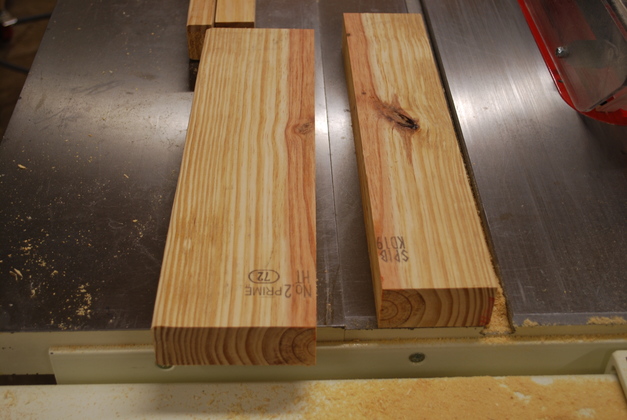
2x8s being cut to length (resized). Note the workbench is the same height as the miter saw's table, this plus the extension makes for a great crosscut area. |
|
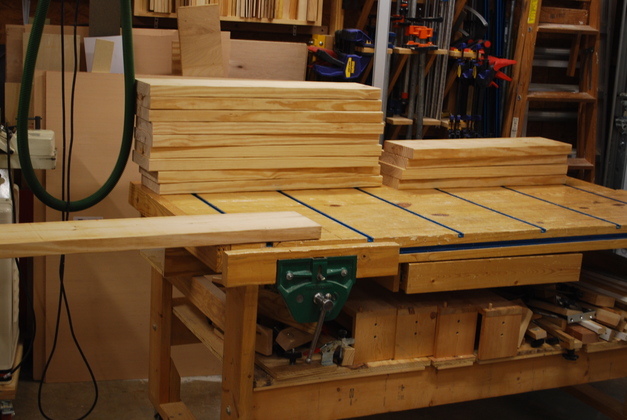
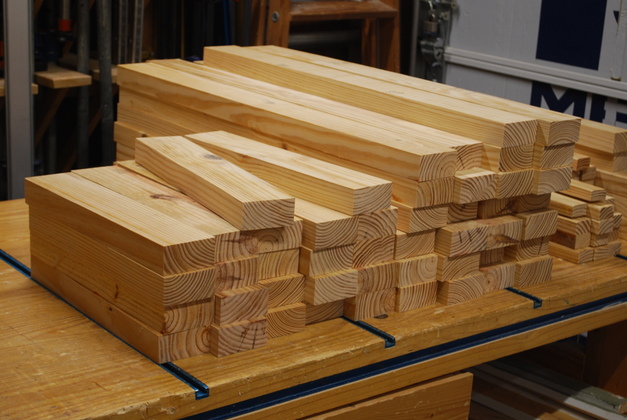
Stack of 2x8 cut for horizontals. |
|
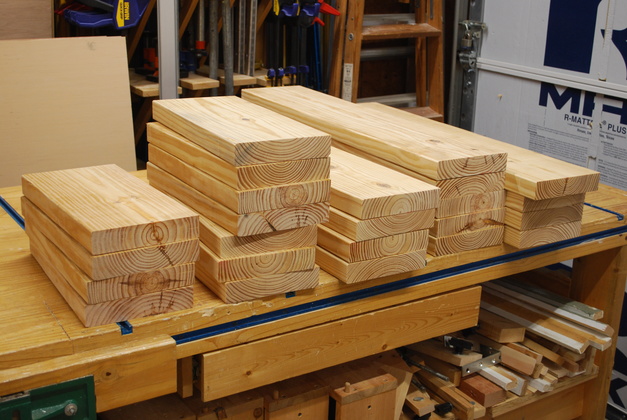
All the 2x8 cut to length. |
|
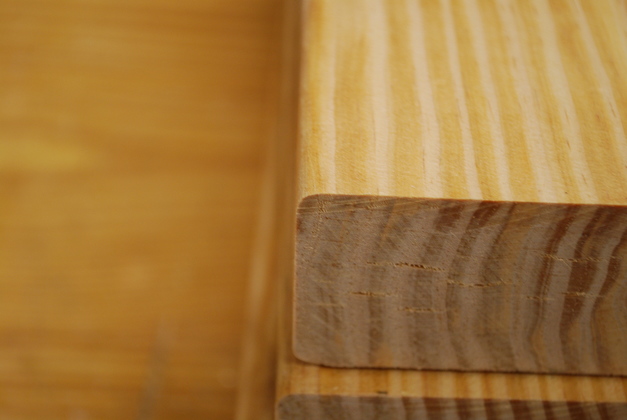
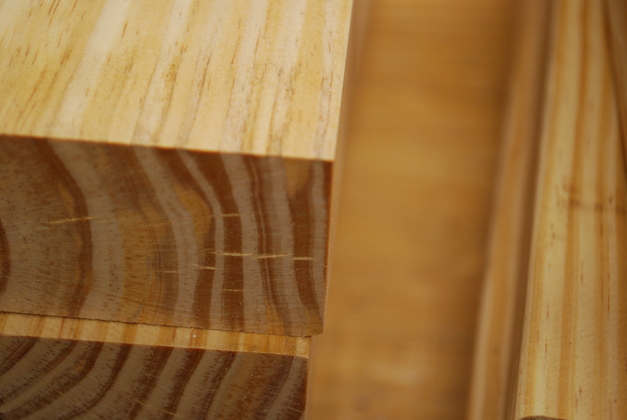
2x8 corner from the mill. |
|
First 1/8" rip makes a square corner. |
|
Ripping 2x8s to 2x3s, first 3" rip. |
|
Yellow pine 2x3s ready to mark and resaw to 1x3s. |
|
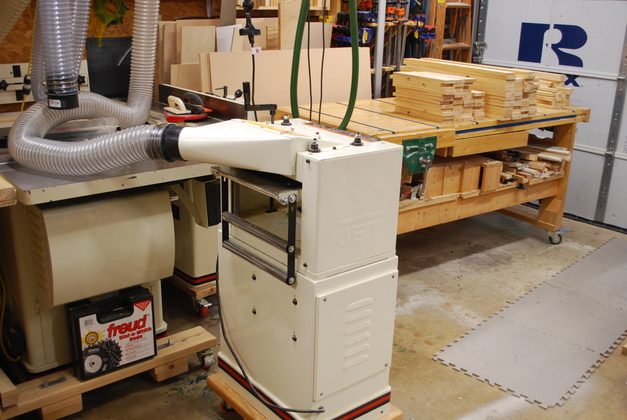
After resawing I run everything through the planer to remove the bandsaw marks and insure all pieces are the same thickness. |
|
1x3s after resawing, planing, and sorted into sets.
Ready to slot and glue.
|
|
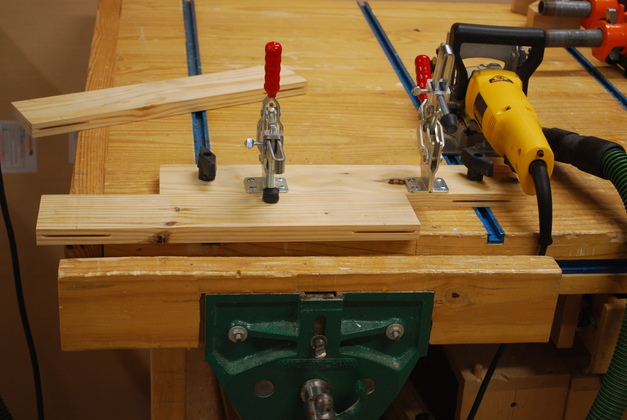
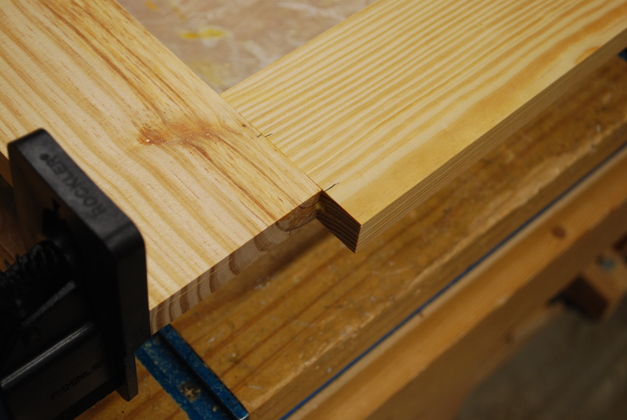
Cutting slots for biscuits in box side verticals. |
|
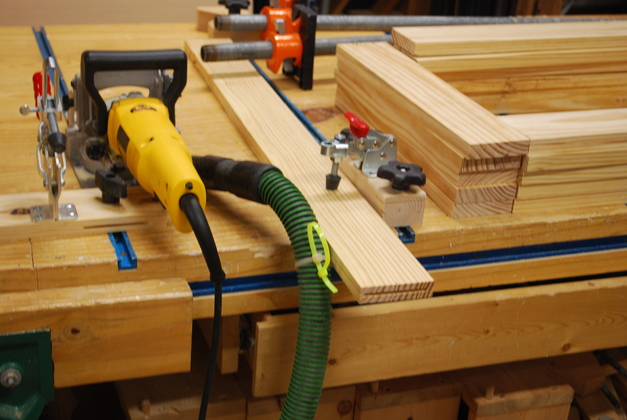
Including biscuit slots in the ends of the horizontals. |
|
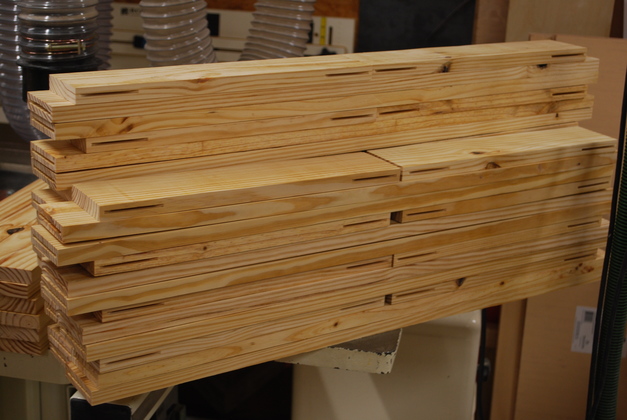
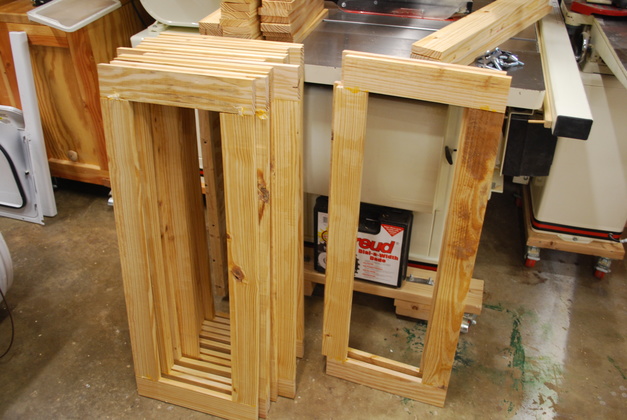
Ten of the twelve box side sets all slotted and ready to glue. All 6 boxes have the same side dimensions so it makes construction a little easier. |
|
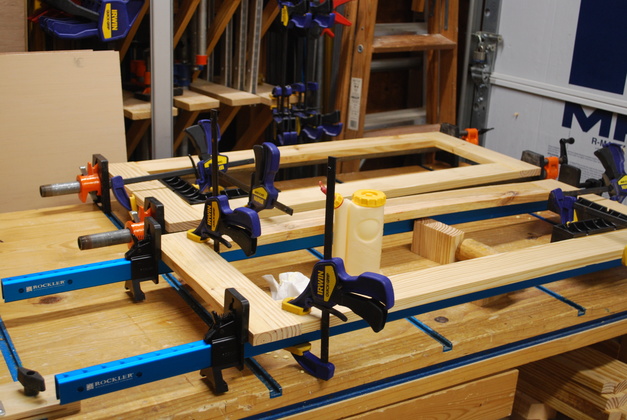
Two sides in the glue, Note the ClampIts keeping everything square. |
|
Partition in glue clamps. |
|
Note the offset for the crossbrace. |
|
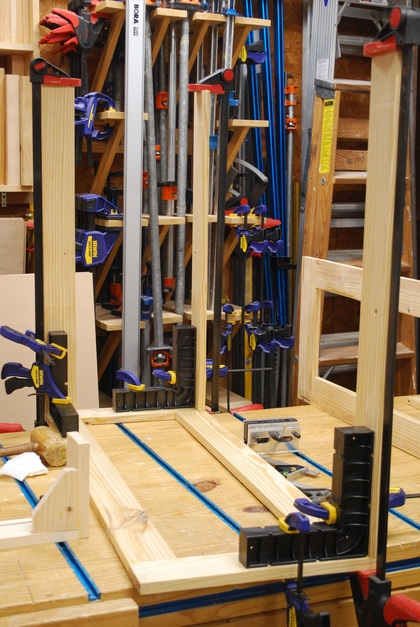
Frame sides (left) and 2 of the partitions (right). Ready to sand. |
|
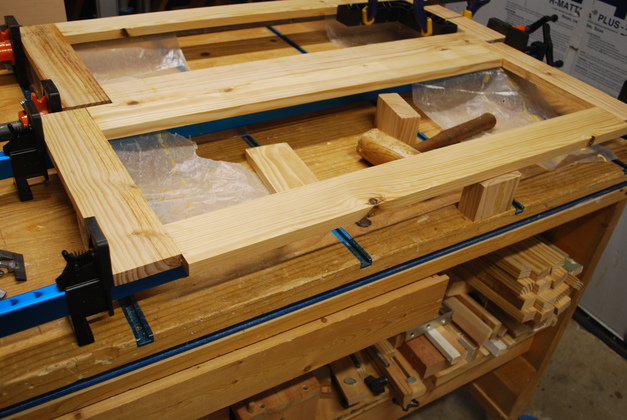
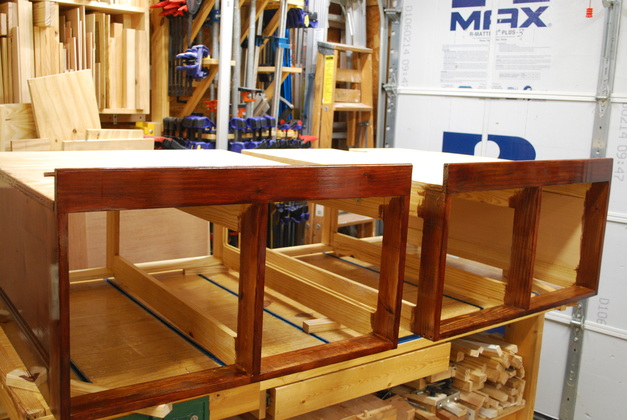
Rabbet in inside of main box side. These are for inset panels at the foot of the bed. Cindy wants to use her old head and foot board but you can see box 3 and 4 under the footboard, so the two foot boxes will need inset panels. |
|
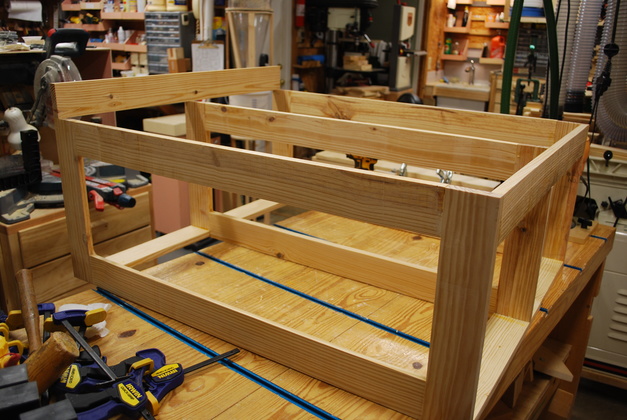
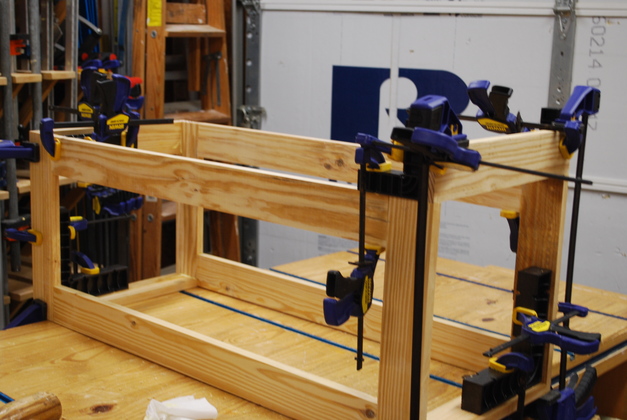
First glue set on main box, cross braces to left side.
Note the ClampIts holding the corners square.
|
|
Second glue set, cross braces to right side. Again note the ClampIts. |
|
Main box frame with sides glued, ready for partition. |

|
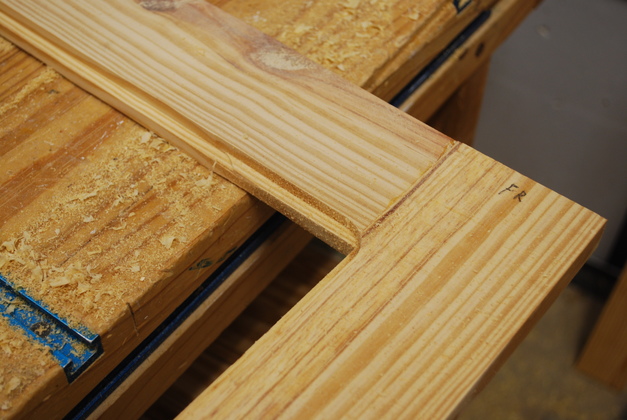
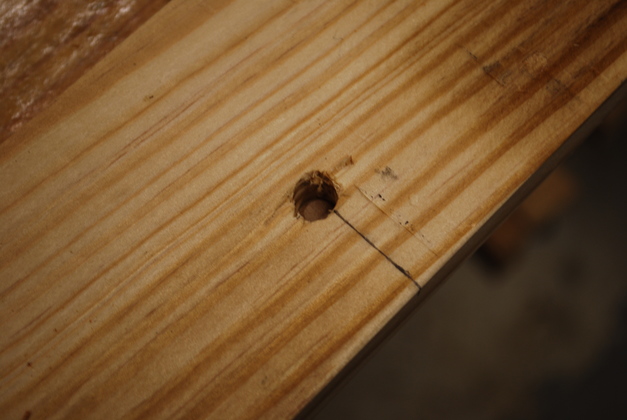
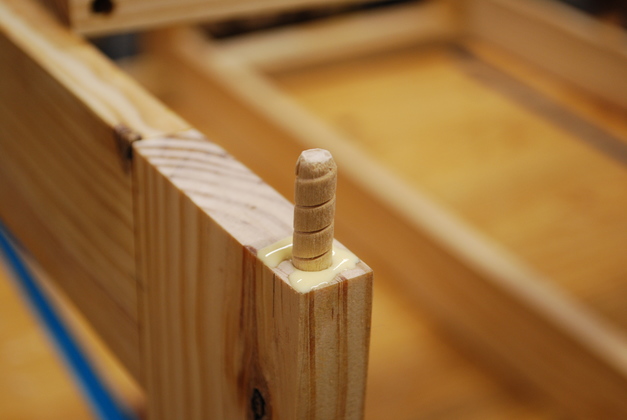
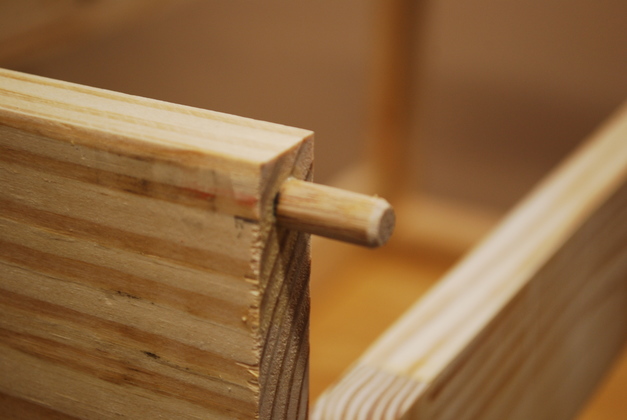
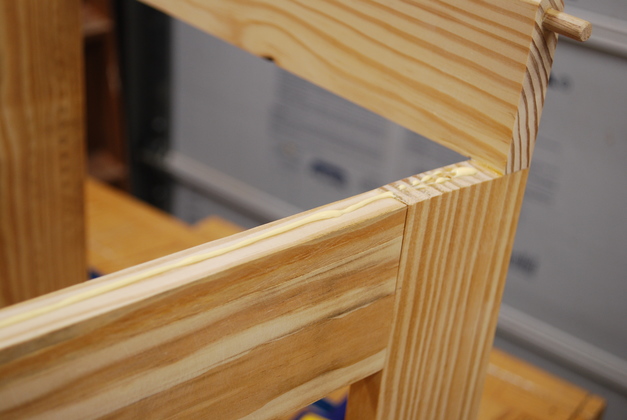
5/16" peg hole in bottom of front partition vertical. Pegs will align and help hold the partition to the cross braces while the glue sets. |
|
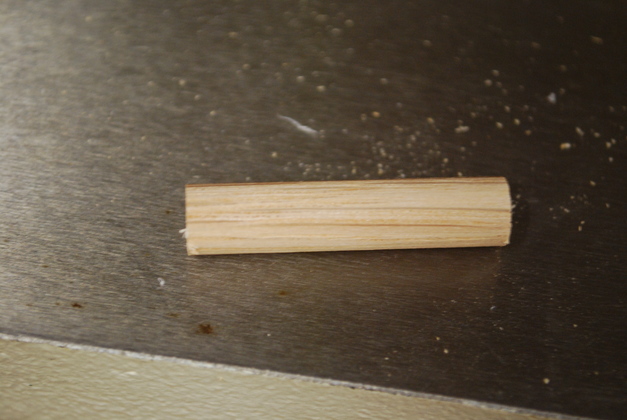
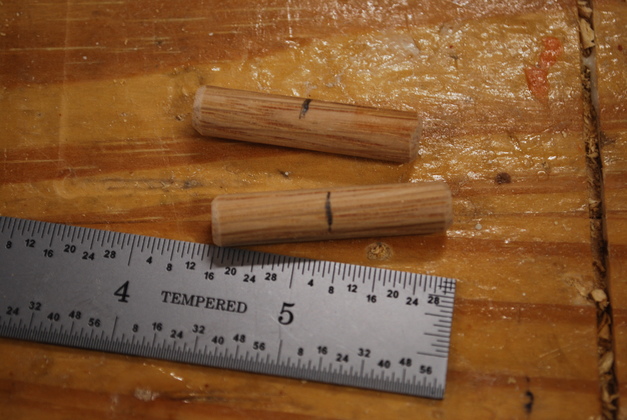
Peg sawed to 1-3/4" from a 5/16" dia. oak dowel. |
|
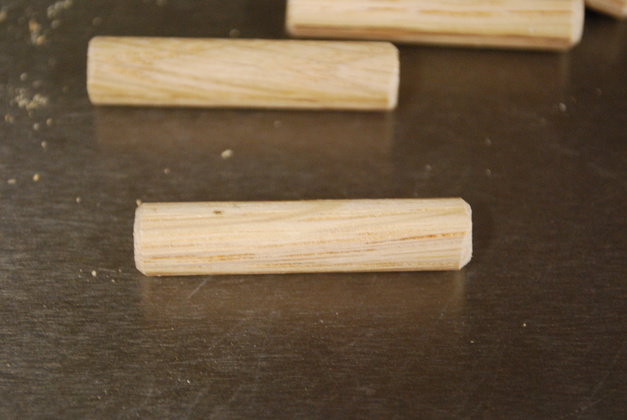
Oak pegs after chamfering on a disk sander. |
|
5/16" peg hole in the center of the lower front cross brace.
Pegs not only add strength but make sure the partition is aligned correctly.
The partition must be in the exact center of the box since it has drawer guides attached to it.
|
|
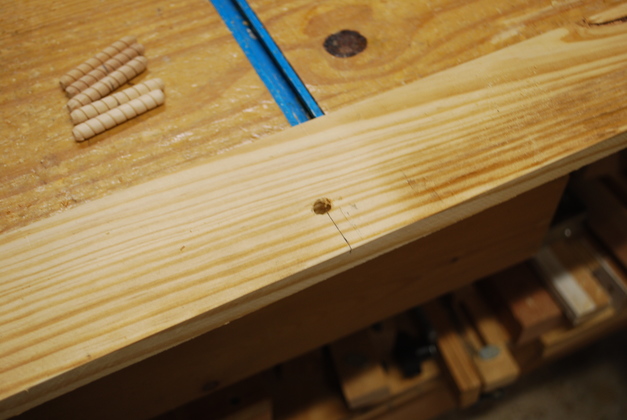
Peg pushed just barely into hole in front cross brace from below. |
|
You can just see the top of the peg looking down into the hole. |
|
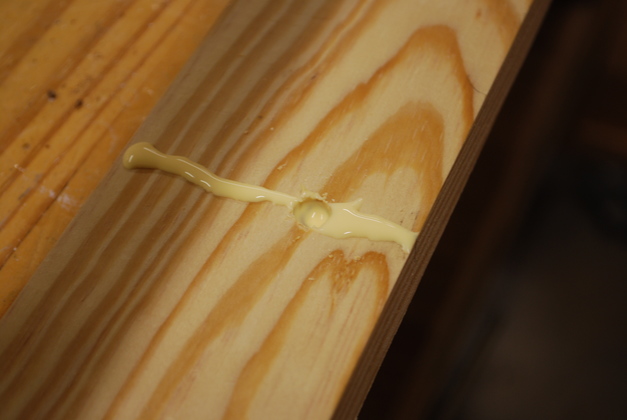
Glue where the partition will go and some extra into the peg hole. I'll position the partition, tap the peg up into it, then clamp the joint. When the peg is tapped up into the partition some of the glue will be carried up into the partition's peg hole. |
|
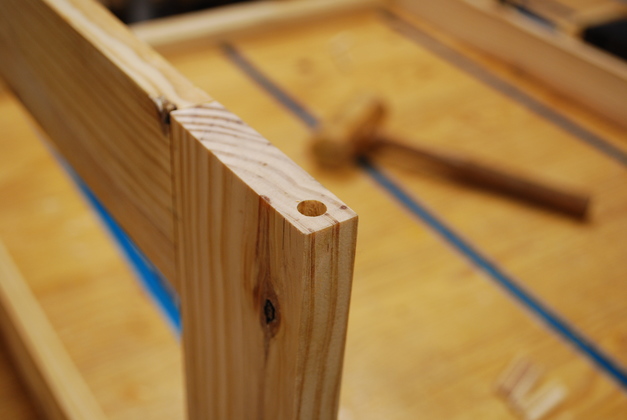
Peg hole in top of left front vertical. |
|
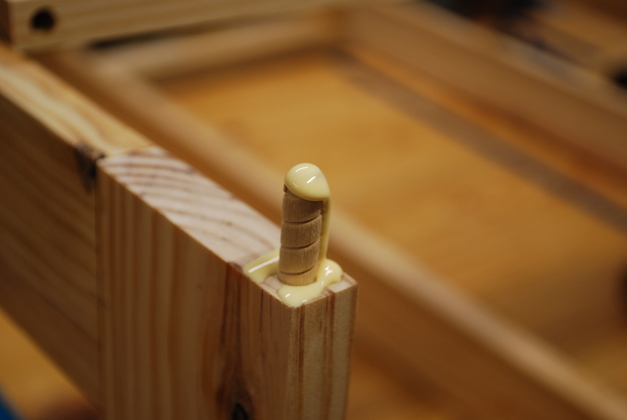
Glue on top of left front vertical with some in the peg hole. Also note the top cross piece and it's left end peg hole. There are three peg holes drilled into the top cross piece, one at each end and one exactly in the center for the partition. |
|
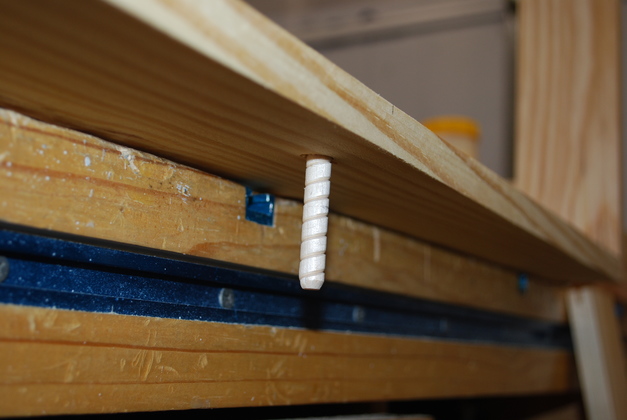
Peg driven half it's length into glued hole. I mark a pencil line around the peg so I know just how deep to drive it. |
|
Glue the top of the peg letting a little run down it's side. The glue will be spread around the peg before I tap on the front cross piece. |
|
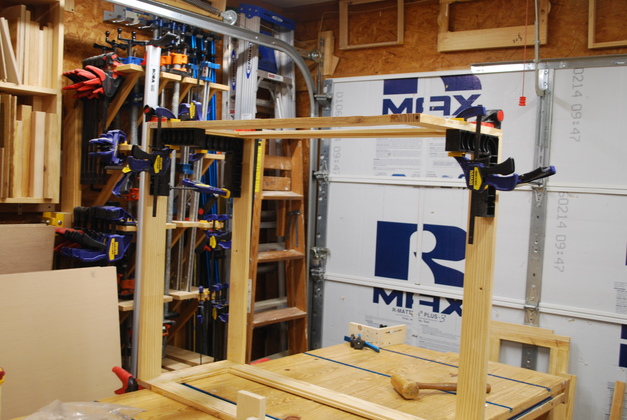
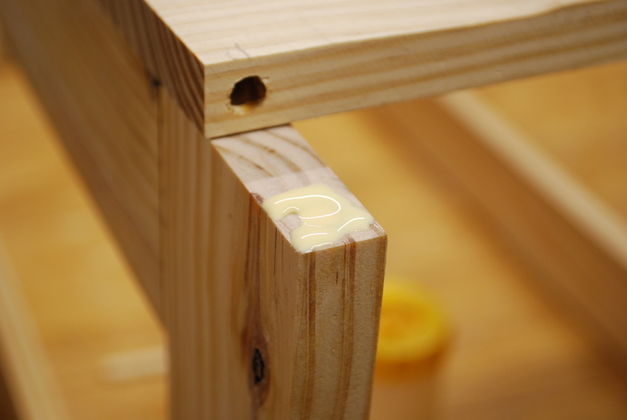
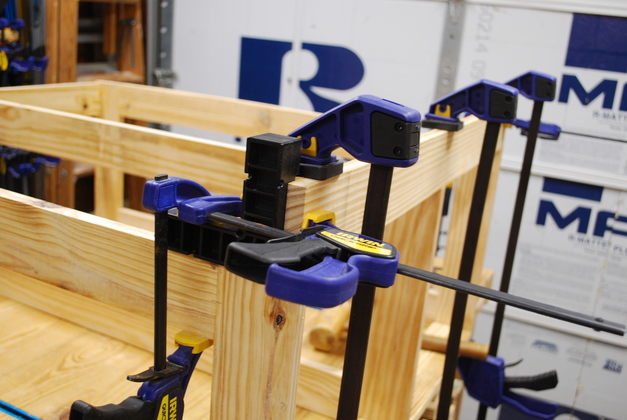
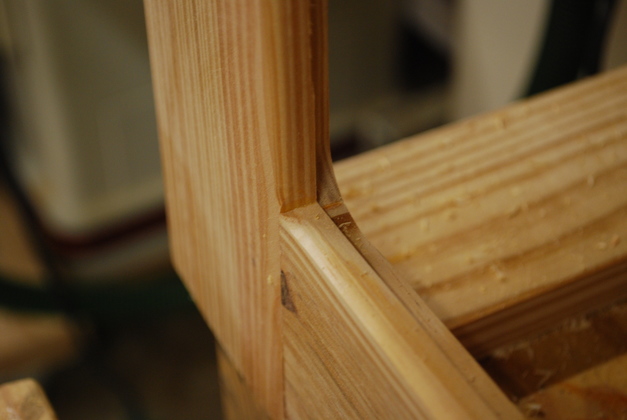
Place top cross piece on pegs, tap down, then clamp all three joints.
Notice the small ClampIts holding the top cross piece vertical.
The 3/4" top will be glued to the top of the frame and the back side of the top cross piece to make it more rigid.
Also, I haven't drilled the 5/16" peg holes in the ends of the top cross pieces that align all the top cross pieces.
|
|
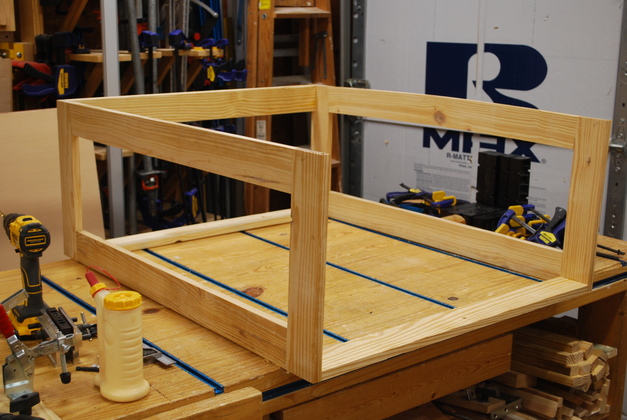
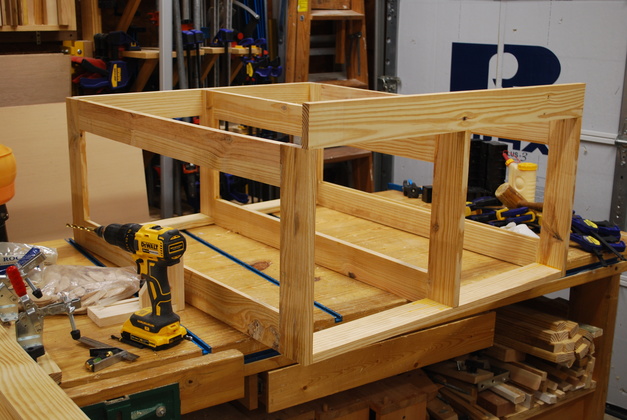
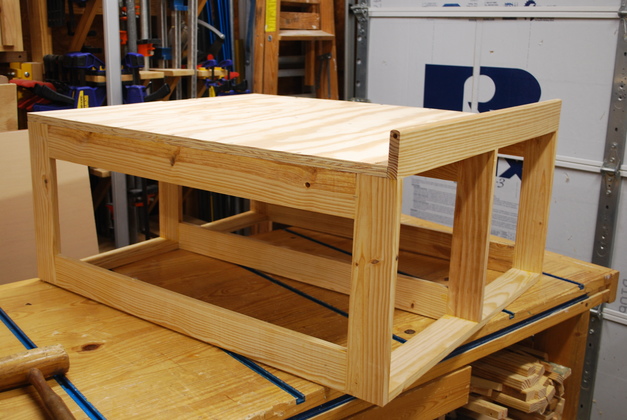
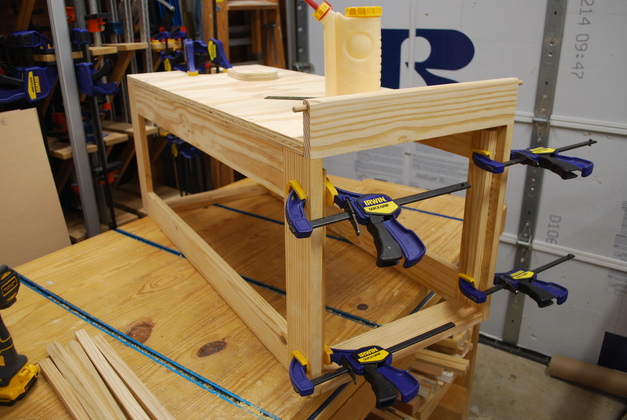
Main box frame glued. All that remains is the top (which I haven't cut out yet), drilling the wing bolt holes to attache it to it's adjacent boxes, and mount the drawer slides. |
|
Back of the main box glued frame. |
|
Main box with top glued/screwed on ready to sand and paint. |
|
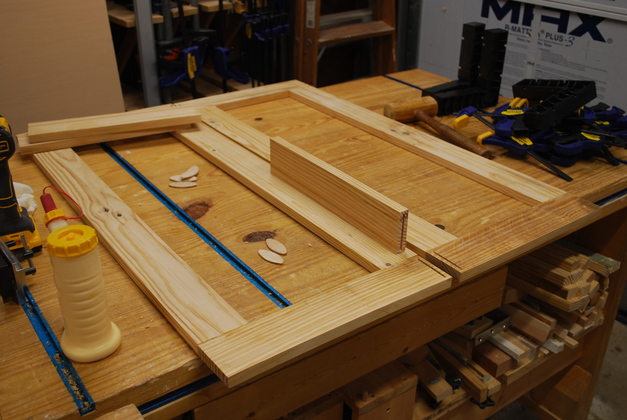
Head box sides and cross braces laid out ready to glue. |
|
Biscuit slots cut for lower front cross brace. |
|
Last head box in the glue clamps. Note the ClampIts. |
|
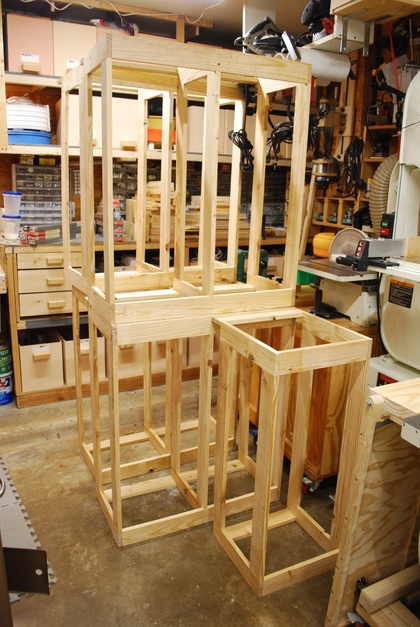
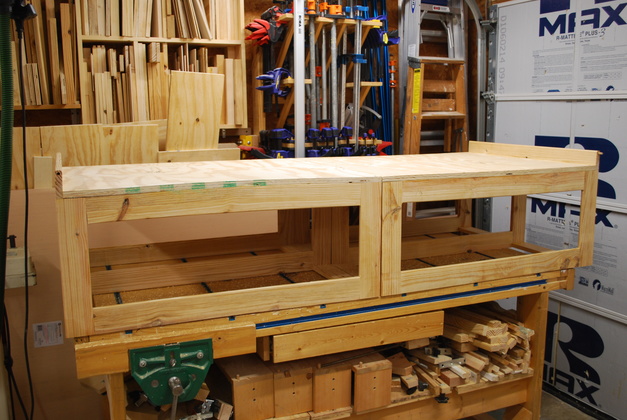
4 main boxes and one of the head boxes glued, ready for tops. |
|
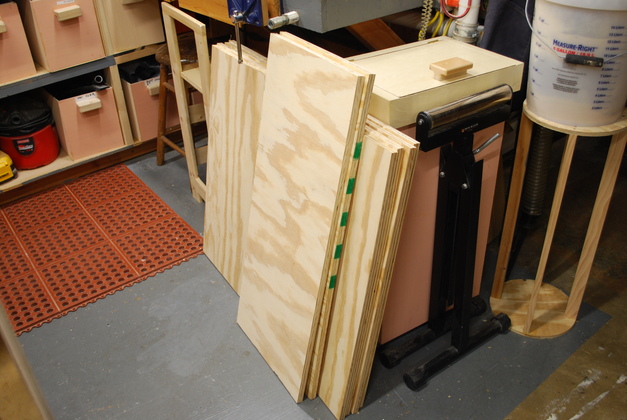
Both main and head box tops. Its December 30th (2017) and we're having a little cold and rainy spell, so Yesterday, I got out on our covered patio and cut up two 3/4" sheets of plywood which had been stored there. I can't work on 4x8' plywood sheets in the shop its too small. |
|
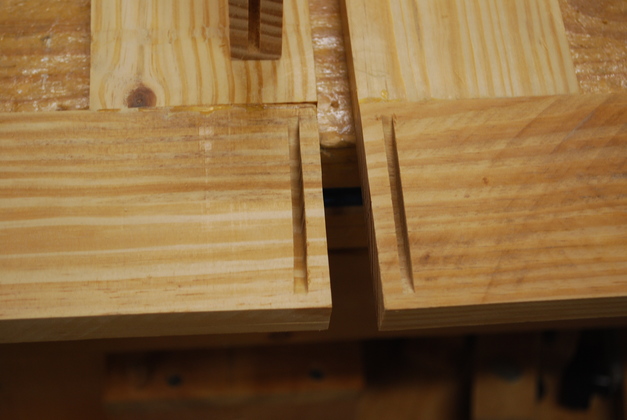
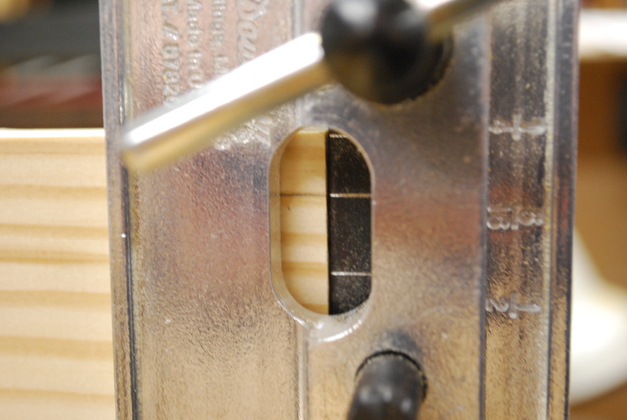
About to drill the dowel hole in the end of the top cross brace. This dowel ensures the top cross pieces of each box are exactly in line, like a continuous board. |
|
The mark is 3/8" down from the top. I do this before I round the top edges of the top cross brace. |
|
Oak 5/16" x 1-1/5" long pegs marked at the center. |
|
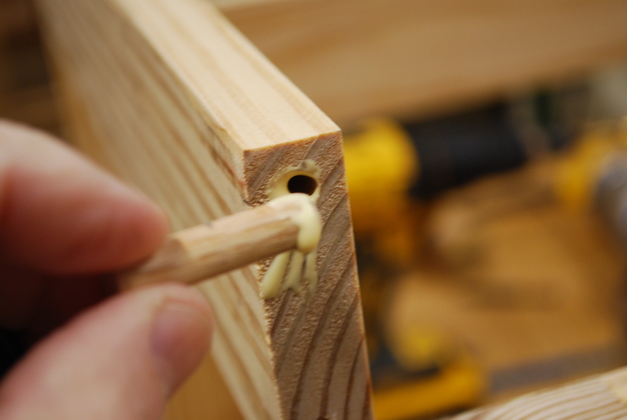
A little glue in the hole and a little more on the peg. |
|
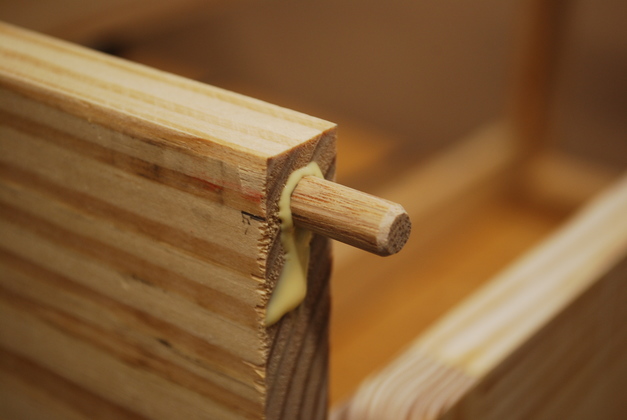
Peg driven into the hole with excess glue. |
|
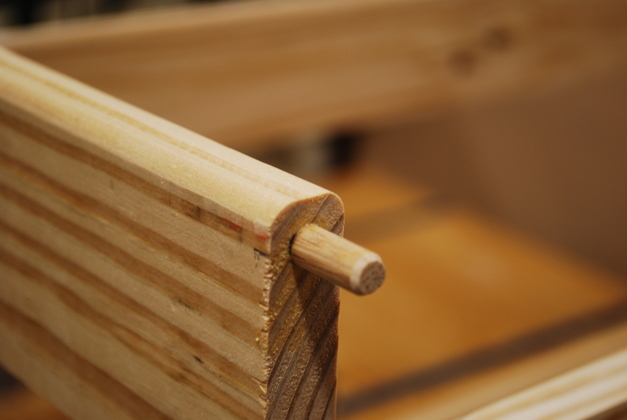
Glue wiped off, and if you look close you can see the half way pencil mark on the peg. Also note the top edges of the top cross brace haven't been rounded yet. |
|
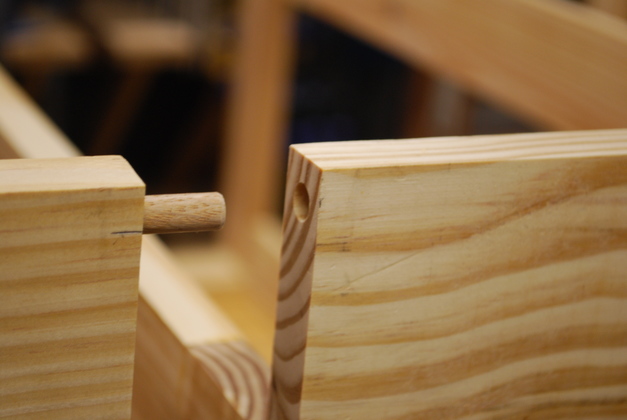
Pegs on adjacent top braces line up. The hole on the right is drilled 21/64", 1/64 larger than the peg to make assembly/disassembly easier. |

|
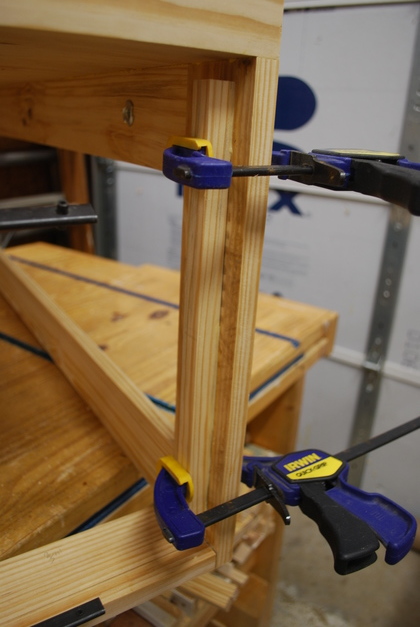
Making sure two adjacent box top frames line up and peg engages. |
|
Edge rounded. |
|
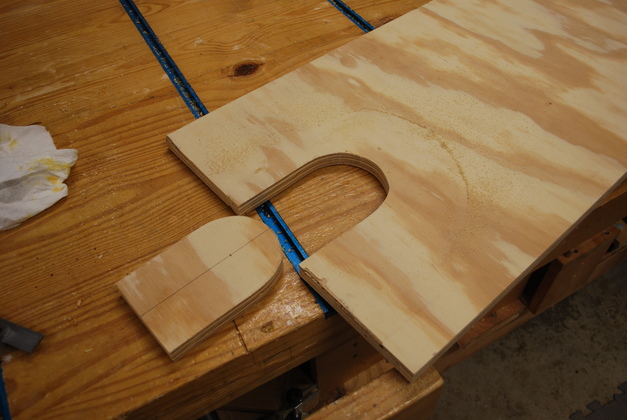
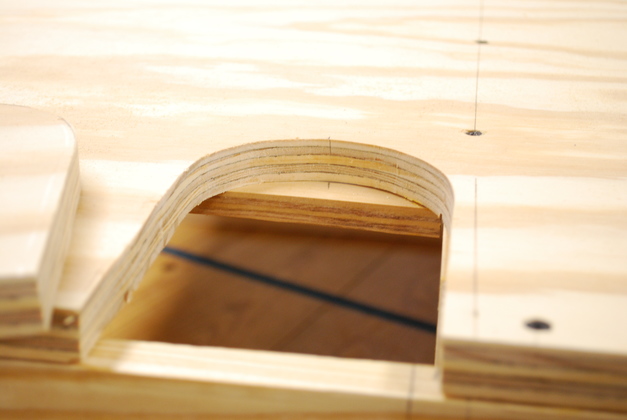
Head box top with dog door cut out. More on the dog doors later. |
|
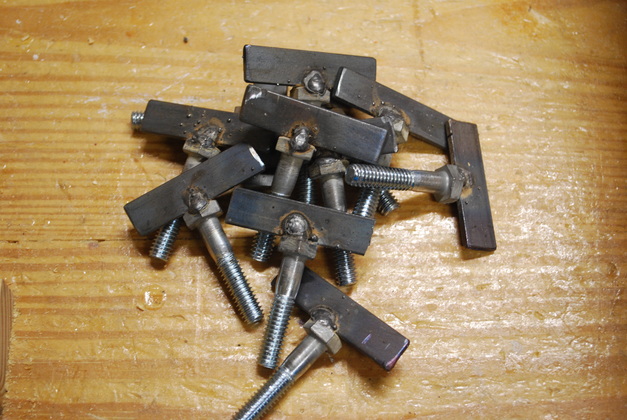
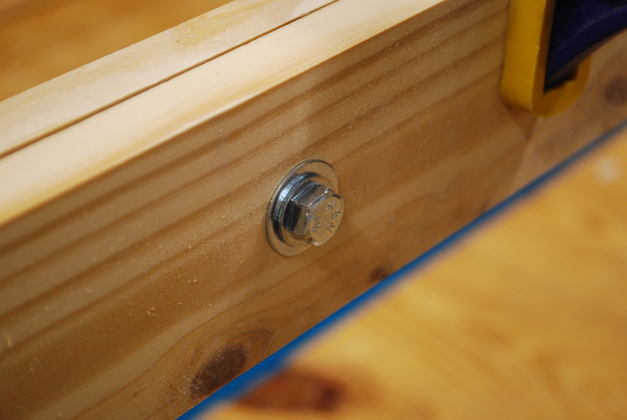
Stack of wing bolts, welded and ready to paint. These will hold the boxes together when finally assembled. Please excuse my "drunk dirt dauber" welding. |
|
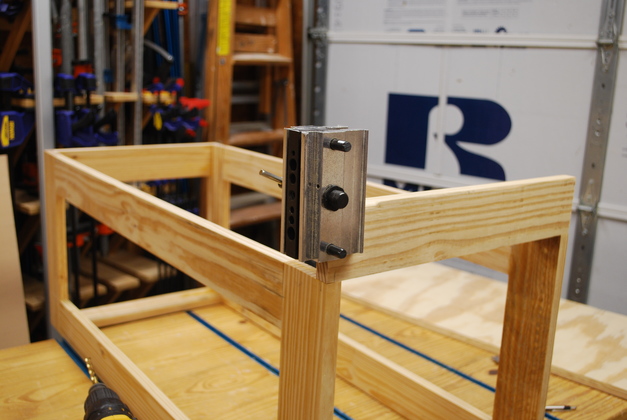
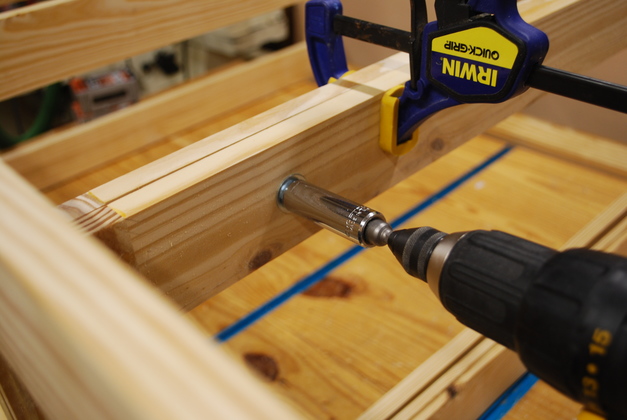
Wing bolt hole drilled between two adjacent boxes. About to insatll tee nut. |
|
Installing wing bolt tee nut. |
|
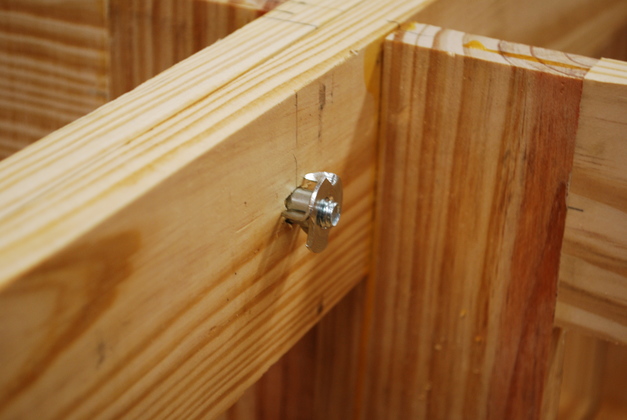
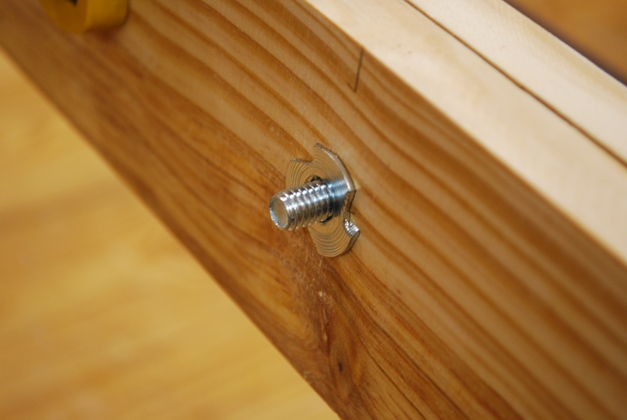
Tee nut fully engaged. |
|
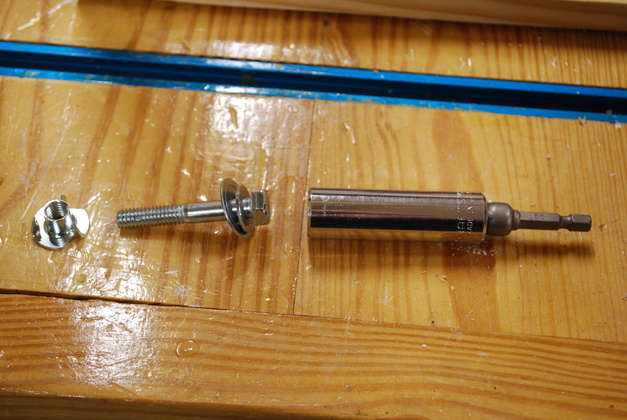
Head of 5/16" hex bolt and washers used as tee nut installer. |
|
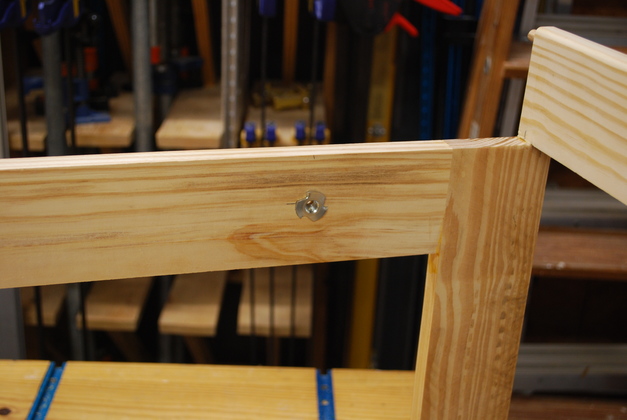
The tee nut anchor for the wing bolt in the side of the head box. This is box number 1. |
|
The wing bolt hole in the back of the head box, the tee nut will be in the other head box (#6). |
|
5/16" tee nut installer. |
|
Bead of glue along top of head box. |
|
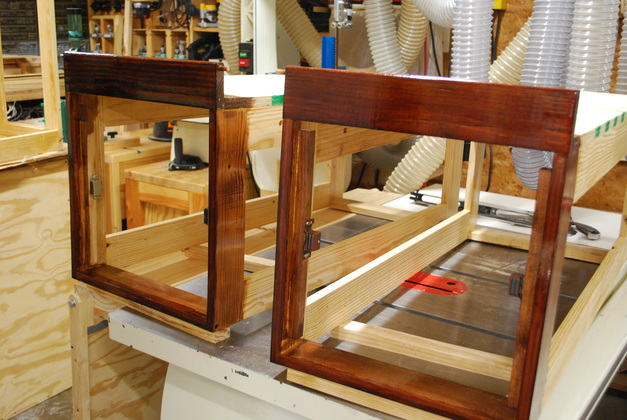
The head box now has it's top glued and screwed down.
Here I'm gluing the front door stops in place, I'll add the magnetic latches next.
|
|
Closer look at the door stop being glued in. |
|
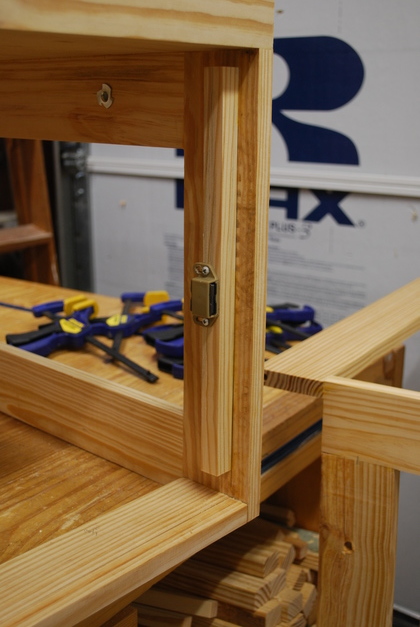
Magnetic latch installed. These two magnetic latches will hold the headbox door in place. |
|
Number 1 head box ready to sand and paint. |
|
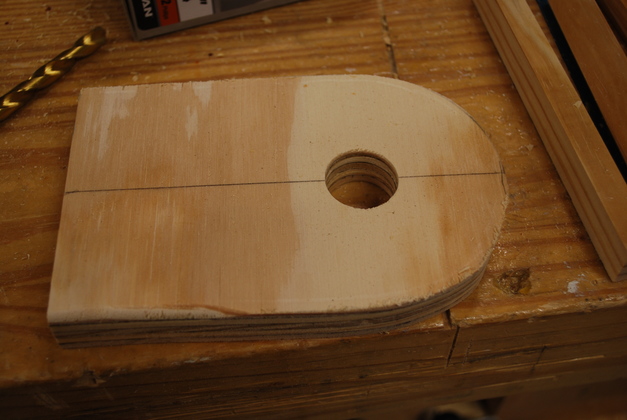
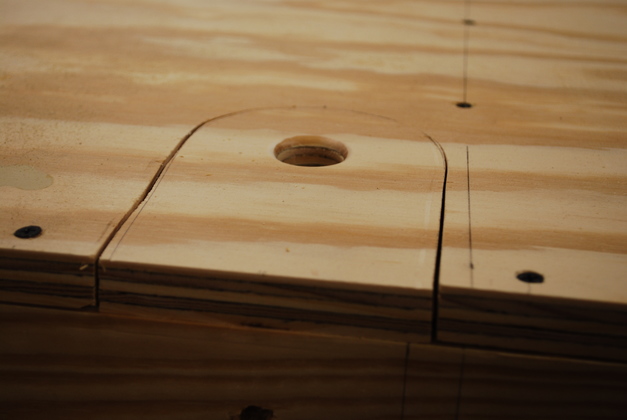
Dog door with 1" finger hole drilled. The doog doors are 4" wide and 6" tall. |
|
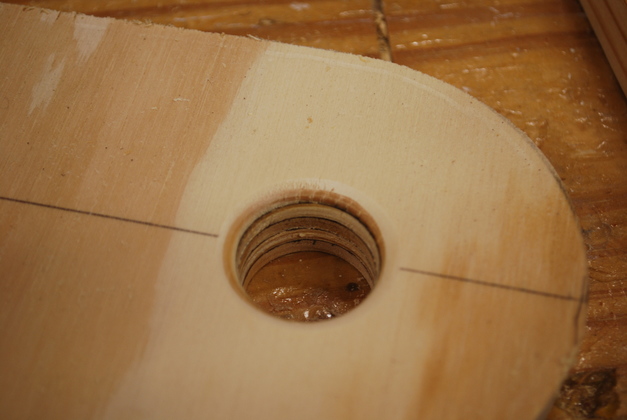
Dog door finger hole rounded off. I only round the top side the bottom is left square, makes lifting a little easier. |
|
Looking underneath dog door at glued door stop. The dog door top rests on this stop and the back frame upper cross brace. |
|
Dog door stop from above. |
|
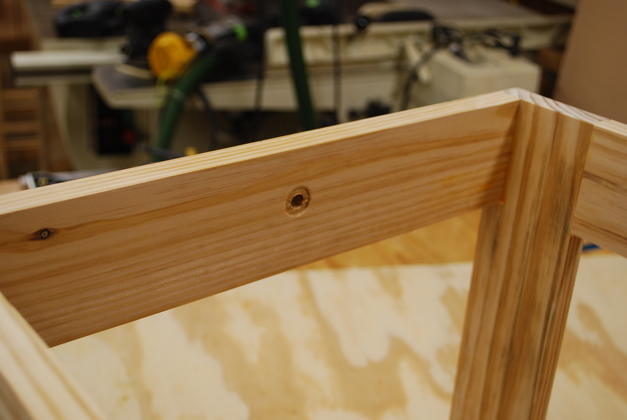
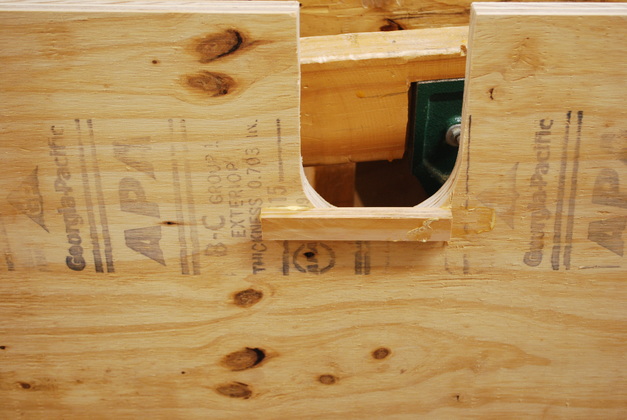
Dog door in place above the wing bolt hole at the rear of the head box. |
|
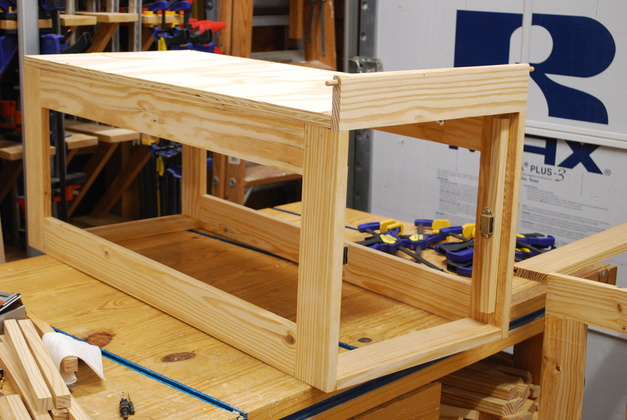
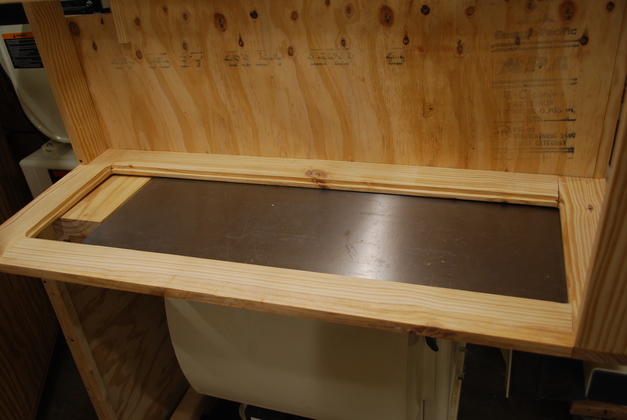
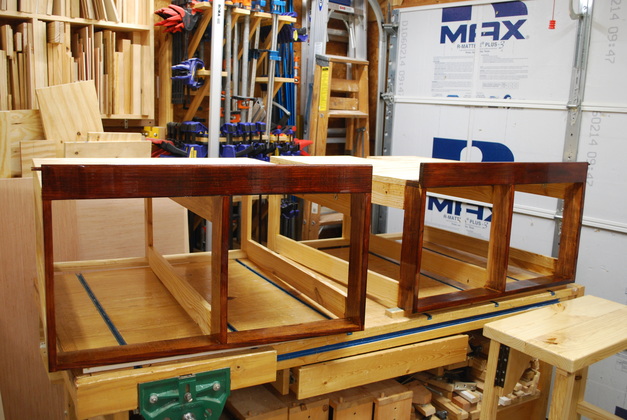
The two foot boxes (3 and 4) joined, ready for inset panels. |
|
The outer edges around the panels has been rounded off. You can also see the rabbet on the inside for gluing the panel. |

|
2x8 cut to length. Here is a link to more info on how I make inset panels. |
|
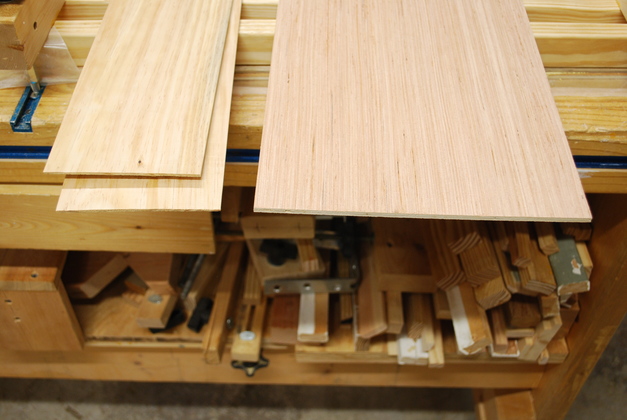
Top of 2x8 marked for resawing into thin pine panels. |
|
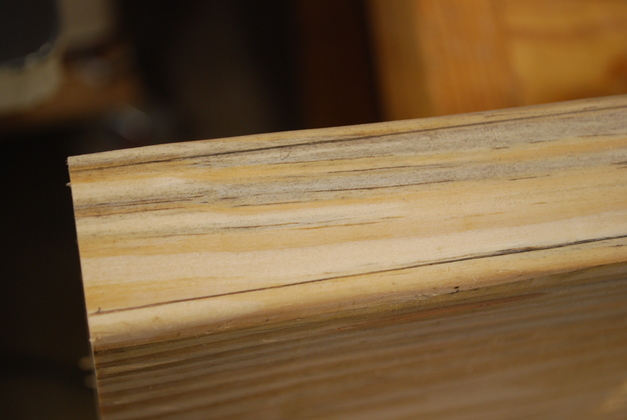
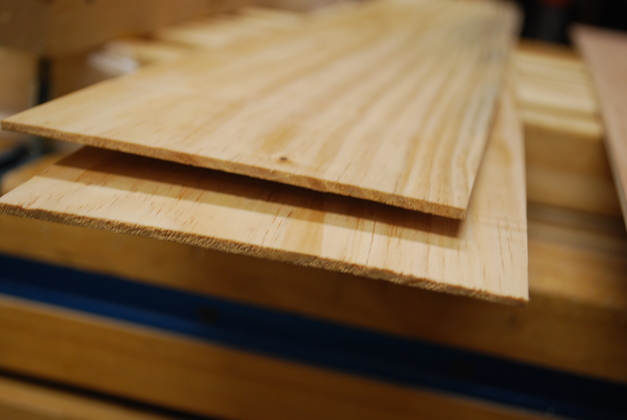
Two of the thin pine panels (on left), and a 3/16" plywood backing on the right. |
|
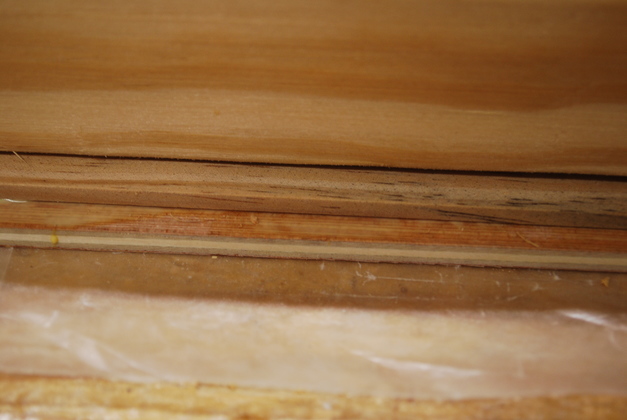
Closer look at edge of 1/8" thick panels. These will be edge joined then laminated to a plywood backing. |
|
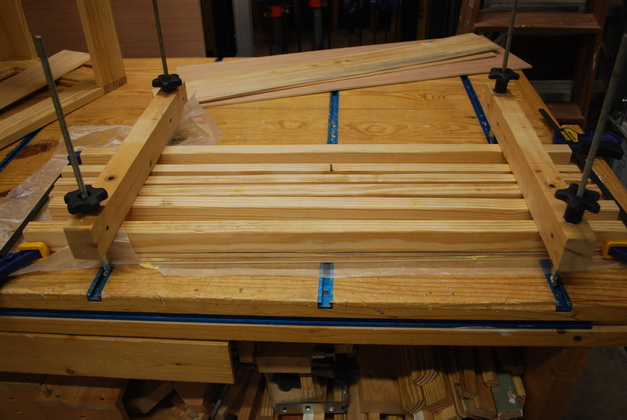
Laminating pine panel to a plywood backing. The long strips are 1" X 1-1/2" pine pressure strips. |
|
Edges of panel being laminated.
|

|
Laminated pine to plywood panel. Note its trimmed to fit and the corners rounded, ready to glue in. |
|
You can clearly see the rabbet for the laminated panel on the inside of the foot box. |
|
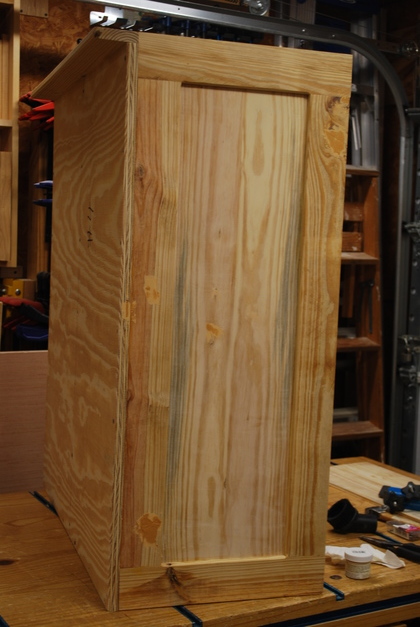
Laminated panel glued into foot box #4. |
|
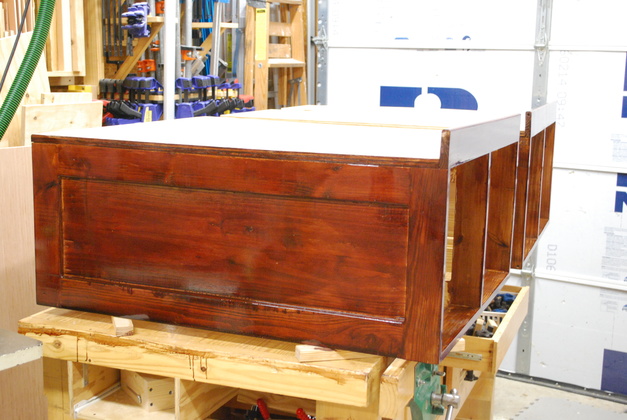
Foot boxes stained. |
|
Foot box fronts. |
|
Head boxes stained. |
|
Main boxes stained. |
|
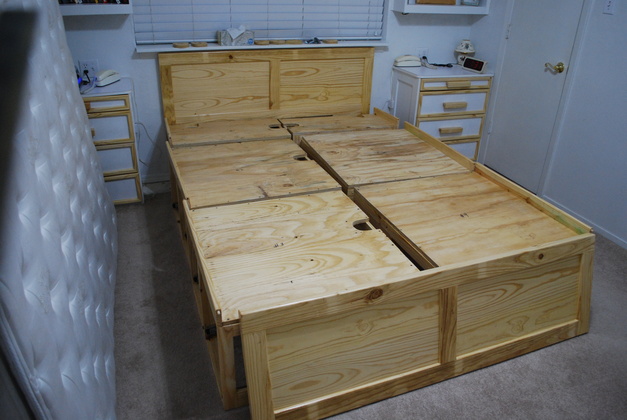
This is actually our queen bed but is shows how the boxes are asssembled. |
|
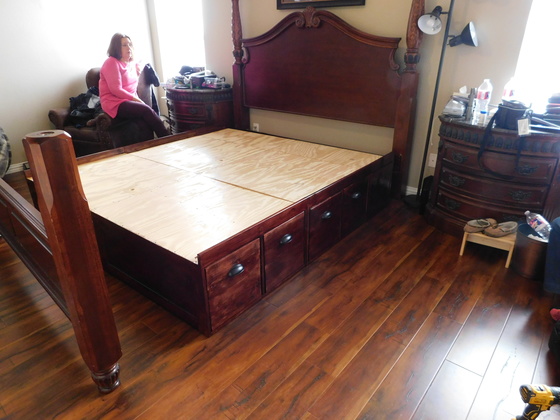
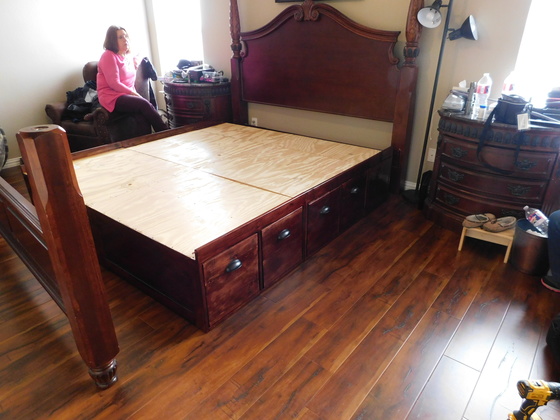
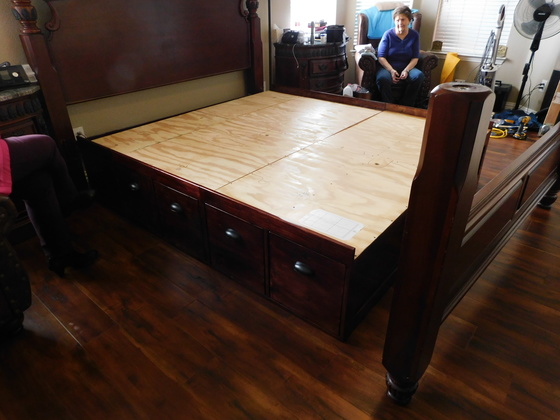
Being installed in Cindy's BR. Thats Susan in the far corner, supervising. |
|
The other side, Betty, supervising, in the other corner. I'm attaching Cindy's foot board. |
|
|
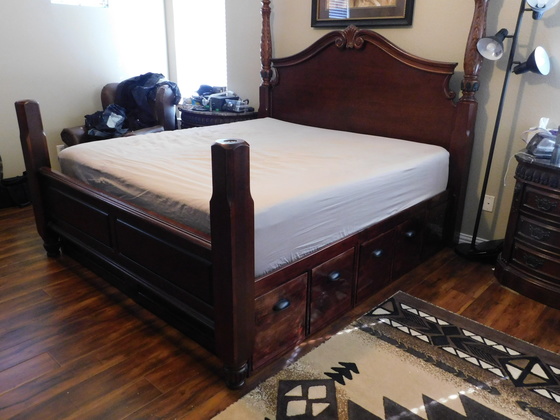
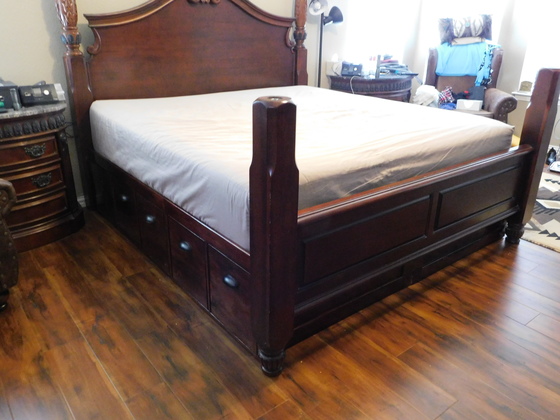
All done, ready to make up and sleep in. |
|
|
I was really tickled that the colors matched the existing head/footboards so well. |

|
|