| 
| 
|
|
Children's Stool
| ||
|
|
|
|
|
Children's Stool
| ||
| Stool Pics | Ivy Pics | Original Stool | Engraving |
| Engraving Alignment | Biscuit Gluing | Diagram |
Betty and I discussed making a small stool for each of the small children in the family for Christmas, and here's what we came up with.
I had previously made a small kitchen stool for Betty to reach things on higher shelves, in the cabinet and we decided to make this our prototype.
Betty's stool was made from scraps I had in the shop and assembled quickly then painted white for durability.
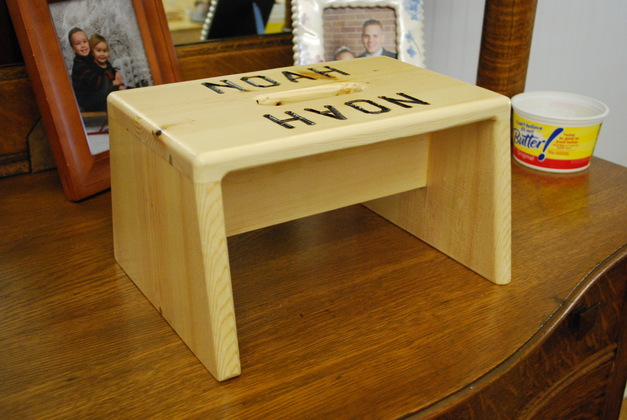
The Oringinal Stool.
But I wanted this stool to be a little nicer.
As I said this was originally going to be for Christmas, but Betty got sick and had to go to the hosiptal at Thanksgiving, then I got a little bug before Christmas, so here it is Jan 06/13 and I'm still working on them. I did finish Kyles loading bench before Christmas.
I experienced a major setback with the stools.
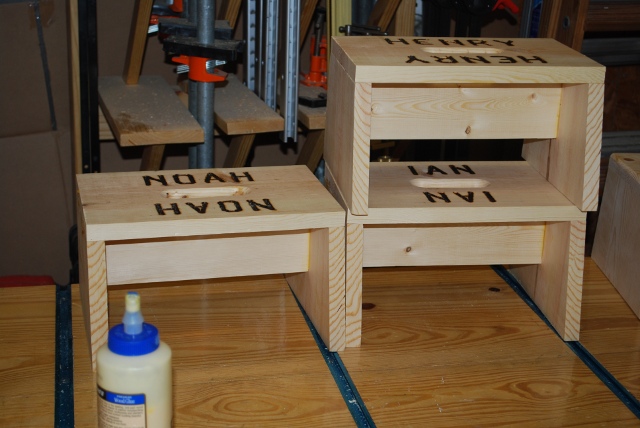
I had engraved, and completely assembled all five, then when filling in the engraving with paint, the paint wicked into soft pine of the stool's top and made a real mess that couldn't be sanded out.
so I had to start over.
When I told John about the mishap, he suggested pyrography (woodburning), which I experimented with.
I was successful using woodburning to make the engraved letters contrast with the pine tops.
I used a biscuit joiner and disk sander, but this project could be done with jigsaw, drill, screws, and sander, if thats what you have. Anything round (I used a socket) can be used to round off the handle corners. I use Titebond glue, its available at Home Depot and Lowes, and is the best woodworking glue I have found, you'll break the board before breaking a glue joint.
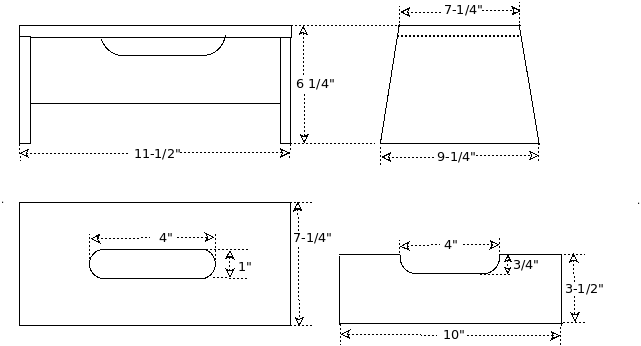
The new stool would be about the same size as the original, 11-1/2" long, 6-1/4" high, and 7-1/4" wide at the top. The ends would flare out from the 7-1/4" at the top to 9-1/4" at the bottom for stability. I decided to make an integral handle, an elongated hole in the top that you could put your fingers through and grip as a handle. First I needed to know the dimensions of the hole in the top and a notch under the lower support brace to clear the fingers, so I built a test fixture. I planned to drill two 1" holes in the stool's top, then saw out the center between them to make an elongated hole. I also needed to saw out a notch in the lower cross brace to clear the fingers as they gripped the top. I had originally allowed 1/2" of depth in the cross brace notch which wasn't comfortable, so I opened it up to 3/4" Based on my earlier designs and builds, this stool should support a 250LB to 300Lb adult with no problem.
I also wanted to engrave each child's name on the top of his or her stool.
This turned out to be a whole lot of work, vastly more than Ivy's Bed because of the lack of a good, small, signmaking template kit.
There are 5 todlers currently, two other slightly older GGsons, already had stools (and 3 more are well beyond toddlers), so Betty said to just make the 5 youngest, Aeden, Henry, Ian, Ivy, and Noah.
BTW, I discoverd that you are way better off using a plunge router for signmaking.
Yeah, I could freehand the names, but I wanted this to look nice, remember.
I had used the Rockler Sign Making Interlocking templates on Ivy's bed
The Rockler interlocking set is easy to use, you interlock the letters, then tape them to the workpiece, even dust collection works with them.
But there isn't enough room on the stool top to use 2-1/4" letters for names like "Zachary".
MilesCraft SignPro:
I got a Milescraft SignPro which has 1-1/2" letters.
The SignPro is a real pain, you have to really need small letters, and I did.
Part of what causes me grief is I have already cut out the stool top instead of engraving a long board then cut out the part I want for one stool.
Of course you have to worry about screw holes where the ends of the SignPro were screwed down.
The SignPro has an extendable set of rails that you place the letter templates between, then attach end pieces which are screwed or clamped to other blocks that parallel the thickness of the workpiece.
You have to clamp down the workpiece and the support pieces of the SignPro's end caps, after you align the template with the workpiece.
Another problem with the Milescraft SignPro, is the TurnLock plastic router bushing guides and the special TurnLock router base plate.
I had tried TurnLock bushings before and they broke easily, so I am not a fan.
The SignPro instructions (very brief) says the TurnLock router base will fit almost any router, I have several Dewalt, Porter Cable, and Fesstool routers some with both plunge and fixed bases, but the TurnLock could only fit a few using slots not a fixed hole, I am disappointed.
My routers come with round head 8-32 screws to attach the bases, but the slots in the SignPro base are large and sloppy so I had to get new pan head screws to get a solid hold on the base.
BTW, the many many holes in the TurnLock router base and the length of the guide bushing pretty much make dust collection with a plunge router useless.
I wonder what routers fit all those holes in the TurnLock base, the base looks like you fired a shotgun at it?
To use the SignPro, I discovered the ends of the template bars had to be clamped down and removed for each new name, the work piece had to be clamped down separately.
This thing is very very hard to use compared to the Rockler Interlock Set.
|
| Drawing of the new stool |
|
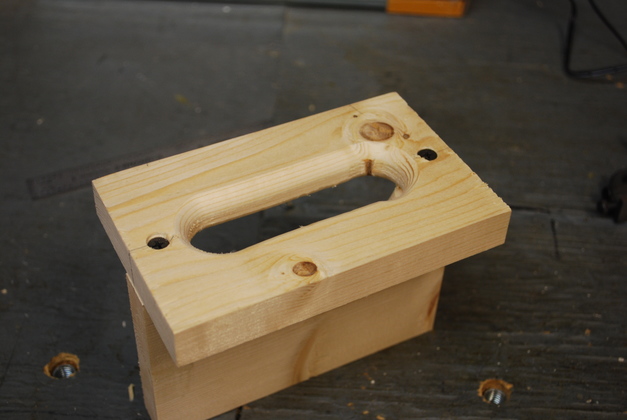
Handle Test Jig
I wanted an oval hole in the center for a handle but, I had to guess at dimenstions.
So I built a test handle, here it is assembled for a test.
|
|
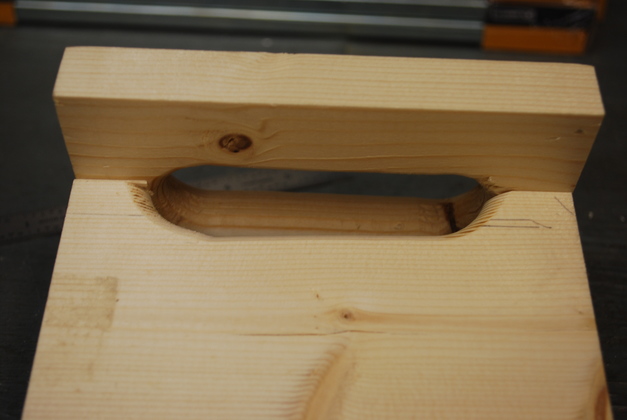
From the side and underneath. This test handle originally had a 1/2" notch under the handle to clear the fingers, but that wasn't enough, so I increased it to 3/4". |
|
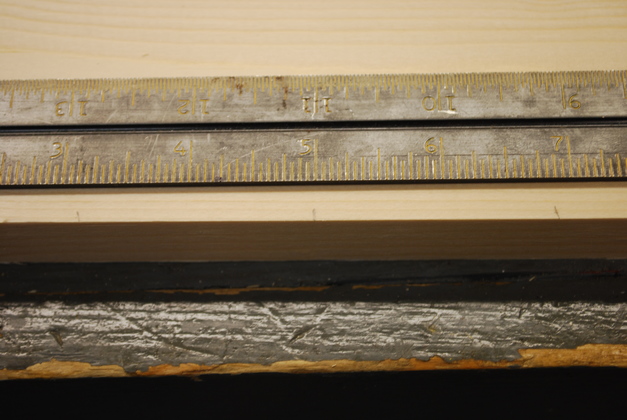
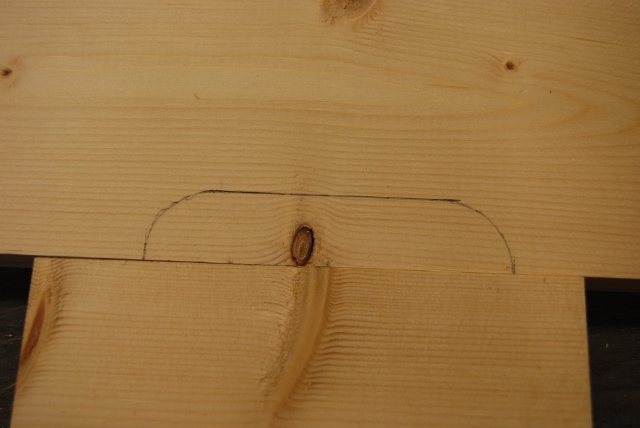
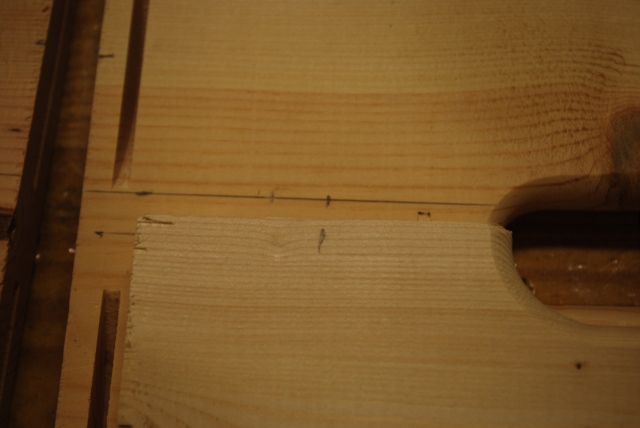
Here I'm marking the 3/4" notch in the edge of the brace. The cross brace is 10" long so the center is 5" and assuming about the same curvature in the notch as in the hand hole, I would curve the ends of the notch. I allowed 3-3/4" for the length of the oval hole and notch. |
|
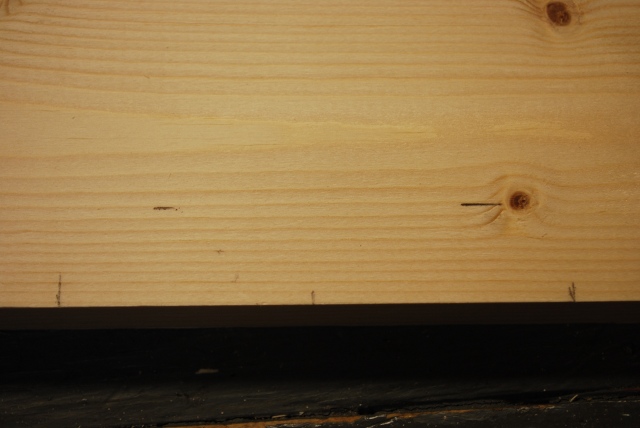
Marked the ends of the notch and the cut along the bottom (pic shows brace upside down). |
|
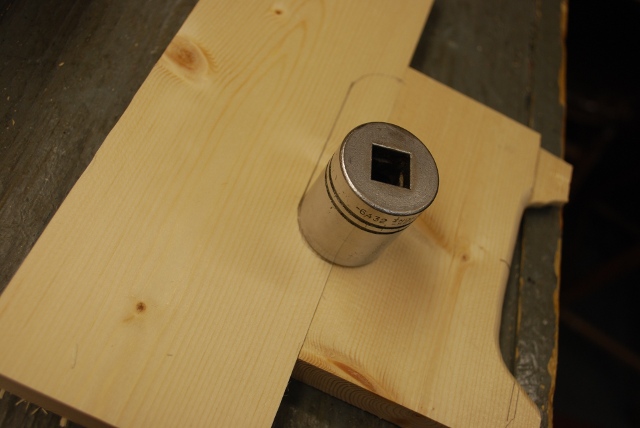
Here I'm using a socket to draw the curve at the end of the notch.
I find sockets are great for drawing curves like rounding off corners etc.
|
|
Notch drawn. Now just jigsaw it out. |
|
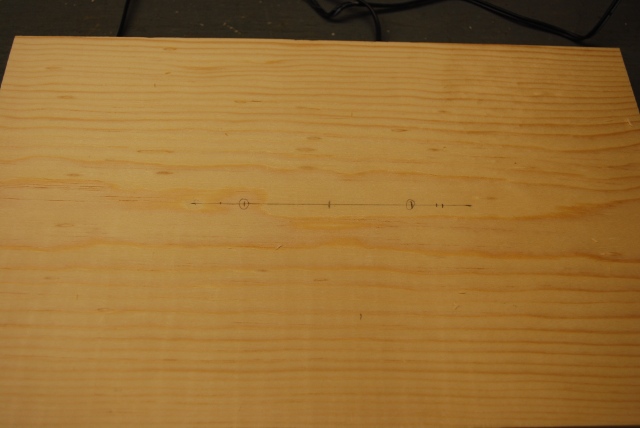
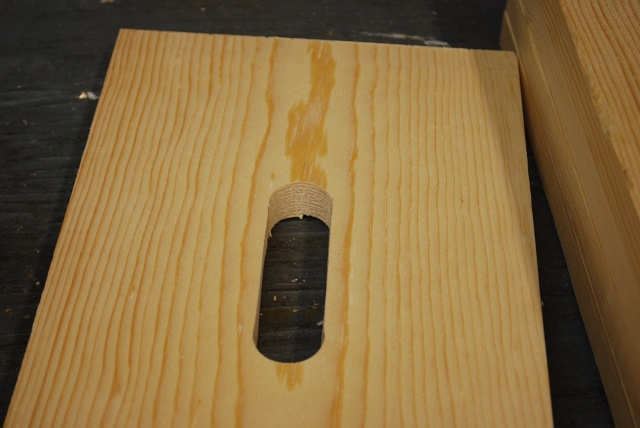
Here I've marked the two spots on a stool top for the 1" holes. I'll drill two 1" holes then jigsaw out the remaining center. |
|
All holes drilled and notches cut. |
|
Close up of a stool top with it's hole cut out. |
|
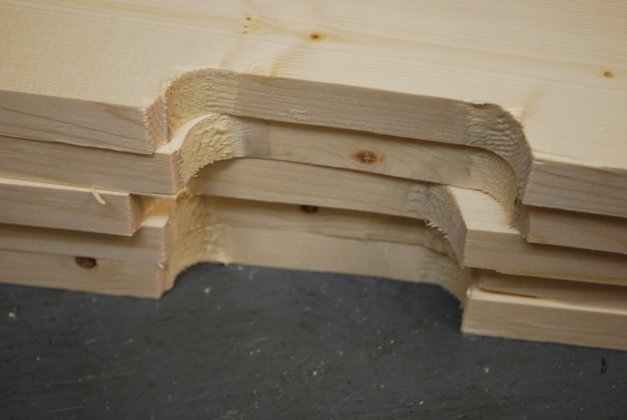
Notches cut out in braces. |
|
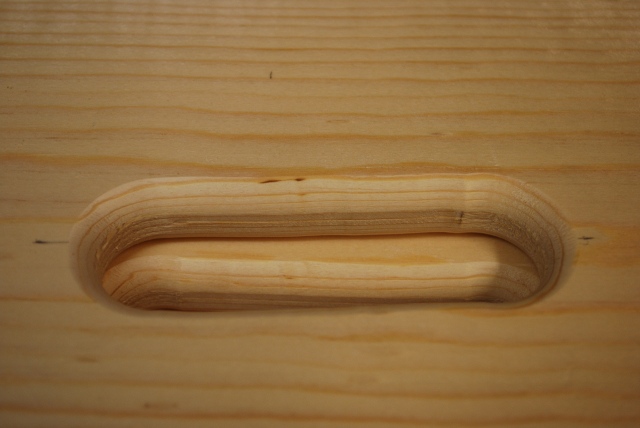
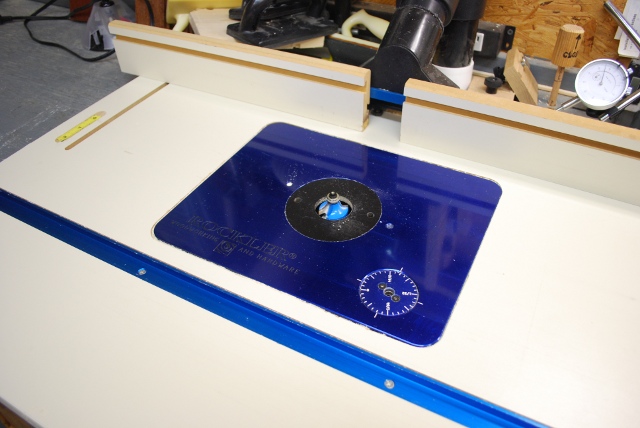
I used a roundoff bit and the router table to round the edges of the holes and notches. The stool tops showing the edges of the oval holes rounded, ready to sand. |
|
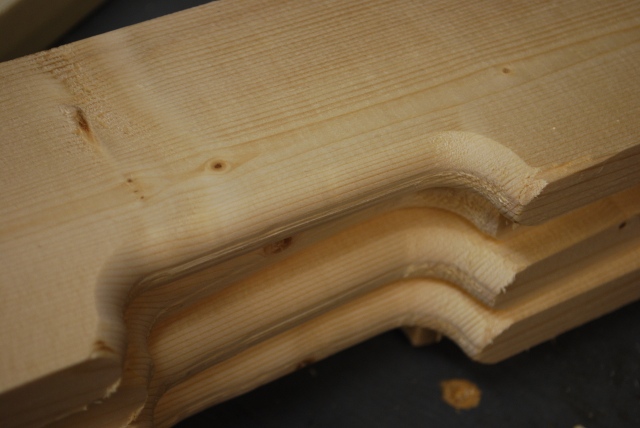
Stack of cross braces with notch edges rounded, ready to sand. |
|
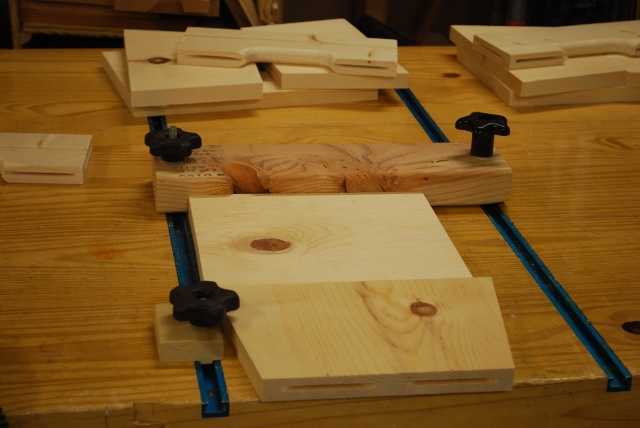
I am going to use biscuits to hold these together, here you can see all the edge slots are cut. |
|
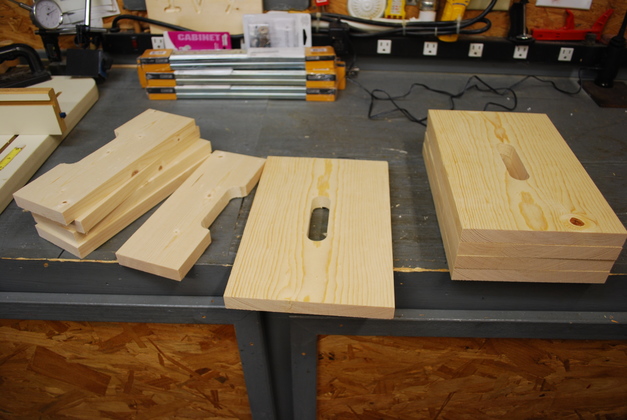
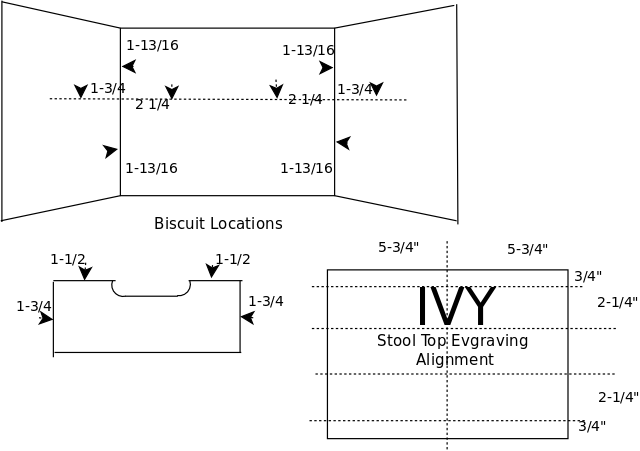
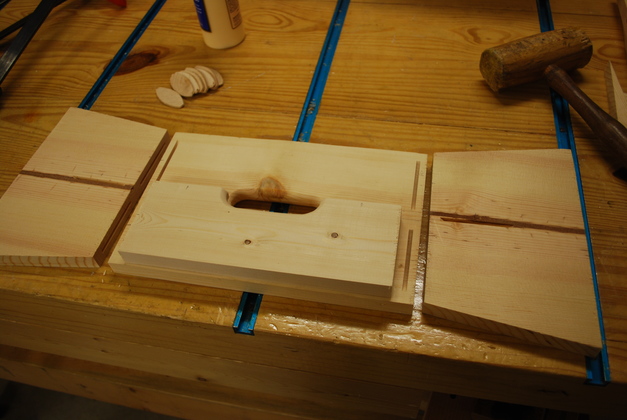
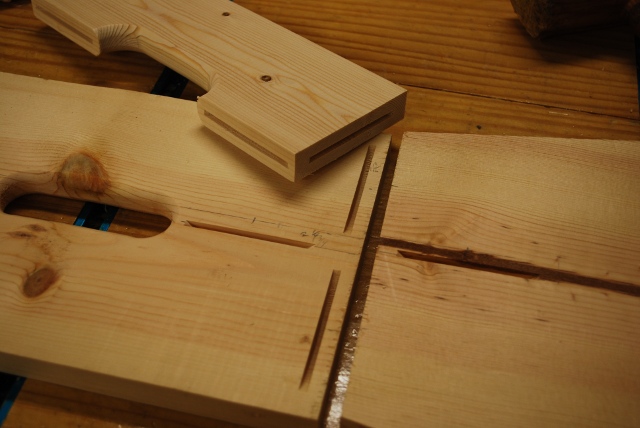
All parts for one stool, layed out the way I marked the biscuit mortises and cutting the slots (mortises). I found a horizontal center line through the oval hole, then marked a parallel line 3/8" above it, even across the aligned end pieces. The 3/8" is the distance from the edge to the cut on my Dewalt biscuit cutter when on a flat surface. Then I marked the position of each biscuit with a little tick mark. I aligned the brace with the stool top and copied the tick marks, same for each end of the stool. Here is a little more detail about cutting slots in flat surfaces. |
|
I am going to engrave the name of each of the 5 small children in the family in his or her stool.
I wanted to engrave each child's name twice on each top so no matter which way it faced, the child could read their name, hence two setups for each name/top.
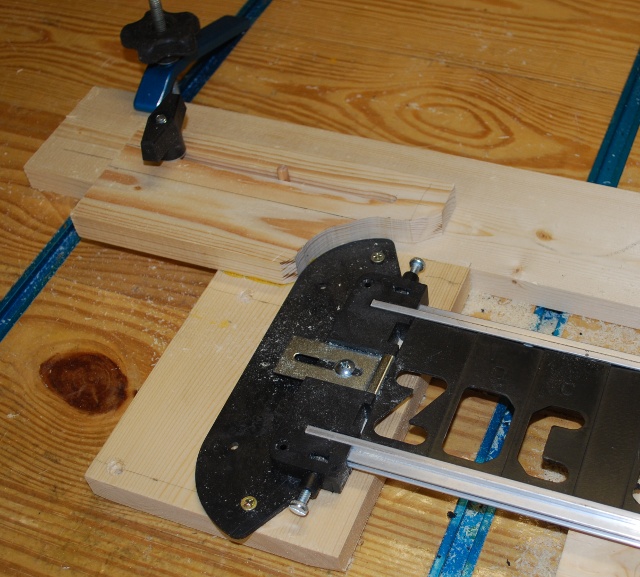
Here I am trying to set up the templates, the problem is each name requires a different setup to hold the template, it's supporting blocks, and the piece being engraved.
Each name has different number of letters (Zachary to Ian), each letter is proportional spaced (different widths), and I want the names to be centered in the top, so each name is a different setup.
Note the template is not attached to it's support blocks, the support blocks aren't clamped to the table, and the workpiece isn't clamped down either, lots of work to do, and redo for each of the small children.
The template is fixed length so I use extra letters as spaces (on left).
|
|
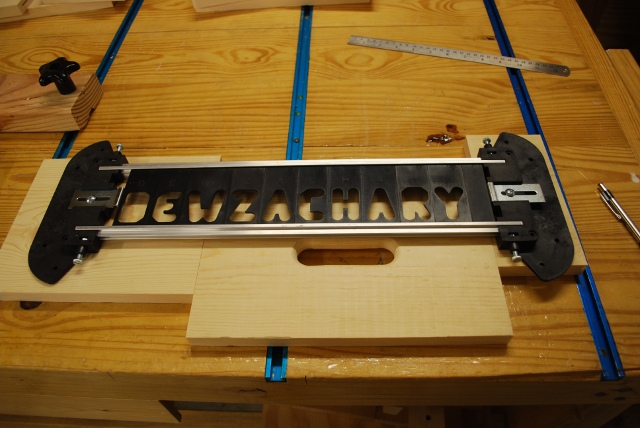
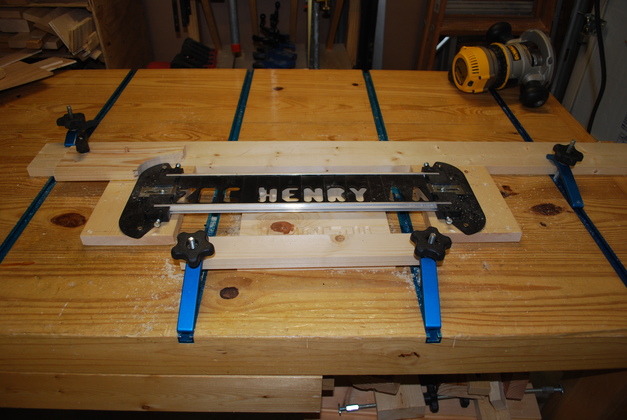
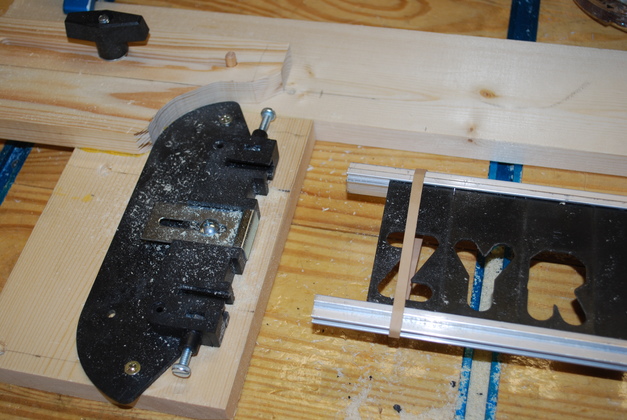
The Kluge I came up with to engrave the stool tops, so far I have been really disappointed in the SignPro. The 1x4 across the top is attached to a fixed board on the right holding the right end of the SignPro, a slider on the left holds the left end of the SignPro and allows replacing letters when moved to the left. Two clamps hold the Kluge down, two more (foreground) hold the work piece (stool top). |
|
The left end of the Kluge, allows the left end of the SignPro to be slid back separately from the rest of the SignPro, so letters can be changed without unscrewing the entire SignPro. The slider unit consists of a 1x4 with slot, glued to a board that holds the end of the SignPro. |
|
Here it is open for changing letters, note the rubber band, it needs something to hold it together so the letters don't fall out when the end isn't on. |
|
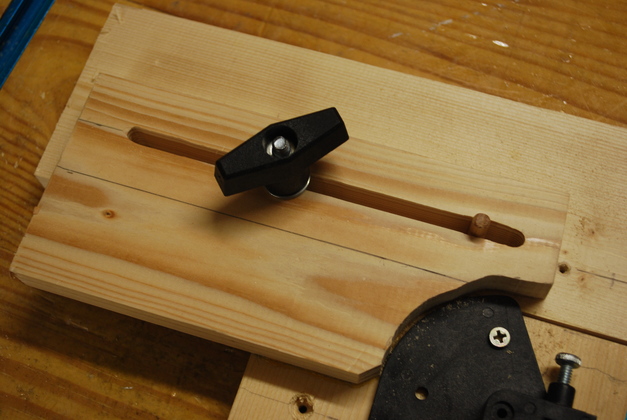
A little bit clearer pic of the slider. You can see the 1/4-20 knob that secures the slider to the Kluge, also note a 1/4" guide pin (dowel) that keeps the slider aligned. |
|
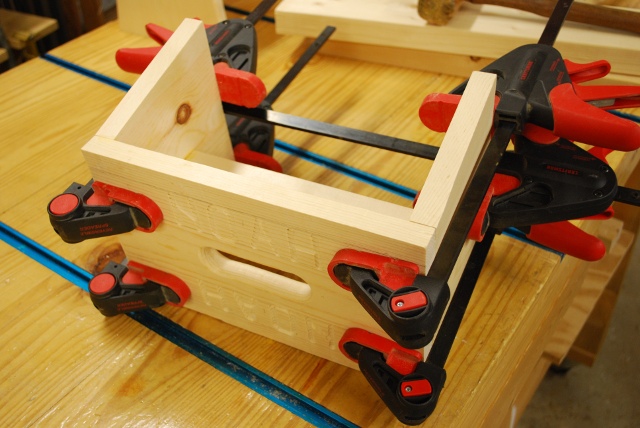
One of the stools glued and clamped. For pics of exactly how the biscuits are glued go to: Biscuit Gluing. |
|
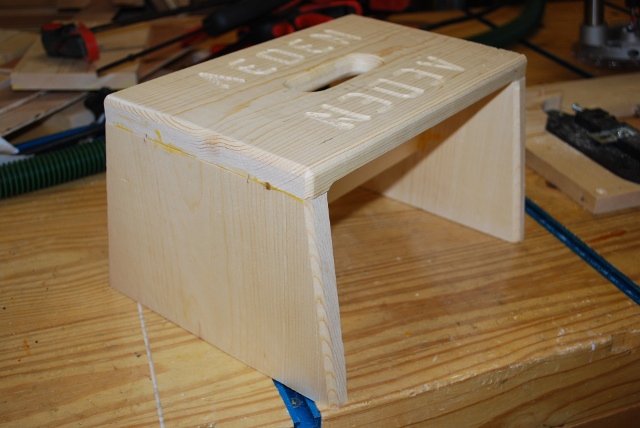
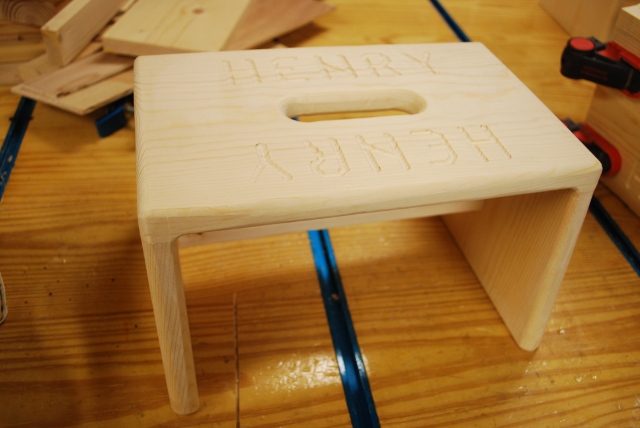
One of the assembled stools, with edges rounded, ready to sand. |
|
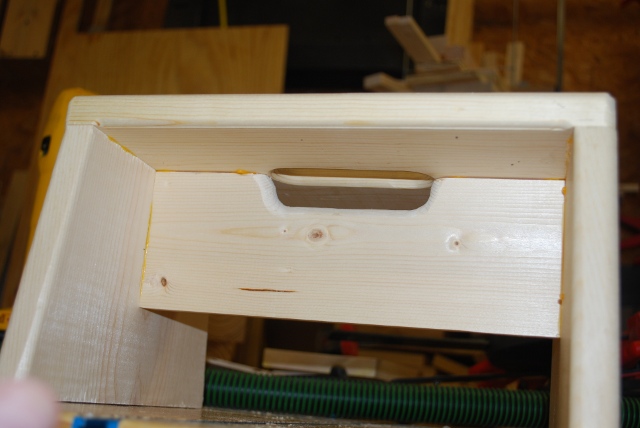
A shot underneath showing the crossbrace with handle slot. |
|
Stools sanded. |
|
|
|
Henry's after sanding, ready to fill in the engraving with paint. |
|
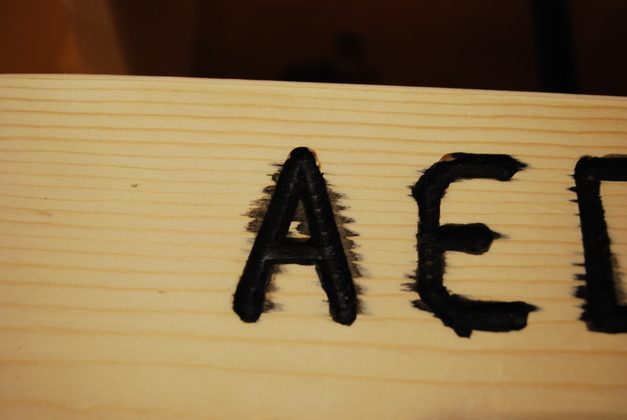
Right here a catastrophe occurred, when I filled the engraved names with paint, it wicked into the wood and looked absolutely horrible.
I wasn't going to have these children looking at and learning to read their own names smeared all over the place so I cut up all the stools for kindling and started over.
Sanding wouldn't take this out, it went deep into the wood all the way to the bottom of the engraving and below.
|
|
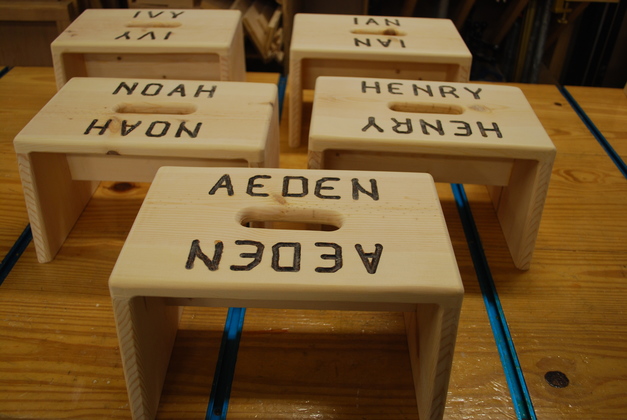
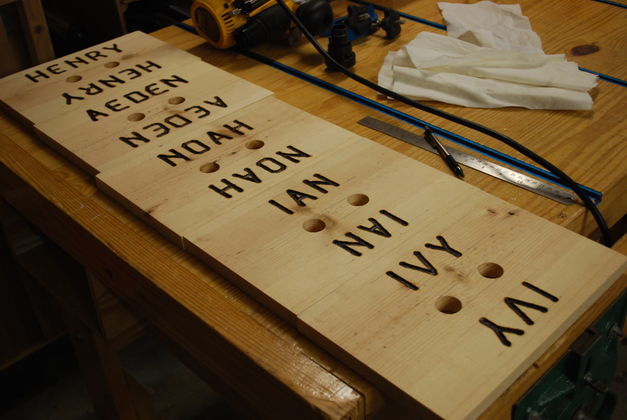
I cut out new tops, engraved them, then did the woodburning. Heres the second build of tops with the names routed then woodburned. Note, I haven't cut out the oval handle hole, I did the least work I could until I saw how the new engraving/woodburning technique worked. |
|
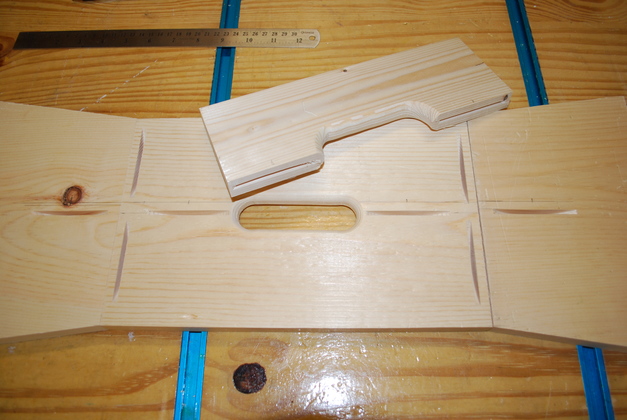
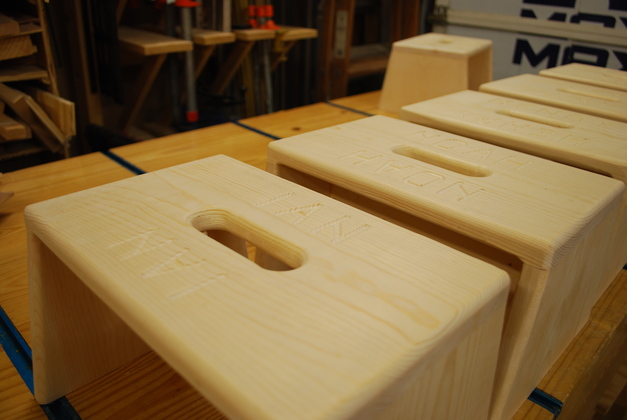
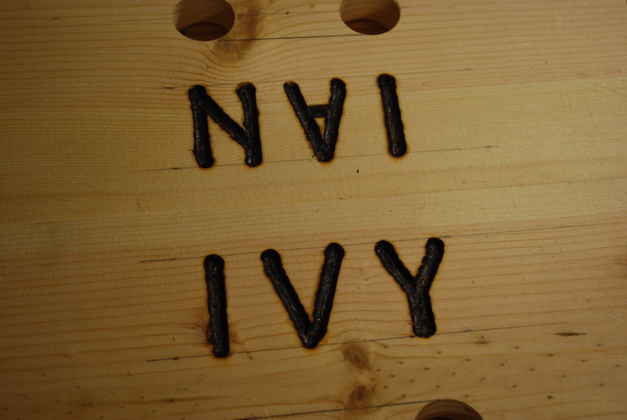
Close up of Ian and Ivy's stool tops. After I saw out the handle hole, and assemble the stools, sanding will get rid of the engraving alignment marks. |
|
The router table set up to round the corners. |
|
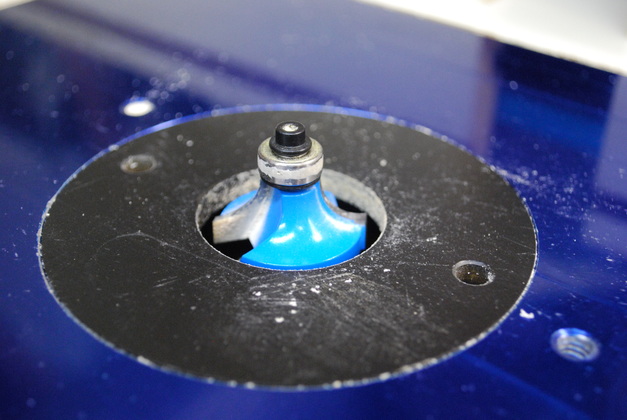
Close up of the 3/8" rounding bit. |
|
Engraving
|
|
| Mortise marking locations and Engraving Alignment. |
| The horizontal dotted line on the stool bottom and legs is 3/8" above the stool's center line and is used for reference when cutting mortise slots. |
|
I did the sawing, engraving, woodburning, marking, and mortise cutting, I had done on the first batch to get to this point. Here is one of the second batch of stools layed out, ready to glue. All the cutout work and engraving was already pictured in the previous batch of stools. |
|
A close look at the center brace alignment marks. The center brace is laying on top of the stool top (bottom view). Again, note the brace alignment mark, its 3/8" from the actual center line. |
|
Look at the biscuit mortises on one end. There are 8 nbr 20 biscuits in each stool, it should be very strong. |
|
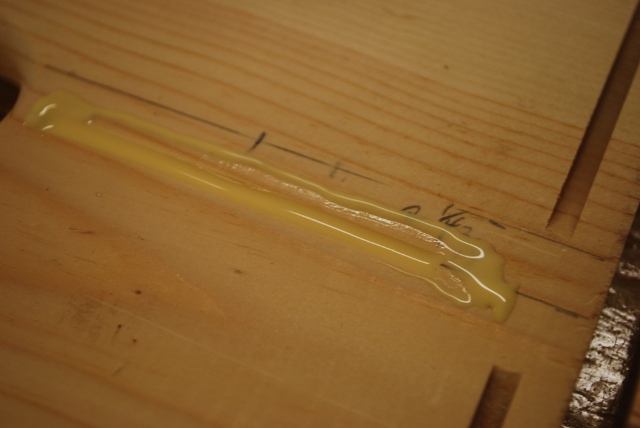
Glue on a mortise ready for the biscuit to be tapped in. Note a layer of glue on each side of the biscuit mortise. You can see a center mark and the brace alignment mark. |
|
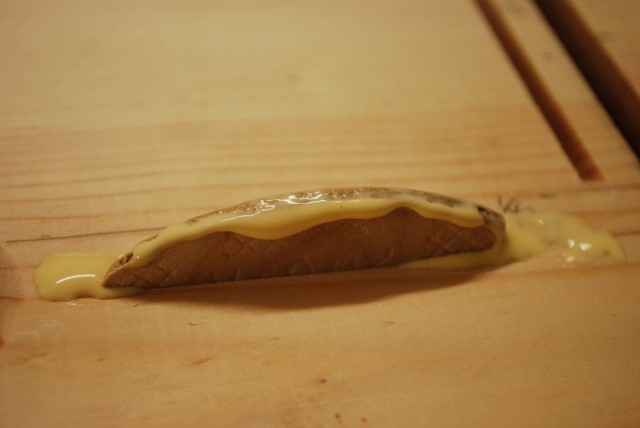
Glue on the biscuit ready to clamp on the center brace. The glue must be about the same on both sides of the biscuit. |
|
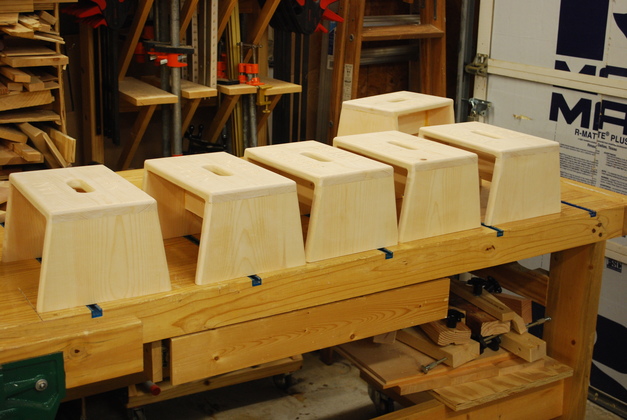
Three of the stools, with engraved names burned, glued up and ready to round the edges then sand. The next pic shows the stools after edge rounding and sanding. |
|
|
The stools, edges rounded and fine sanded. Look at preceeding pic to see how they looked before rounding and sanding. |
|
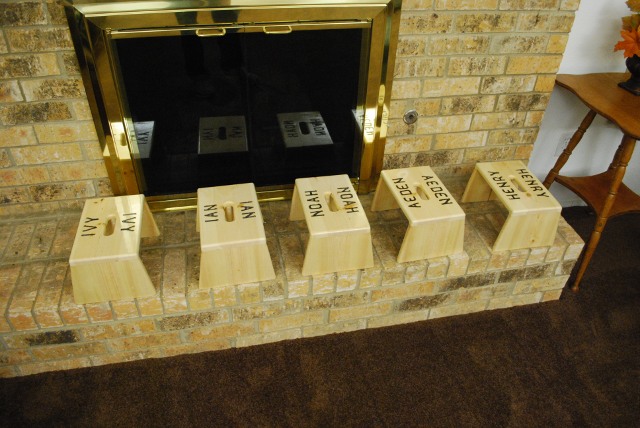
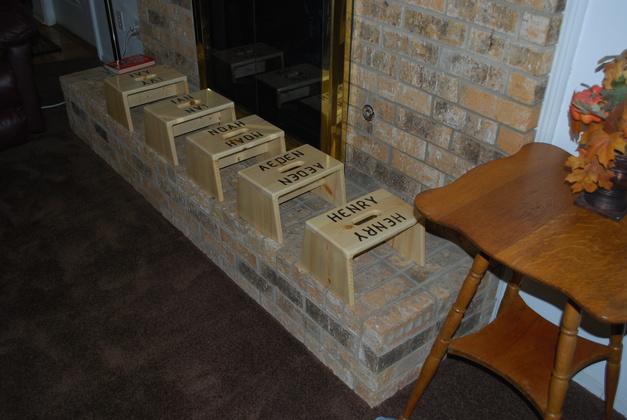
All lined up on our hearth. You can see the reflection of the firescreen in the top of Ivy's stool, they are all like that. |
|
Beside Grandmaw's spindle table, bought in 1911, second hand. |
|
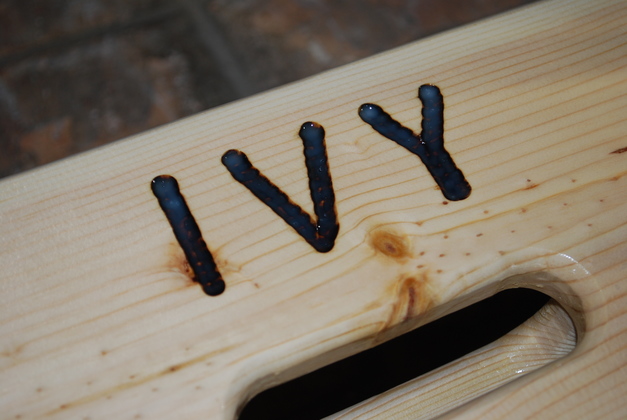
Ivy's paint is still not quite dry deep in the letters. |
|
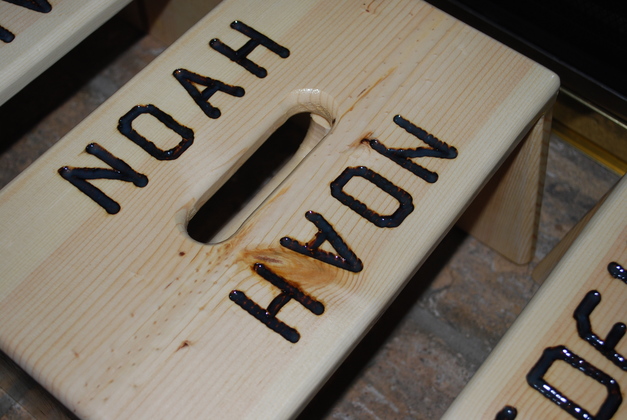
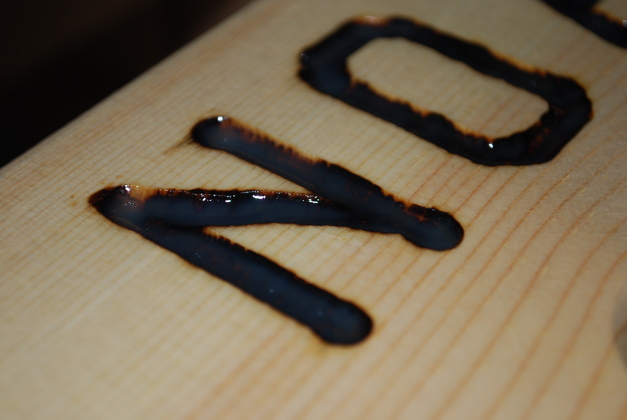
But Noah's is. |
|
You can see here, close up, how the burned engraving worked. |
|
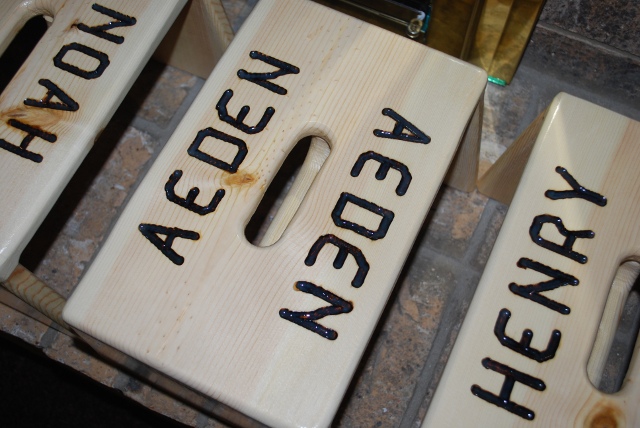
Look at lettering on 3 stools. |
|
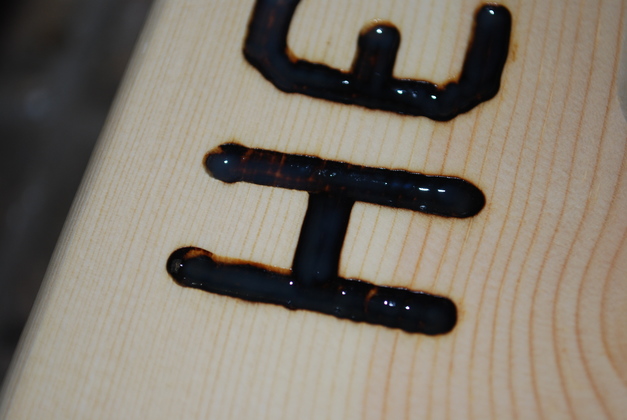
Closer look at Henry's name. |
|
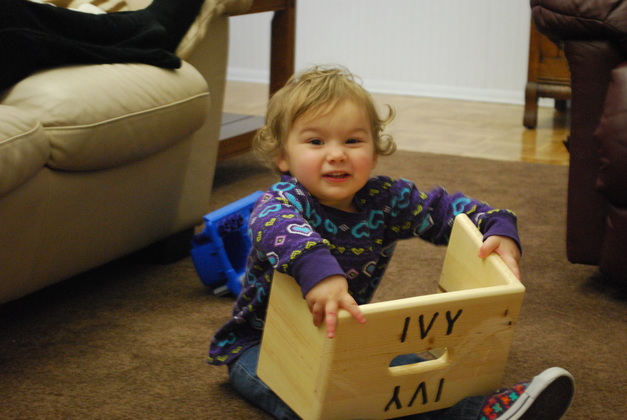
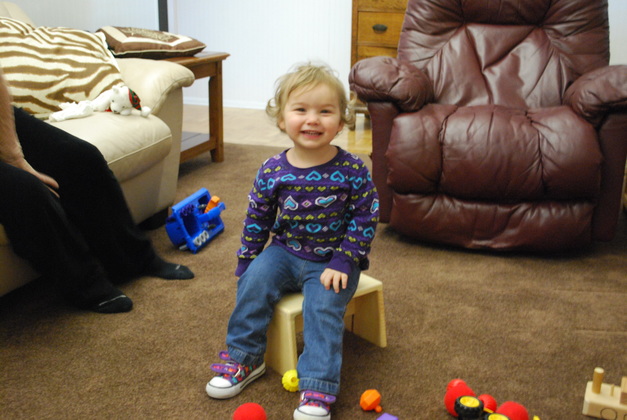
Ivy sitting on her stool. |
|
|
And its handy to just play with! |
|
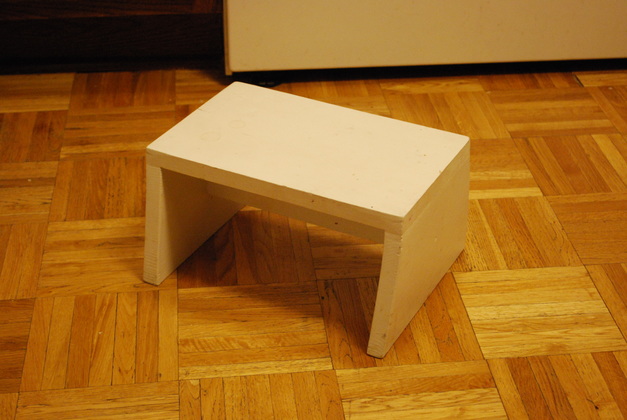
The original stool. Since this one is painted, I probably screwed it together (with glue) then spackeled the holes, sanded it, then painted the whole thing. I built it years ago, so I'm not sure. |
|
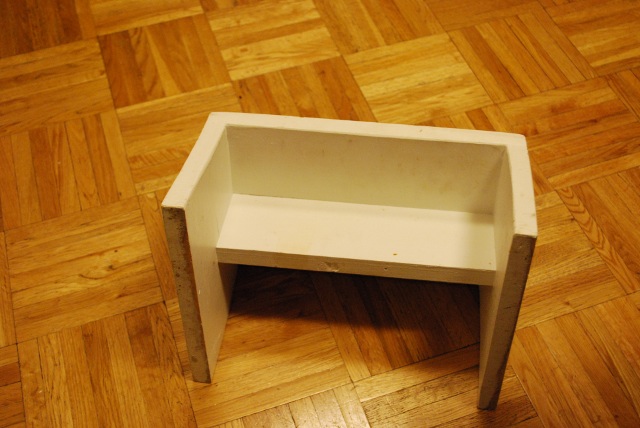
From the bottom, a very simple design, but works and it has lasted well. |
|
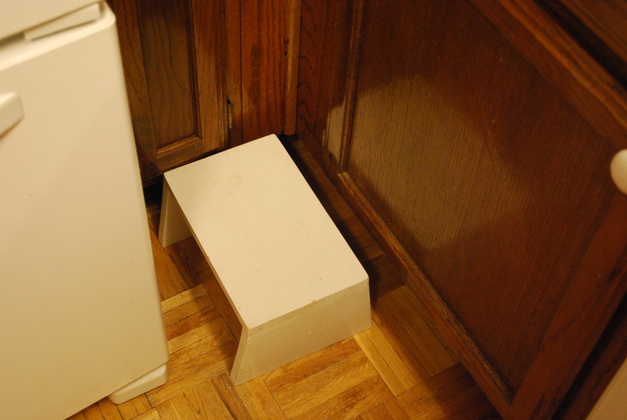
It lives in the small alcove next to the fridge. |