| 
| 
|
|
Kelsey's Farmhouse Table
| ||
|
|
|
|
|
Kelsey's Farmhouse Table
| ||
| Construction Info | Top | Frame | Benches |
| Mortise & Tenon Page |
Kelesy found a table like this on Ana-White.com and really liked it for their home.
Due to space available, I can only build a 6' long version but shes OK with that.
Sorry, I had a link to the Ana White plans but, apparantly Ana White has deleted or moved the Farmhouse table Plans?
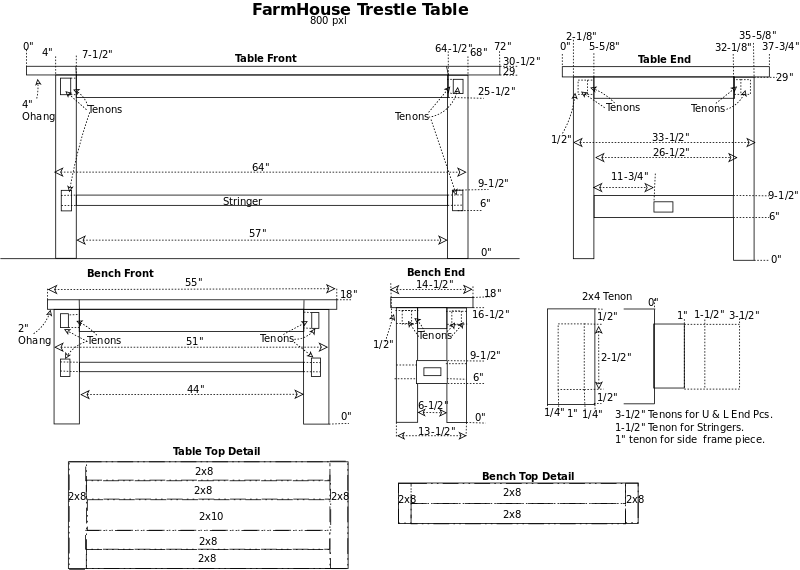
The original table's top and frame was built with butt joints, pocket hole screws, and six lap joints (three on each lower end pieces).
The lower frame (part of the trestle) used notched lap joints (screwed together).
I'm not a fan of pocket hole screws in this situation.
I will use glued mortise & tenons for the top and frame but pocket hole screws will hold the top to the frame.
The top will be loose tenons (#20 biscuits) and the frame will be mortise and tenon construction.
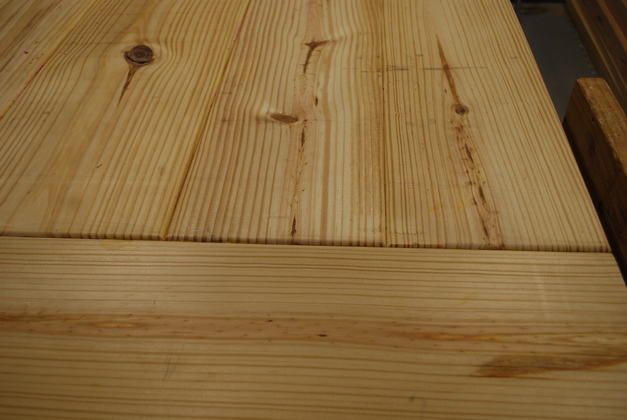
All mating top surfaces will be passed across the jointer to insure a good tight fit but with rounded top edges to give that rustic farm house look.
BTW: Kyle helped me chisel a lot of these mortises.
He loves using old hand tools like chisels.
|
Top pieces laid out. The edges have been across the jointer then rounded so they are all the same curve. |
|
Top center pieces cut to length, ready to slot for biscuits. |
|
Tick mark on rounded edge for biscuit slot. |
|
I rounded the cross grain edge so it would look uniform. |
|
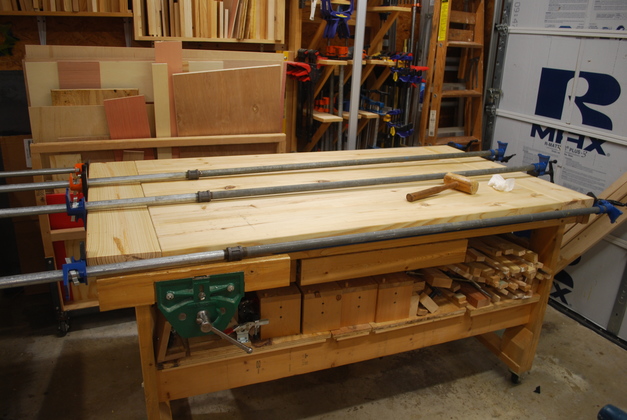
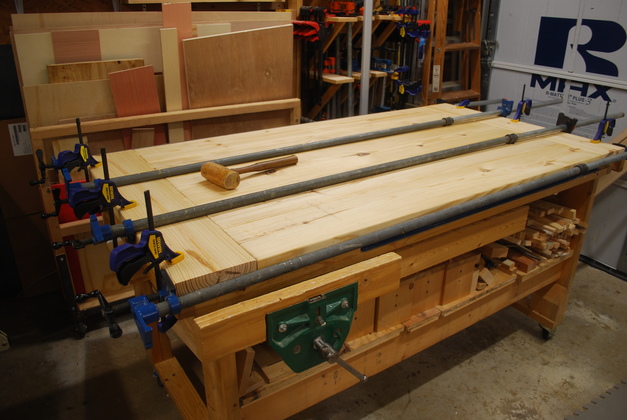
Right end of top being glued, note the 8 foot long clamps, they'll be needed again for the frame. |
|
A little closer look at the end. Thats about 2000 Lbs of pressure on the table end. |
|
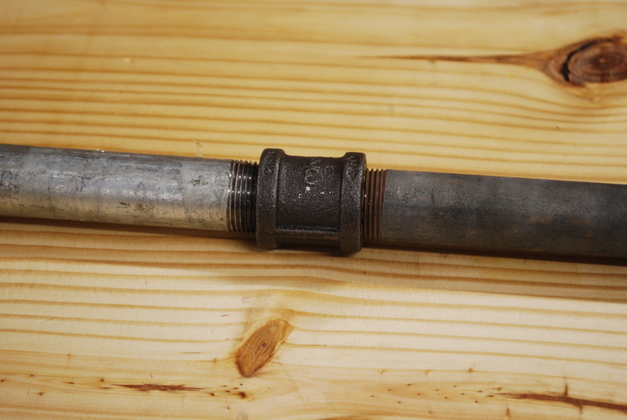
I used 3/4" NPT unions to extend the clamp pipes. |
|
Look at 3ft. extensions and unions. |
|
Clamps reversed to glue left end. |
|
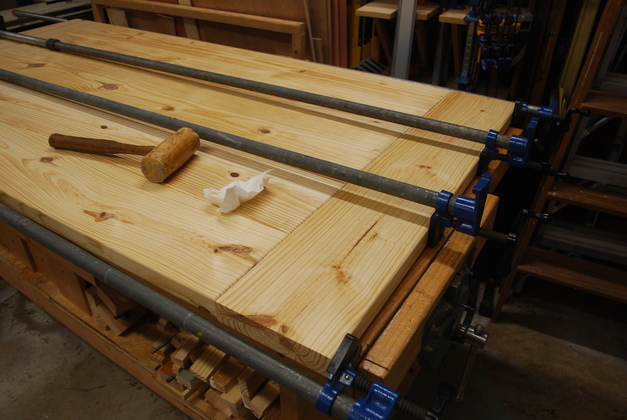
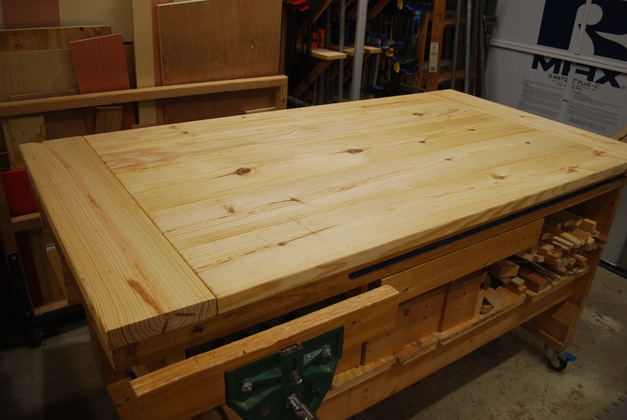
Top completely glued and rough sanded. |
|
Closer look, note ends of center pieces are rounded off as is the edge of the end cross piece. |
|
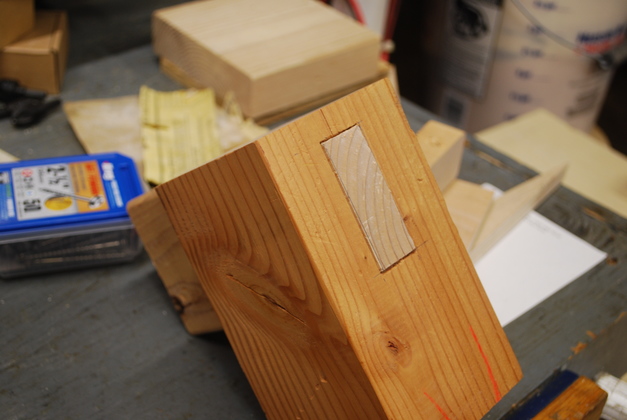
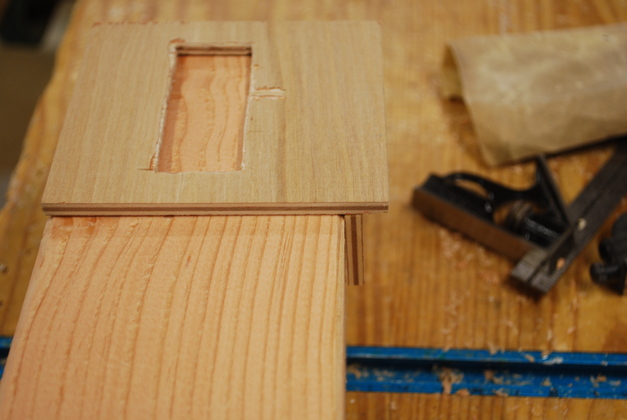
I made a trial through mortise and tenon in some scrap to see how it would work. Most of these tables use lap joints, I thought thru mortise would look more unique ("rustic" in Kelsey's words). |
|
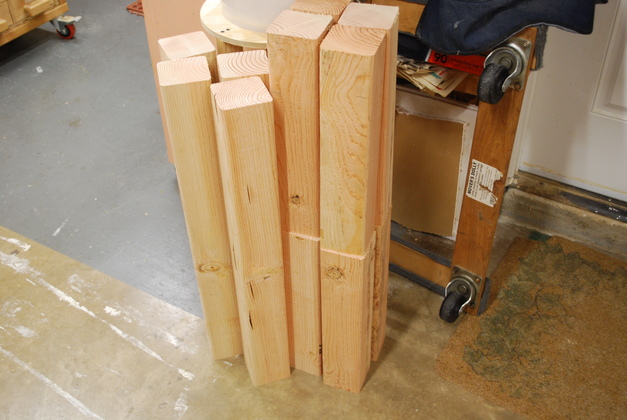
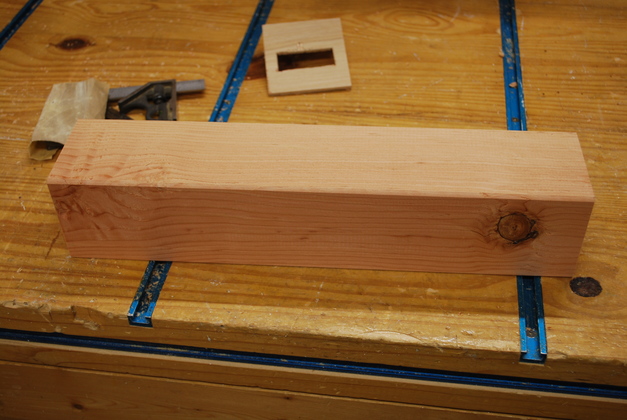
4x4 legs cut to length, table legs on the left, bench legs (2 high) on the right. |
|
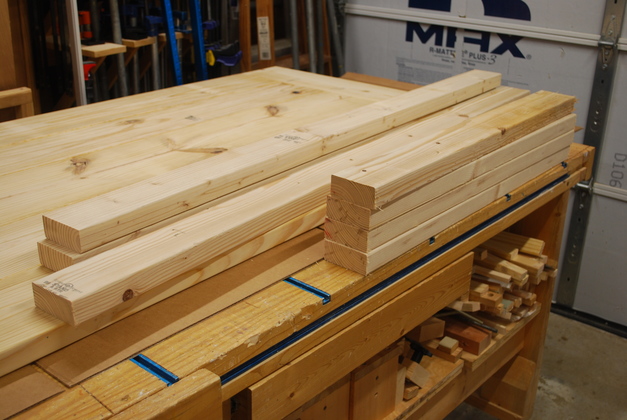
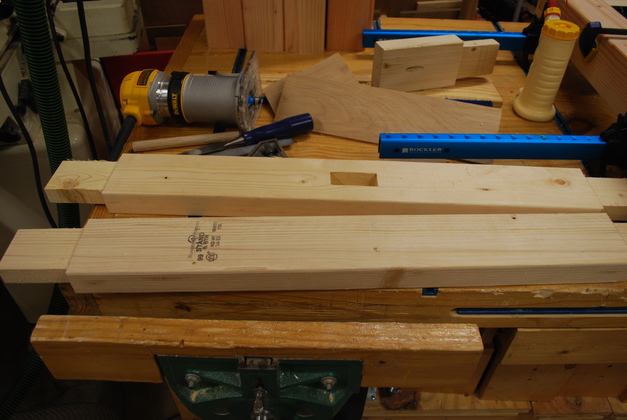
Table frame pieces cut to length. The two on the far left are the side pieces, the one in the middle is the stringer, and the 4 on the right are the upper and lower end pieces. There will be three different length of tenons, the cross pieces will be 3-1/2" long, the stringer tenons will be 1-1/2" long and the frame side tenons will be 1" long. |

|
Drilling mortises into leg. The two on the left intersect, the horizontal mortise is a through mortise. |
|
Closer look at mortising operation. |
|
Table and bench legs on the workbench during the mortising operation. |
|
Bench leg being marked for mortising. Note the little guide on the bench beyond the unmarked bench leg. |

|
Mortise guide being used to mark the top of a bench leg. |
|
You can see the little vertical backstop glued to the bottom of the guide. |

|
The two through mortises on a bench leg. Drilled but not cleaned out yet. |
|
Both sets of bench leg mortises drilled. |
|
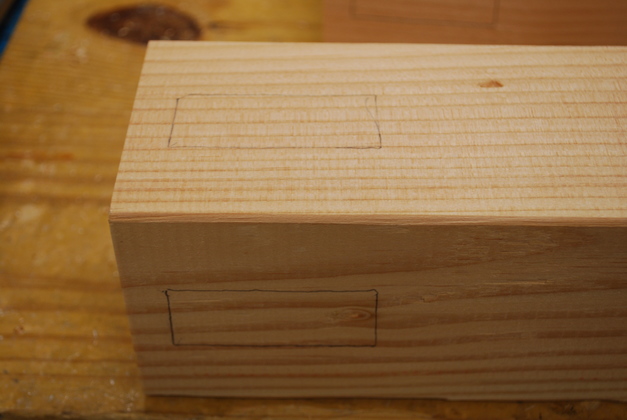
Mortise marks on top of a table leg. |

|
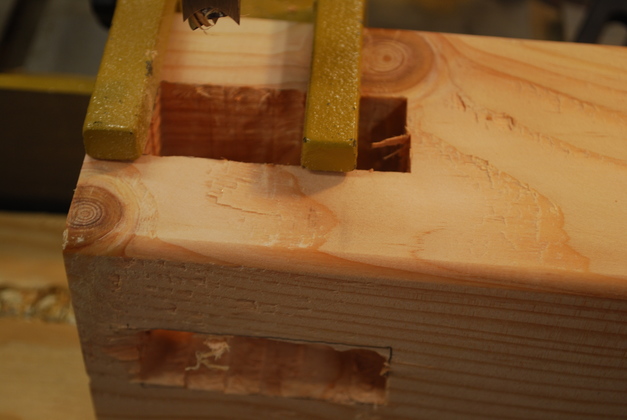
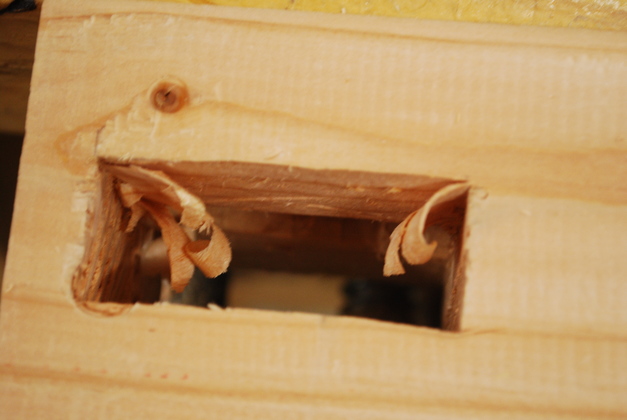
Looking through a freshly drilled through mortise. The chiseling will soon begin. |
|
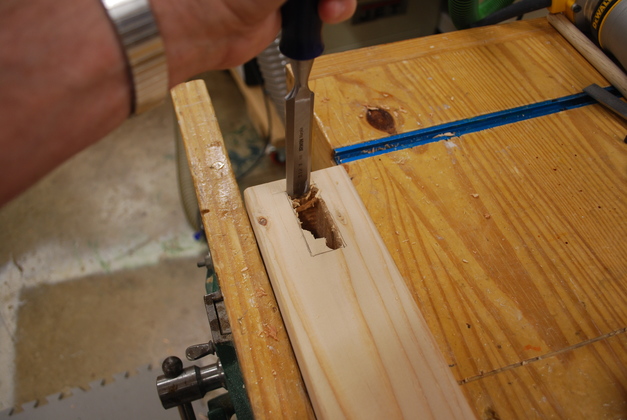
Chiseling out a mortise. |
|
During chiseling of a through mortise. |
|
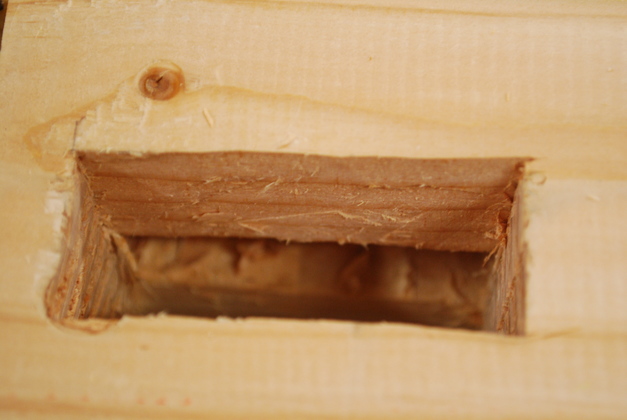
Cleaner through mortise. |
|
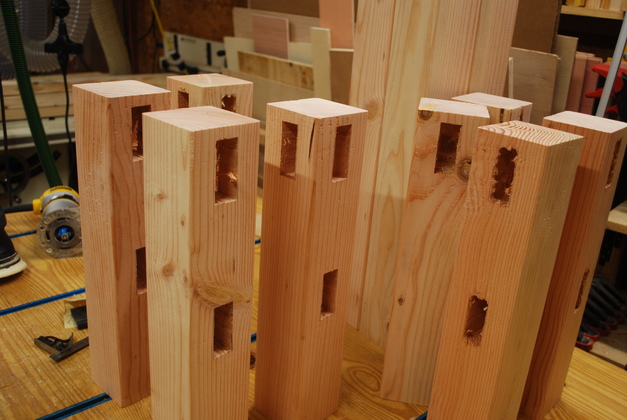
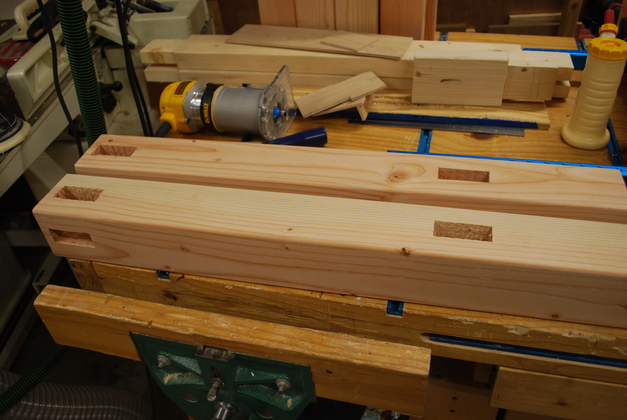
Table legs with mortises cleaned out. |
|
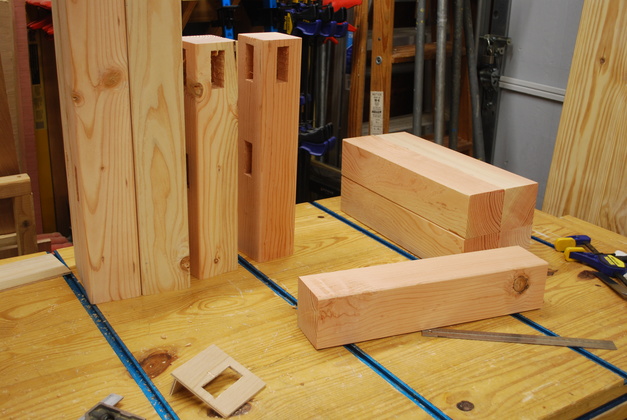
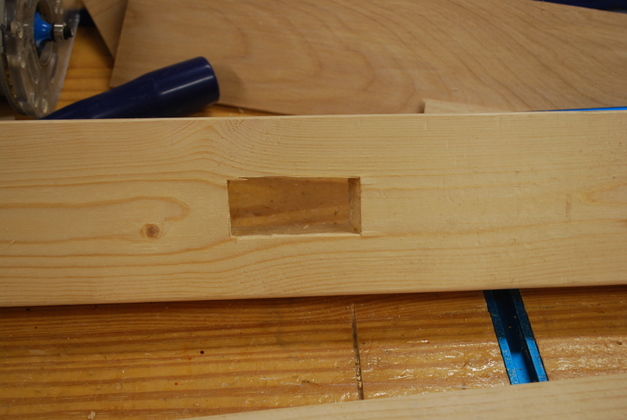
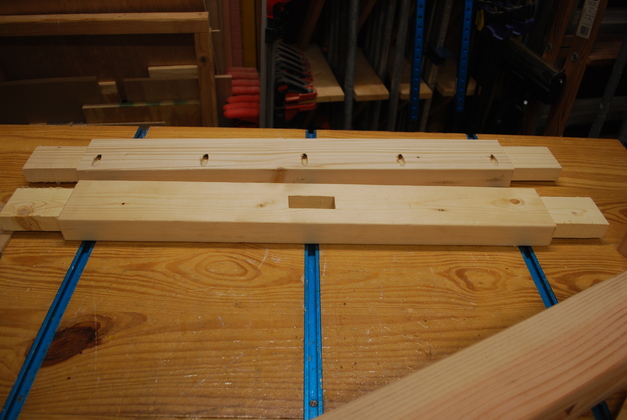
Frame cross pieces with mortise in lower one (top in pic) and tenons on both. |
|
Mortise in a lower cross piece. |
|
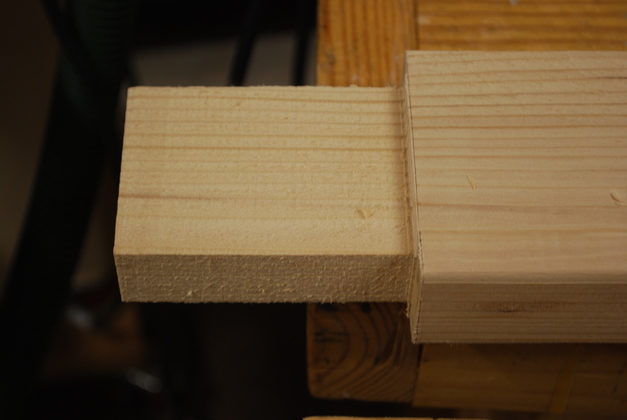
Close look at a tenon for through mortise on a cross piece. |
|
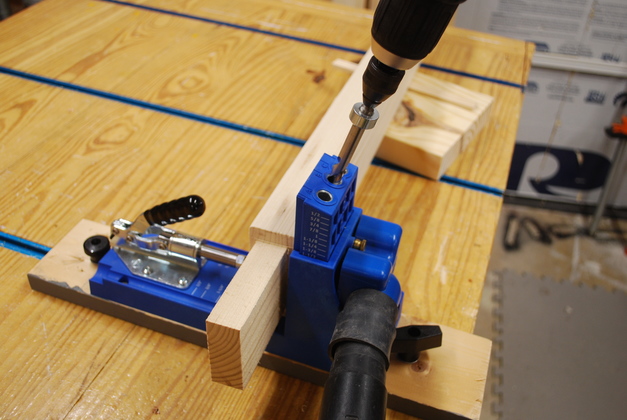
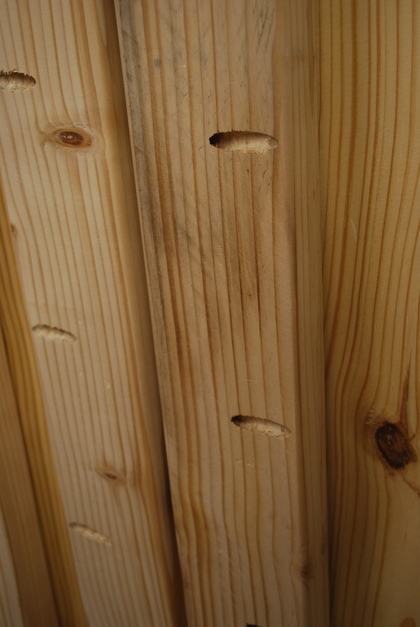
Using the Kreg jig to drill pocket holes in a top end piece. These will hold the top to the frame. |
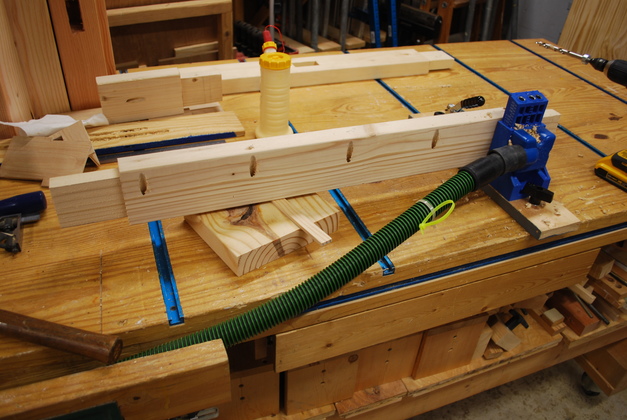
|
All pocket holes in end piece drilled. The same was done for the side pieces. |
|
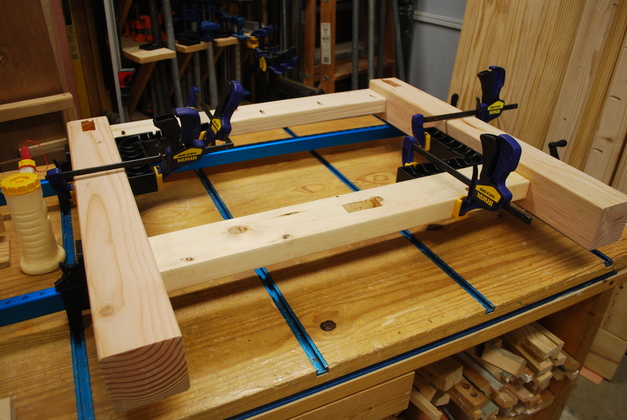
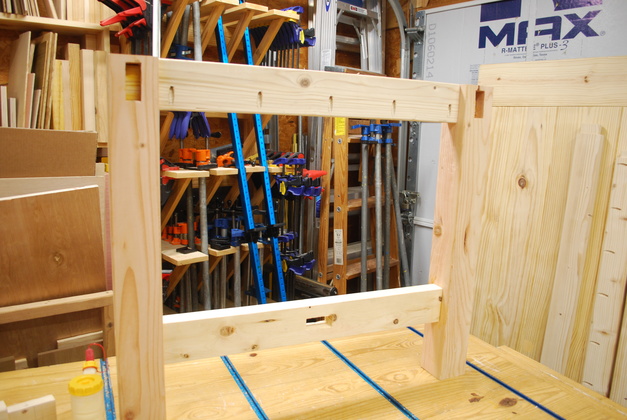
Both upper and lower end pieces ready to glue to legs to make a legset. |
|
One leg set in glue clamps. That stringer mortise is really in the center even though it doesn't look like it. |
|
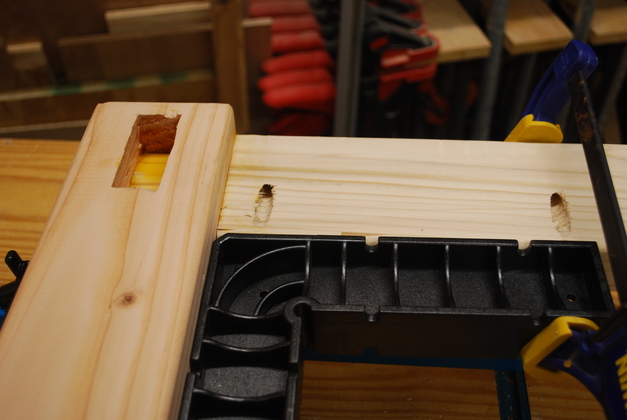
Closer look at the leg set top with pocket holes. |
|
One of the legsets glued. |
|
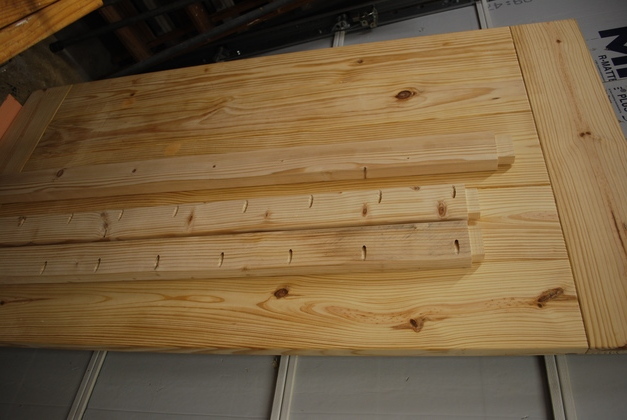
Frame side pieces (with pocket holes drilled) and stringer leaning against top. |
|
Closer look at pocket holes in frame side pieces. These pocket hole screws will hold the top to the frame. Of course gravity will also be at work here. |
|
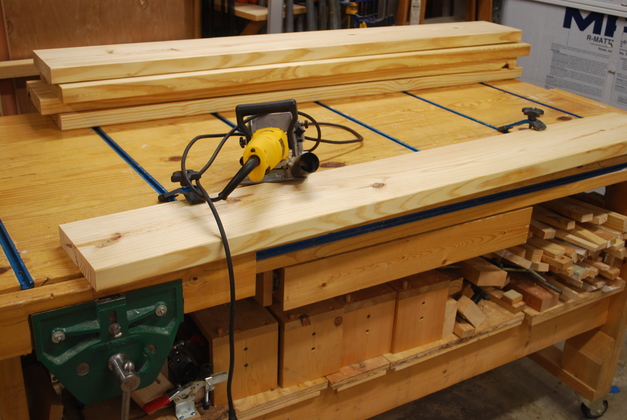
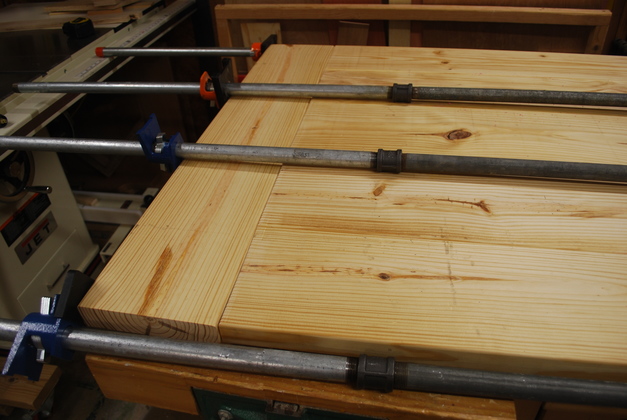
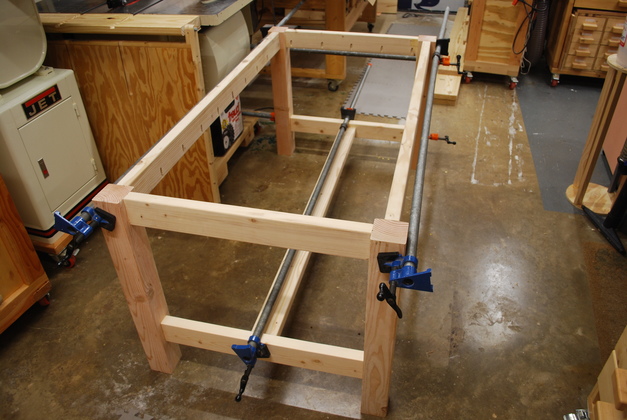
Frame being glued using the three 8' pipe clamps |
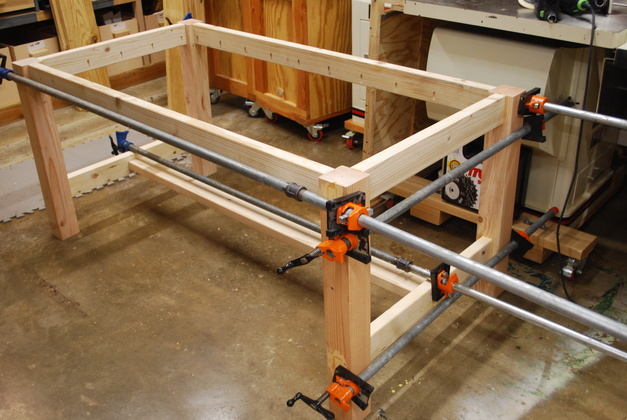
|
Side view of the frame being glued. You can see the pipe clamp extender unions on two of the clamps. |
|
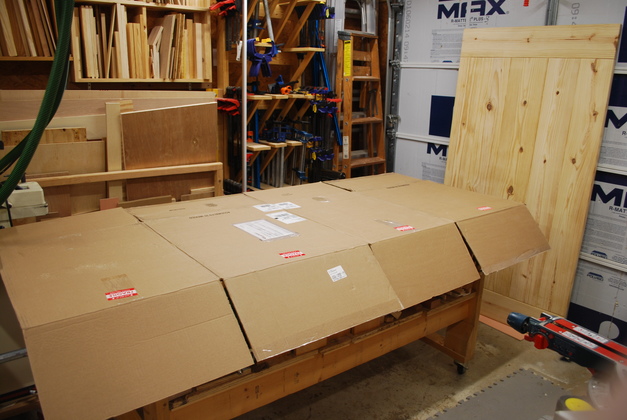
Preparing to assemble frame to top. The top (against overhead door) will be placed, upside down on the cardbard then the frame will be inverted over it. The cardboard will protect the sanded top. |
|
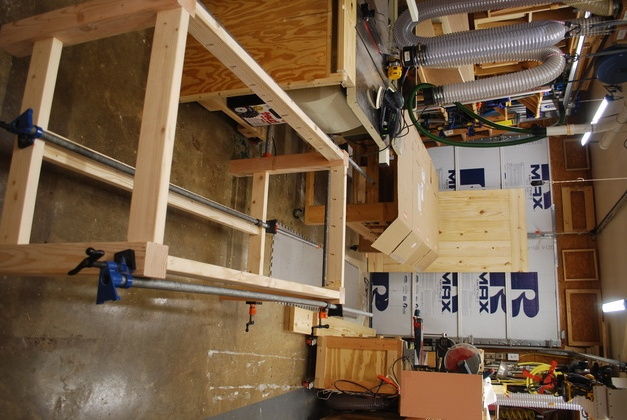
Both frame, foreground, and top, against the door, background. This illustrates how small my shop is for this size project. |
|
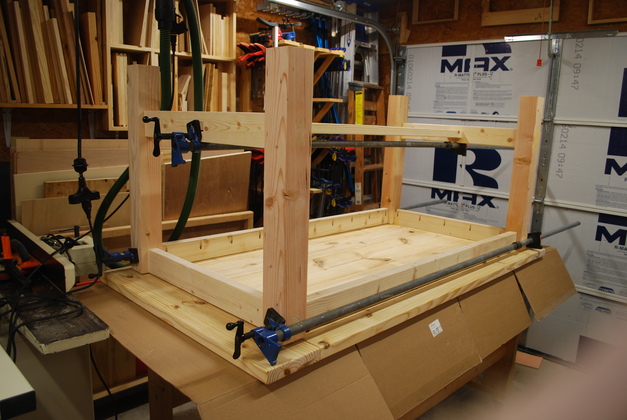
Frame inverted over inverted top, ready to align and apply the pocket hole screws. |
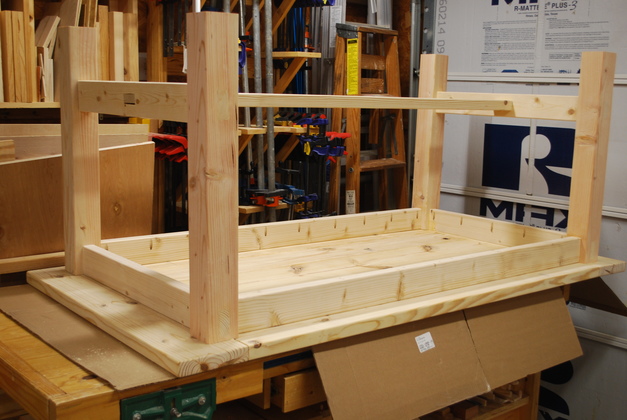
|
Complete table, aligned and screwed, still upside down. |
|
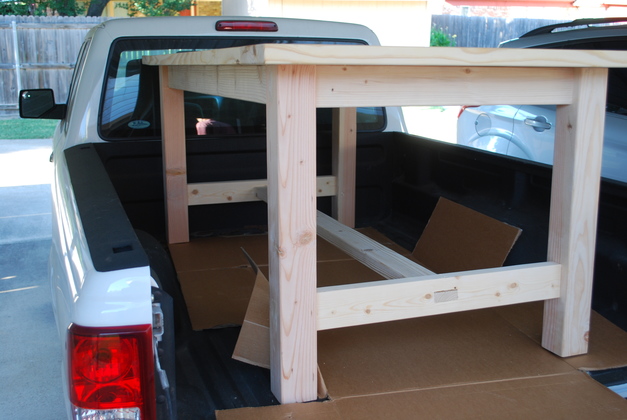
Loaded, ready to go to Kelsey's. |
|
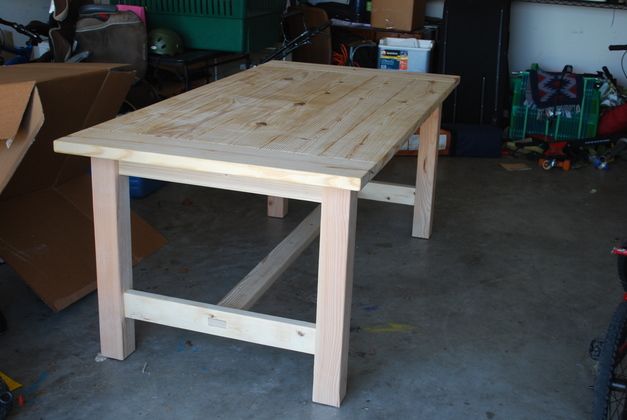
In Kelsey's garage, ready for stain and polyurethane. I'm thinking the stain will bring out the ends of the through tenons. |
|
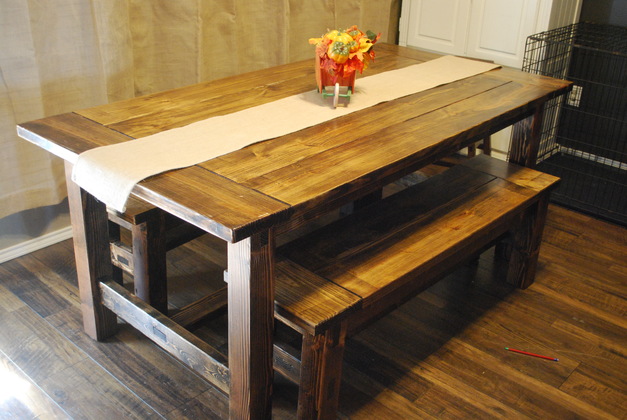
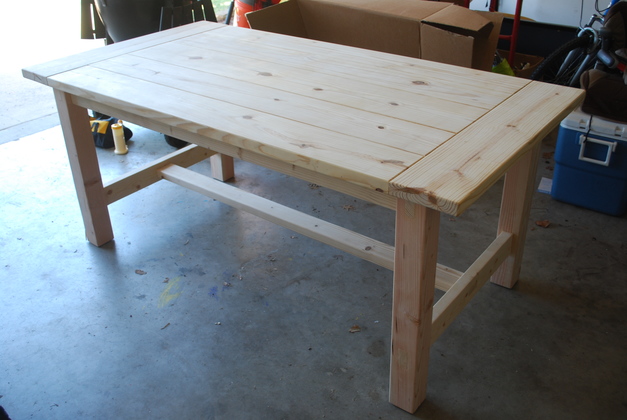
The light and this perspective brings out the top grooves (Kelsey wanted a rustic look). |
|
|
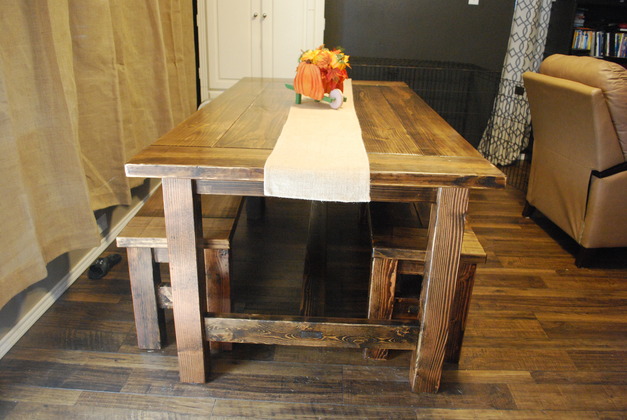
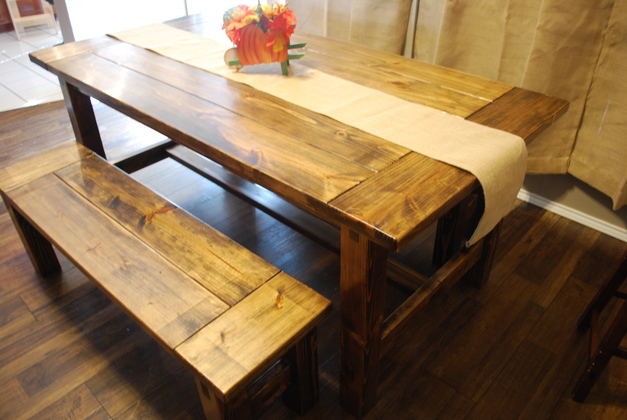
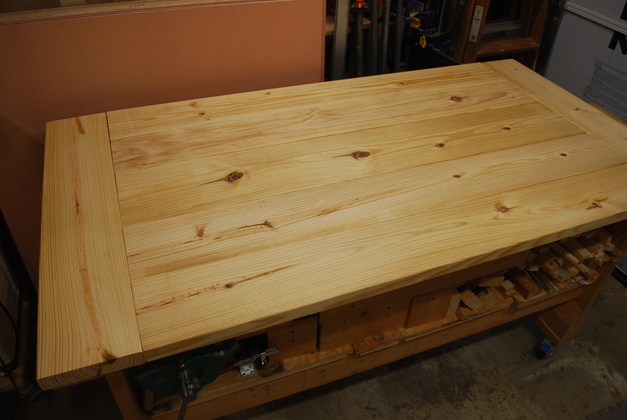
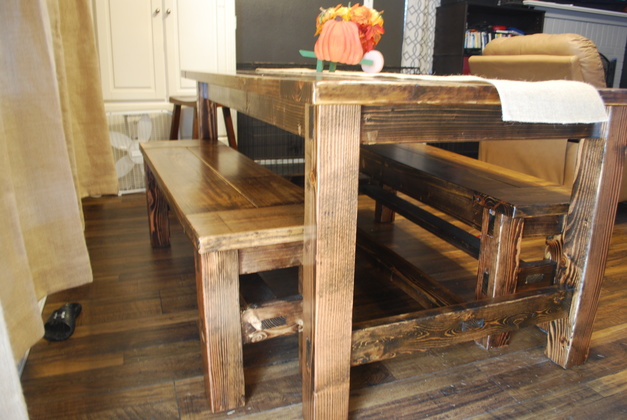
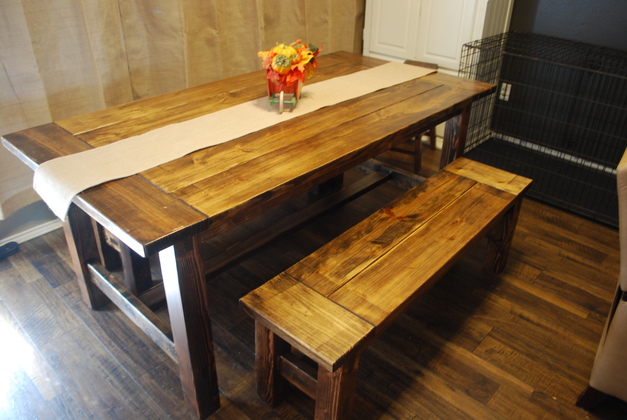
In Kelsey's house after they stained and finished it. |
|
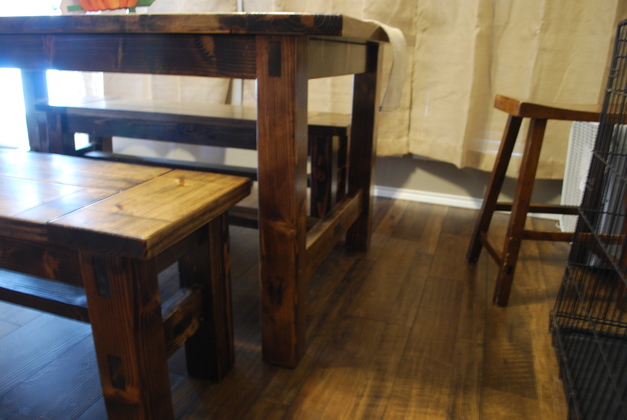
Note how neat the benches store under the table. |
|
Bench out. |
|
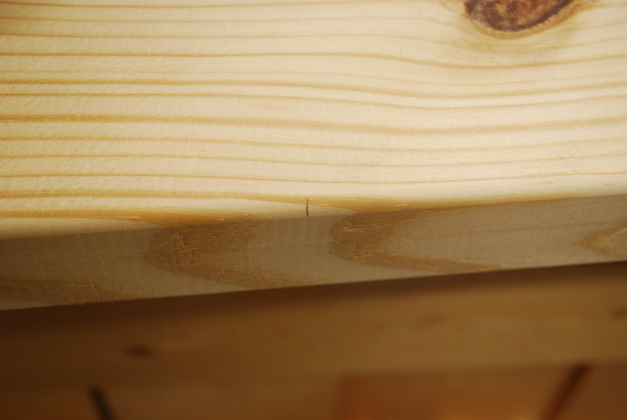
You can just see the tenon ends. |
|
|
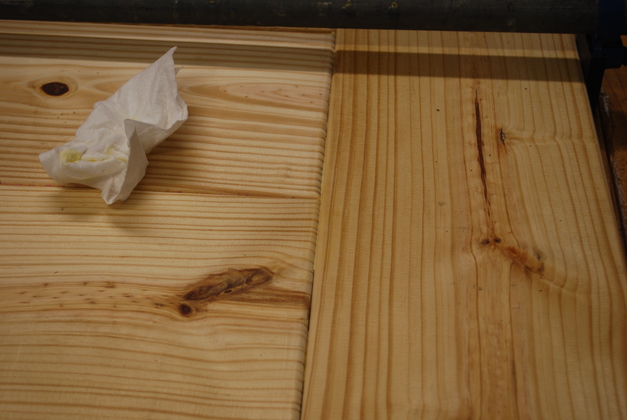
You can see the matching patterns in the bench and table top. |

|
|