Dc6 Dust Collection System
Planning for Dc6 Cyclone
The 4" system plenum is actually a 6" system (cross sectional area in the main plenum is the same as a 6" round hose or 28.27in²).
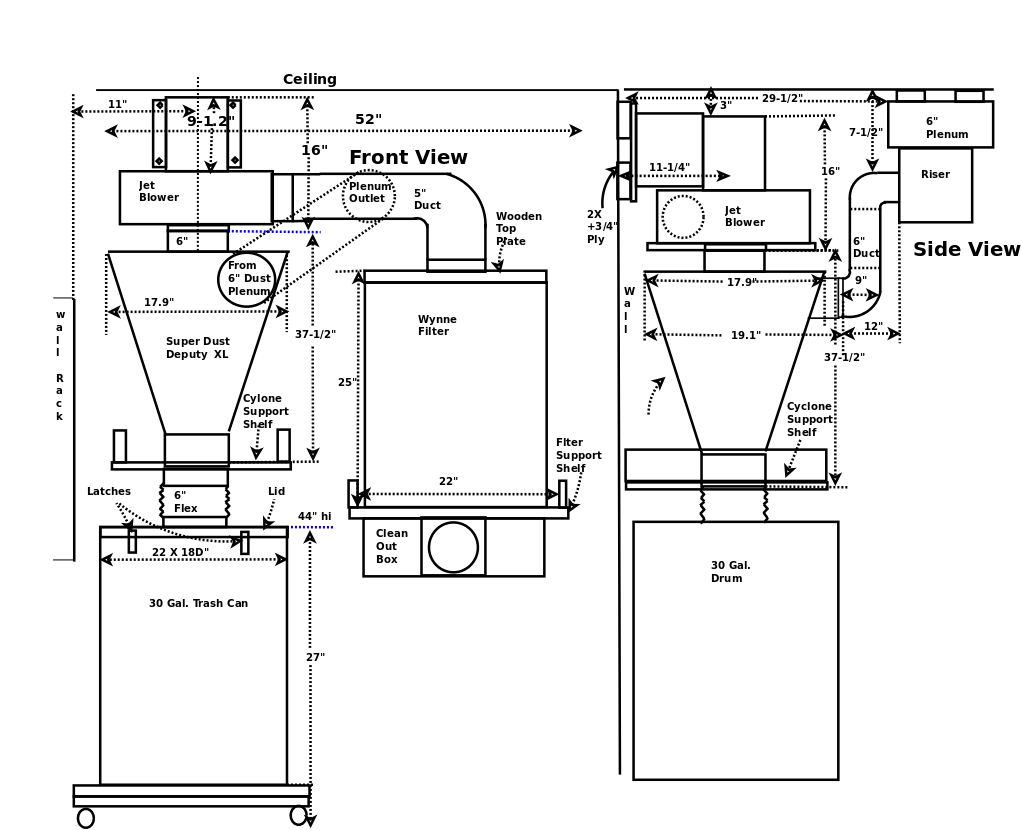
This new cyclone will be a 6" cyclone but connected to the main plenum, in front of the blower (in terms of the chip flow, see schematic).
I really like the idea of having the separator in front of the impeller/blower, you don't have years of abrasion from dust chips on the impeller.
Of course this means several more air-tight joints in the system.
I plan to swap the Jet filter and the blower, rotating the blower 90° clockwise, mount the Super Dust Deputy where the Jet filter is now.
The Wynn filter will sit on a shelf, with a clean out below, above the table saw.
The cyclone, sitting on it's shelf, below the blower, will have a 6" flex line down to the dust bin.
This will allow me to remove the cyclone with out disturbing the blower or empty the dust bin without disturbing the cyclone.
The blower's outlet will connect directly to the top of the filter.
I agonized about what kind of cyclone to get.
I had built a small Bill Penz cyclone for my 2" system and have a pretty good idea of how it works.
The best cyclone for the $ is a Clear View CV-1800 (Bill Penz design), but I couldn't squeeze that into the space, so I finally ordered an Oneida Super Dust Deputy XL.
After receiving the Oneida Super Dust Deputy XL, I was a little disapponinted, it didn't have an internal spiral ramp, the bottom of the cyclone's cone had big notches moulded into it (to support the flange), and of course the entry was very small (no transition) and didn't angle down into the cyclone.
I shouldn't fuss about the size of the entry, thats the reason I bought it!
I'll cover the lower cyclone's notches with metal tape.
I'm still gonna try it and see how it does.
The Dust Bin
I originally bought a 30 gal. plastic roll-around trash can as the dust bin, but it collapsed when the vacuum hit it.
I stopped the collapsing with an internal ring brace, but I didn't like it.
I finally bought a 33 gal. round metal trash can for the dust bin after trying a 33 gal plastic roll-around.
The metal can is the best, it doesn't need internal bracing and it's mouth fits perfectly into a 33 gal black trash bag for emptying.
I decided to build a dust bin full sensor like the one Oneida has for $150.
There were several itterations of dust detector, ultrasonic, and infrared.
Please take a look at the dust sensor page.
Schematic
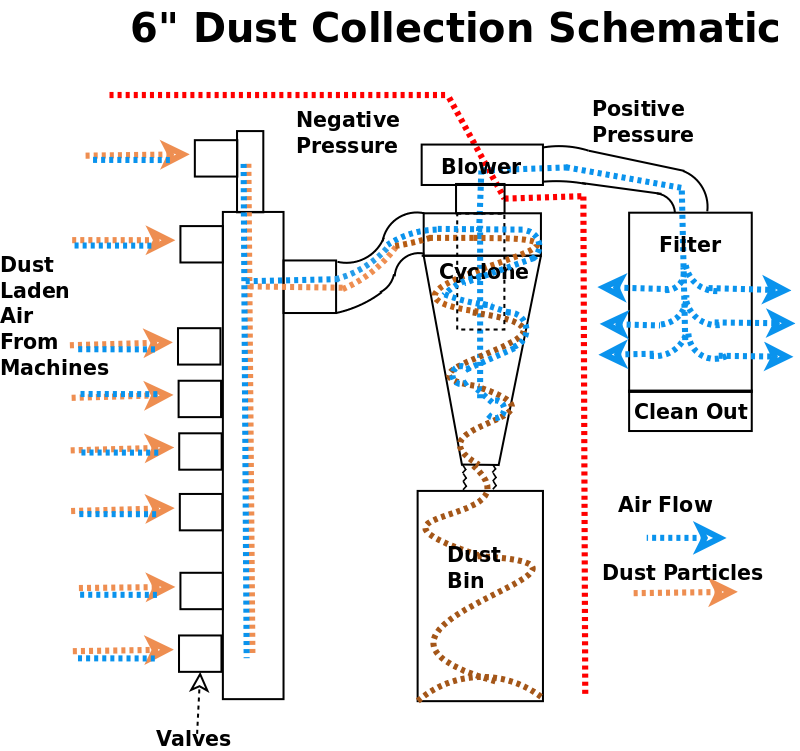
Air, laden with dust, comes in from the machines on the left.
It is gated by the updraft valves then routed via the 6" plenum to the cyclone's input.
As the dust laden air enters the cyclone it is forced down and outside so it swirls counterclockwise at a very high rate of speed.
The heavier dust particles (chips), are forced by centrifugal force, to the outside of the cyclone's cone where they continue to spiral toward the bottom.
As the particles approach the smaller bottom of the cone they pick up speed until they reach the very bottom of the cone where they are projected (due to their inertia) down into the dust bin.
The air, free from chips, is drawn upward, through the center of the cyclone, into the vacuum side of the blower's impeller then projected out, through a 5" metal pipe into the top of the filter, where is again filtered for very fine pieces of dust and finally back into the atmosphere of the shop.
Any large particles in the filter will fall into the clean out box below the filter.
The red dotted line separates the negative pressure side (LEFT) from the positive pressure side (RIGHT) of the system.
Blower
|
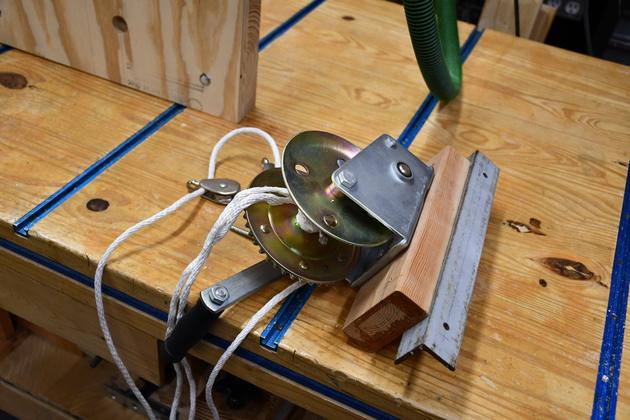
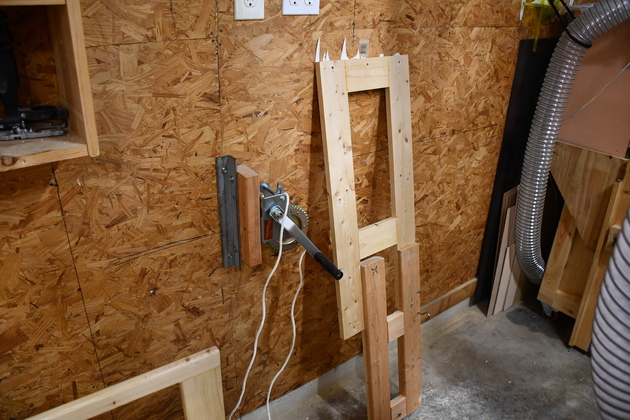
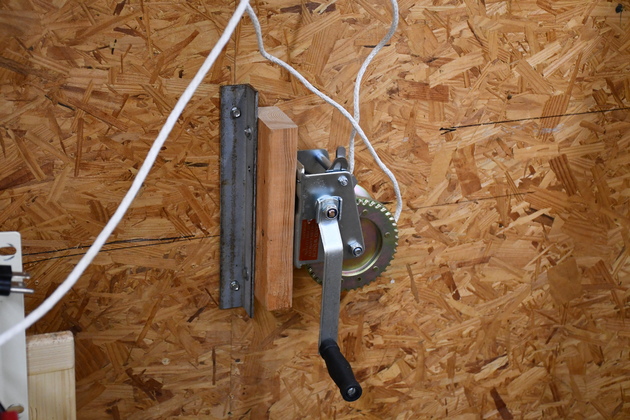
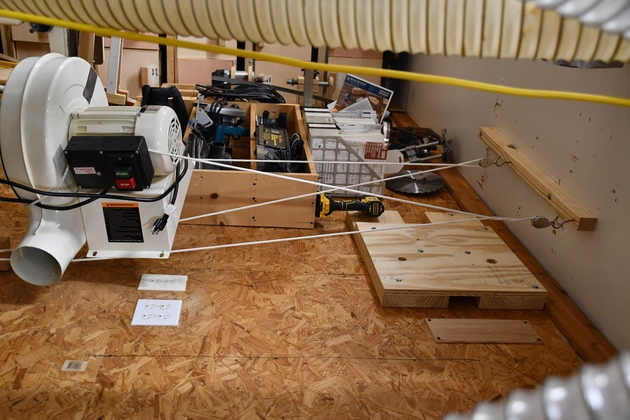
If you wonder how an old person gets a 60 Lb. blower down from then back up to the ceiling, it entails a boat winch, a couple of pulleys, and some nylon rope.
The holes in the angle iron are for lag bolts into a stud, low in the wall.
This is the winch I used to originally put the blower on the ceiling.
|
|
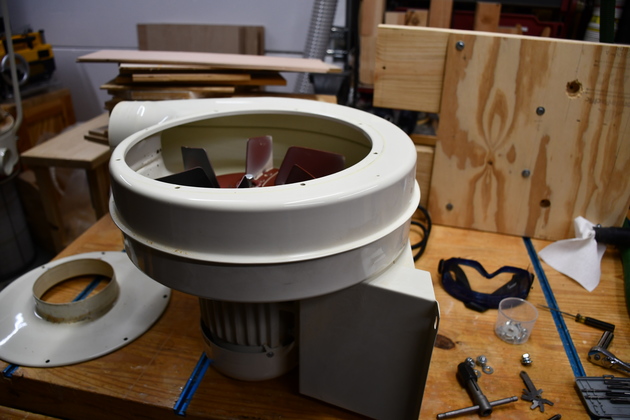
The blower, originally Jet DC-1100, removed from the ceiling, with the
cover removed.  The impeller is firmly attached.
FYI: I checked, the Jet 1100 and 1200 use the same blower housing and
motor mount.
|
|
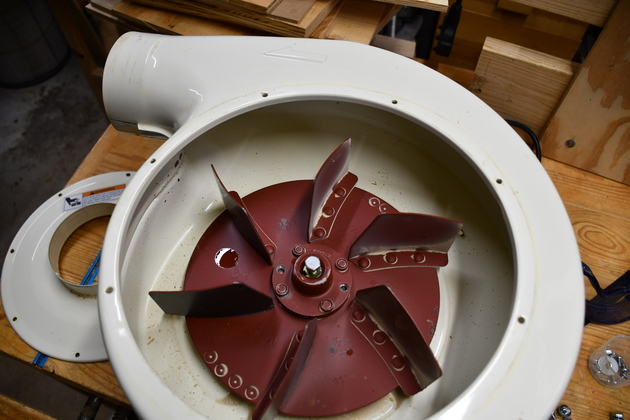
Looking down inside the blower.
If I remember correctly I purchased the DC-1100 in 2006 or 2007, so its about 12 of 13 years old.
I know I switched to the Wynne Environmental in 2012, 7 years ago.
It actually looked pretty good considering having been run many many hours.
|
|
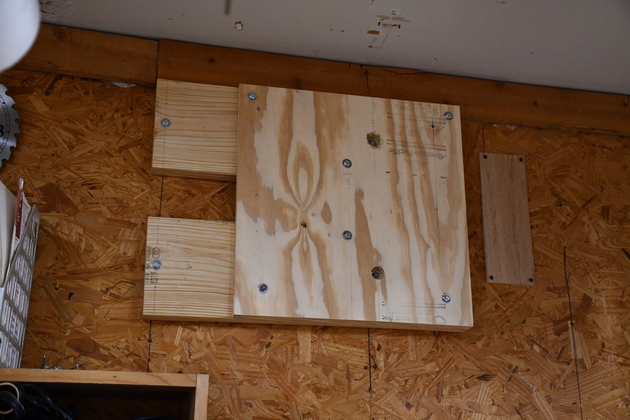
An early version of the new blower mount, I realized it couldn't be this tall.
Note the two large holes in the 3/4" plywood square are so I can tighten the right hand lag bolts into the stud.
|
|
Here is my previous frame that held the blower, separator, and filter all on the
ceiling.
You can also see the winch lag bolted to a stud for lifting and lowering the blower.
|
|
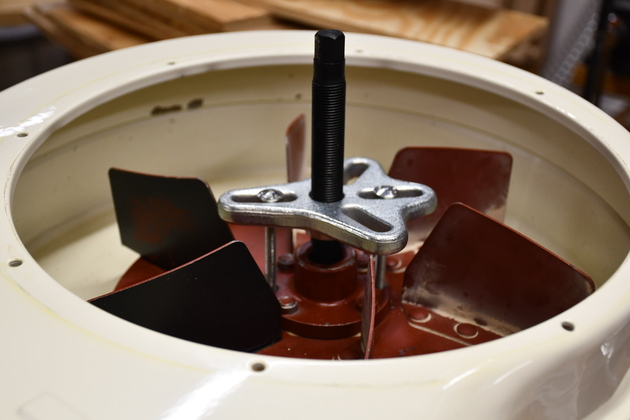
The impeller had two blind holes in the aluminum flange, but they weren't deep enough to tap without a bottoming tap (which I didn't have).
So I drilled them out with a 1/4-20 tap drill, this steering wheel puller sprang into action and voila, as if by magic, impeller is free.
|

|
The bottom of the 1/4-20 bolts.
I didn't even have to bang on the puller bolt, the impeller just slipped off easy as pie.
|
|
Naked motor.
I couldn't feel any end play or slop in the bearings, Jet really provided a good motor.
|
|
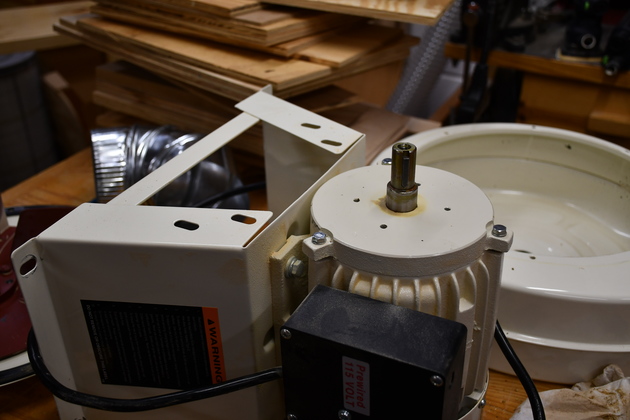
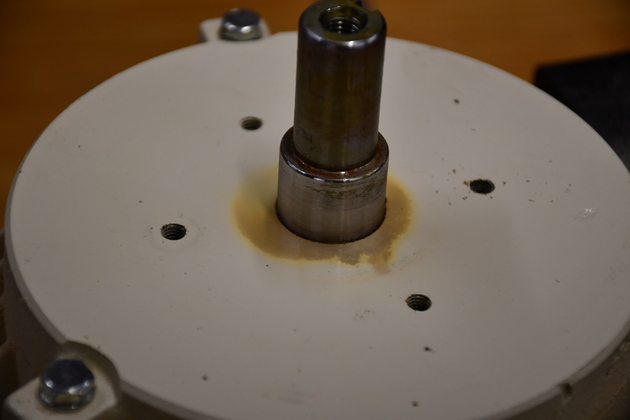
Close up of the motor's shaft.
I wonder if Jet turned it down to fit the impeller???
I need to reorient the housing 90° for my new setup.
Note, they provided 4 tapped holes for the two main bolts holding the blower housing on.
|

|
The blower preparing to make its ascent.  I did actually have help,
Betty cranked the winch while I guided the blower assembly to it's
new attachment point.
|
|
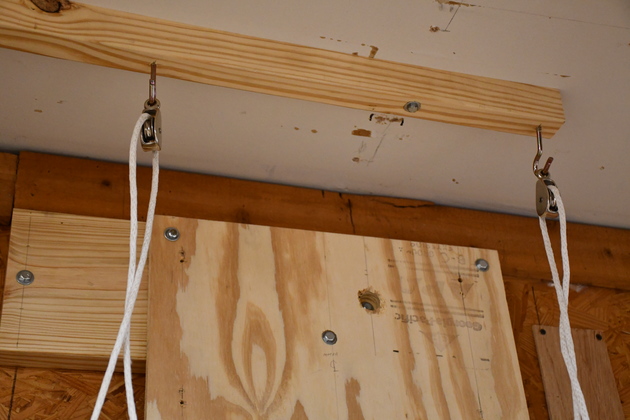
I attached this hoisting bar across two joists to lift the blower.
|
|
This thing does all the work of lifting or lowering the blower.
|
|
On its way up.
|
|
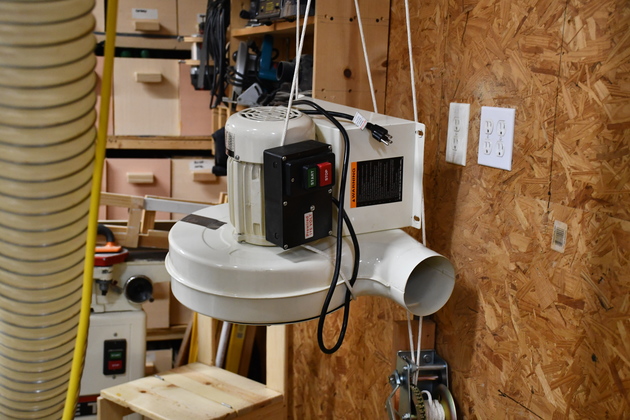
The whole shebang.  Note the bar with the pulleys attached to the ceiling
It's there just for this.   I even left it after the blower assembly was
installed.
|
|
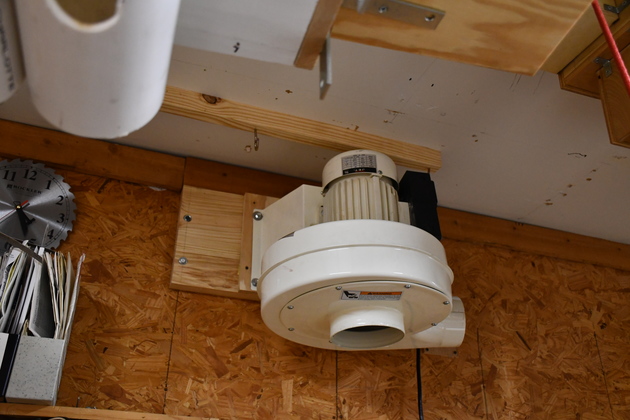
And mounted on it's panel.
I'll remove the hoisting bar so the motor will have better air circulation.
|
|
You can see the blower's 5" outlet isn't quite parallel to the wall.
It does, however, point right at the center of where the filter will be!
|
The Cyclone
|
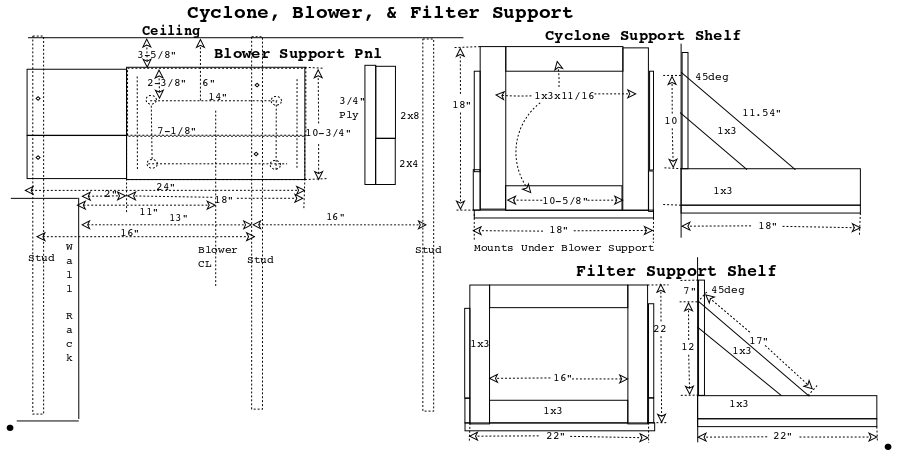
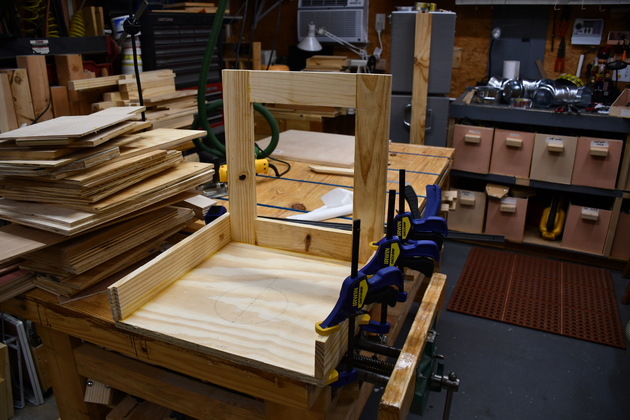
Cyclone support table, being glued.
I gulued the back frame fist, biscuits in each corner.
while that set I cut bisucit slots across both sides and the back for the frame.
Once the back was set I glued one side, then the back with a biscuit between and finally the other side.
|

|
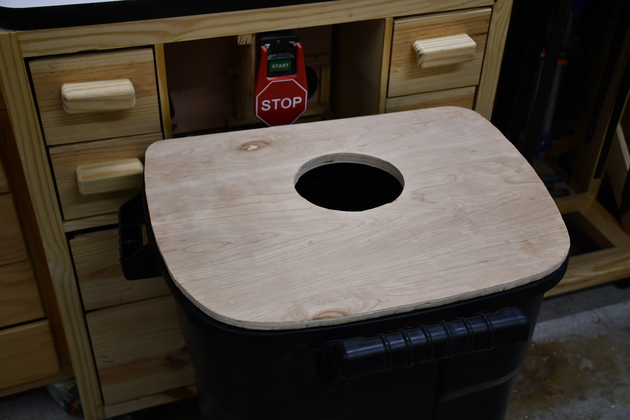
Last I glued the diagonal supports with a biscuit at each end, also cut the 6" hole.
I know this looks like a seat for an outhouse.
|
|
This is the original rectangular plastic dust bin which collapsed under vacuum.
I replaced it with a 33 gal. metal trash can which works great.
The top for the dust bin, with it's hole.
I'll put latches on the sides.
|
|
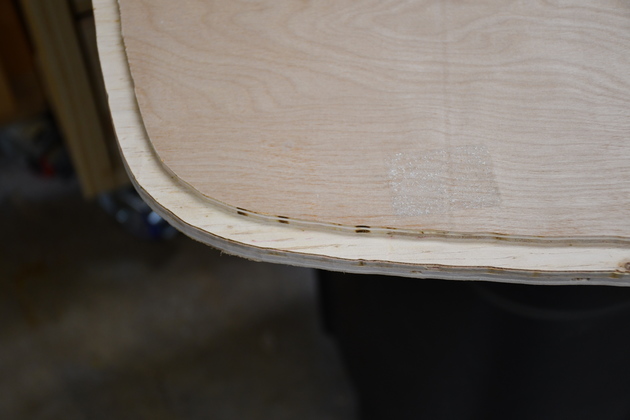
Under side of dust bin top, note the rabbet for a gasket.
More dust bin pics
|

|
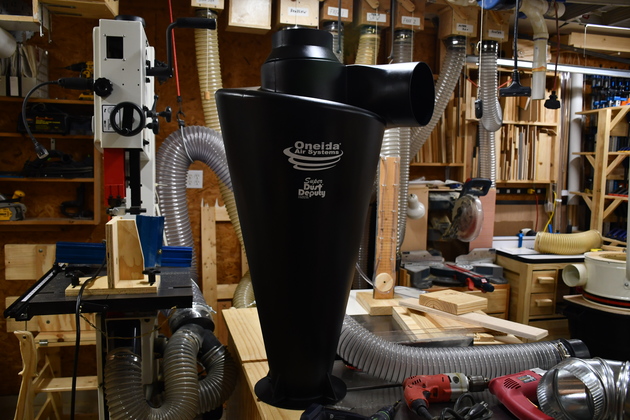
Finally the Super Dust Deputy has arrived, the box is worse for wear but the cyclone is ok.
|
|
When it was unboxed it was OK.
This is where I found the Super Dust Deputy XL does NOT have a spiral ramp however the top is spiraled down which appears to serve some of the same purpose.
|
|
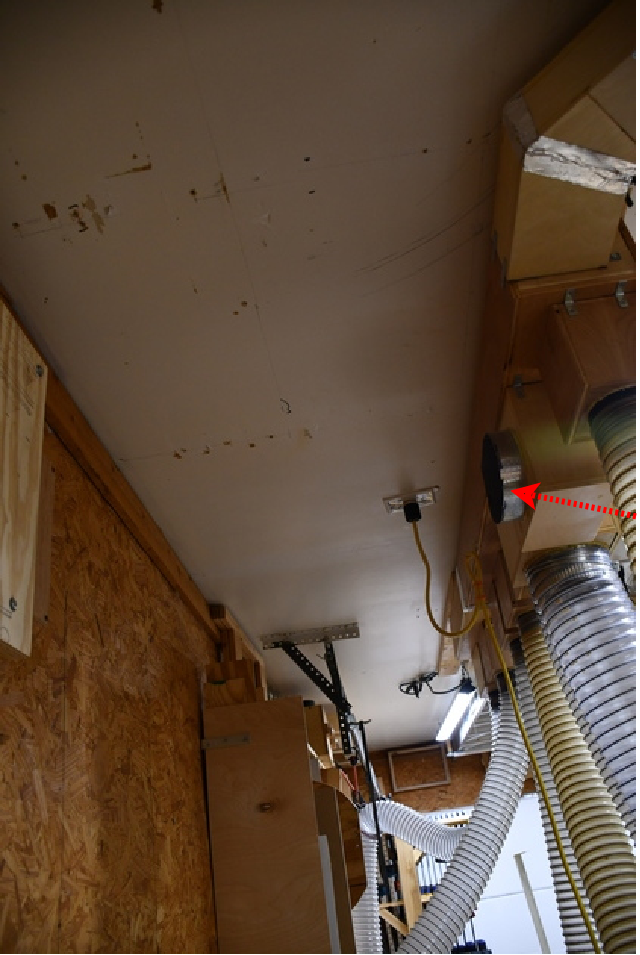
The ceiling behind the plenum where the DC goes.
Note I left a flange on the 6" riser to connect to the cyclone's input (Red Arrow).
The plug in the ceiling with the yellow cable is the 240V for the table saw.
|
|
The old jet DC-1100 separator sitting on top of the dust bin.
Note the filter on the floor behind and to the right of the dust bin.
|
|
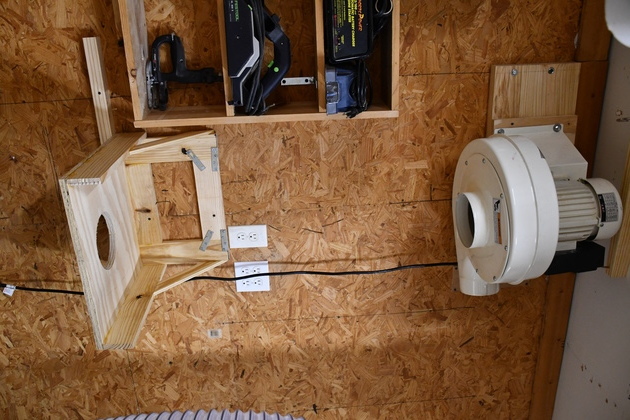
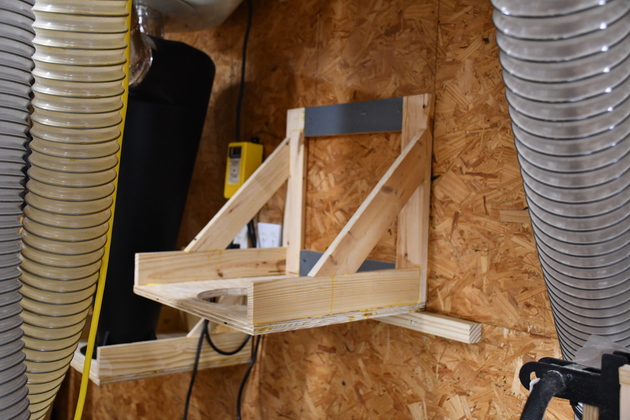
Shelf ready for cyclone directly below blower.
|
|
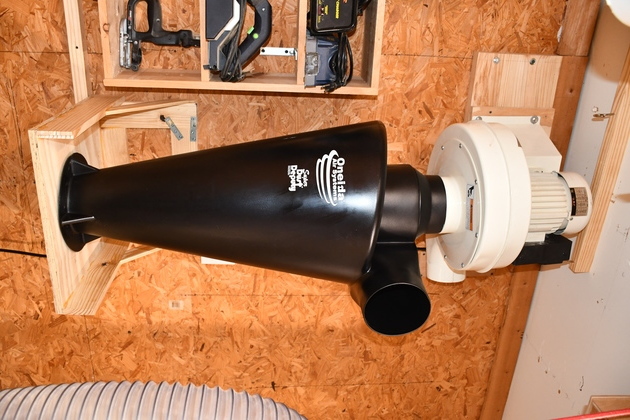
Test fit cyclone between blower and shelf.
|
|
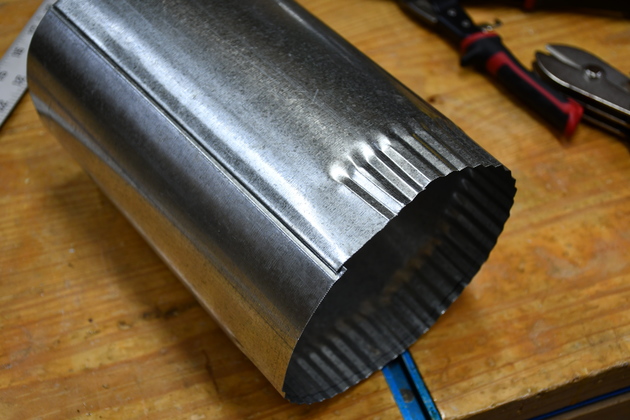
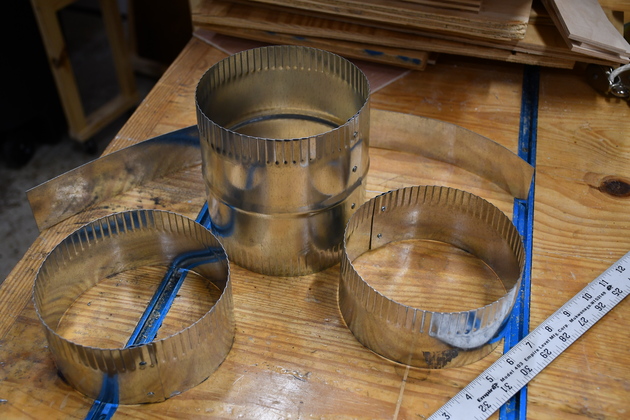
I have cut the connecting piece of 6" duct and now I'm crimping a male on one end.
This is the piece that connects the elbows on the main plenum and the top of the cyclone.
BTW: when you use pipe with these kind of male female joints, the male should always point the direction of the air flow, then, if you can, use metalized tape on the inside to reduce turbulence.
|
|
I bought two of the unions (shown at top) and cut one in half for two 6" flanges for each end of the cyclone's input plumbing.
|
|
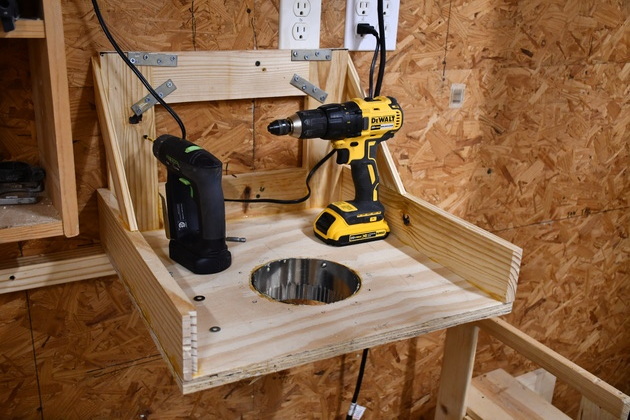
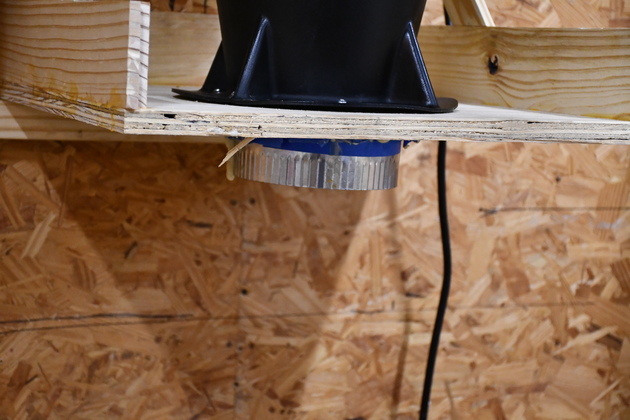
Here is one of the 6" flanges glued into the cyclone's shelf.
This will connect, via flex tube, to the dust bin.
|
|
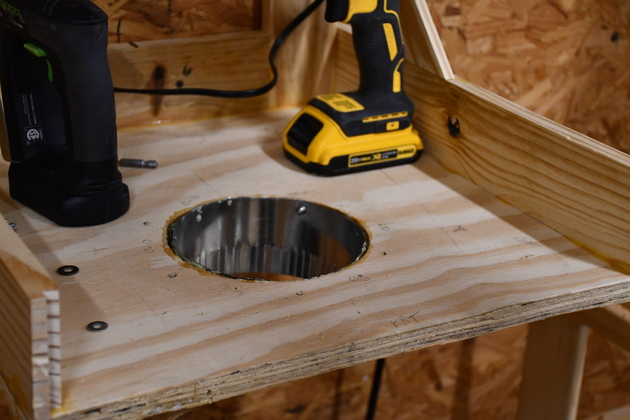
Closer look at the cyclone shelf with it's dust bin hole.
|
|
A side look at the 6" flange.
The blue painters tape was for the acrylic glue I used to hold it in place.
Acrylic glue foams and fills gaps making this air tight.
|
|
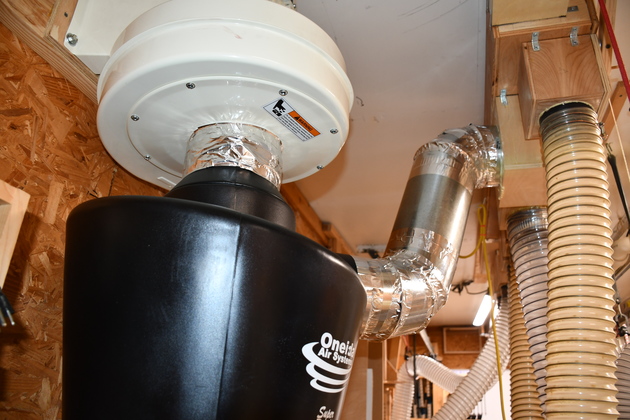
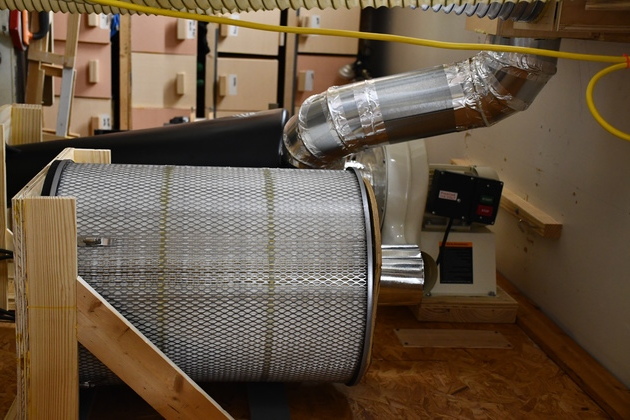
Cyclone connected to the 6" ceiling plenum.
For the connection from the ceiling plenum to the cyclone's input I'll use flexible ells, sinc these won't quite be 90° corners.
You can see the flexible ells, I will tape each of these connections.
You can see the blower's outlet above the cyclone.
|
|
From the other side.
|
|
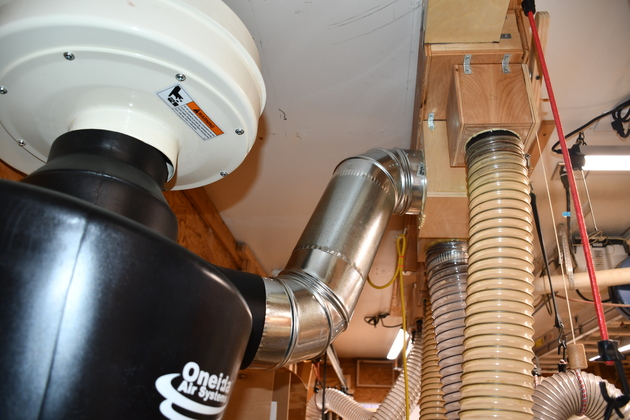
A look at the taped plumbing from the cyclone to the ceiling plenum.
|
|
Other side of the taped 6" connections.
|
|
Closer look at taped 6" plumbing.
|
|
Completed 6" plumbing.
|
|
The dust bin connected to the bottom of the cyclone shelf.
You can also see two of the the draw down latches.
|
Filter
|
Filter shelf screwed to the wall to the right of the cyclone.
Note the 2x2 bar screwed to the wall under the filter shelf, thats the way I make sure I get it level and at the right height, it'll be removed later.
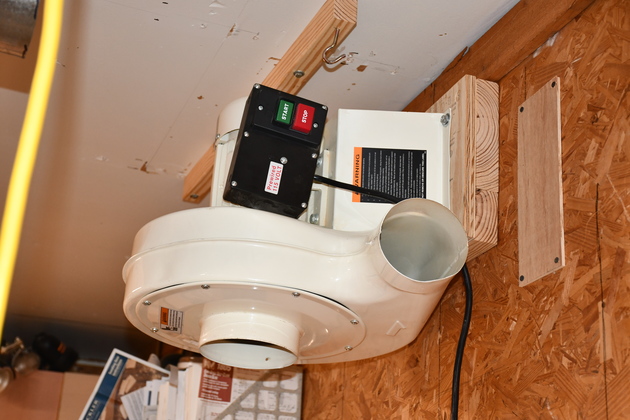
On the far side of the filter shelf, on this side of the cyclone you can see the remove power switch (yellow box) for the blower.
|
|
Filter on it's shelf. You'll note the open output of the blower above it,
this is a concrtuction pic.
You can just see one of the latches holding the filter down on this side.
I have disliked these latches since my first Wynne Environmental (2012).
|
|
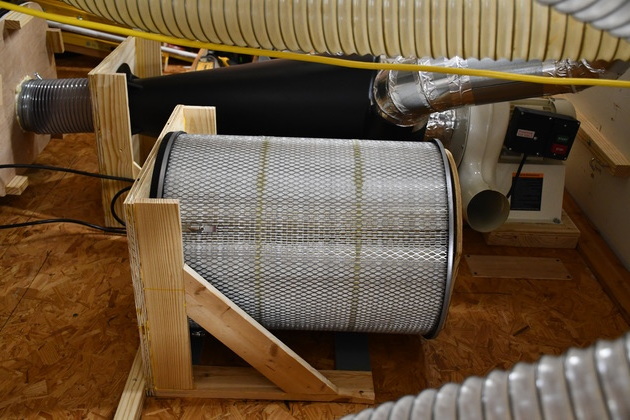
6" tall flange on top of the filter.
Note the flange is in line with the blower's output, fewer curves mean more iffecient air flow.
|
|
Filter with taped plumbing.
5" from the blower's output.
Note the 6", on the left, from ceiling plenum to input of cyclone.
|
Filter Holddown
|
In 2024 my dust detector didn't work and the bin filled up, which started
to fill up my filter.
I had to clean out the filter.  Which means unmounting the filter: it has
a 1/2" plywood top which is screwed to it, and is latched to the shelf
below.  The latches have always been problematic, my shop is tiny so there
isn't much room in the back to secure them.

This year I decided there had to be a better way, so after consideration
I screwed 4 screw eyes into the shelf where the latches used to attach,
and ran two 48" bungies from the back, up across the top and down to
another eye on the opposite side.  Voilla!  No air leaks and the filter
is easy to remove and replace.

To install the filter, the bungies are hooked at the rear, lay each one
to the outside of the shelf, set the filter on the shelf, strech a bungie
up from the rear across the top and back down to it's front hook.  Repeat
the opposite side.
Here you can see the 4 yellow bungies holding the top on and the filter
down on it's shelf.
|
|
A closer look at the filter and it new bungies.
|

|
Here you can see the ends of the two bungies hooked into their screw
eyes.
|
|
You can just see the top board and the two bungies.
|
Old Filter Hold Downs
|
I modified the hold downs from Wynn.
This is the parts of the main lower filter hold down, the bracket on the left is screwed to the support shlef and the modified pipe clamp with two tongs on each end grap the expanded metal filter covering and the base.
The problem is the expanded metal has very sharp edges and the slot screwdirver constantly slips out of the clamp's worm driver slot.
I tried a 5/16" nut driver but, under pressure, the pipe clamp straps flatten out which makes it difficult to keep the nut driver on the clamp's worm.
|
|
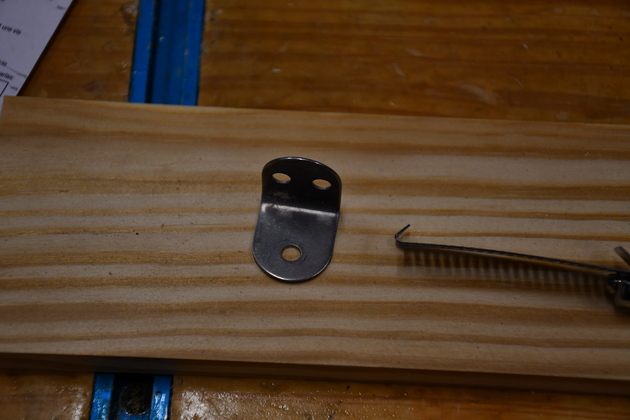
Pic of the bracket.
|

|
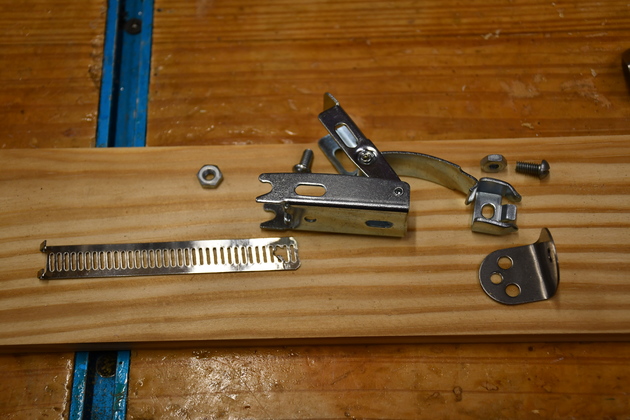
I bought this draw down latch from Lowes.
|
|
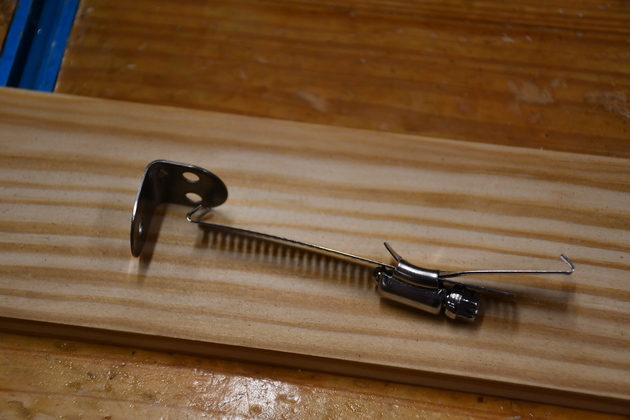
All the hold down and latch parts.
I drilled a hole in the longer pipe clamp strip and bolted it to the latch.
Then I bolted the latch's snatch bracket to the original Wynn hold down bracket.
Not shown: I cut a small 3/16 plywood piece and bolted the latch's snatch block and hold down bracket to it.
|
|
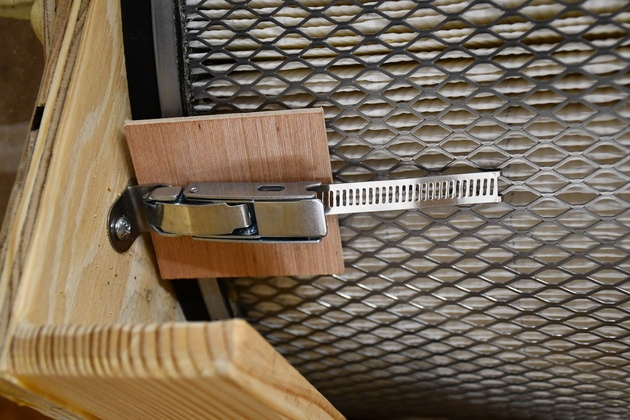
Here is what I'm using now, but I'm still thinking about it.
|
|
Bottom of the filter and the clean out below.
|
Finished
|
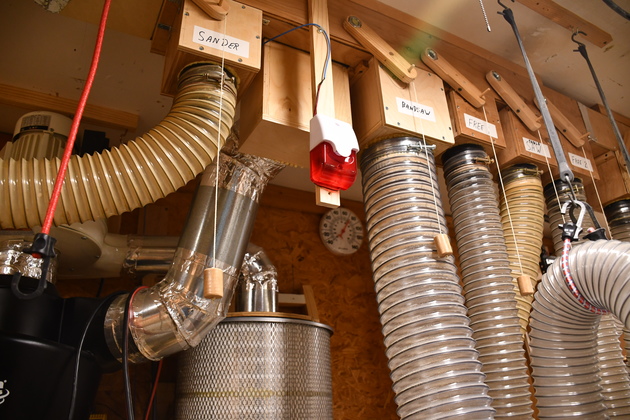
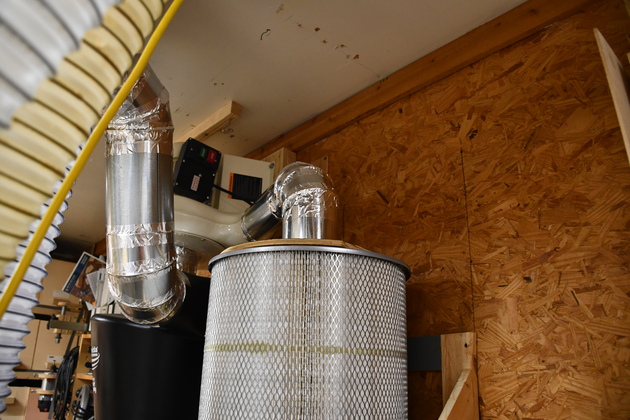
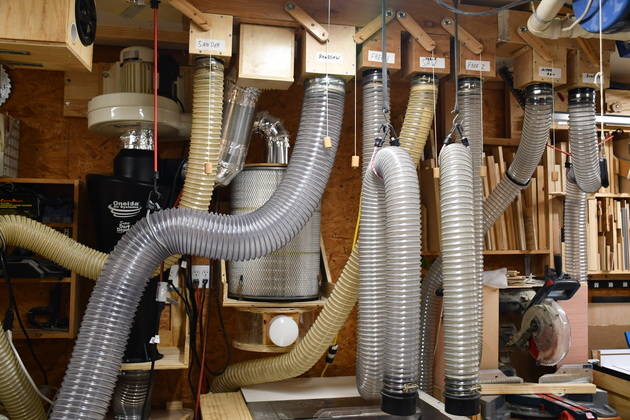
Looking across the table saw, behind the hoses you can see the cyclong and filter.
|
|
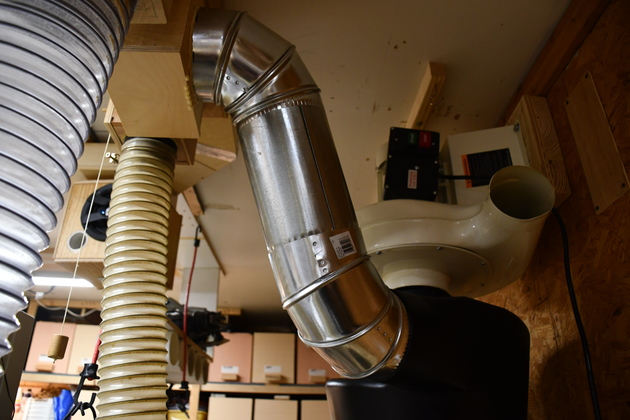
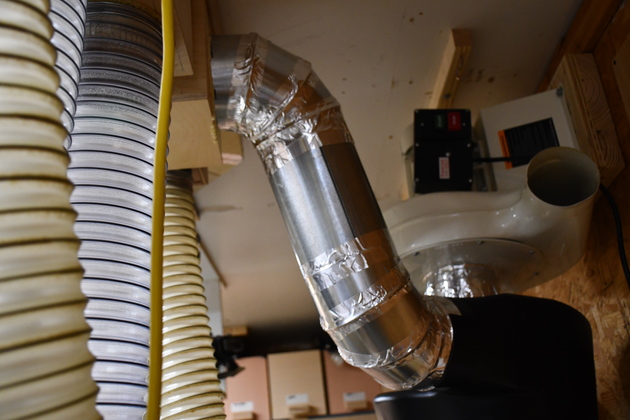
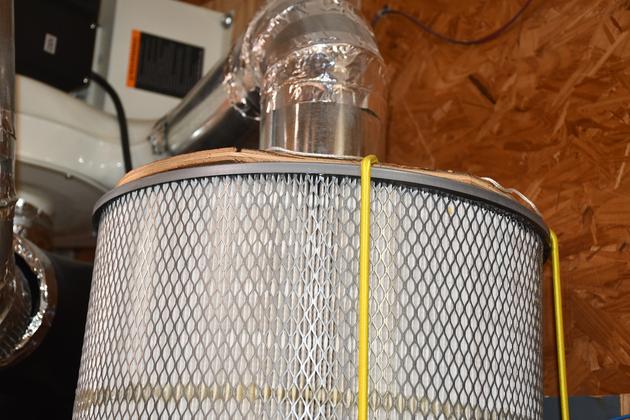
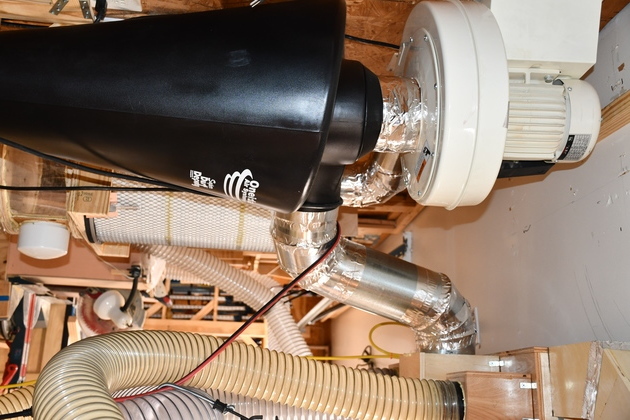
Better look with at the impeller, cyclone and the filter beyond.
You can see the input to the cyclone from the ceiling plenum.
|

|
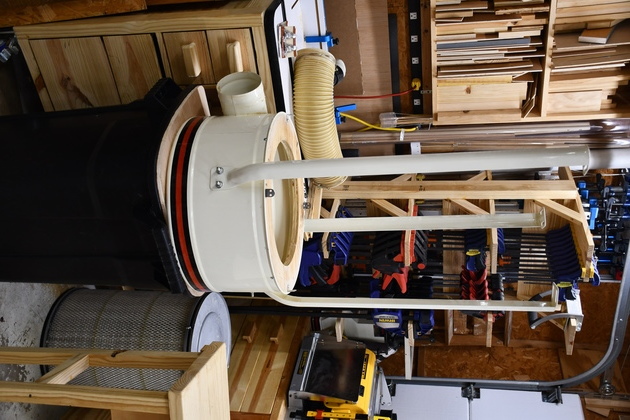
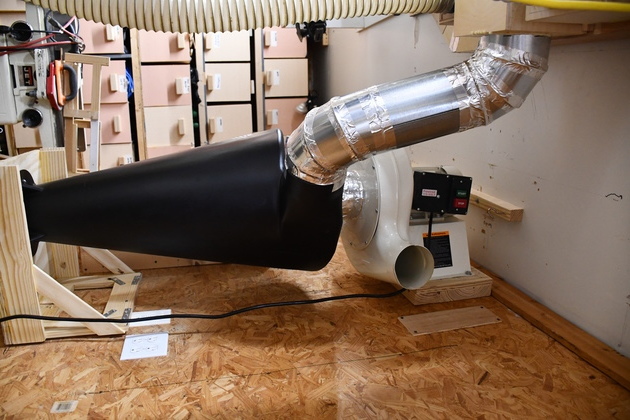
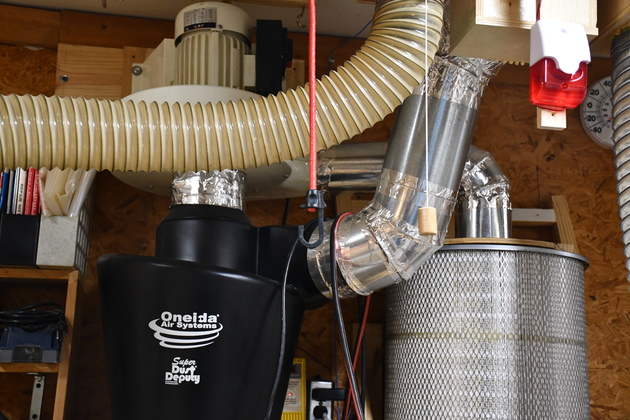
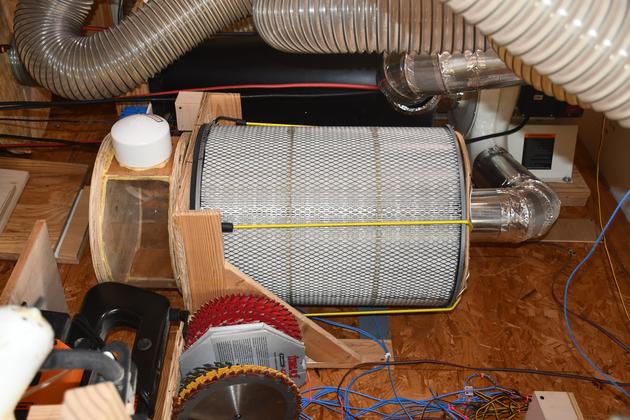
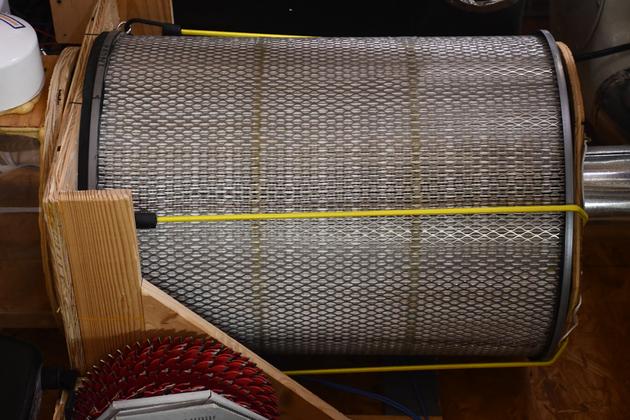
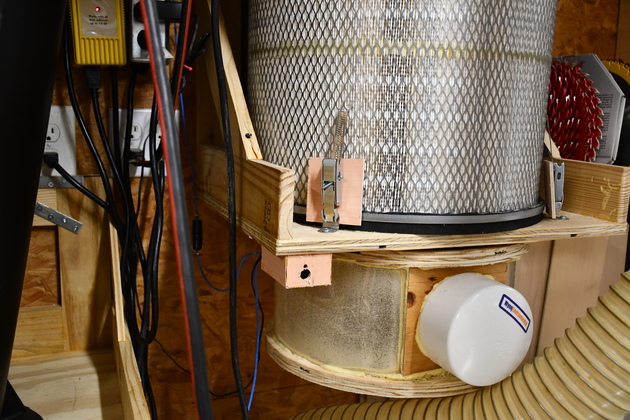
Cyclone, with blower above, showing the dust bin below and the filter & cleanout to the right.
Its hard to see the blower because it's hidden behind the sander hose.
|
Dust Bin
|
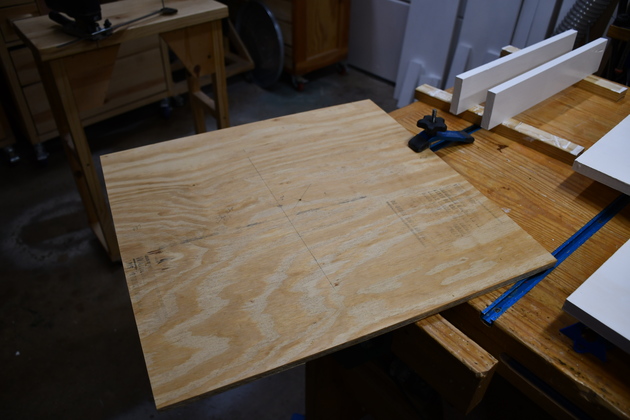
1/2" plywood for dust bin lid.
|
|
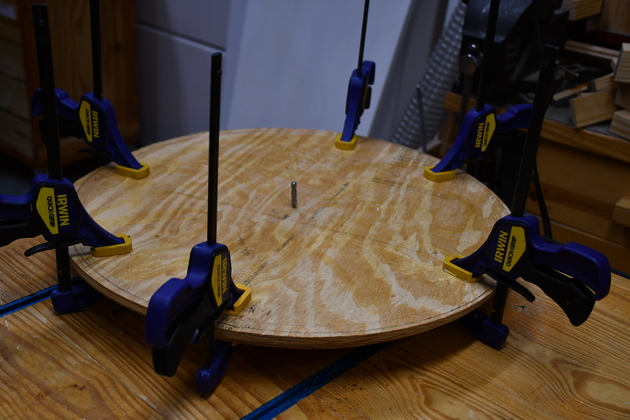
Laminating two pieces of 1/2" plywood to make the dust bin lid.
|
|
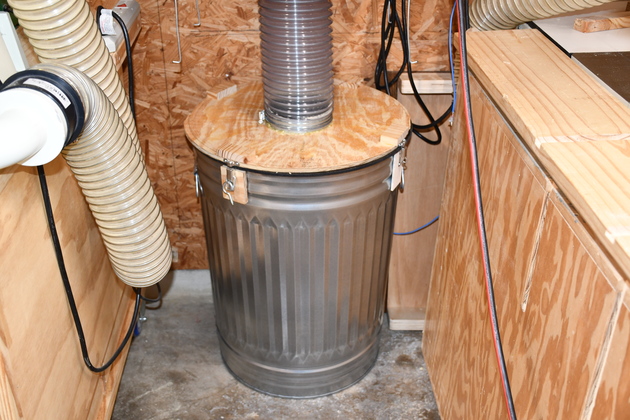
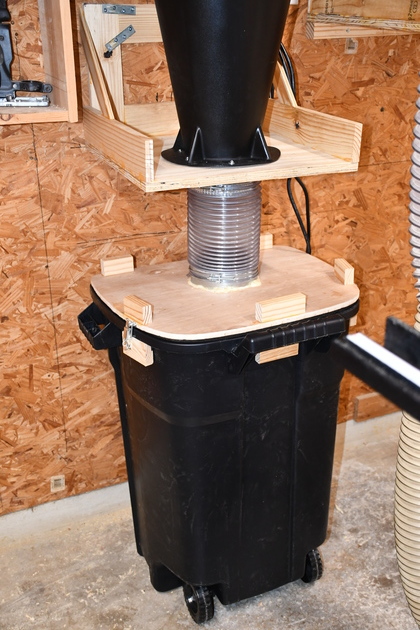
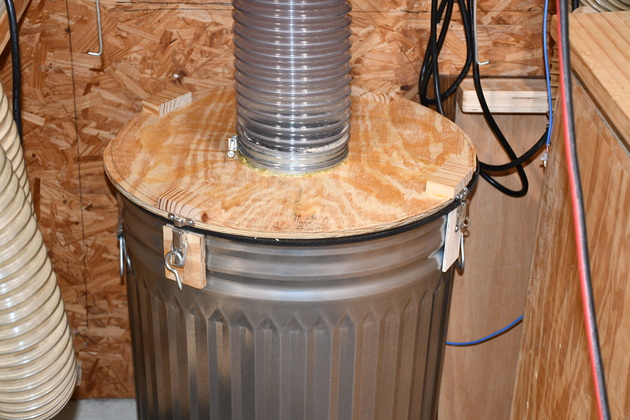
Bin installed under the new cyclone.
|
|
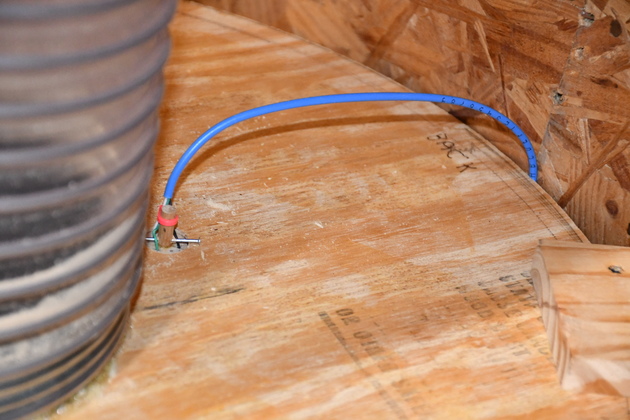
Closer look at dust bin lid, you can see the dust sensor wire and the sensor's top.
|
|
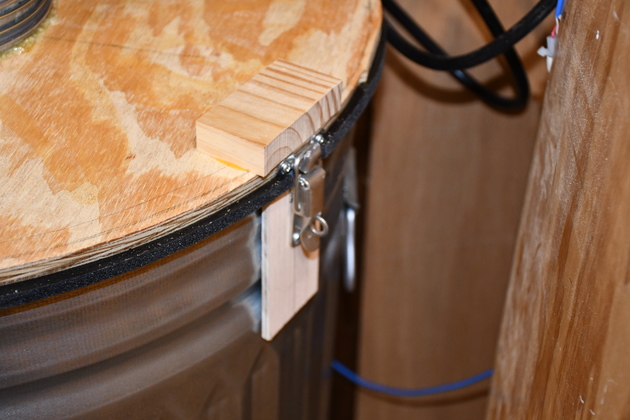
Draw latch holding lid closed and pressure on the gasket.
|