|
|
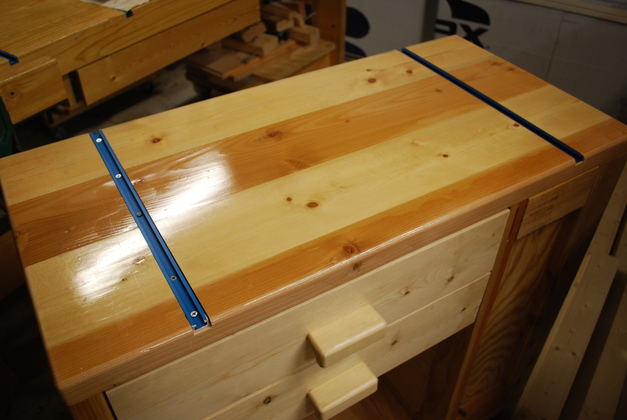
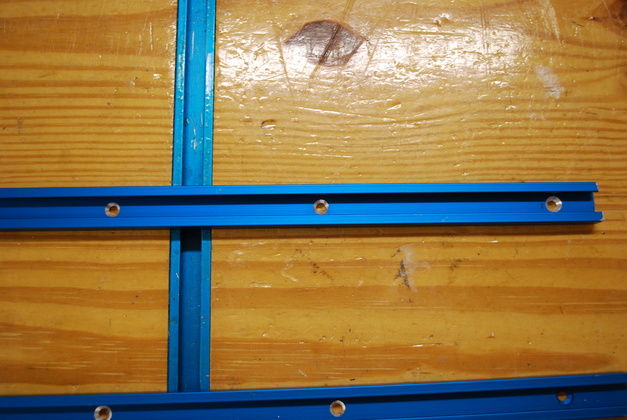
Tee Tracks installed on a new Loading Bench.
|
|
Tee Track Install Into Loading Bench
|
02/03/13: Add special tee track tools.
12/25/12: Page Origin.
This shows installing Tee Tracks on a loading bench, but the same process should work for most situations.
I have had really good luck with using tee tracks on workbenches including the loading bench.
On the loading bench, I use them to hold and position presses, powder measure bracket, and tumblers.
Because of the strain of sizing cases with a press, I increase the number of hold down screws in the Tee Trk by placing one at least every 4".
On this installation I use #8 X 1" flat head screws to hold the tee tracks down.
The center of the Tee Tracks are 6" from the edge of the loading bench, which matches the press bases.
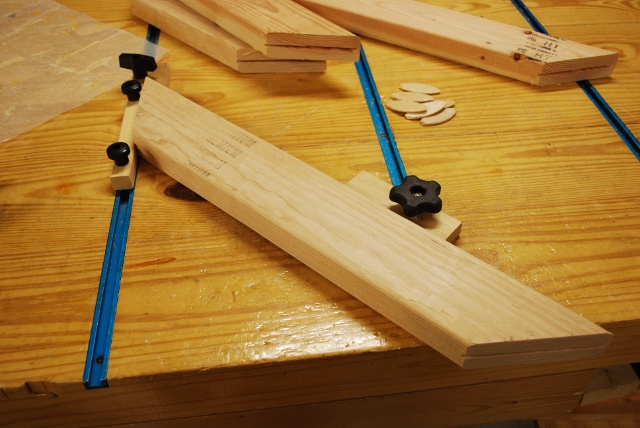
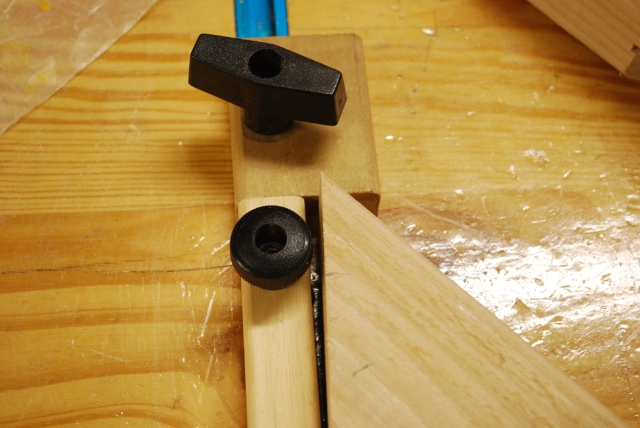
I have created some simple tools in addition to some purchased clamps and blocks.
The tools I made are just boards with a hole or a slot and a tee bolt and knob, but they help a lot.
Here are the pics.

|
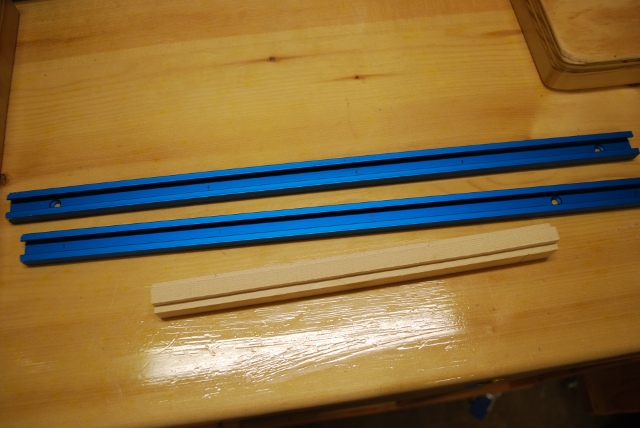
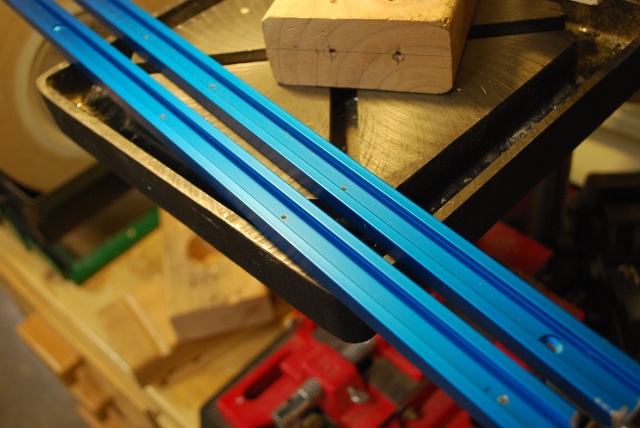
A new loading bench (Kyle's) with the tee tracks, laying on top, cut to length.
The loading bench is 18" across, I cut the tee tracks about 1/2" shorter giving a 1/4" space at each end.
The top edge of the bench is rounded and I don't want to have to file the tee track down that far, and you don't ever attach anything that close to the edge anyway.
One of the objects of installing tee tracks is that the tee track doesn't interfear with sliding things around on the top of the bench, so they must be below grade (the table top).
I usually set them 1/32" to 1/16" below the bench top.
|
|
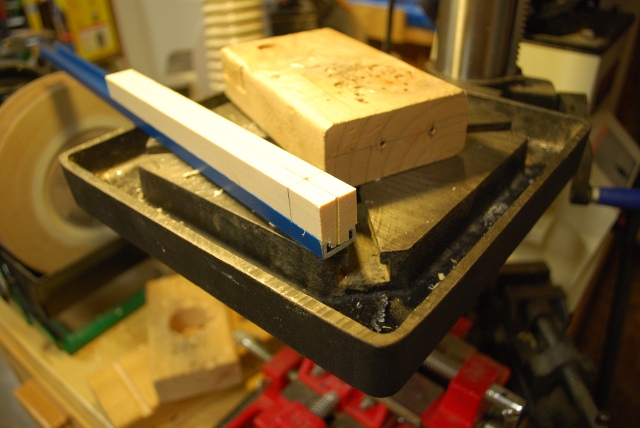
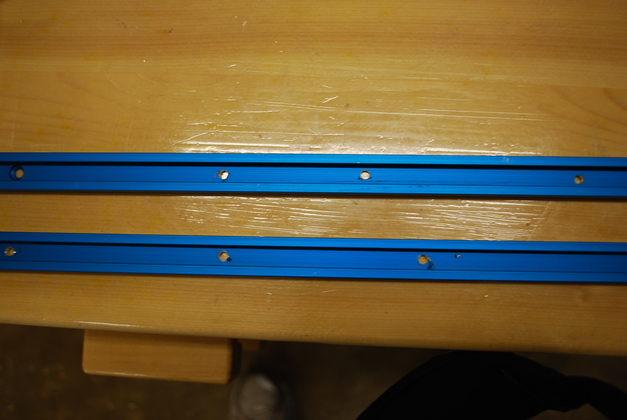
Here the tee tracks have been cut to length (17-1/2"), you can see how far apart the mounting holes are.
The wooden guide block is the same width as the tee track (3/4"), I routed off a section on each side leaving a tongue that exactly fits into the tee track's slot.
|
|
Here the wooden guide block is snapped into the tee track's slot.
You can see the mark on the side and a pilot hole drilled directly through the center of the block.
I marked the tee track every 4" and I just match the mark on the tee track to the mark on the wooden guide block.
|
|
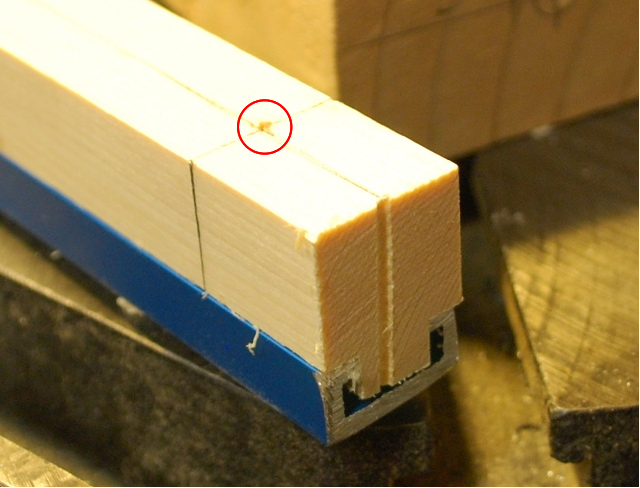
Close up of pilot hole in guide block (red circle).
|
|
I used the wooden guide block to drill pilot holes at 4" intervals in the center bottom of the tee track.
Note, in the track on the top you can see an original chamfered mounting hole.
|
|
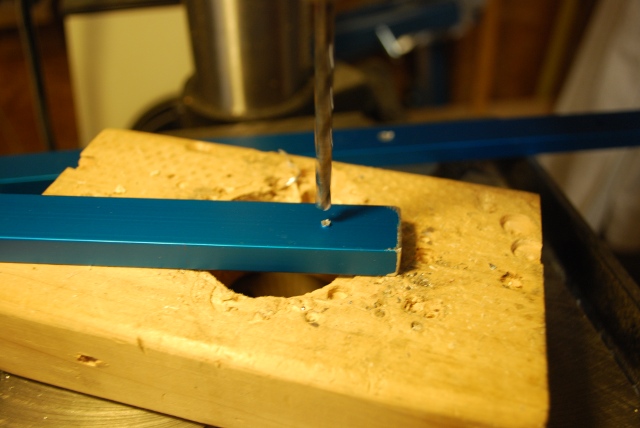
Here I'm boring a body drill hole for a #8 x 1" screw (thats what I use to mount these) from the bottom.
I drill this hole from the bottom and then countersink from the top which takes care of chamfering the holes.
|
|
From the top, all body holes are drilled, you can see drill flash around each hole.
|
|
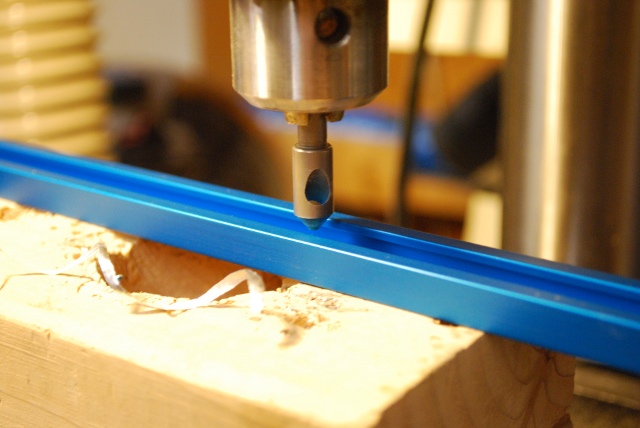
Counter sinking the holes from the top.
|
|
All holes countersunk ready for flat head #8 x 1" screws.
|
|
Closer view of countersunk holes.
|
|
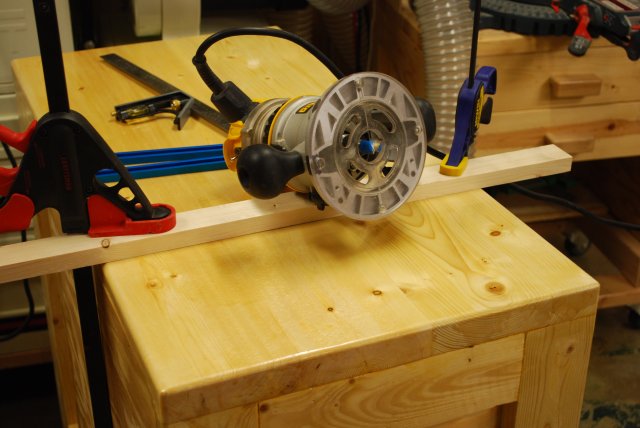
Ready to route the tee track mortises.
Since the tee tracks are 3/4" wide, and I have a 3/4" wide mortising bit, I actually make 2 passes moving the guide bar toward the end of the benc about 1/32" between passes.
I use a try square (in the background) to set the distance from the edge to the guide bar (the tee track center is 6" from the edge so the guide bar is 9" for my Dewalt router).
Since the router bit will be completely involved in this cut (not an edge cut), I move from left to right, which causes the router to push against the guide bar instead of away from it.
This makes it easy to follow the guide bar and make a straight cut.
You can make the second pass (after moving the guide bar slightly) right to left since it'll be an edge cut.
|
|
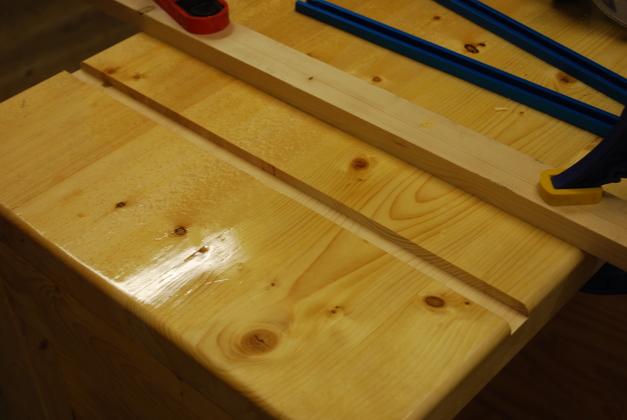
After both passes, the tee track mortise routed to 25/32".
Note, I route the tee track mortise after the top is painted, if you try to paint inside the mortise, it makes it tee track tight to get into the mortise and hard to get the tee track height correct.
1/32" is .03125 and a single coat of paint varies from .006" to about .012"
I like the tee track to end up between 1/32" and 1/16" below the top of the bench.
|
|
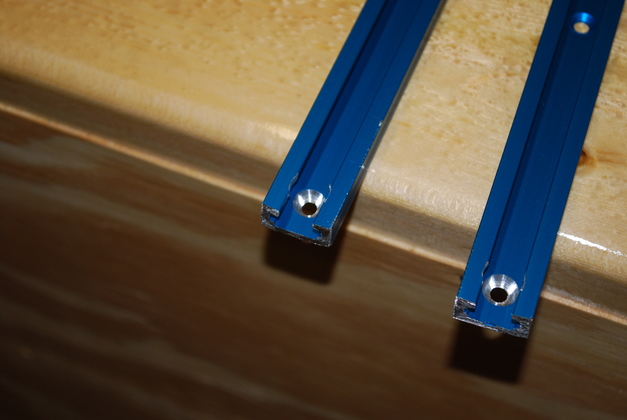
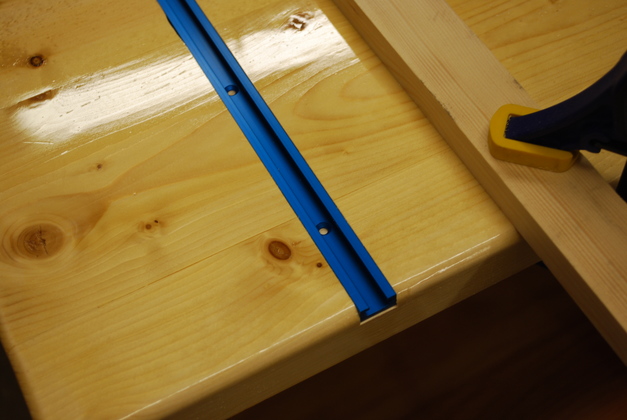
Tee track in it's mortise, ready to screw down.
You'll note the small gap at the end of the tee track.
|
Tee Track Special Tools
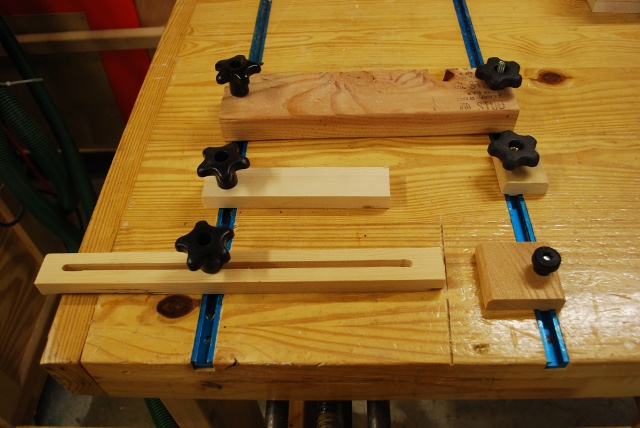
|
Some of the simple tools I have to help hold things while I work on them.
|
|
Here I'm using a variety of blocks to hold a piece while I cut a rabbet around the inside edges.
If I used clamps they would get in the way of the router.
|
|
After the rabbet is cut.
|
|
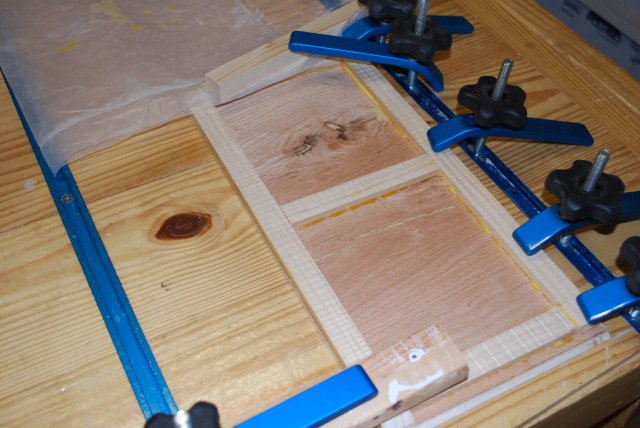
Here I'm using clamps and blocks to hold a table top while I glue the vertical supports.
|
|
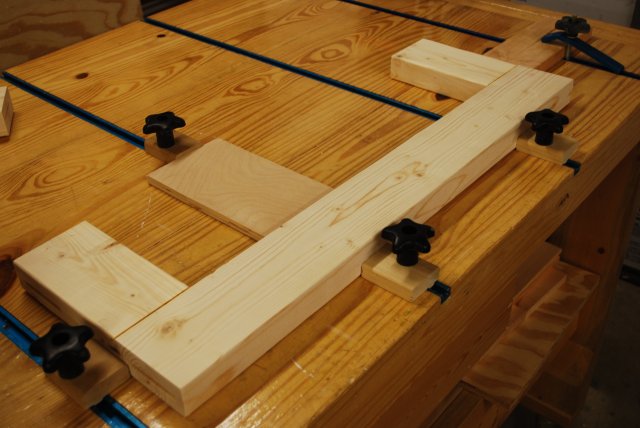
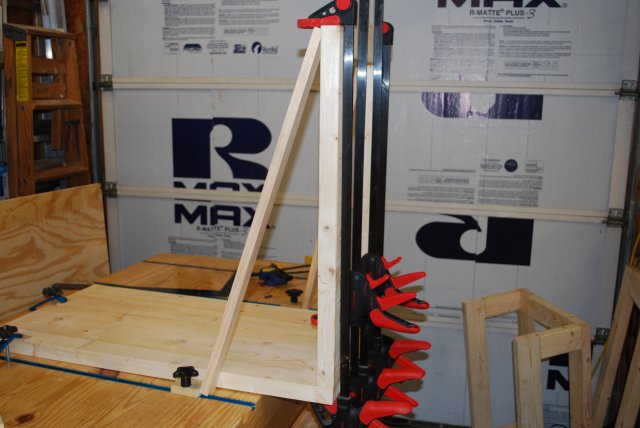
On the machine caster bases, I needed to cut 8 biscuit mortises into a 45° angle, so I set up some blocks to hold the piece.
This way I can quickly cut 8 slots without tightening and loosening clamps.
|
|
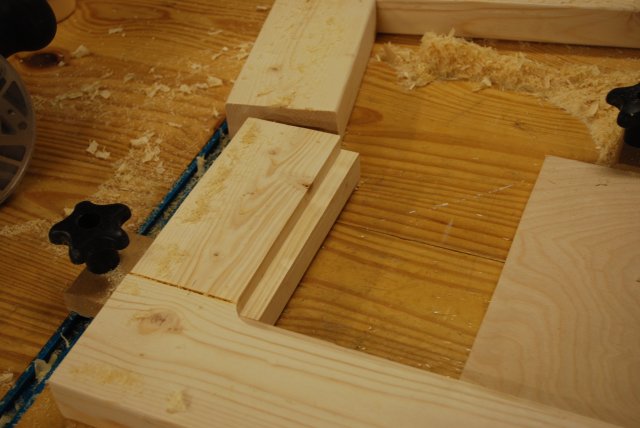
The back end of the 45° setup.
I just created a pocket to hold the back end of the piece (see above).
|
|
Here I'm using store bought clamps to hold a 3/16" piece flat while I glue the frame onto it.
|