12/26/12: Page Origin.
The drawers on loading benches store loading tools or loaded ammo, so I always put locks on them.
I realize that these won't keep a really determined well tooled thief from gaining access, but it works for children and, I think, satisfies the law about keeping firearms and ammunition out of the reach of unauthorized personnel (we have a security system which summons the police thus limiting the amount of time a thief has to break into things).
Remember don't store powder, primers, or loaded ammo. in the garage, it gets too hot, put a lock on a small closet in the house and store everything there.
I converted a closet this way and someday I might have time to do a page on it.
I did do a page on it Safe Closet Page.
Here is how I go about it:
I bought these locks from Home Depot (about $4 each) they require a 7/8" hole to clear the lock body, and have a 5/16" throw of their bolt.
You can buy them keyed alike, each package has a "Key ID" on it, just buy a pair with the same "Key ID".
I also bought a length of 1/2" angle to use as striker bars (something for the lock to hold against).
The angle used for the striker is the same width as the slide, 1/2".
I mount the lock with the withdrawn bolt flush with the side of the drawer, so things work out well for clearance between the lock and the striker.

|
Drawers installed in loading bench before drawer locks installed.
|

|
Here are the two Home Depot cabinet crossbolt locks and the two home made strikers.
For the strikers I bought 1/2" angle iron and sawed off two 3" pieces (later 2" pieces), then drilled and coutntersunk a hole at either end of both strikers.
After mounting the locks in the cabinet fronts, I calculated how far back the strikers had to be to provide a drawer lock striker.
NOTE: I have started cutting the striker bars only 2" long and it works great.
|
|
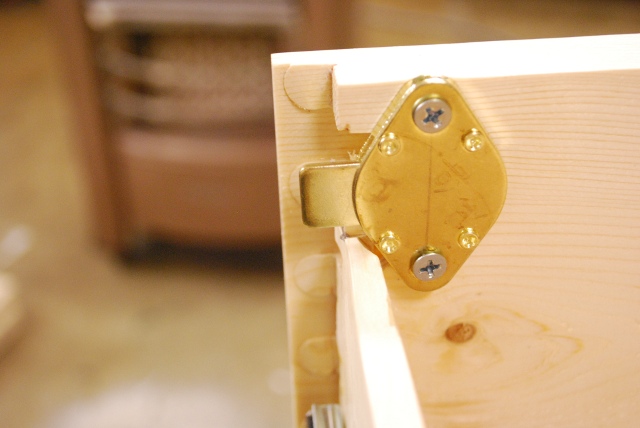
Here is a lock with the bolt extended (locked), note the side of the lock overlaps the drawer side so the bolt will engage the striker bar.
The rabbet is 1/2", the striker will be installed against the frame on this side, there is about a 1/8" gap between the frame and the edge of the drawer front.
The height of the angle iron bar is 1/2", so that means the bar misses the side of the drawer by about 1/8".
The lock's throw (amount the cross bolt extends when locked) is 5/16" so we get about 3/16" to 1/4" engagement of the lock's bolt and the striker bar.
|
|
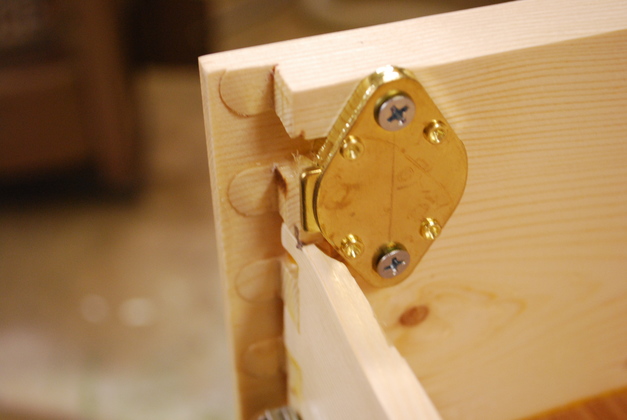
Here the bolt is withdrawn (unlocked), note it is about flush with the outside of the drawer.
|

|
Both drawers with locks installed.
|

|
View across the top of the drawer, you can see the top of the striker.
The bolt from the lock will be behind (on the left of) the bar when the drawer is shut, so if the lock is locked, the bolt will strike against the back side of the striker and keep the drawer from opening.
The striker bars are attached with 1-5/8" wall board screws into the 2x4 frame of the loading bench.
|

|
Front view of striker bar screwed into the inside frame of the cabinet.
When I was finishing this loading bench, I didn't have much time so thats why I don't have more pics.
However, if somebody needs more detail I still have the original loading bench which has the same striker bars but a slightly different kind of crossbolt lock (from Rockler).
|

|
Short (2 ") striker bar in cabinet above slide.
|

|
A pic of the original loading bench, with the bottom drawer removed, you can see the lock striker bar on the right hand side above the slide.
|

|
Close up of striker bar on original bench.
Note this one is reversed (screws on front side) from the newer striker bars.
Another NOTE: this bench uses a european slide instead of the full extension ball bearing slides I use now.
One of these days, when I have time, I'll replace it with a full extension slide.
|