Loading Shelf Construction
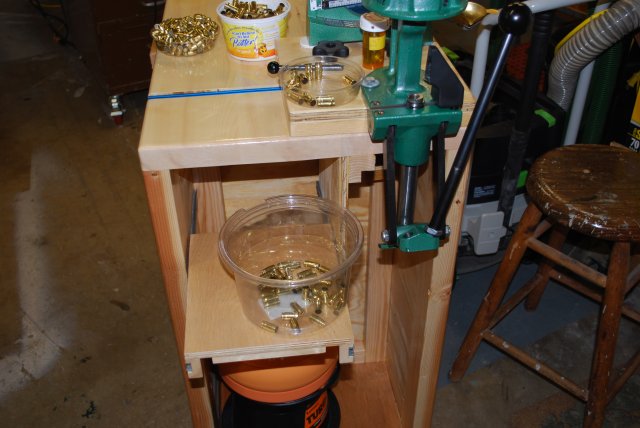
A loading shelf extended while depriming/resizing.
12/07/12: Page Origin.
The loading shelf is one of the unique features of the Mobile Loading Bench.
The first one, pictured above, was built with metal slides but I can't get those anymore (10" slides are hard to find and pricy).
So I started building them with wooden slides.
After looking at the way I used the original loading shelf, I realized it doesn't hold a lot of weight and doesn't even extend very far so a home built wooden slide was OK.
Ps. I can now get 10" metal slides.
Please see the Techniques section for info about using the loading shelf.
Also look here for info on newer loading shelf.
|
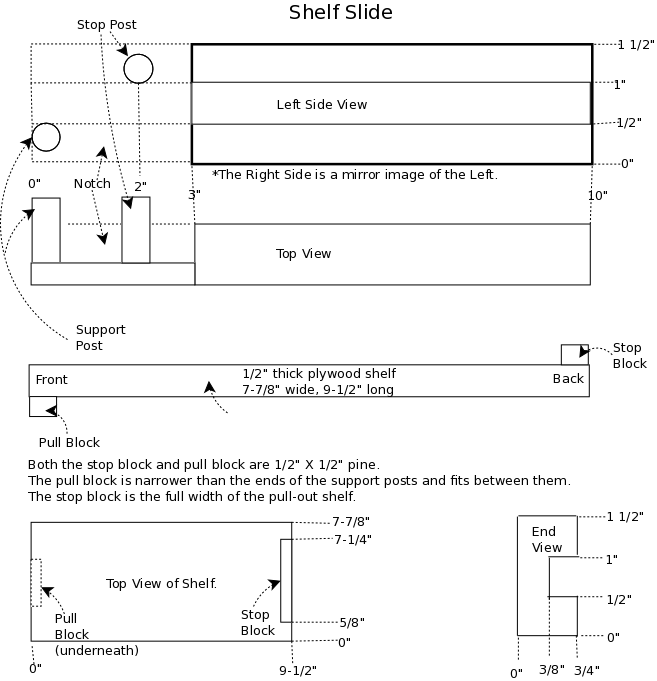
The shelf guides are made from two pieces of 1x2", 10" long.
I cut a slot 1/2" wide in the center and 3/8" deep for the shelf to slide in.
The shelf is made of 1/2" birch plywood which is actually about 1/32" thinner than 1/2".
Rockler has a 9/16" bit if you want a little more space, and I will say with only 1/32" slop, you have to be very careful to get the guides mounted exactly parallel.
|
|
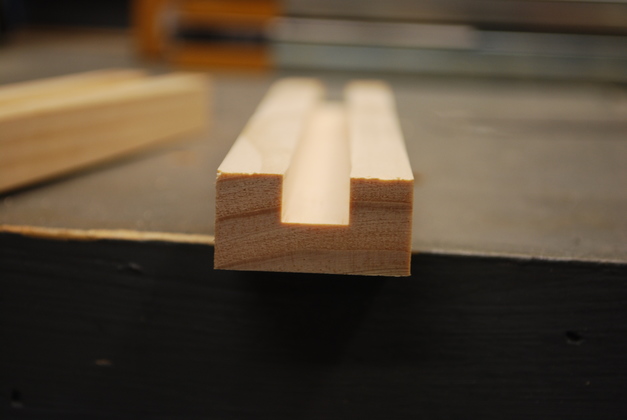
The end of one guide with the shelf slot cut.
The slot is 1/2" wide and 3/8" deep, or 1/3 of the width and 1/2 of the depth of the 1x2.
|
|
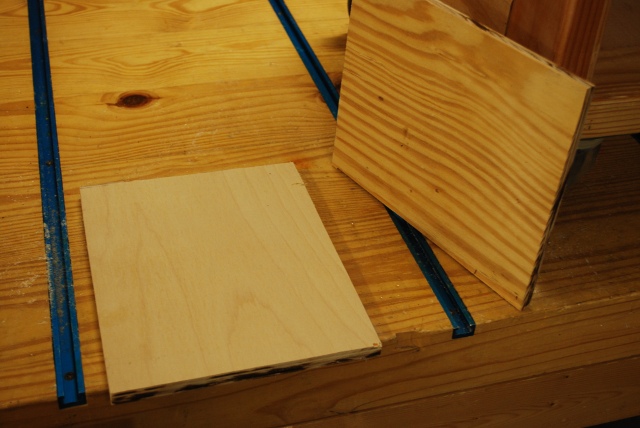
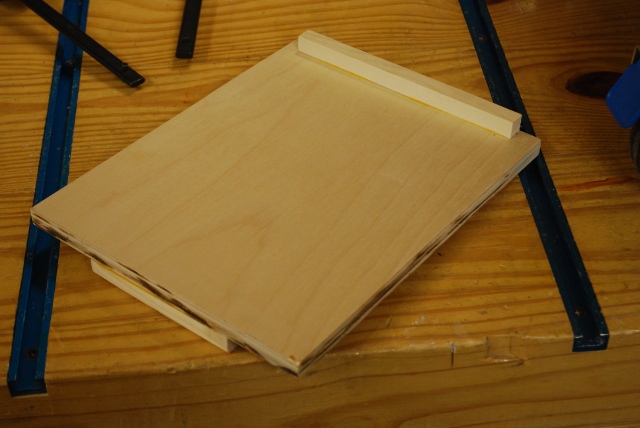
The shelf (made of 1/2" birch on left) and support panel (made of fir on right) cut out.
|
|
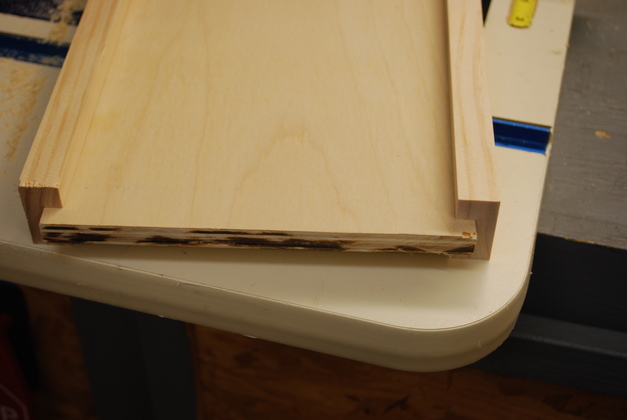
Test fit of the shelf into the guides.
|
|
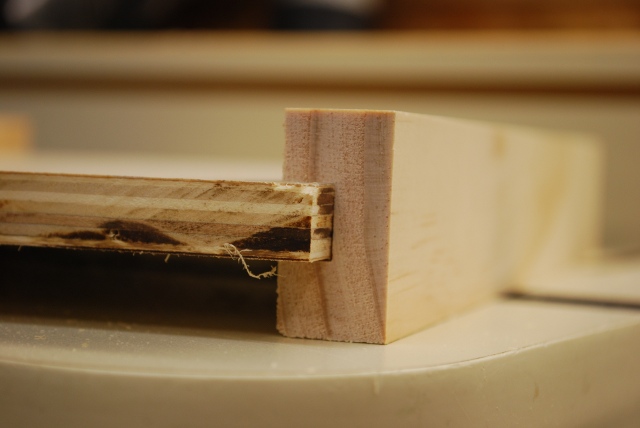
A closer look at the fit, the plywood is 15/32" and the slot is 1/2".
Be sure and leave room for paint on both the guide and shelf.
|
|
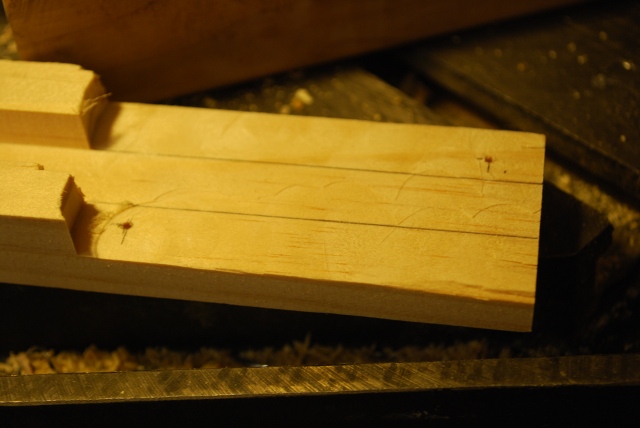
I used the router table to clean off the pivot notch on the outboard end.
I drew extended slots to show where the shelf should be, then marked the position of the support and stop posts, and drilled pilot holes.
You can see the pilot holes drilled for the support and stop post.
How to drill a clean hole page
|
|
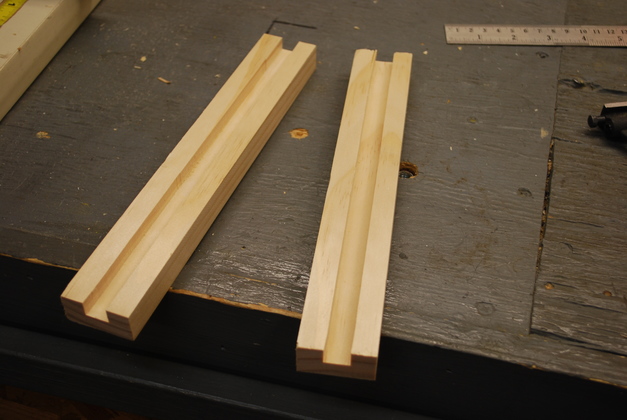
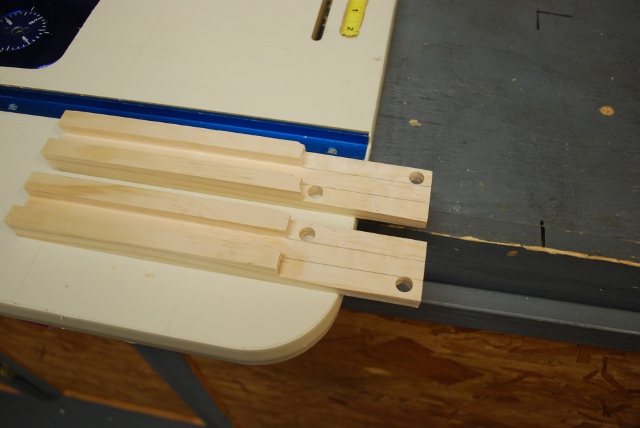
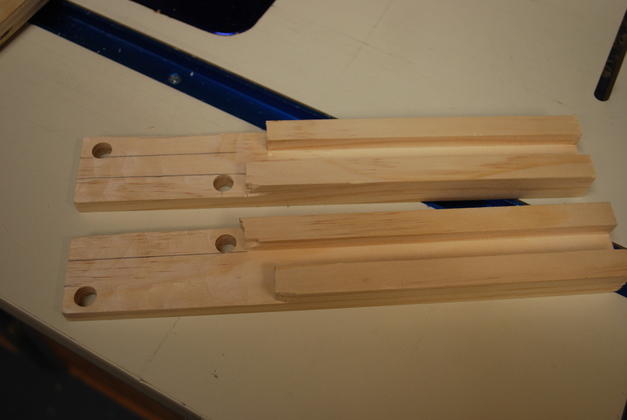
Here are the two guides with notch cleaned off and holes for support and stop posts drilled.
Note they are mirror images, the drawing above mentions this but doesn't show a mirror diagram.
Note the stop and support post holes are lined up with the top and bottom edge of the shelf.
|
|
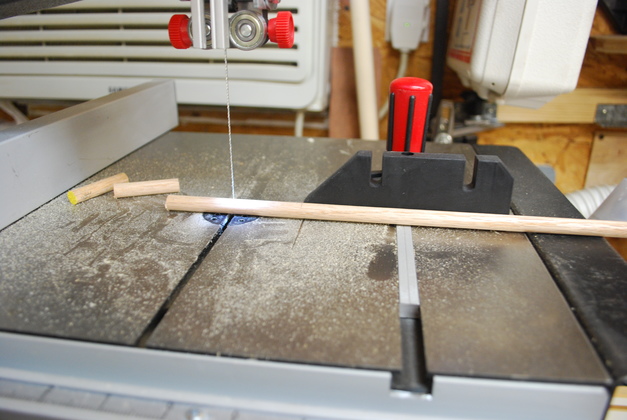
I'm cutting a 3/8" oak dowel into 1-3/4" lengths for the stop and support posts.
These are at least 1-3/4" long, a little longer doesn't hurt.
|
|
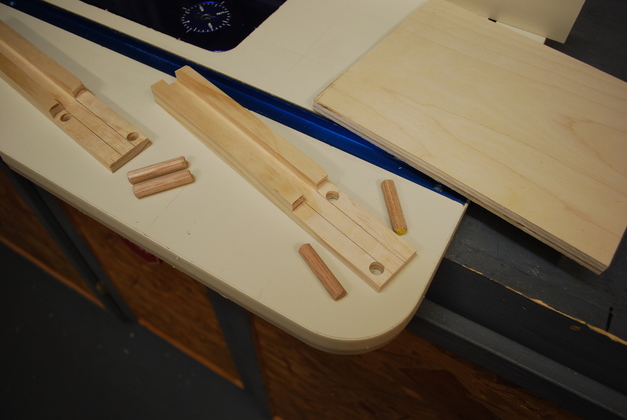
All the parts for shelf and guides.
Again note the stop and support post holes are lined up with the edges of the shelf, not the edge of the guides.
|
|
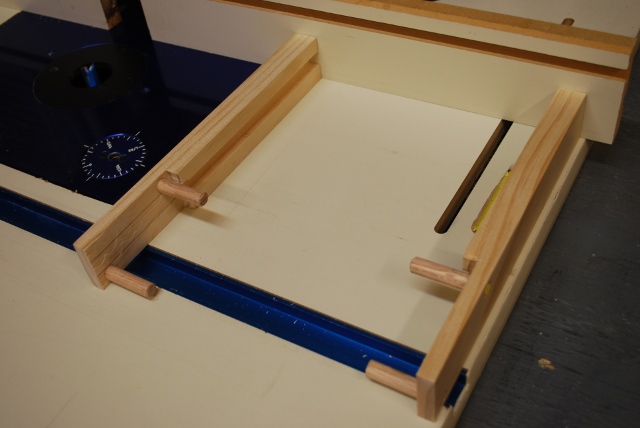
Guides with posts temporarily installed, showing how it will look in the Mobile Loading Bench..
|

|
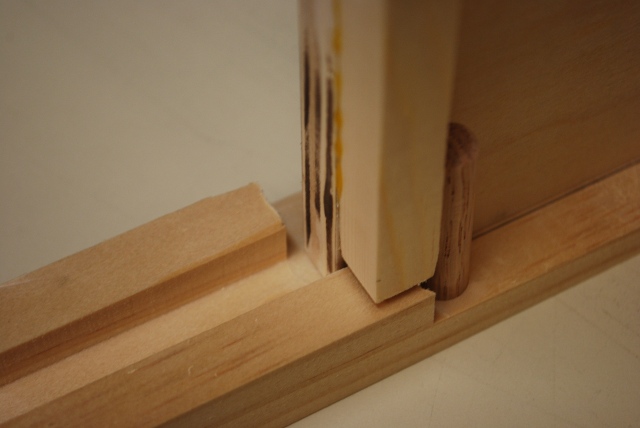
Closer look at the front end of the guides.
|

|
A close look at where the stop and support posts are in relation to the shelf's top and bottom surface (pencil lines).
|
|
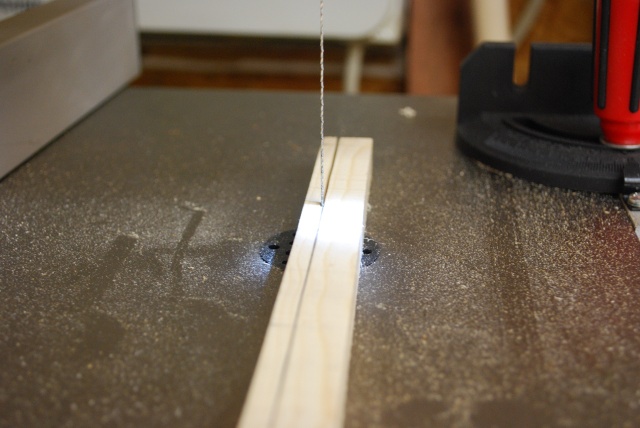
Here I'm sawing out what will become the pull and stop blocks.
I'm sawing a 1/2" square piece of pine then I'll cut to length and glue them to the shelf.
The pull length isn't critical, maybe 4", the stop block must be 1" shorter than the width of the shelf.
|

|
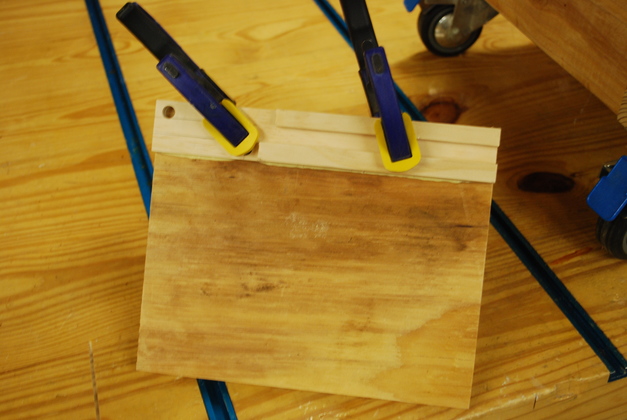
Shelf in clamps gluing on the stop and pull blocks.
|
|
Shelf with both pull block (bottom) and stop block (top rear).
|
|
Here is the shelf being test fitted into the left hand guide, the top of the shelf is toward us.
Note the clearance between the back edge of the shelf and the lower guide, there must be enough to allow the shelf to pivot down in back and miss the lower part of the guide.
|
|
Here you can see the clearance cut on the bottom guide rails to allow the shelf to pivot.
The left guide is on the bottom, the right side guide is on top.
If the stop block is 1/2" then allow about 5/8" from the back of the stop post to the end of the lower guide rail.
|
|
The right hand guide being glued to the vertical shelf support, shown upside down.
|
|
Left guide being glued/screwed to cabinet side.
The bench's inset panel allows things like this to be attached to a flat surface.
|
|
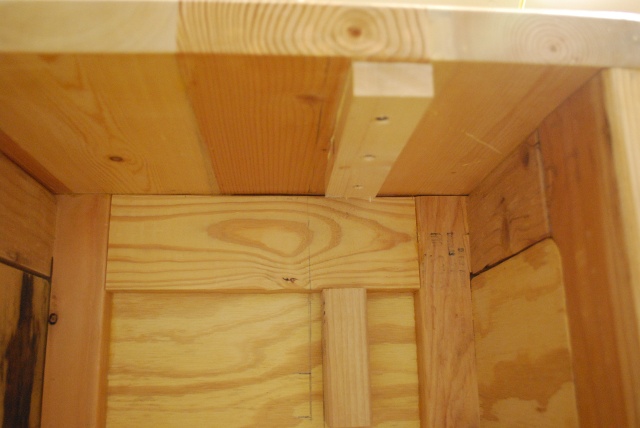
Here the two support blocks for the shelf vertical support are being screwed/glued to the loading bay's interior.
|
|
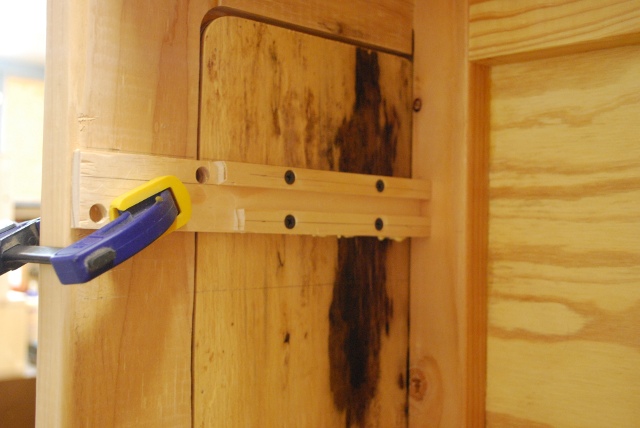
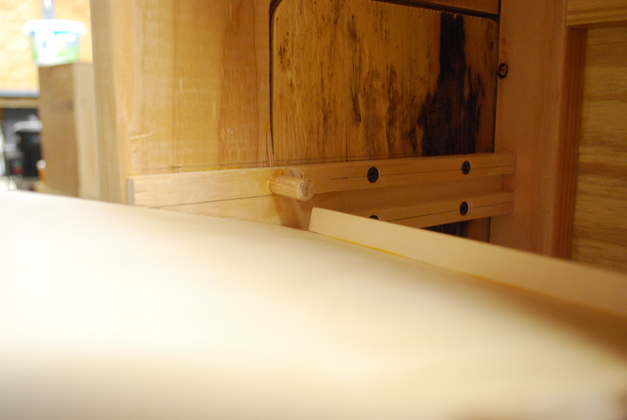
Guides mounted in the Mobile Loading Bench.
You can see how the stop and support posts line up with the top and bottom of whe shelf.
One step was not shown here, I first mounted the guides without the stop and support posts glued in, then drilled the 3/8" holes about 1/4" into the walls, then glued the posts into the deeper holes.
This gives the shelf a little better support.
|
|
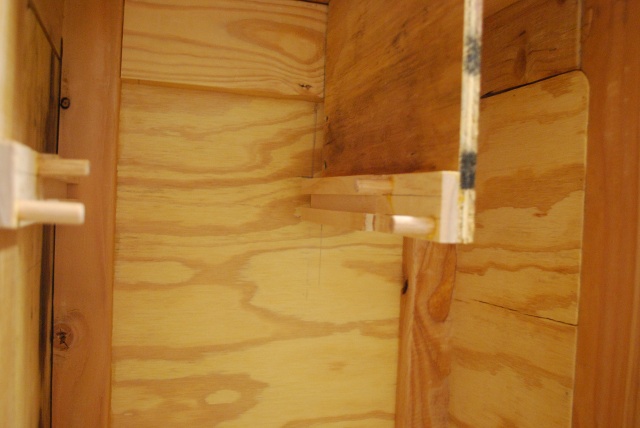
In order to insert the shelf, you set the back end on top of the support posts, raise the front end, then slide it back until the stop block goes beyond the stop posts, then lower the shelf until it is resting in the guides.
|

|
Here the shelf is resting in the extended position, note the stop block, at the rear, against the stop posts.
|
|
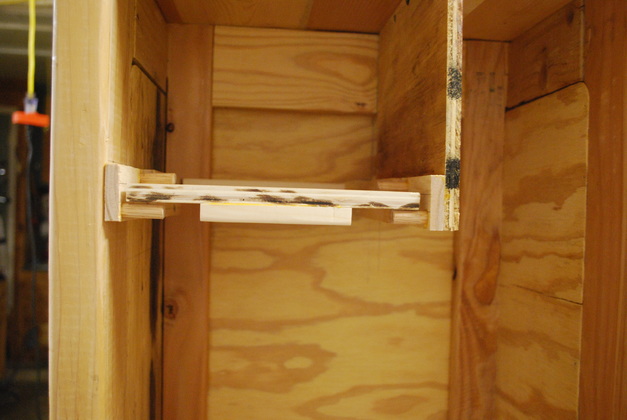
Shelf pushed back into the cabinet.
From this front edge view point, you can see the support posts in front, and the pull block, you can also see the stop posts and the stop block.
This would look a little better with a 1/2" cap strip or moulding covering the front edge of the shelf (hide the plywood edge).
Please go here to see shelf edges on Bill's Printer Storage Cabinet.
|
|
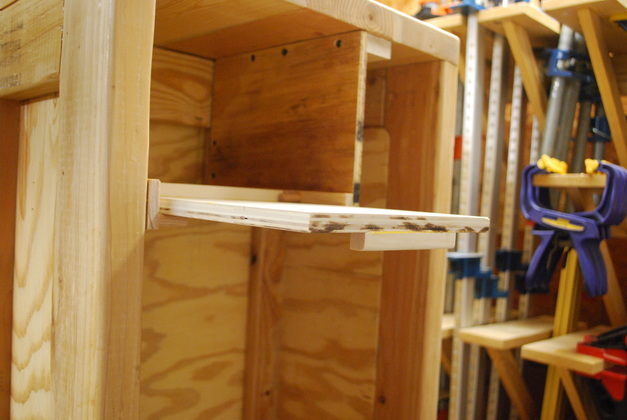
Shelf extended, viewed from the side.
|