How to Make a Holster for Wraparound SunGlasses
A more or less step by step procedure

| 
|
|---|
I have good peripheral vision so when I look through "flat" sunglasses I can
see the frame and that distracts me.  I always thought that wraparound polarized
glasses make people look like super fly, but what the heck, I couldn't see the
frame when I look through them.
I tried several wraparounds and finally bought a pair of fishing polarized
glasses from Academy.  Wraparounds are difficult to carry when your not wearing
them, like indoors.  I don't like carrying anything around in my hand or pocket
and they won't stay if I just hang an earpiece over the neck of my shirt, so I
looked for some kind of carrying case.  The only thing I could find was a
couple of large, zippered carrying cases that rode horizontally on my belt.
One was soft sided and the other was rigid, the soft sided one took both hands
to open or close, so I got the hard sided case.

Now I'm a retired senior suffering from a little Dunlop disease (belly done
lopped over my belt).  So after I had bent over a few times, I broke the frame
of my new glasses.  I glued the frame with super glue but guess what, after
another week or so the same thing happened again.
Disappointment!
What do I do?
I started thinking about a sunglass case I had made about 35 or 40 years ago that
I liked very much.  This case held the sunglasses in a vertical position, like
a pistol in a holster (better for Dunlop sufferers and its out of the way of
your pockets), so I decided to make another one but for wraparounds.
The old case was for "flat" sunglasses, made from a
simple piece of leather wrapped around the glasses and sewed down the side and
across the bottom and then sewed to a aluminum "belt clip" which hooked over my
belt.
This "belt clip" is unique, I can't take the credit for the basic bracket idea,
a friend of mine (Charlie Cox) had made one similar and allowed me to copy it.
More about the bracket later.  The shape of the wraparound sunglasses was a
problem so I researched how handgun holsters are made for ideas.  The crux of
what I learned is to make a wooden block the shape and size of the object
to be holstered, then wet the leather and clamp it around the block until it dries.
The bracket is the key to quick attachment and removal. It is made of .056" thick aluminum and bent so it reached up under the belt and hooked over the top. After passing down behind the belt, it bends back up and out then bends down again and forms a flat area to attach the leather. The top is on the left.Bending this thing from a flat piece of aluminum is a challenge, the original was difficult to bend and showed it. I came up with my bending tool which I have used many times.
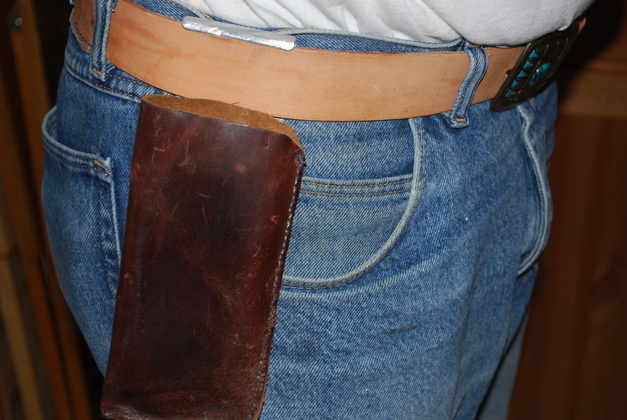
The final sunglass holster, shows how the bracket attaches to the belt. You can see here the extra space in the bottom loop on tbe bracket allows the bracket and case to move up when attaching or removing it from the belt. Please see the attachment of the original.
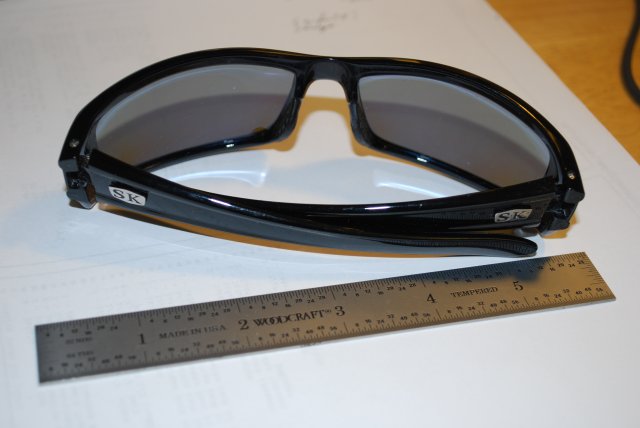
| The wraparounds, from the back. |
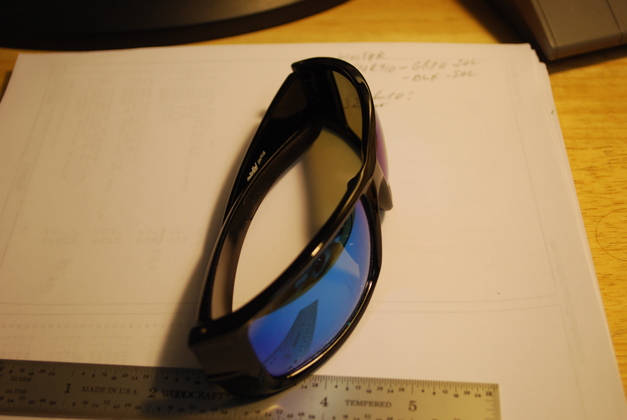
| The wraparounds from the front (superfly view). |
The Original Case
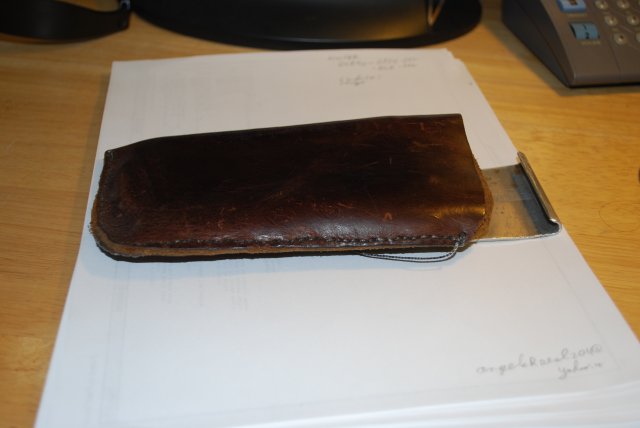
| The original sunglass case. I made this in the middle 70s. |
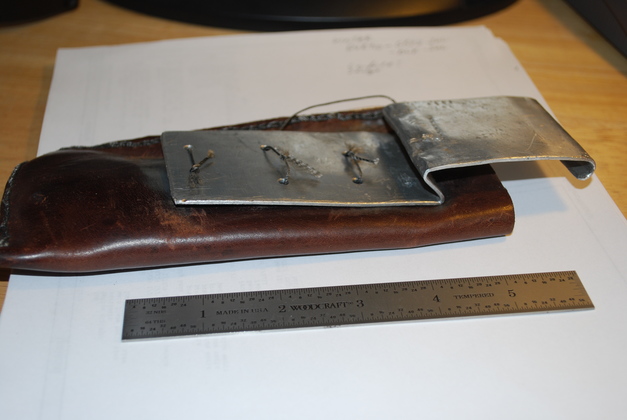
| The original sunglass case from the back, remember this is over 30 years old and was used for over 10 years. I had access to a sheet metal brake and started the bends with it then finished with a hammer, a steel bolt, and vise. |
|
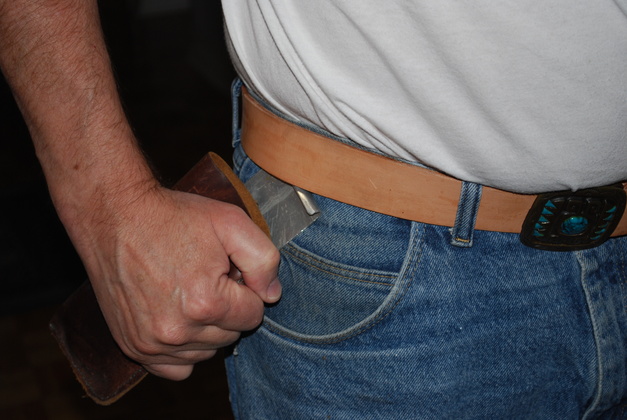
Heres how it attaches.
Place the top rear edge under your belt then push up. I just snaps into place. |
| Its quick on and off and it never came off by itself. To remove: push up slightly, twist the front toward your body, then angle down and slide forward. |
Forming The Leather
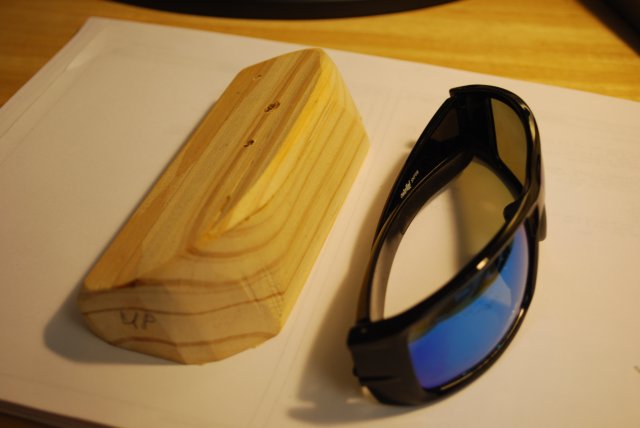
| I had to make a block the size and shape of the glasses to form the leather around. Actually the block is very slightly oversized so the case will slide in and out with just a slight resistance. A bandsaw comes in real handy here, but other tools could also work. |
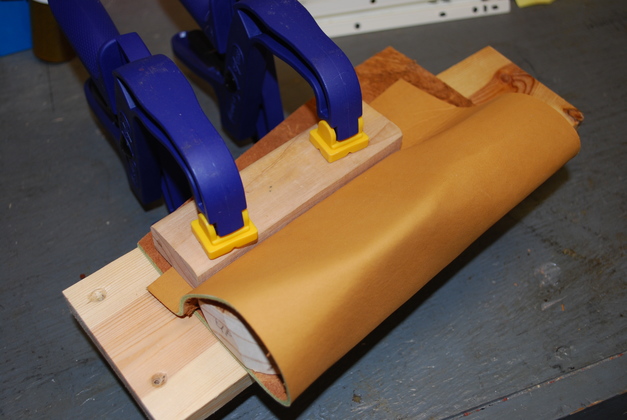
| Soak the leather in water then clamp it around the block and let it dry. The leather was odd shaped to begin with so things didn't come out even, not to worry, it'll be trimmed. The primary thing here is to get the leather to mould to the block tightly. |

| Another shot of the block in the leather. |
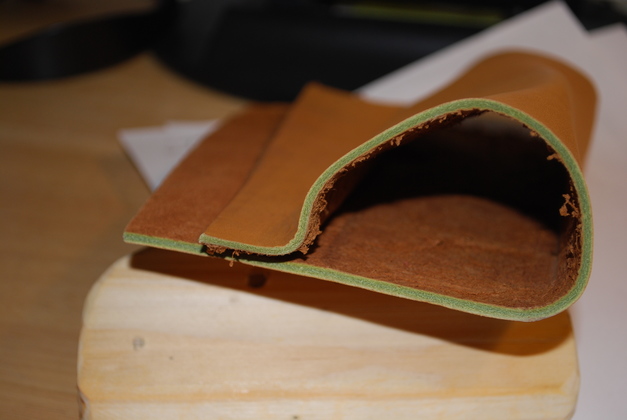
| The leather after its dry. |
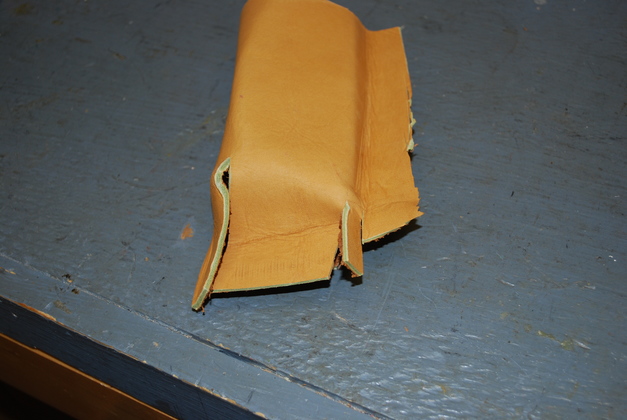
| I cut slits at the bottom to allow the leather to be folded, left side first then right side then the top folds down and will be sewn. The right side is glued over the left side then the top is glued over that before its sewed. I draw a line where the seam is to go, then use a 4 pin punch to make the holes for the thread to pass through, then a sewing awl for the actual sewing. After sewing I trim the excess leather about 1/8" from the sewing line. |
The New Case
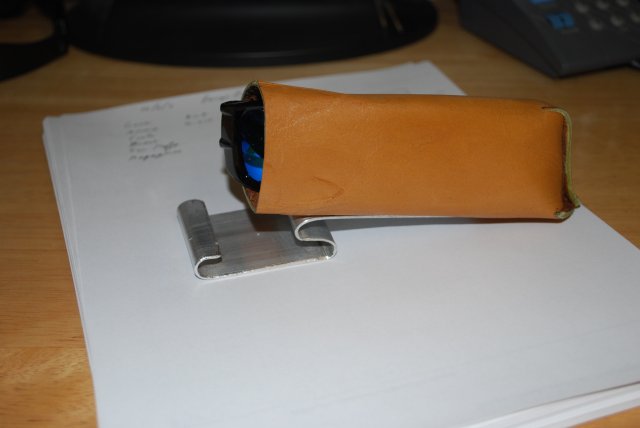
| The sunglasses in the new case. I had to re-do the case and these shots. I had the case too low, it rode up when I sat in the car etc, so I moved the leather up about 3/4". |
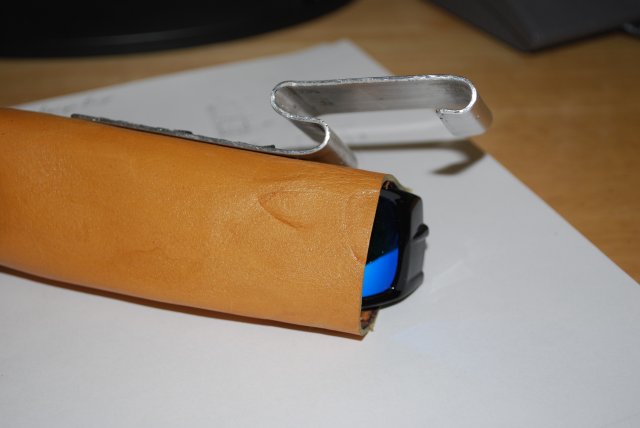
| A little closer look showing the bracket's angles. |
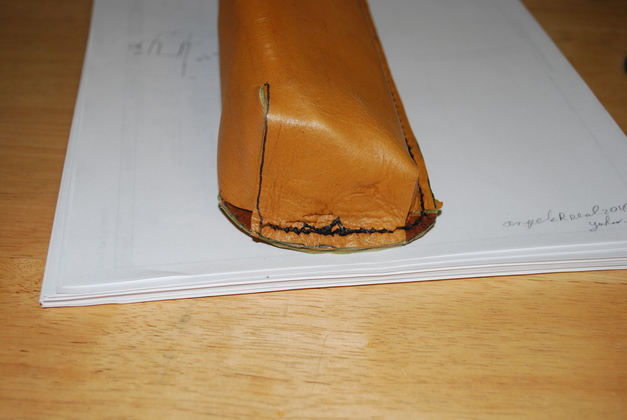
| Bottom of the case, after folding and sewing. |

| Back side of the new case. I drilled two rows of 3/32" diameter holes (just big enough for the awl to pass), be sure and chamfer them (I used a larger drill bit) so the thread won't be cut. The rows are 1 1/4" apart and the holes are 1/4" apart. |
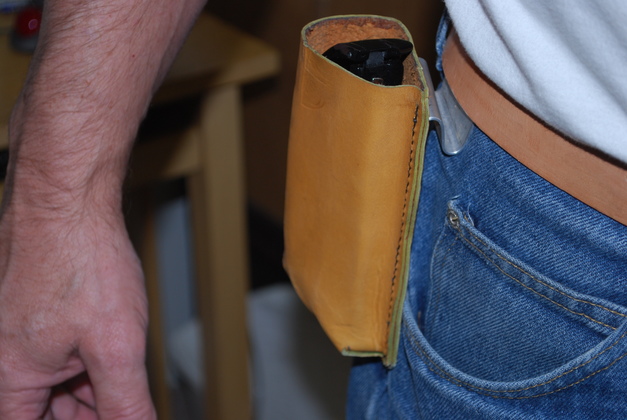
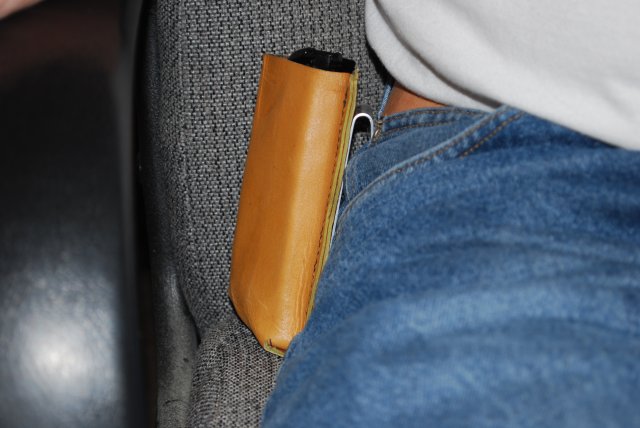
| The new case on my belt. I slide it back against the side belt loop which allows me to reach in my pocket for keys, and back pocket for bill fold. Notice the right side of the glasses are on top and the lenses toward the rear, so when I pull them out, with my right hand, snap open the ear pieces, I can put them on my head all with one hand. |
|
| How it works while seated. This is in a chair with a slight bucket seat, but it works the same in a car with a bucket seat. You can see why I had to raise the leather holster on the bracket, I could have raised it a little further. |