09/25/15: Page Origin.
I frequently need a large piece of wood, for things like a table top, that you can't purchase at Lowes, so I make it out of smaller pieces of lumber.
I use a procedure called edge joining, that is, I glue pieces of wood together at their edges using loose tenons (biscuits), for strength and alignment.
Choose flat boards, no cupping or warping with a nice grain.
You can use something with knots as long as their tight and can be sanded smooth.
Knots can make the top more interesting.
Cut the boards to length (I add about 1/64" for sanding) then run both edges of each board across the jointer to make the very flat and the corners exactly square.
I lay them out as they are going to be used in the table top, putting the "good side" up (top side) and choose an edge (usualy the one closest to me) and call that the front.
I use biscuits (or plates) for these joints, this is called a loose tenon.
I make small "tick" marks across the joints every where I want to put a biscuit (I usually put them 4" apart and at least 2" from each edge)).
Next I rotate them up on their back edge and mark a small number (in pencil) at the center front edge, so I can get them back in the same sequence and oriented the same way.
Since the boards don't exactly equal the width of the top I need, I use an extra board and rip off a piece to make it come out.
I clamp the pieces of the top together, then mark the rip line on the back edge board, adding an extr 1/32" for one pass across the jointer (I keep my jointer set to 1/32").
Then I rip the back edge board and run the ripped edge across the jointer.
I use a biscuit cutter to cut the mortises (or slots) for each biscuit.
I set the depth (distance from the fence or edge of wood) so the center of the cut will be in the center of the board.
Making sure the biscuit cutter's fence is flat on the board's top face and up snug against the edge of the board, I cut at each "tick" mark.
Sometime, in soft wood, there is a little tear out at the right edge of the slot, I trim this off with my pocket knife.
Most of these pic were made building an end table for the den.
The background is one of the panels I made for the end table project.

|
1x6s cut to length, ready to mark.
|

|
After cutting to length, I lay the pieces out with the "good" side up and arrange them front to back.
I mark a small number, in pencil, on the underside of each board, near the front edge, so I can get them back in the same sequence and oriented the same way.
This top should be 18x24", it is made of 1x6s (about 5-1/2" wide) so I have to rip one piece length wise to get the overall width to 18"
Here the top pieces are clamped in place, but not glued, so I can measure where to rip.
When I mark the rip line (with the top pieces clamped together), I allow an extra 1/32" for a pass across the jointer to clean up the bandsaw marks.
Next I mark a small tick mark (I use 4" apart) where each biscuit goes.
I am using #10 biscuits so I start about 2" from the each side.
|

|
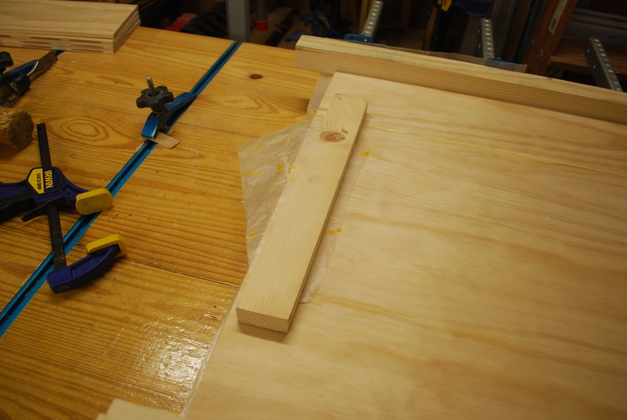
Ripping off the partial top piece.
Note the resaw guide.
|

|
Closer look at ripping on the bandsaw.
The left side is the one I need accurate, so I'm using the left side of the blade to follow the line.
I use my resaw guide for all bandsawing.
|

|
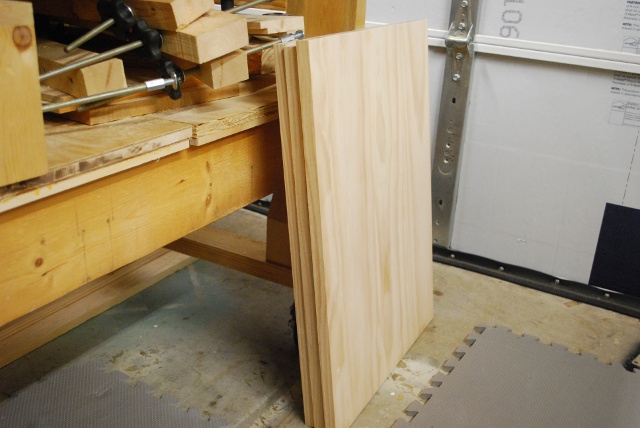
In front, pieces for two tops, note the narrow piece on top ripped to make the top 18" wide.
The taller stack, in the back, is two sets of open shelf pieces.
|

|
You can see the small numbers on the underside front edge that indicate the sequence the pieces go in.
This particular top has symmetrical biscuit slots, but if they are asymmetrical the numbers make sure everything will match when you're ready to glue.
|
|
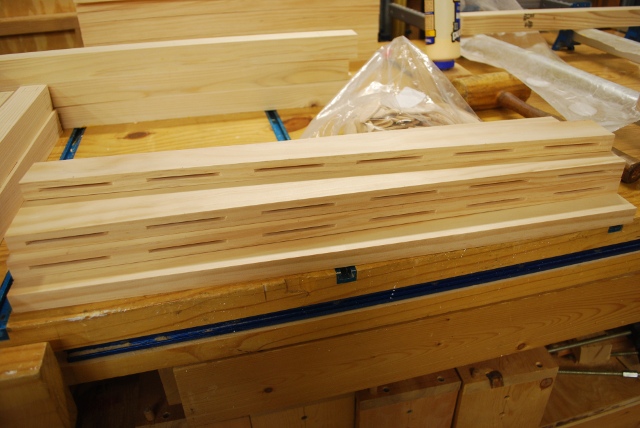
See the biscuit slots in the edges of a set of top pieces.
One of the most important parts of edge joining is to get all these slots exactly the same distance from the top.
That means the top will be flat after you glue them.
|

|
Closer look at the biscuit slots with biscuits on top.
The mortise (slot) for the biscuit is tight (press fit) when first cut but when you apply glue, the biscuit and slot wood swell making it fit tighter, so you get good glue penetration.
I have broken wood glued together this way and the wood will break before the joint does.
|

|
Glue being spread, note how I let some run down into the biscuit slot.
The remainder of the glue will be spread evenly over the mating surface.
|

|
Glue spread on first and third pieces.
Notice how its fairly uniform, and covers the entire mating surface.
I use a small glue spreading brush from Rockler, it leaves the glue in little furrows (you can see some on the right end of the front board) ensuring a uniform amount of glue all over the mating surface.
I have used my finger to spread glue but thats not as accurate as the little glue brush.
And when you finish just wash the glue off or let it dry then peel the glue off.
|

|
This is the Rockler brush I use to spread glue.
Notice how the ends of the silicone bristles are beveled, it really lends itself to making a nice uniform layer of glue.
|

|
Close look at silicone bristles on the Rockler glue brush.
|

|
Biscuits set into slots on first and third pieces, ready to tap down.
|

|
Biscuits tapped down into the slots.
|

|
Glue on top of biscuits so a little runs down both sides.
|

|
Inserting biscuits into upper top piece, the slots in the upper piece "wipes down" the glue on top of the biscuits so it covers the entire side of each biscuit.
|

|
A little squeeze out, will be wiped off now then lightly sanded when the glue is dry.
|

|
Now in the clamps.
See how the little tick marks I made line up to keep the pieces aligned the way I set them up originally.
|

|
Out of the clamps and flat sanding.
You can see my Festool Rotex 5" I use to make things flat.
|

|
Sand until you can't feel anything.
I use a Festool Rotex 5" to make things flat.
|
|
Next, edge sanding.
|
Thin Panels

|
Here I'm marking a 1x6 down the center of it's edge after it has been cut to length and the edges across the jointer.
|

|
Resawing a 1x6 a for thin panel.
A 1x6 is 3/4" thick, so its marked 3/8" from either edge (center).
After being resawed and run across the jointer each piece will be about 5/16" thick.
|

|
Stack of 5/16" thick pieces for a panel.
Please note the DeWalt slot cutter on the right.
|

|
Laying out pieces for a panel, just like I do for a 1" or thicker top.
I'll make "tick" marks every 4" to position the biscuits, and mark small numbers on the front edge of the under side for positioning and sequence.
|

|
The center of a 5/16" thick panel is 5/32".
The DeWalt and Porter Cable slot cutters will only adjust to about 9/32" from fence to center of cut so I have to use a shim when I cut the slots.
|

|
You can see the notch in the shim so I can line up on the "tick" mark.
|

|
Slots in the edge of a 6" by 5/16" thick panel.
The key to making a flat top or panel by edge joining is to pick which side you want for the top surface then make sure the slots are all the same exact distance from that top surface.
|

|
Lined up on the long clamps just like I do the thicker stuff.
BTW, this thin panel does NOT have symmetrical slots, you can see the two left slots are slithtly closer than the rest.
|

|
Spreading glue on the mating surface of a thin panel.
Note how the glue flows down into the biscuit slot.
|

|
A little hard to see but the glue is spread evenly overh the mating surface.
|

|
Biscuits tapped down into slots.
|

|
And a bead of glue run across full lenth of the top.
This will be "wiped down" the sides of the biscuit and it's mating slot as the biscuit is inserted into the top piece.
|

|
Biscuits being inserted into adjascent panel piece.
|

|
Panel pieces lined up in long clamps with just a little pressure.
|
|
Waxed paper and a pressure bar across the glued joints.
The pressure bar will prevent the panel pieces from popping up or bowing under pressure of the long clamps.
|

|
Clamps holding pressure bars to clamp underneath, ready to tighten long clamps.
|

|
A 5/16" thick panel glued and ready to sand, notice it's standing in a 3/8" slot in a tee track.
|

