| 
|
|
|
Salt & Pepper Shakers
| ||
|
|
|
|
|
Salt & Pepper Shakers
| ||
| Wood Threading Jig | Test Shakers | Production Run | Cylinder Maker |
Betty and I decided we needed to make some gifts for the ladies in the family, so we decided to make some wooden salt and pepper shakers with screw on lids. Last Thanksgivving, we were at Missy's and I noticed that she didn't have a salt shaker anywhere, so she obviously needed a set. The same goes at Cindy's, no salt shakers on the table hence, there is a need. I don't like any salt or pepper shaker you fill from the bottom, it makes a mess, and I have just developed my wood threading jig so I can make screw on tops.
Betty really likes contrasting wood layers so I looked around the shop and found I had some nice light colored semi-hardwood (probably poplar) that John had give me several years ago and some Brazillian Cherry flooring so I decided to try using these. Now Betty wants me to give the pepper shaker a dark top and the salt shaker a light colored top, then drill the holes in the top.
I made some tests with white wood, vertically laminated, then more with the chosen wood, horizontally laminated. I had to test the lamination direction, woodthreading, the dispensing hole size, and finishes. After trying vertical laminating with contrasting wood colors, I decided I'm not good enough, yet, to make a threaded lid, that lines up the stripes when screwed shut.
Finishes
I'm going to try salad bowl finish on the interior and the exterior.
I'll use polyurethane, externally, on the first tests.
S and P Hole Diameter
I measured the holes in a variety of salt and pepper shakers made of a variety of materials, they ran from .1" in thick materials to .065" in metal tops.
I'll need to get the cleanest holes I can, so the S and P flow properly.
I'm thinking of startng off with 5/64" (.0781") and then to 3/32" (.09375"), it should be easier to keep holes clean in hard wood.
|
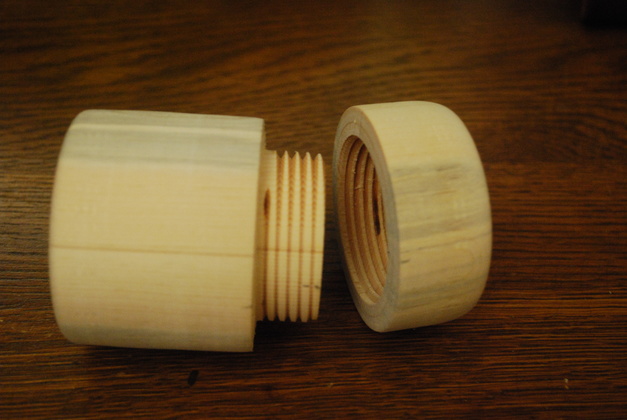
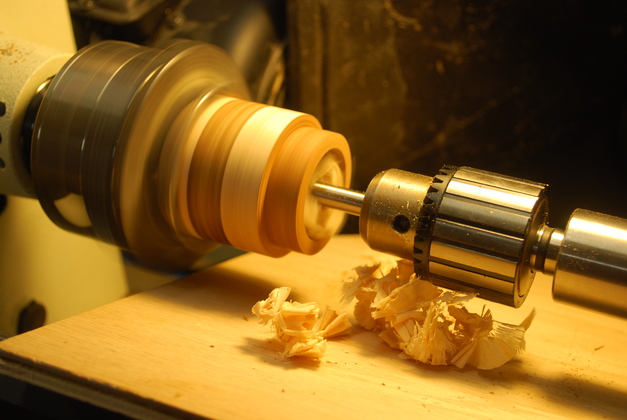
The first test, made from 2 fir (I think) 2x4s, vertically laminated. This should test threading, S and P dispensing hole size, and finishes. |
|
You can see the threads. I'll coat the inside with the salad bowl finish, drill the S and P holes, and paint the outside with clear poly. Then we'll actually use them in the kitchen. |
|
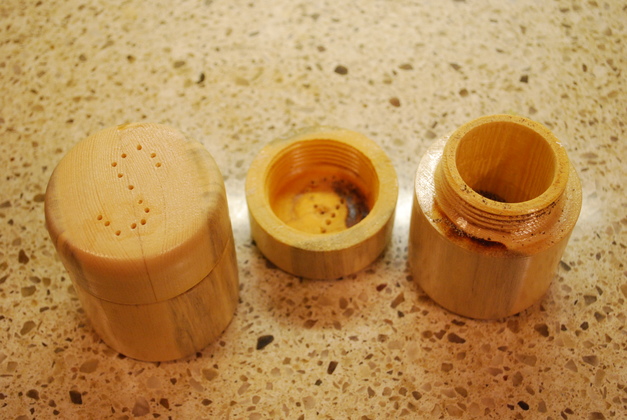
This is what they look like in the kitchen with salt and pepper. They appear to dispense the right amount of salt and pepper with .078125" (5/64") diameter holes. The salad bowl finish gives the interior a slightly yellowish cast, the outside is painted with clear poly. If you look closely, around the holes in the S, you can see a little darkened area, this is where the salad bowl finish ran out when I did the inside. I need to work on that. |

|
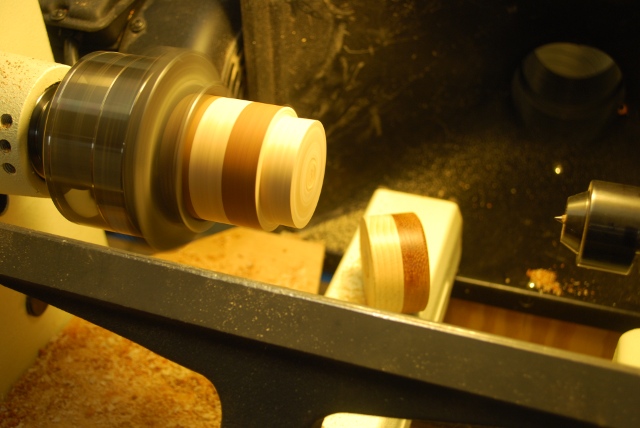
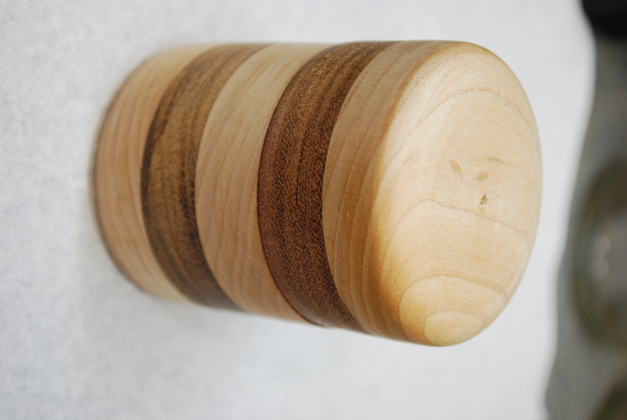
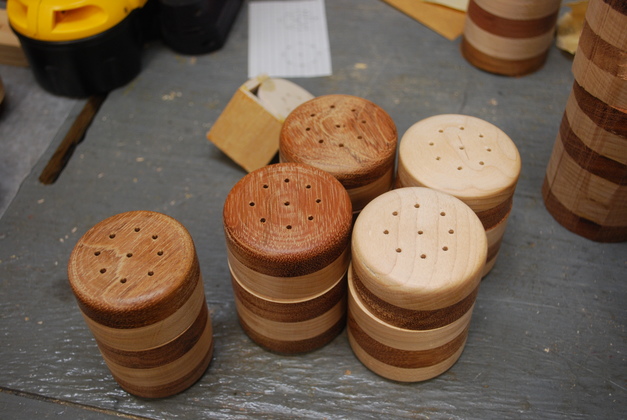
Test shakers, I rubbed the lid on the left with tung oil and turpentine (first coat), the one on the right doesn't have any treatment yet. Sebsequent coats will only be tung oil. None have the dispensing holes drilled, and I will coat with salad bowl finish inside the shaker and lid. |

|
Salad Bowl Finish I used. I tried tung oil but Betty didn't think it was shiny enough! |
|
Contrasting Wood
|
|
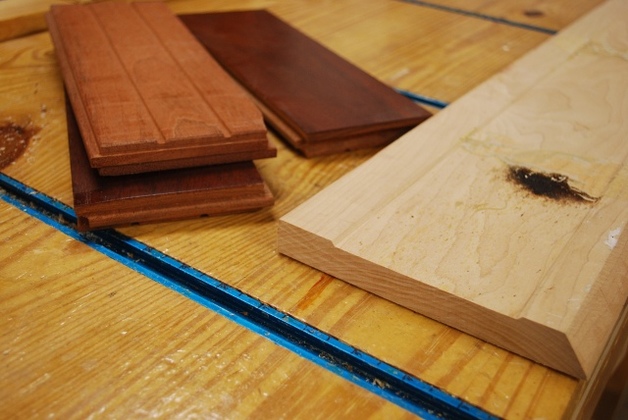
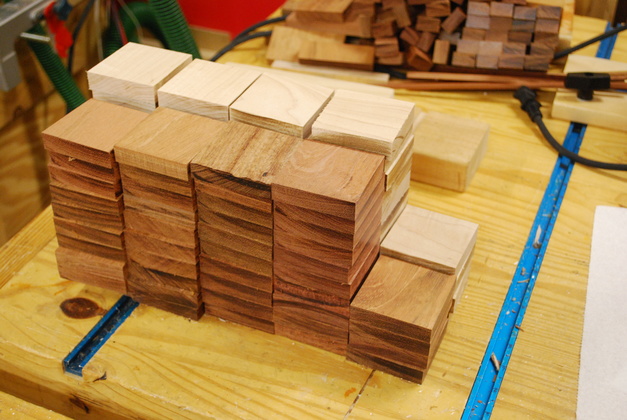
After machining, these are about 1/2" thick. A stack of 3 dark and 3 light (6 layers) will be about 3" tall. |
|
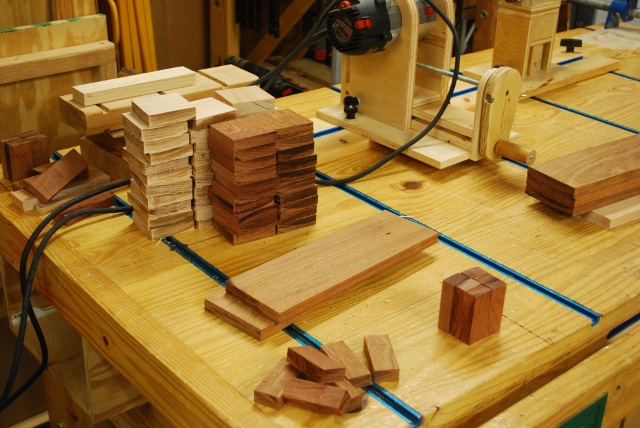
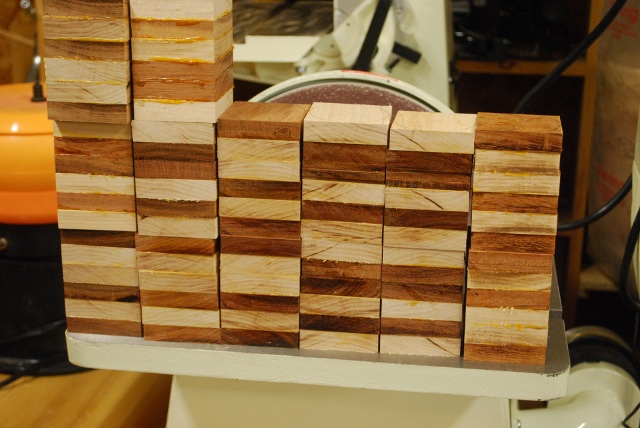
Cutting 2-1/2" square blocks of poplar and brazillian cherry. The wood threading jig is on the workbench in the background. |
|
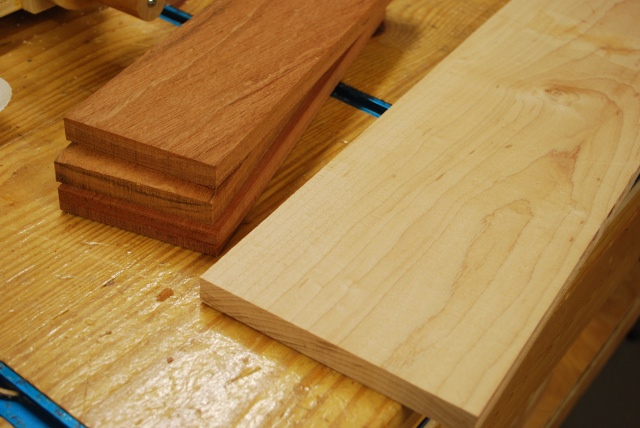
Closer look at stacks of blocks, it takes 12 blocks to make a pair of shakers. |
|
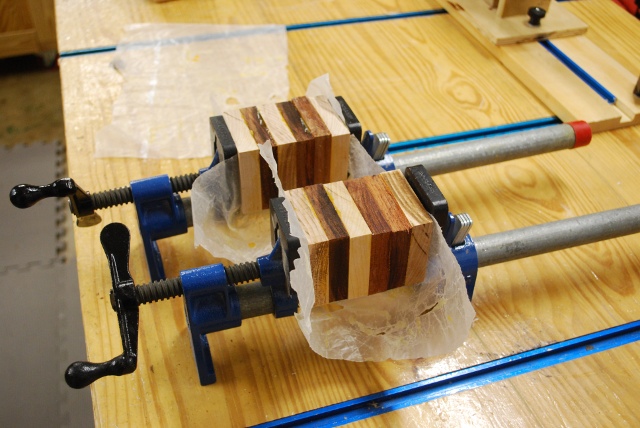
Laminating stacks of 2-1/2" square blocks for salt shakers. Note the double dark stripe on the right. |
|
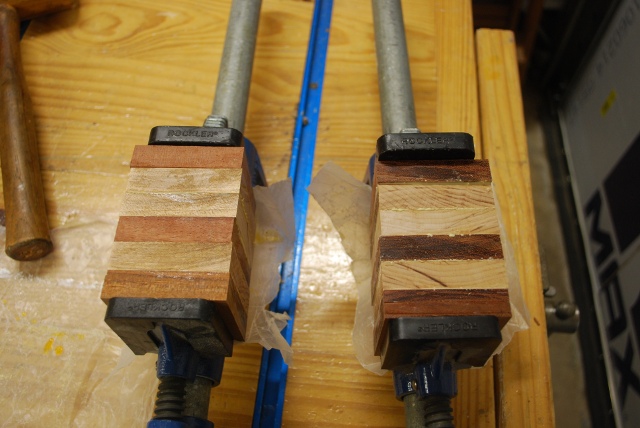
Pepper shakers being laminated. Note the double light stripes near the top. |
|
Stack of laminated blocks ready for sawing. |
|
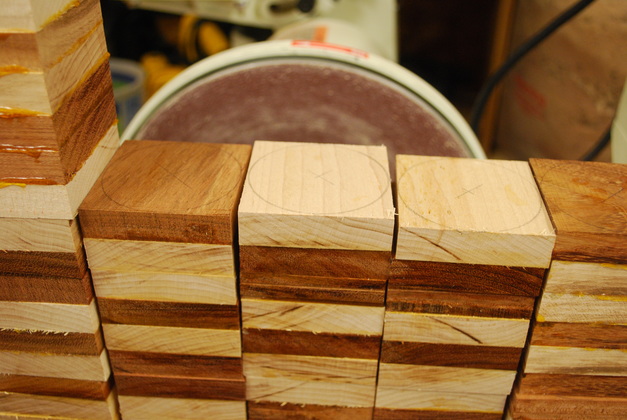
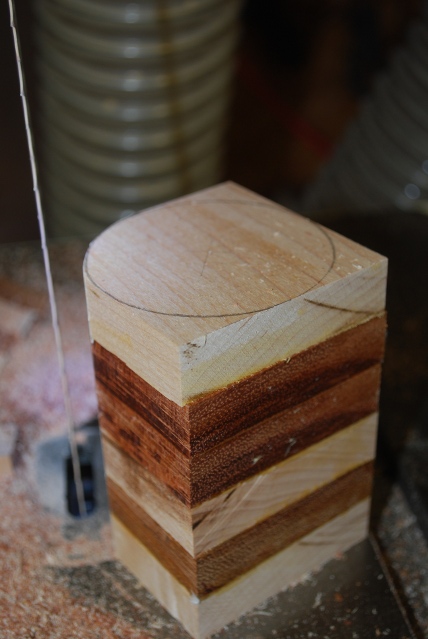
Circles drawn for sawing. |
|
Sawing off the corners with the bandsaw.
You can see the circle on the top that I am sawing.
|
|
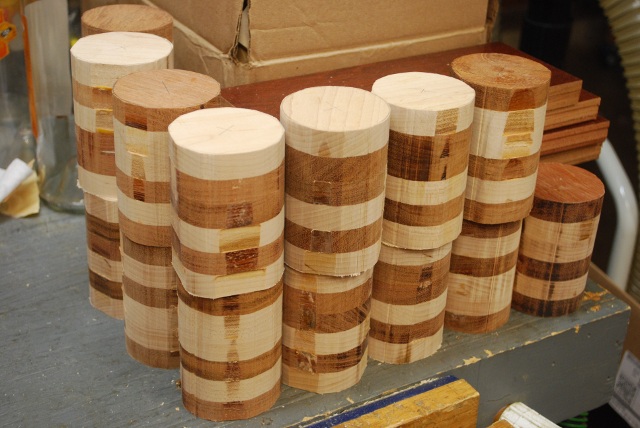
Bunch of cylinders, ready to turn. |
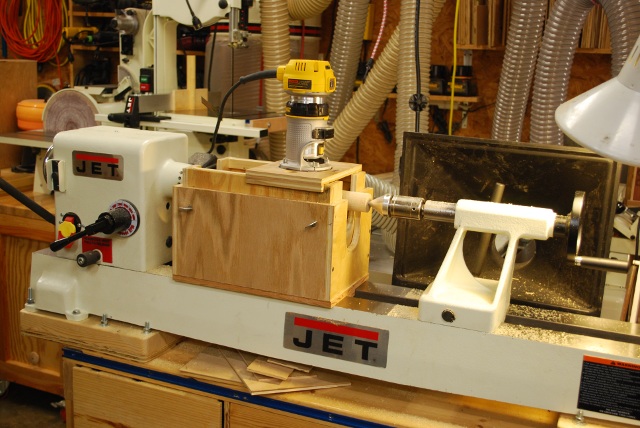
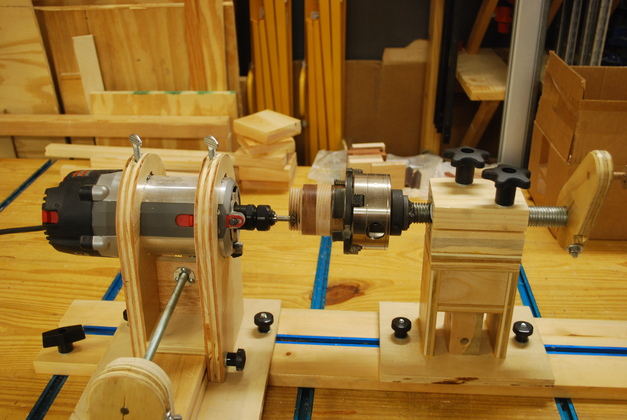
| Since I need to make lots of cylinders, I made a cylinder maker tool to make the cylinders faster and more accurately than I could using a roughing gouge. Click to see how it works. Now I don't have to saw off the corners of the stacks, I can even cut the threaded part on the cylinder maker. |
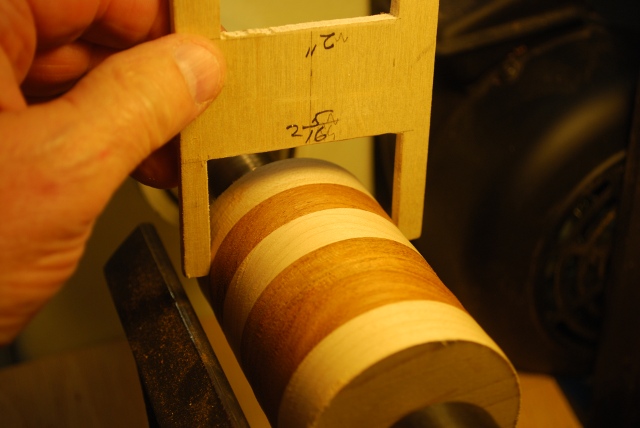
| My go-nogo guage, allows me to have all the cylinders identical. Thanks to the cylinder maker I only need this on the turned down (threaded) section. |
|
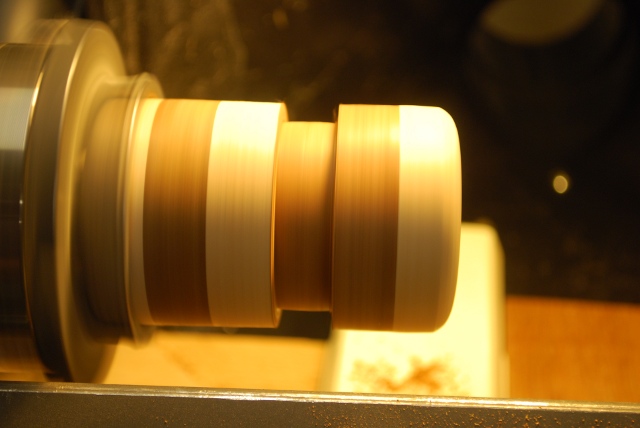
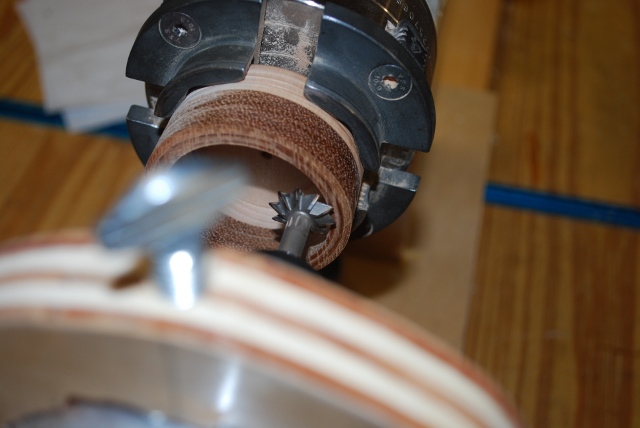
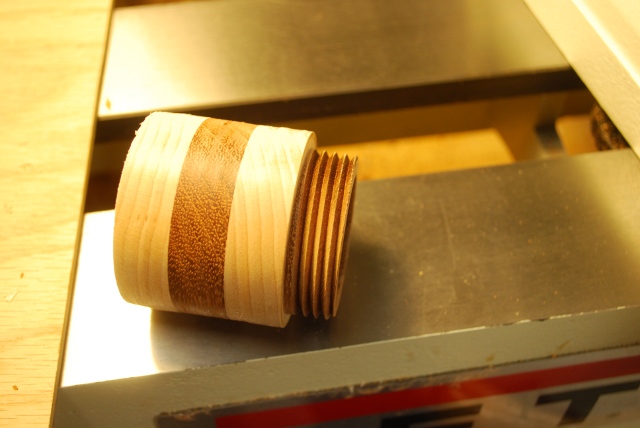
Moved to a chuck. Remember there were two adjacent same color layers (both light on this shaker). The machined down section is the lower full dark layer wide or about 1/2" will become the male thread. The female section will be the next dark layer up (to the right) from this one. I used to turn this down with a parting tool, but now I use my Cylinder Maker. |
|
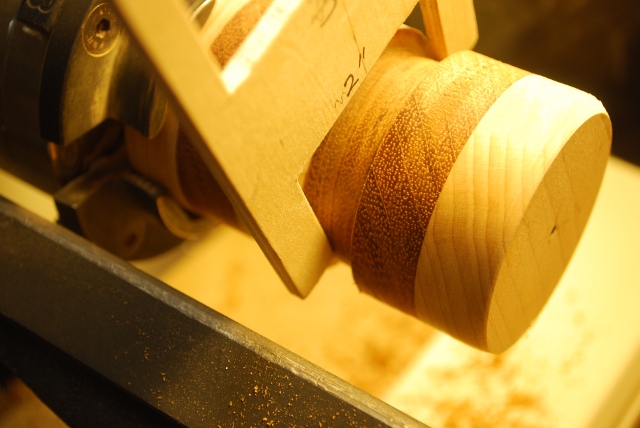
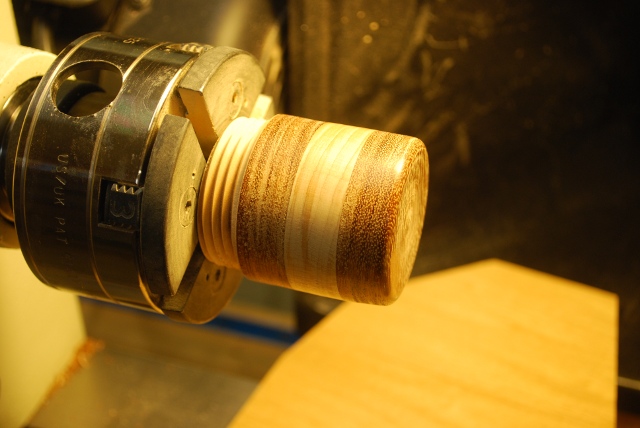
Now I'm using the other end of the go-nogo guage on the inset threaded area. |
|
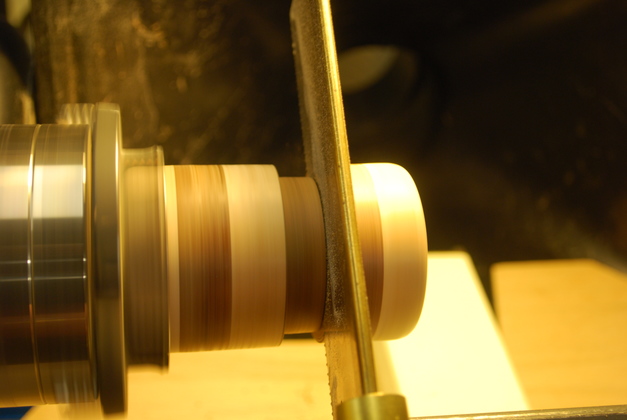
Sawing off the top with a japanese saw. As the lathe turns slowly, I push the saw back and forth to clear the kerf of sawdust. This also distributes the wear and heat, across more of the saw blade. A hacksaw works well for this too. |
|
Saw off complete. You can see the sawed off top in the background. |
|
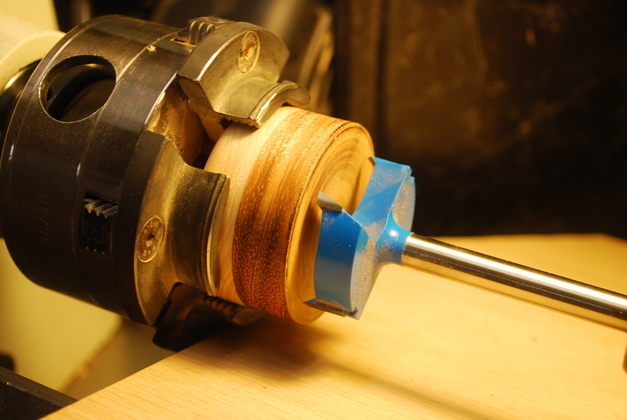
Begin boring out the top. |
|
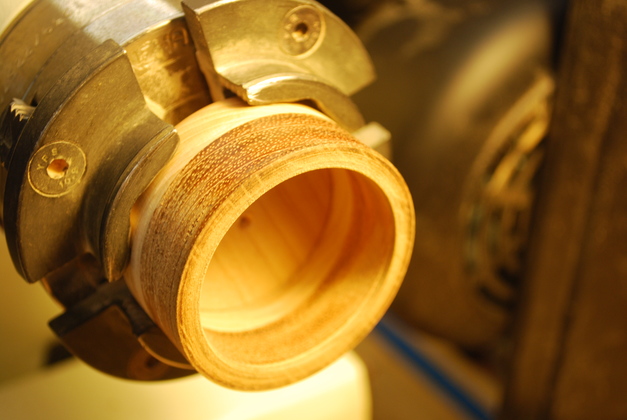
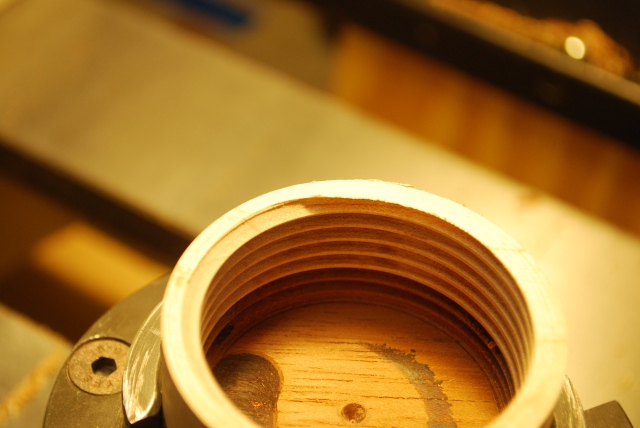
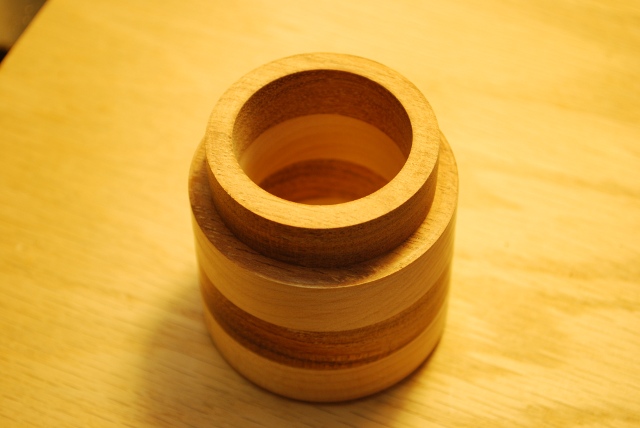
Top bored out to 1-7/8" diameter and 7/8" deep. The top and bottom will be threaded together, the bottom diameter is 2" the top bore diameter is 1-7/8" leaving 1/8" for thread overlap, 1/16" per side. |
|
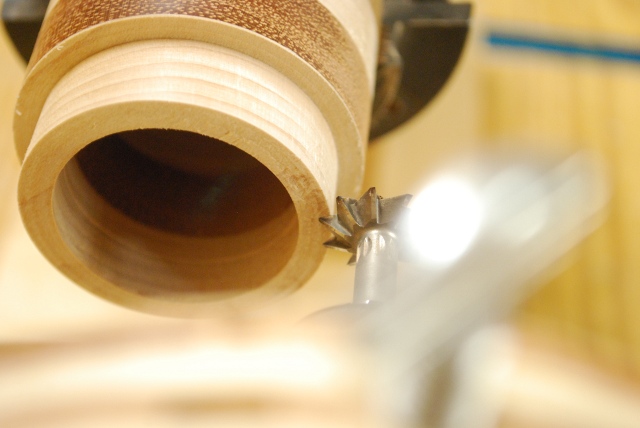
Starting to cut female threads inside the shaker top, using my woodthreading jig. I set the cutter to overlap a little over 1/16" and the fit is usually perfect. |
|
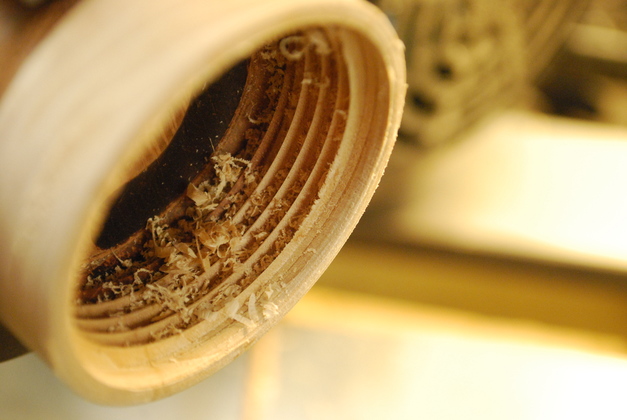
Top threads cut, notice how they come all the way to the edge. |
|
Bottom threads, notice they don't go all the way to the shoulder (where the top should screw down to). |
|
I have to turn a small relief area in the top so it will screw down all the way. |
|
Boring out the center of the salt shaker to 1-1/2" diameter. The bottom part is 2-1/2" from top edge of male thread to bottom and the bore is 2-1/4" deep leaving about 1/4" thick bottom. |
|
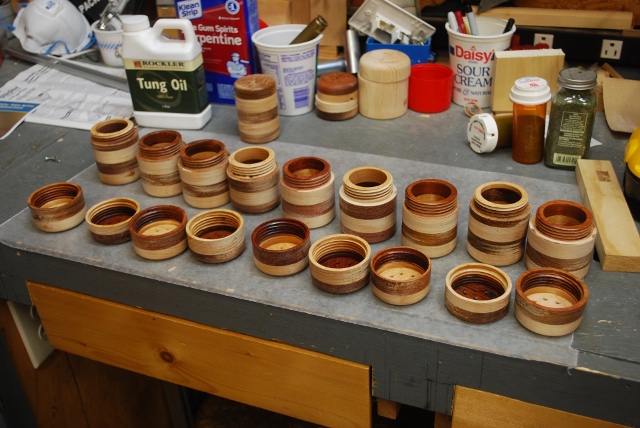
Bottom of shaker bored out, but not yet threaded. |
|
|
Bottom in my thread cutting jig. I leave the piece positioned in the chuck it was just turned in so I know it'll run true for the threading. |
|
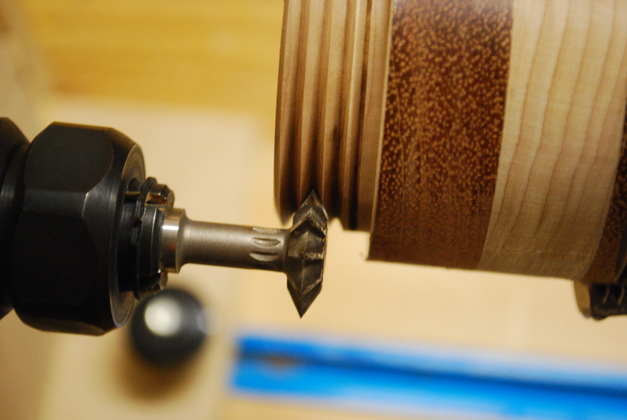
Start cutting male threads in the bottom with my woodthreading jig. You can see the depth of cut. |
|
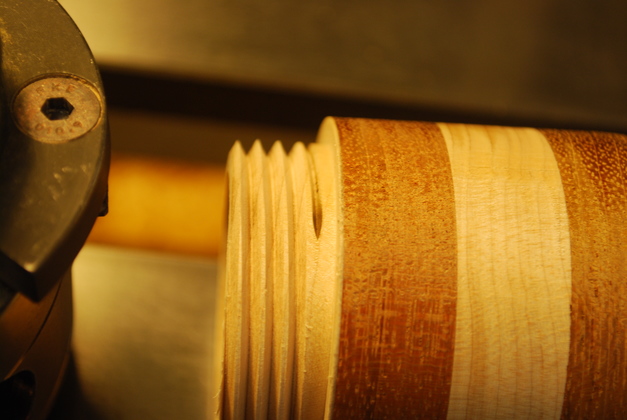
Side view of bottom with threads cut. |
|
Bottom threads complete. You'll notice the bottom edge hasn't been rounded yet. |
|
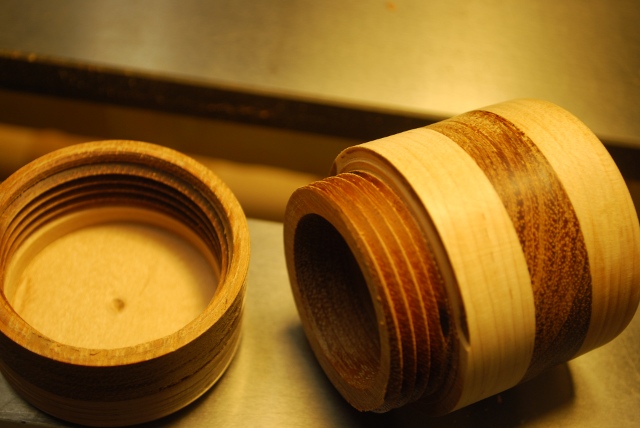
Both external (male) threads on the bottom of the shaker and internal (female) threads into the top are cut. These threads are 2" diameter. One of the things I really like about my thread cutting jig is I can cut almost any diameter from just under 1" to about 7". |
|
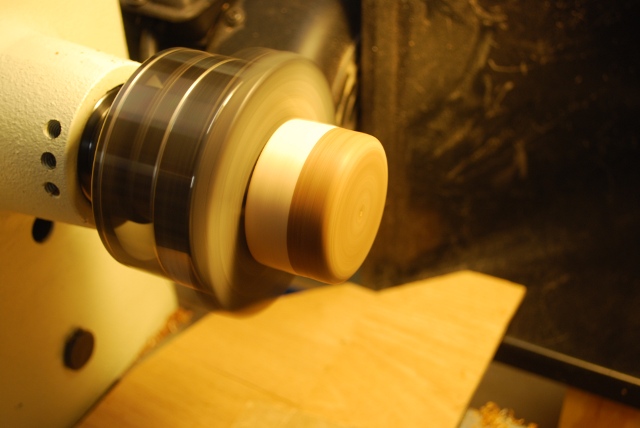
Top chucked up for sanding. I use a progression of grits, from 120 to 1000, then 0000 steel wool. |
|
Rounding off and sanding the bottom. You can see it starting to have some sheen to it. I make the bottom a little concave so it'll always sit level on a table. |
|
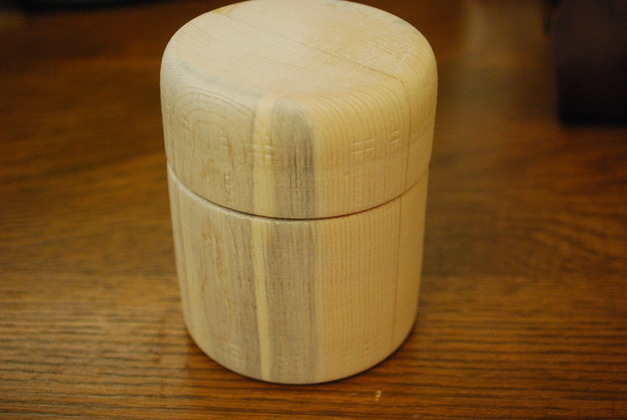
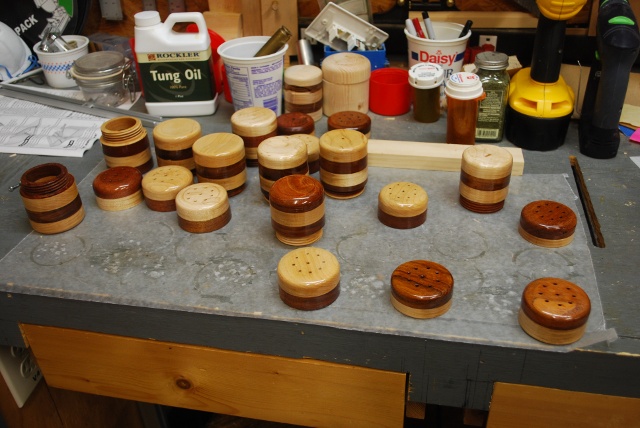
A nearly finished salt shaker. My objective with this go-round was to get the horizontal stripes balanced, all the same thickness and alternating when screwed closed, white on top for salt dark for pepper. Next, drill the top holes, coat the inside with salad bowl finish. |
|
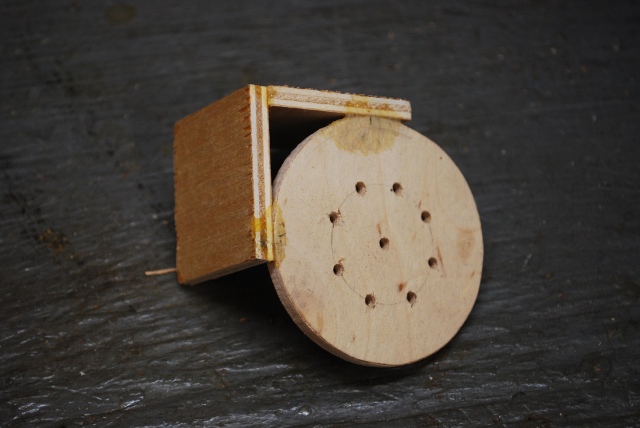
I made a template for drilling the dispense holes. |
|
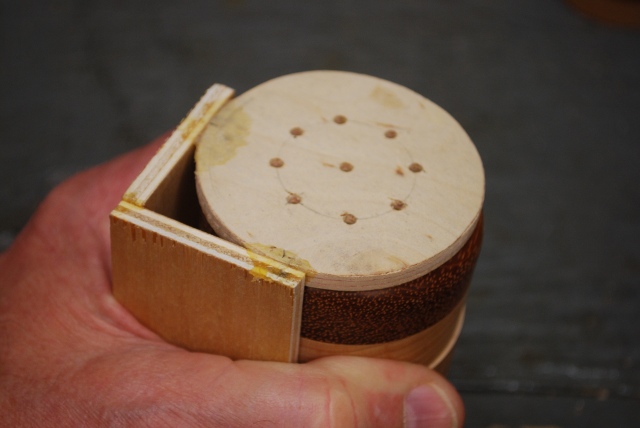
Heres how I use it. I hold it in alignment with one hand then insert a pencil and mark each hole. |
|
After I mark where the holes go, I center punch a dimple with an awl. |
|
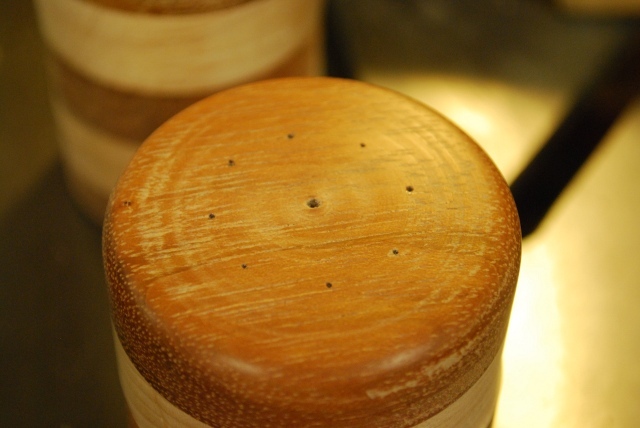
Holes being drilled, I drill 3\32" holes to dispense both salt and pepper. After I drill I countersink just a little (more on the inside), sand and they're ready to apply the finish. |
|
I have applied 3 coats of salad bowl finish to the inside of these sets. |
|
Starting Salad Bowl Finish on the exterior. |
|
|
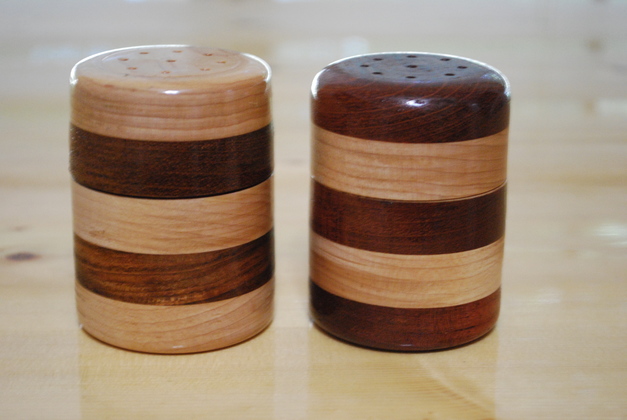
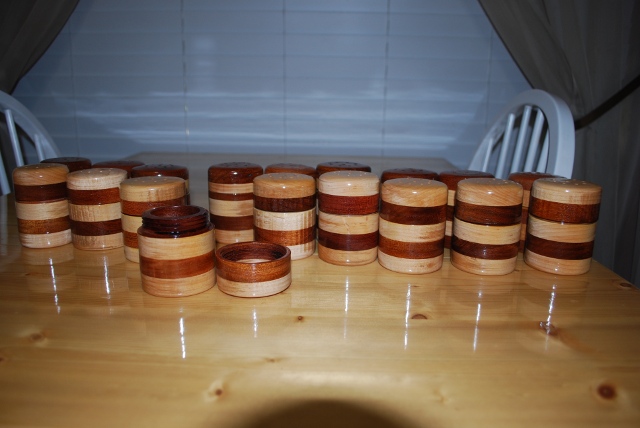
A final pair. A little crude but interesting. |
|
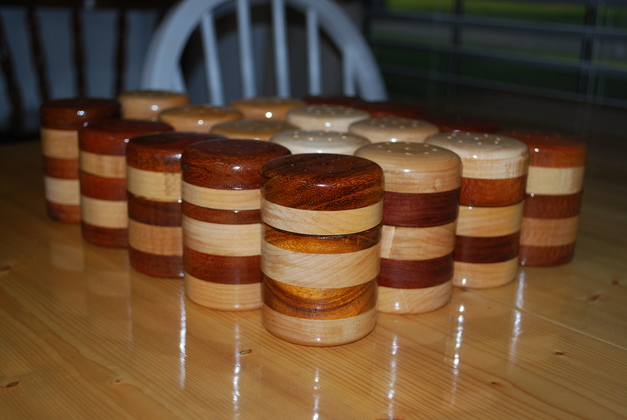
Some pics of the last batch. |
|
|
The grains in some of these is interesting. |