|
| 
| ||||
|
Blower Install
| ||||||
|
|
|
| ||||
|
Blower Install
| ||||||
| Uninstall Blower | Rebuild Blower | Reinstall Blower |
| First, move the machines in front of Dc | |
| Next remove the hoses, and unplug all the power as well as Isnsrs. | |
| Remove the dust bin | |
| Untape all the joints from the blower and cyclone | |
| Remove the cyclone | |
| Rig up the winch and ropes to lower/hoist the motor | |
| Unbolt and lower the motor | |
| Now we're half way |
|
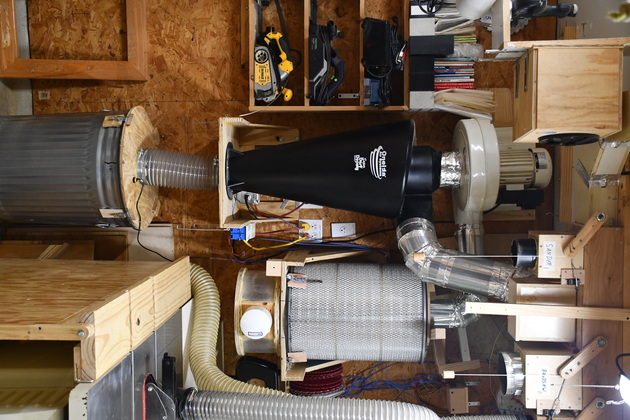
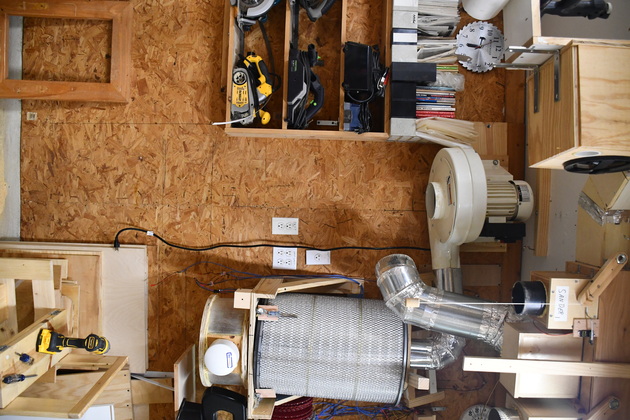
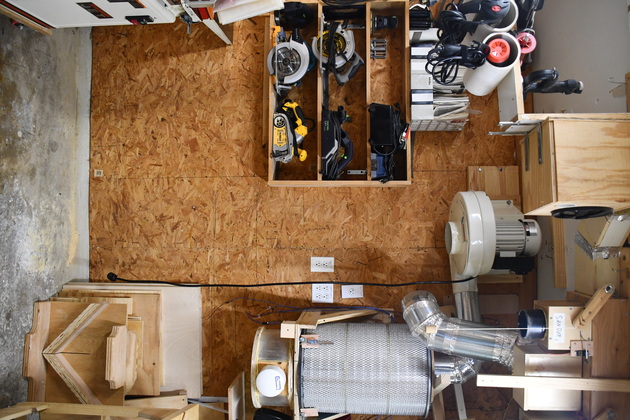
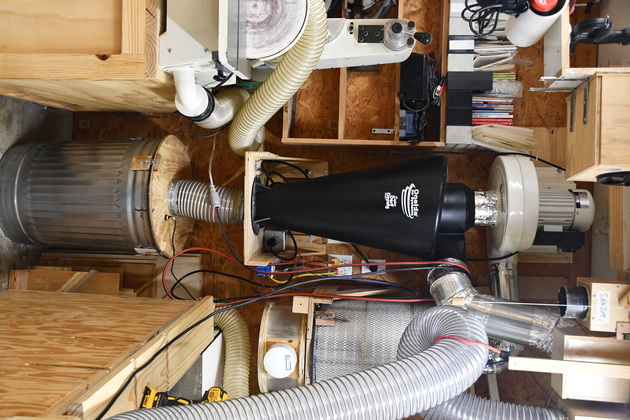
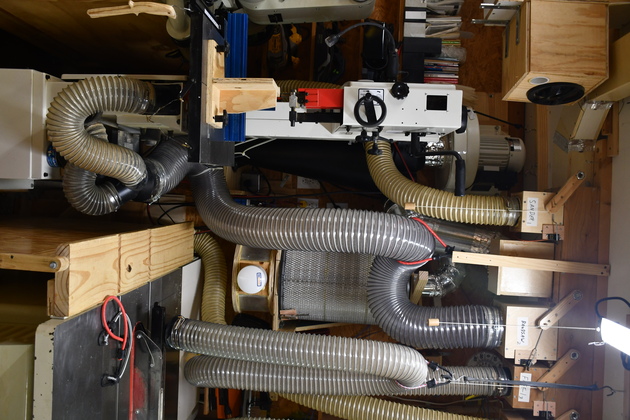
| Here is DC6 without the hoses and bandsaw in front of it. The motor is bolted to a wooden wall mount, the cyclone is supported by the shelf under it, and the dust bin sits on the floor. You can also see the Wynne filter on it's shelf with the clean-out box below, both on the filter shelf. |
|
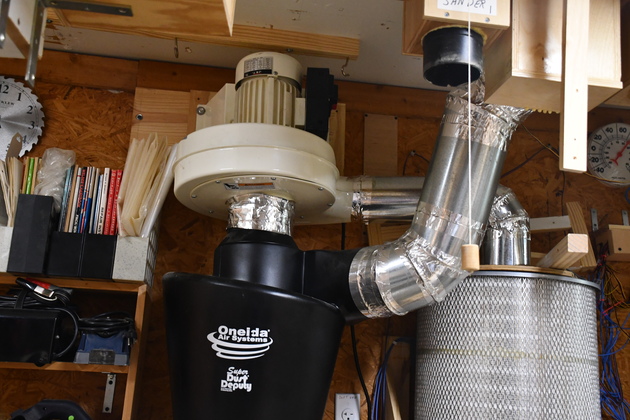
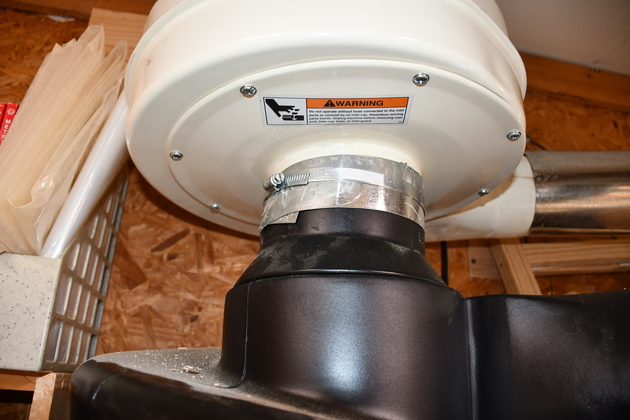
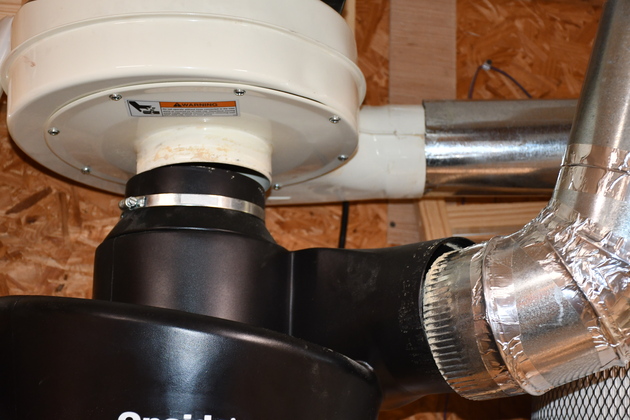
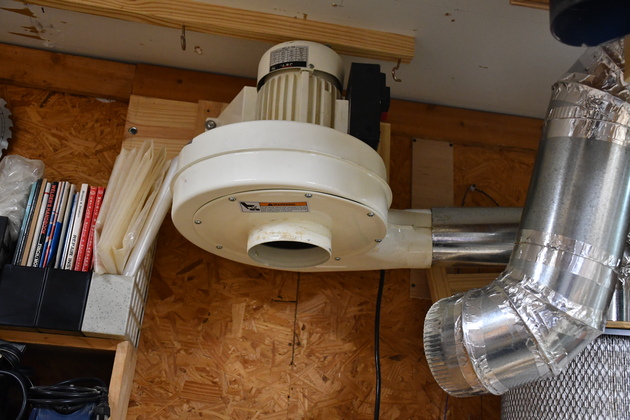
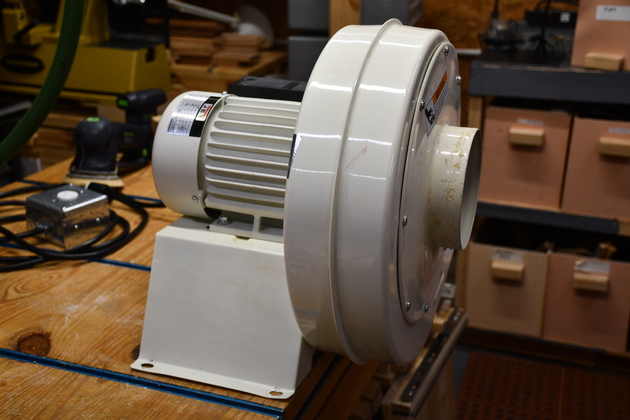
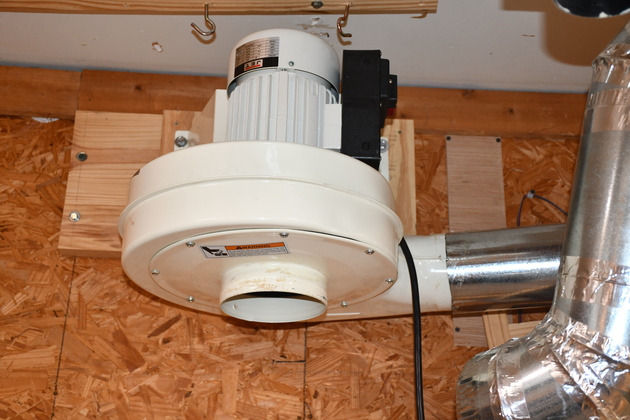
Closer look at the blower, the blower unit (motor, impeller, housing, and mount) weighs about 60Lbs.
Note: every joint in the negative and positive pressure parts of the system are taped with aluminum backed AC Duct Tape. Interestingly enough the blower is the only part of the DC-1100 still in use and I am in the process of replacing the motor and impeller. |
|
|
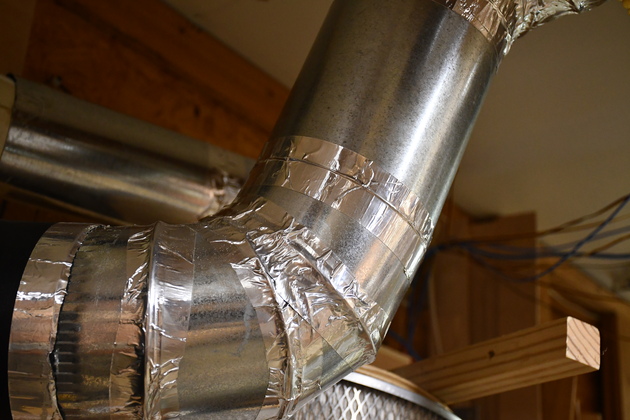
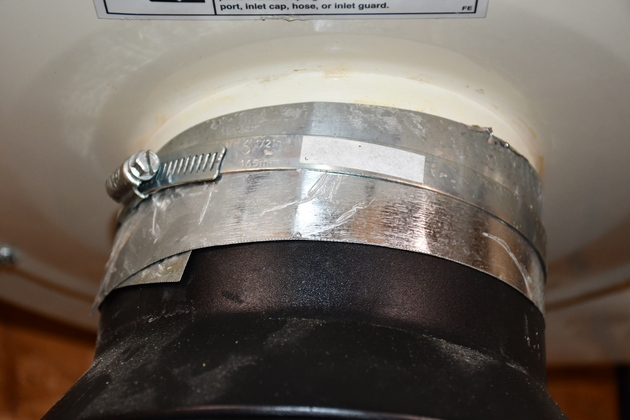
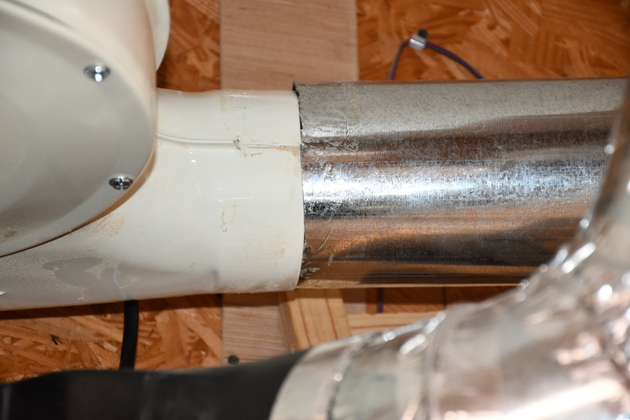
| I have removed the aluminum tape from the top of the cyclone to the blower input. Note I used a piece of tin as a collar around the joint to furce alignment, since both the blower input and the cyclone's output ID are the same. Remember, I didn't have a lot of extra vertical room, so I butted the two together and clamped this collar around them and finally taped over it. |
|
|
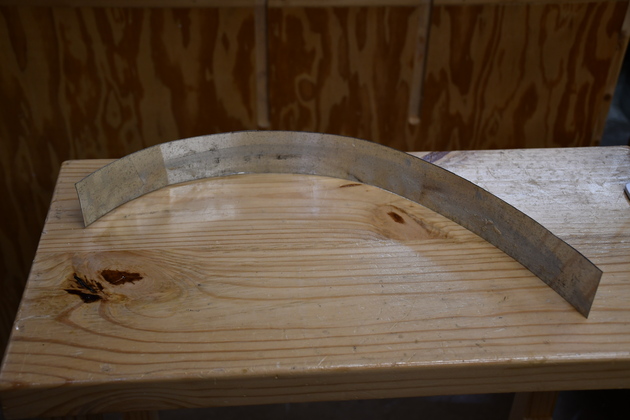
| The collar after being removed. |
| The cyclone to blower joint without the collar. |
| I have removed the tape and pulled the 5" pipe from the blower's output. This is the ouput pipe to the Wynne filter, normally the pipe to the filter fits over the blower's output. |
| All the joints to the blower and cyclone have been separated. All that remains is to unscrew the cyclone support shelf from the wall. |
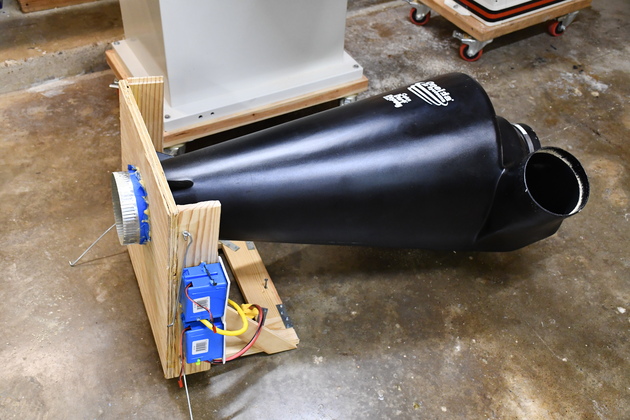
| Cyclone, with it's support shelf, removed. Note the two Isnsrs (current sensors) for the sander and bandsaw screwed to the side of the support shelf. |
| Everything below the blower is out of the way, ready to unbolt and lower it. |
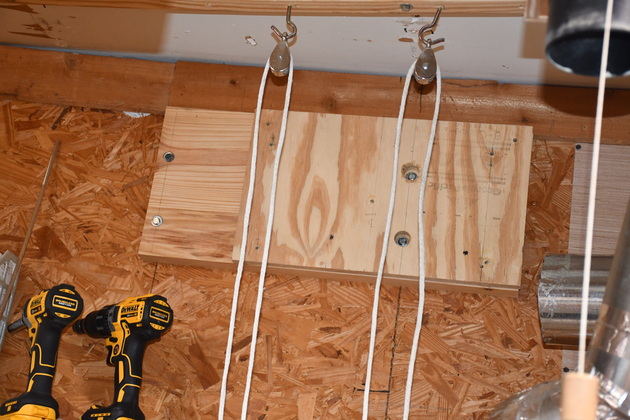
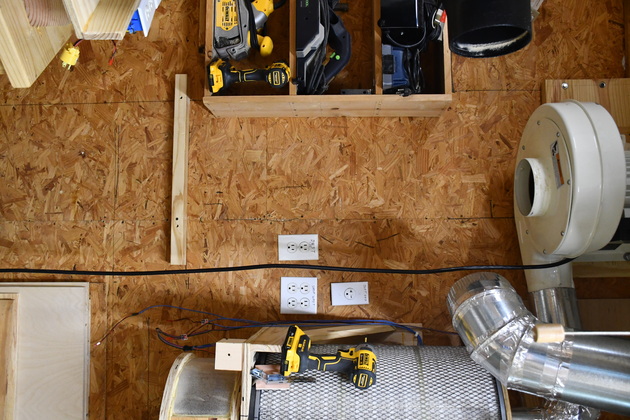
| Closer look at the Jet blower. Note the hoisting bar screwed to the ceiling joists above the blower. This blower assembly weighs about 60 Lbs. |
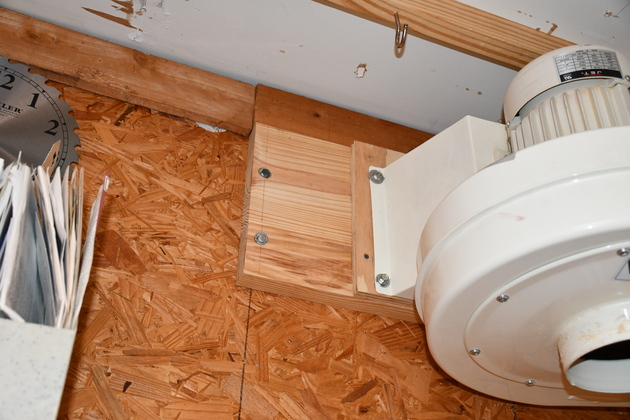
| A close look at the wall mount, it is a 2x10 plus 3/4" plywood. The 3/4" plywood is needed to make the blower's input align with the top of the cyclone. |
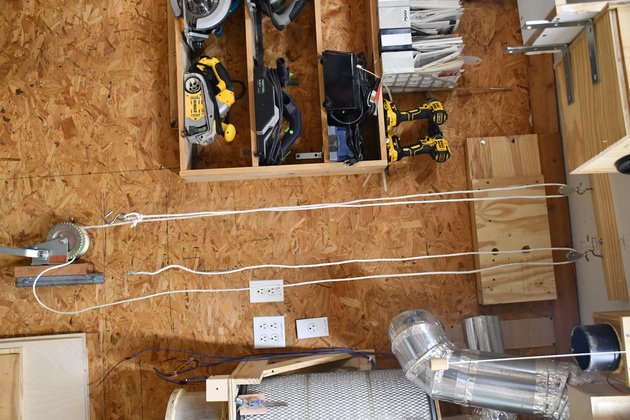
| All gone, blower removed. Note, you can see the boat winch, bolted to a stud, at the bottom. This thing does all the work of lifting and lowering the blower. |
| The original Jet blower with it's 1-1/2 HP motor and 11" impeller. This thing weighs about 60Lbs. |
| A little better look at the mount still bolted to the wall. |
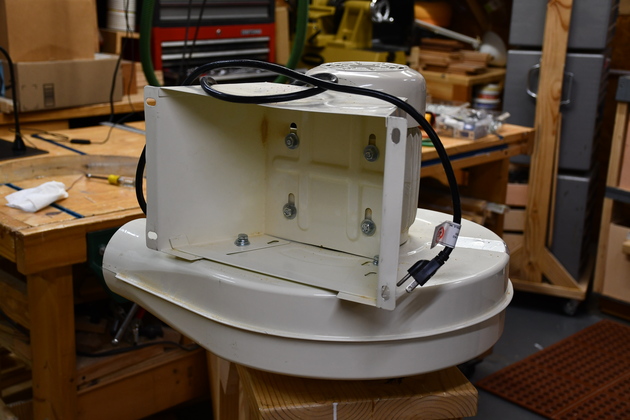
| Underneath the motor mount, note there are four 8mm bolts holding the motor to it's mount and 2 holding the blower housing. |
| I think the old blower motor's switch box was damaged when I hoisted it last time. |
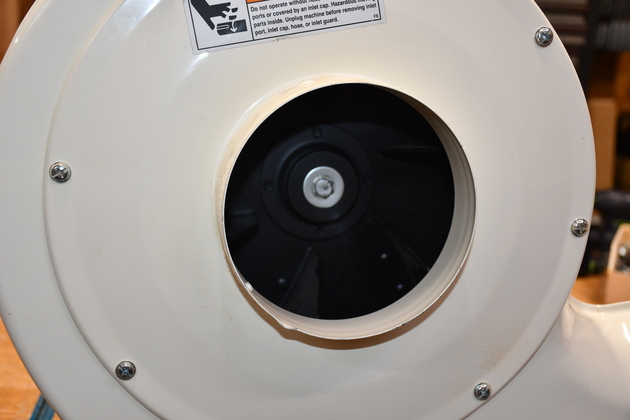
| First step, remove the impeller cover. |
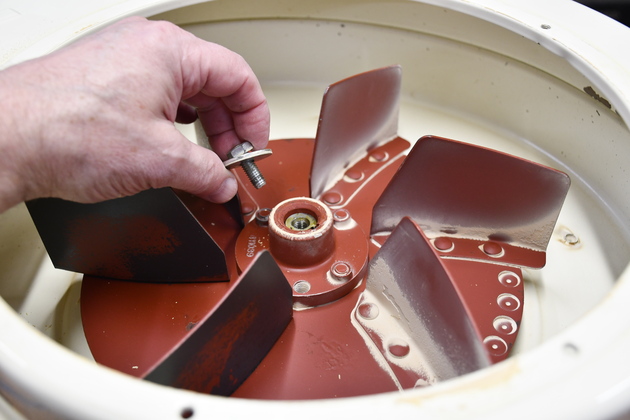
| Cover removed, now pull the impeller. Note, I unbolted the bolt and washer holding the impeller to the motor shaft. |
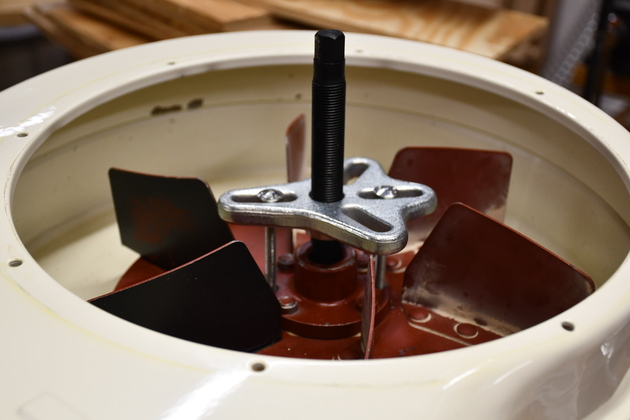
| Pulling the impeller from the motor shaft. I had to drill and 1/4-20 tap the two holes in the impeller flange so I could pull it. |
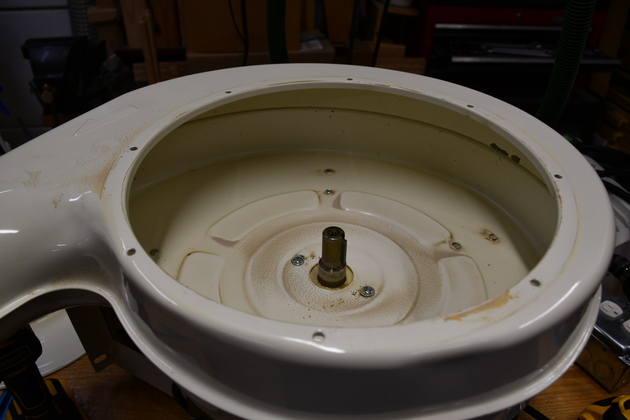
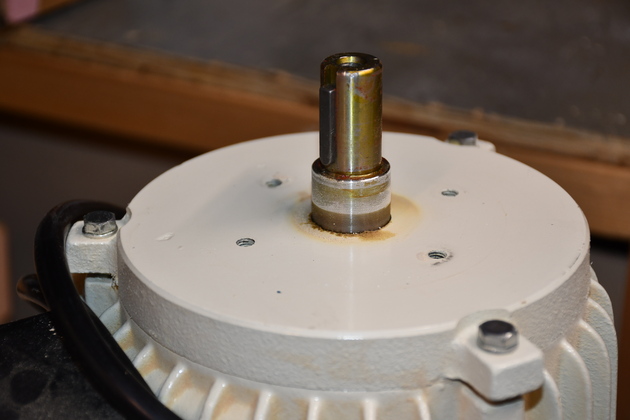
| Old DC-1100 (1-1/2HP) shaft. |
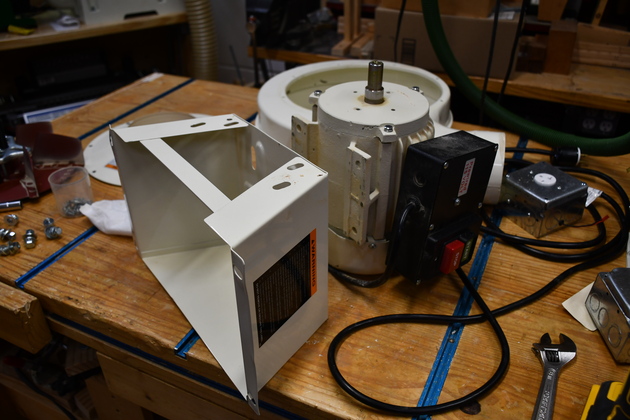
| The blower copletely disassembled. |
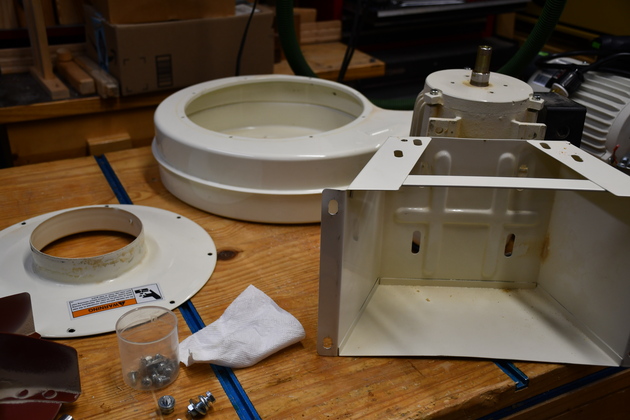
| I spread out the blower parts to give more room for the motor replacement. |
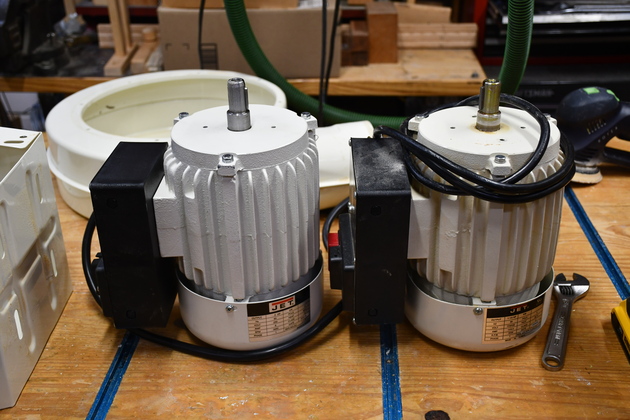
| Side by side comparison, the 1-1/2 HP motor on the right, the 2HP motor on the left. Note the 2HP motor only has 2 holes to mount the blower housing and the old one has 4. |
|
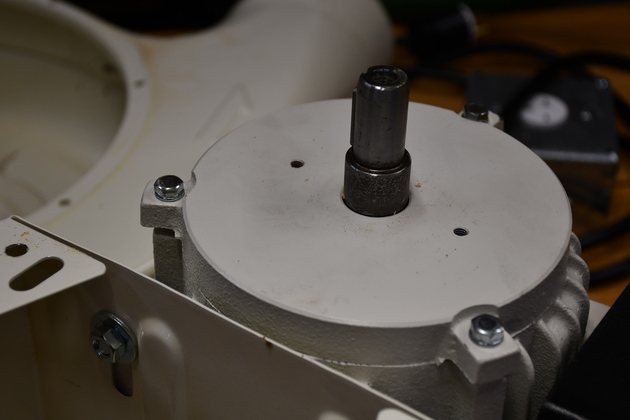
| Left: old 1-1/2 HP motor, Right: new 2 HP motor, note the differences in the tapped holes. |
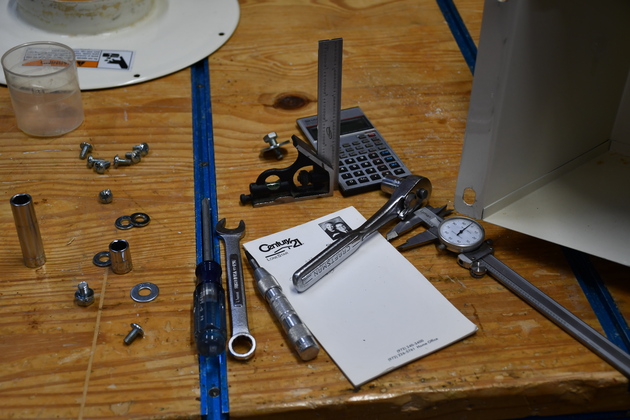
| I had to drill a different set of mounting holes in the blower housing, these are some of the tools I used. Remember, the ouput of the blower must point at the center of the filter. |
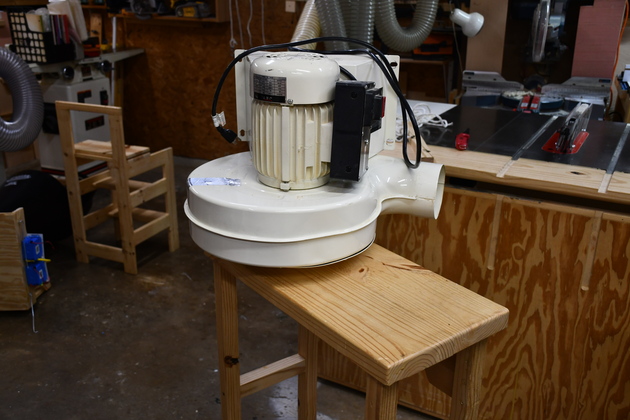
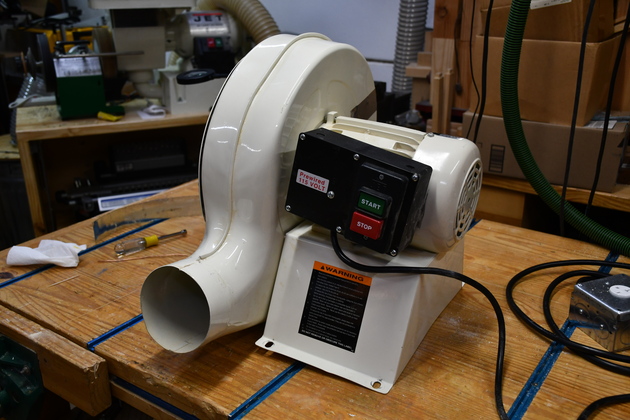
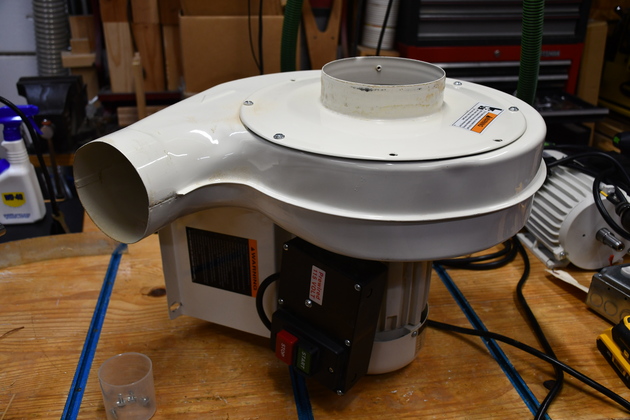
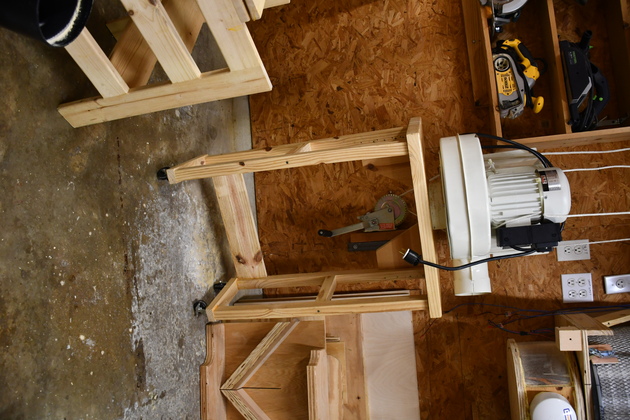
| Assembled, sitting right side up, ready to be raised to the wall mount. |
| With the larger impeller. I did run it before I raised it to the ceiling. |
|
|
With hoist rope attached.
A difficult part of hoisting the blower, there is no good attachment point, and while lifting you must keep the blower assembly balanced, right side up.
Of course this thing wasn't designed to be hoisted to the ceiling.
Prior to this pic, with the blower's base on the table top (sitting upright) I turned the blower on to test it. I had to hold the blower since it pushed the cart around, vigorously. |
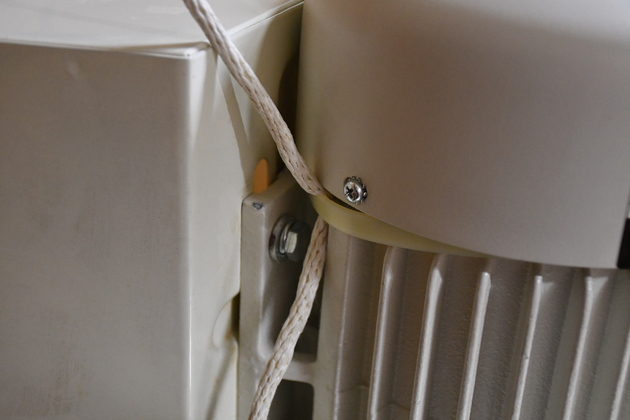
| The rope comes down from the pulleys on the ceiling as a loop. It passes between the lower part of the motor and the impeller shroud. The right side passes under the switch box mounting boss (cast iron) then up the side of the motor to a large zip-tie which holds the ropes alligned with the cooling vanes cast into the motor housing. BTW, this is a nylon cored rope with a cotton outer wrapping, which is rated at several hundred pounds. No, one segment of rope holds the entire weight of the blower assembly. The one negative about this hoisting arrangement is I can't get the blower quite as high as needed, so I have to lift it the last 1/2" or so to make it line up with the mounting holes. |
| Rope, on the right side, coming out from between the motor (left) and the impeller shroud (right). Note it passes under the cast iron switch box boss (left). |
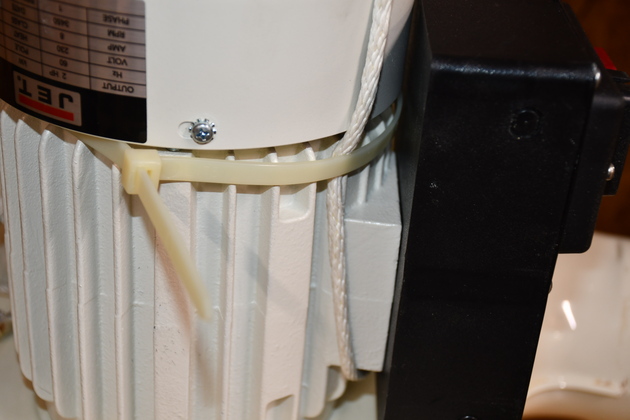
| Upper right side. Note you can see the 24" long, 3/8" wide zip-tie, not yet completely tight. When the zip-tie is tightened, it will keep the ropes between the cast iron cooling vanes on the motor, held on opposite sides, keeping the motor's mass more or less straight up and down while being hoisted. These larger zip-ties require a different tool to tighten. |
| Upper left side, the zip-tie has been tightened. Once the motor is bolted to the wall mount, I'll cut the zip tie and remove the rope. |
| New motor/impeller bolted to the wall mount. |
| Close look at new blower mounted. |
| A little farther look. Note, the 2x2 board screwed to the wall, I added that to make it easier to align the cyclone with the blower, height wise. I set the cyclone shelf on top of the board and adjust it sideways to align with the blower inlet, and screw the shelf to the wall. |
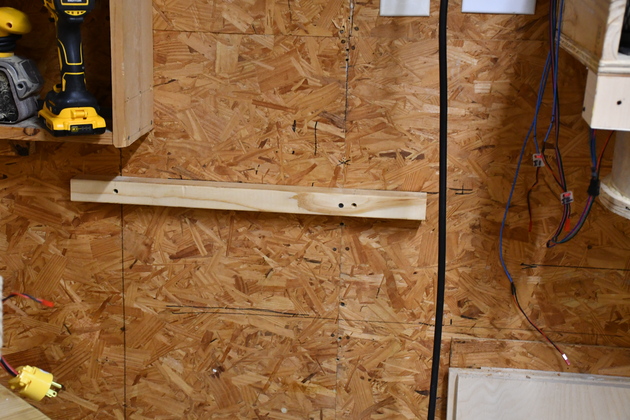
| Closer look at the cyclone alignment bar. |
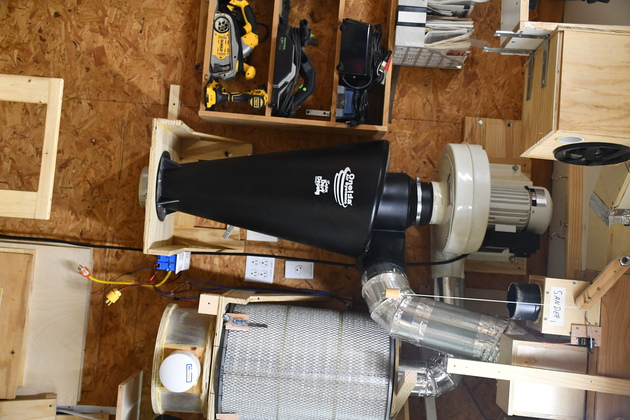
| And now the cyclone is installed. |
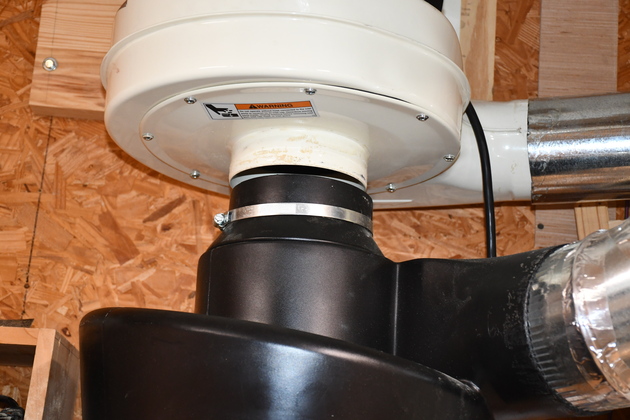
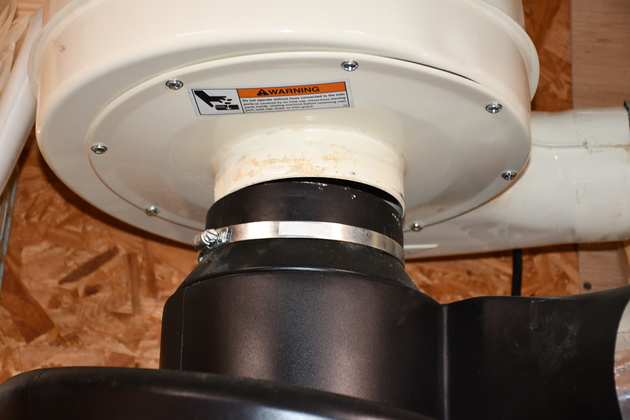
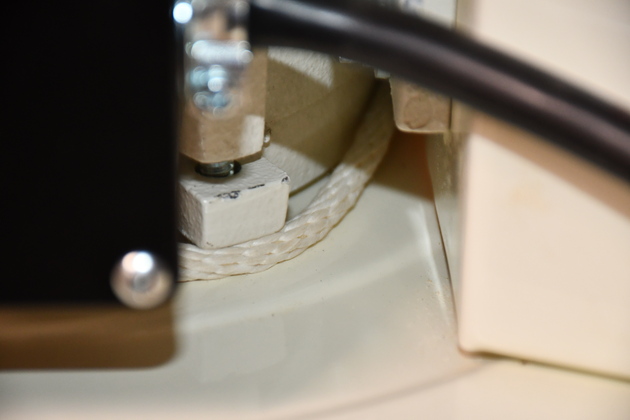
| Closer look at the junction of the blower and the cyclone. The collar forces them to stay aligned. |
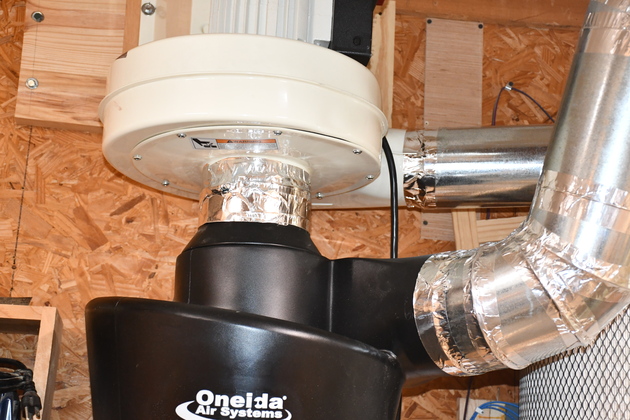
| Collar on, and all joints taped. I should have taken a pic of the collar before I taped it, but I did take one before I removed it. |
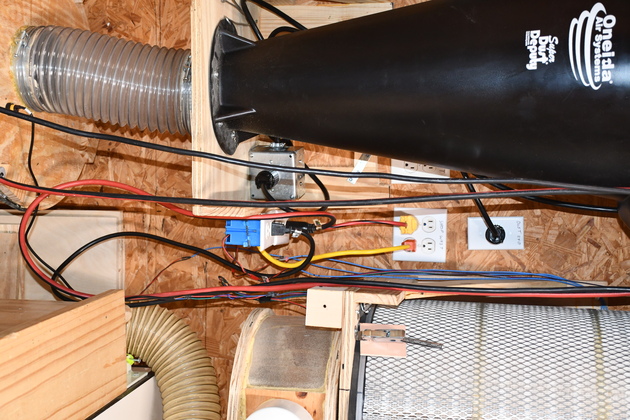
| All electrical connections made, including power, the two Isnsrs, and the dust detector. |
| Back in it's place with everything hooked up except 4" dust hose to the sander. |
| Back to normal. The new blower works with the automation electronics. This blower has a different sound, more 'authoritative'! There is a very noticable increase in vacuum. |

|