|
|
| 
|
|
Bins
|
06/19/16: Page Origin.
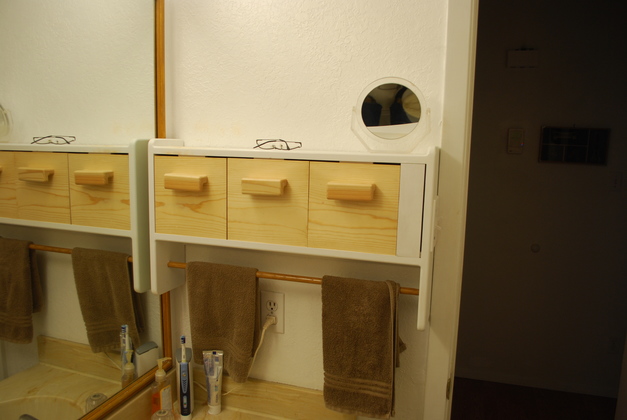
Betty and I decided to try using lift out & tllt bins as bathroom storage instead of cabinets or just shelves.
I had seen plastic tilt bins at Lowes but not for sale and they didn't look good with our other cabints.
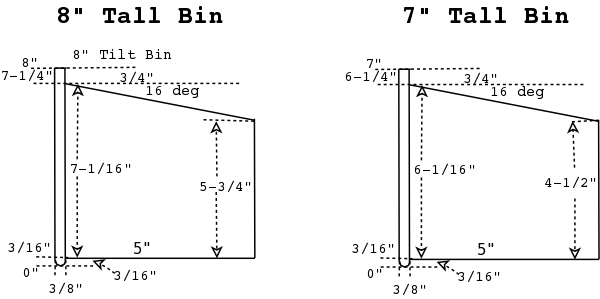
In the back bath I made 7" tall bins but Betty had taller items so I made these 8" tall and 8" wide.
These bins have proven to be a great addition to both baths, I use one for meds, and another for shaving, etc.
Box

|
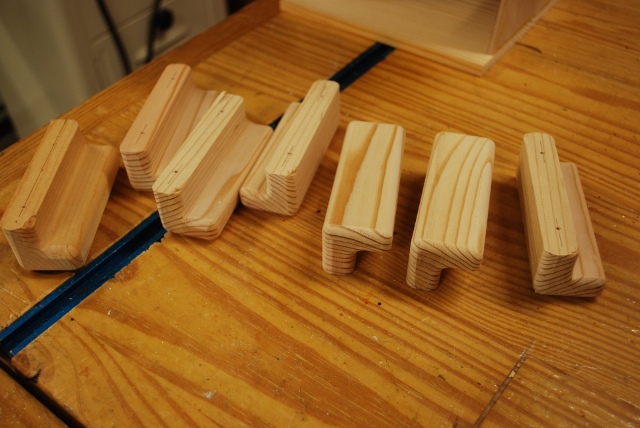
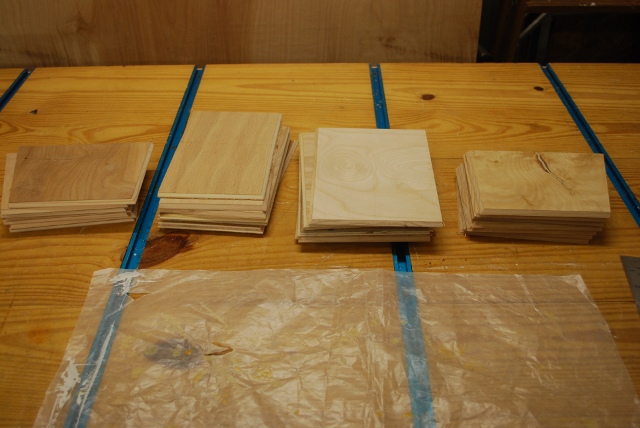
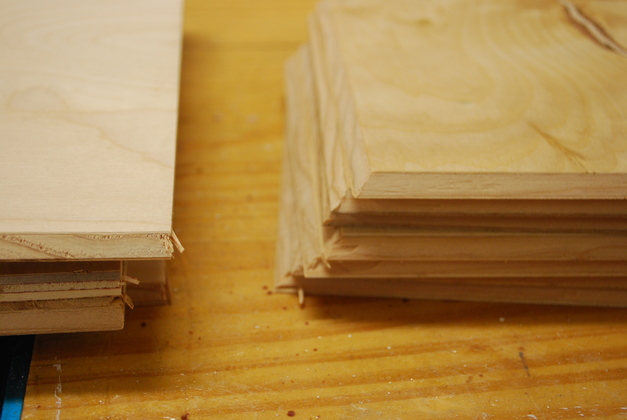
Pieces cut out for several bins.
The front (left) is 3/8" thick, the back, bottom, and sides are 3/16" plywood.
|
|
3/16" thick plywood cut out for left side, bottom, back, and right side.
|
|
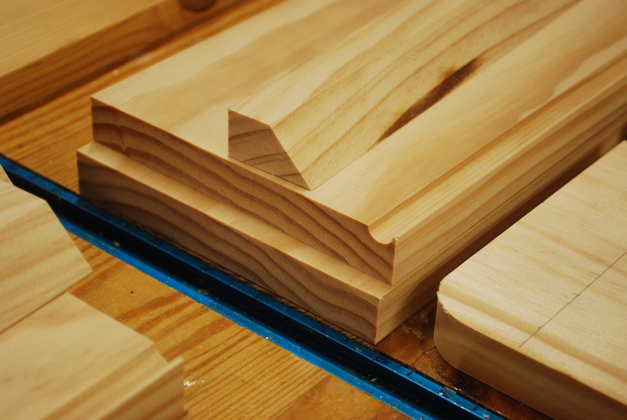
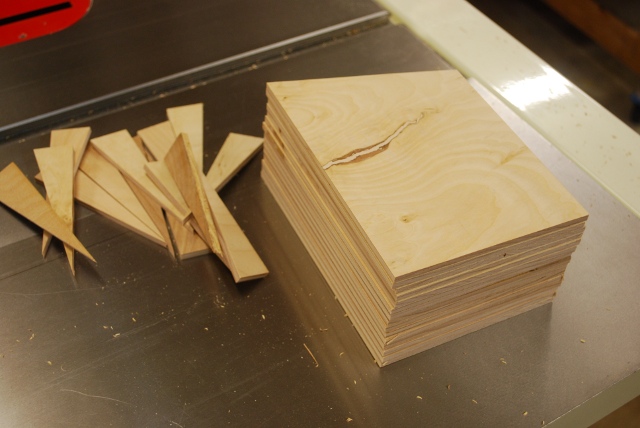
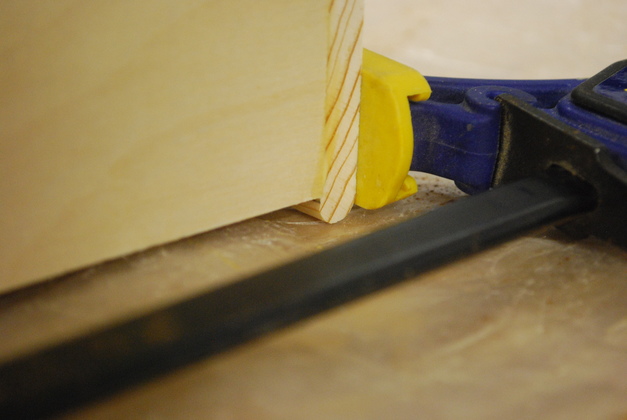
Sides have the top angled.
Note: I used three of the wedges to make a clamping brace.
|
|
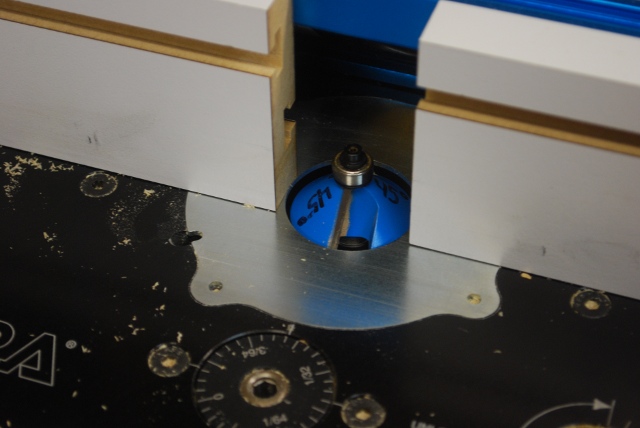
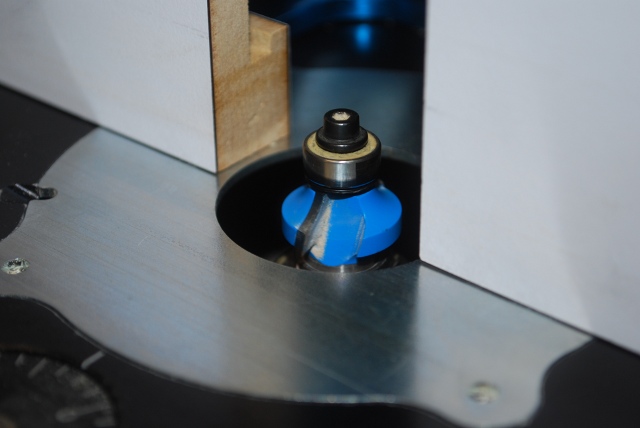
Router table setup for mitering plywood edges.
Note the 45° written on the bit, Rockler doesn't put the sizes on bevel or roundover bits just the number but they don'e even keep the same numberso You have to keep track seperately.
|
|
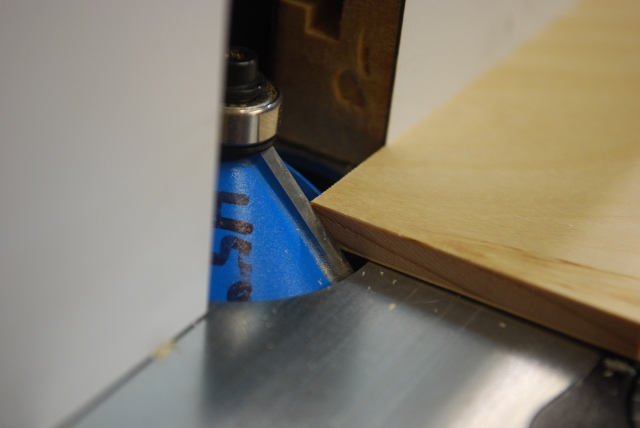
This is how I set the blade, it should cut just short of the top surface, this is a piece of the same plywood I'll be mitering.
|
|
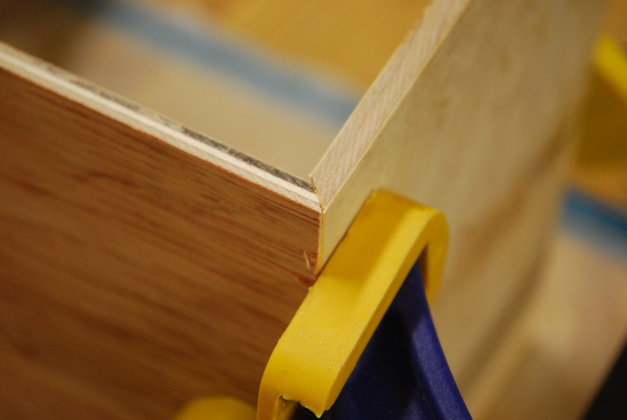
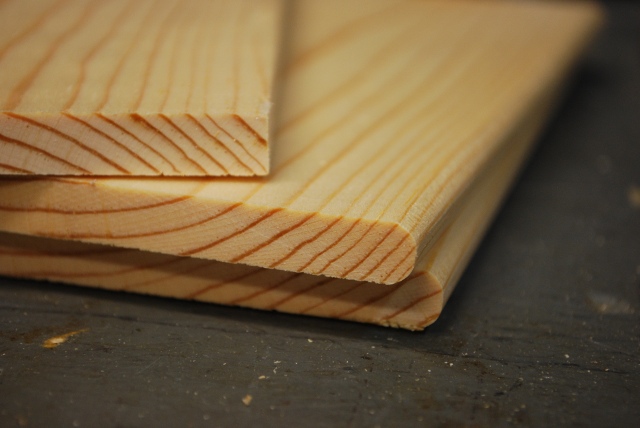
Mating edges have been mitered on the router table with a 45° bit.
|
|
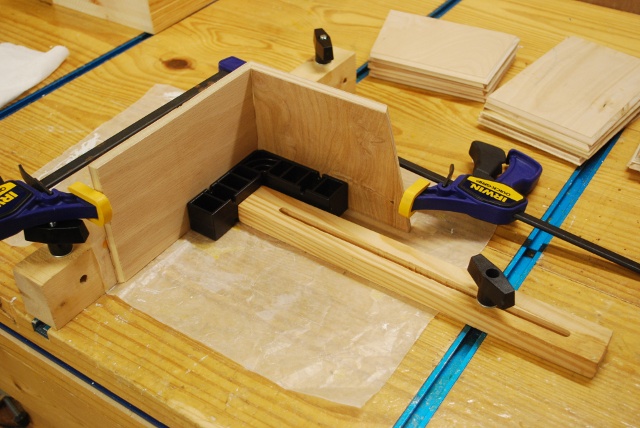
I glue one side to the bottom at a time using tee tracks on my work bench and clamps.
Notice the mini-ClampIt keeping the side square to the bottom.
It doesn't take much pressure on the clamps to hold the miter joints together for gluing.
I press the joints firmly by hand to get the glue to penetrate the wood then use the clamps to keep them tight while drying.
|
|
Start out with flat plywood and keep the miters tight and square while drying.
|

|
Making my angle glue brace from the wedges I cut off the sides.
|
|
Using the angle glue brace.
|
|
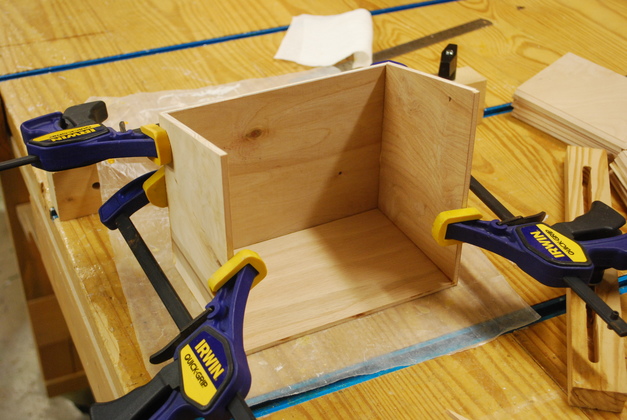
Sides and bottom glued now I'm gluing the back on.
|

|
Gluing on a back.
|
|
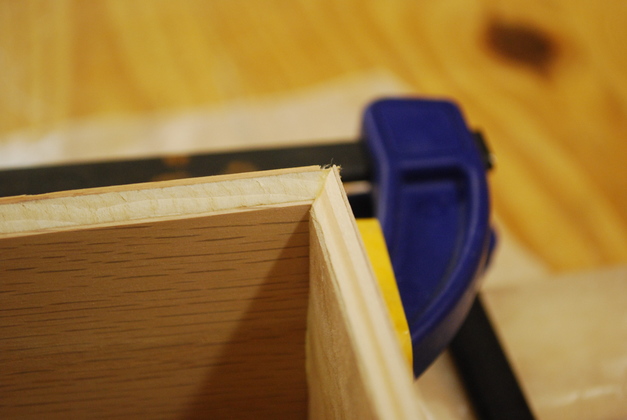
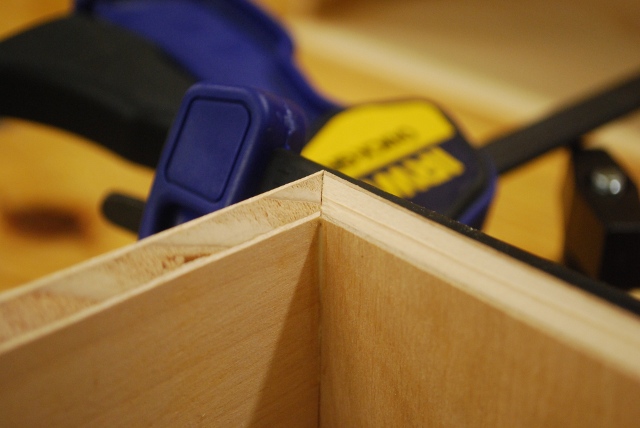
The miters look neat for plywood.
|
|
Inside of a miter joint.
|
|
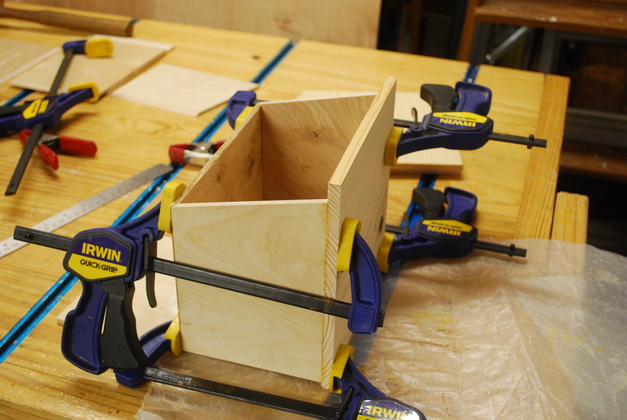
Gluing on a front.
|
|
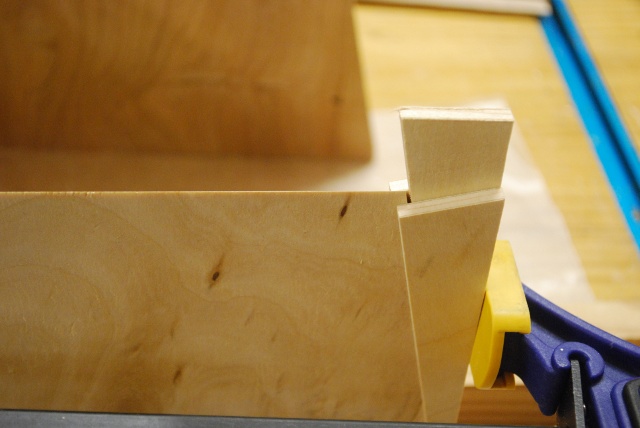
Since the plywood I am using is 3/16" and I want 3/16" protrusion of the front below the box bottom, I use it as a spacer under the box.
|
|
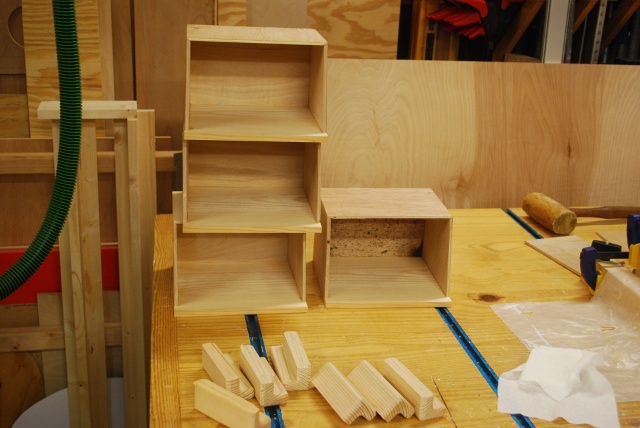
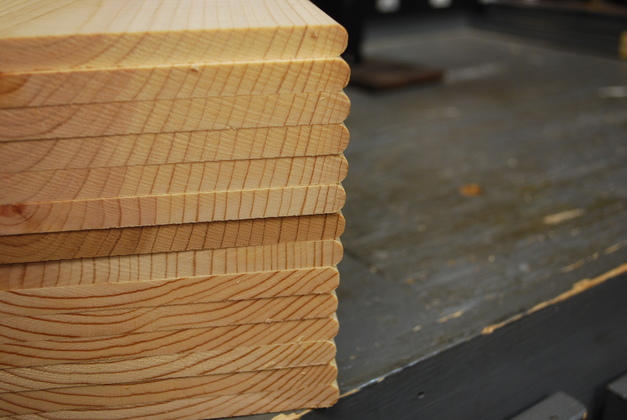
Starting to stack up.
|
Front
|
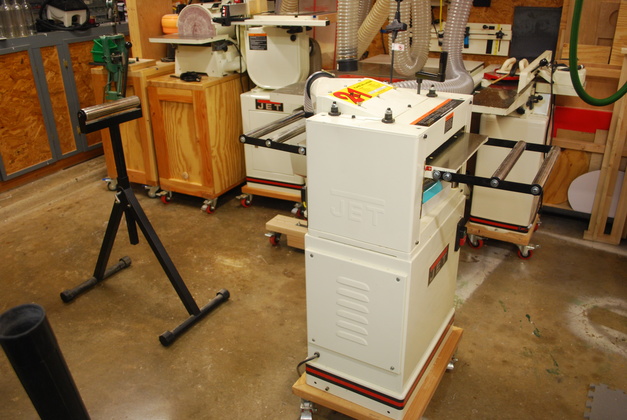
Planer set up to plane 1x10 down to 3/8" thick after I resawed them.
|
|
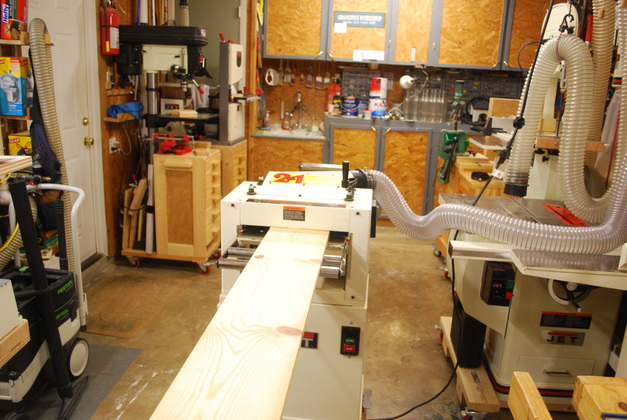
Planing the 1x10.
Next I'll rip it to 8" wide then cut it inot 8" long sections.
|
|
3/16" roundoff bit set for rounding lower edge of front panel.
I round one side then turn it over and round the other.
|
|
Front panels: top one is before rounding the two lower ones have been rounded.
Note the rounded part is a perfect helf circle, this is the pivot point for the bin when tilted..
|
|
Stack of front panels rounded and ready to glue.
|