Diagrams of a Mobile Loading Bench With Planed Frame
10/07/13: Tweak positions and sizes for printing. Add diagram click (hyper) links.
Break into 3 pages for printing.
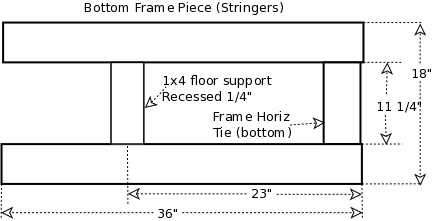
05/19/13: Add main bay floor brace to diagrams.
05/18/13: Tweak lumber list, panel cut list needs work UNDER CONSTRUCTION
05/02/13: Add Purchase and Cut Lists
05/01/13: Spun off from Non-Planed Diagram.
To the Diagrams,
to the Purchase List,
to the Cut List.
A 2x4, when it comes from the mill is 3-1/2" wide and 1-1/2" thick and has slightly rounded corners.
For this project I'll plane about 1/16" off each board face so the 2x has nice square corners (See Square Board Page for more info) and the joints will be flush.
The resultant 2x4s will be 3-3/8" by 1-3/8".
The bench top is made from 2x6s edge laminated so I end up with a 1-1/2" thick top, 18" wide and 36" long.
All joints use biscuits every 4 inches on the center line of the boards being joined.
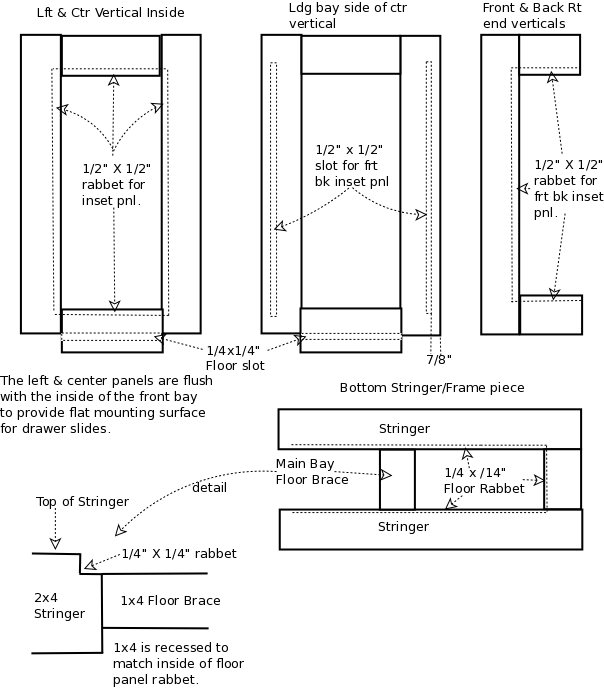
You have to keep everything square and plumb so drawers work.
Passing the 2x4s across the jointer I still hold the 10" from the end dimension of the right vertical support so the loading bay is 10" deep.
Planing with a jointer makes the drawers about 1/4" wider.
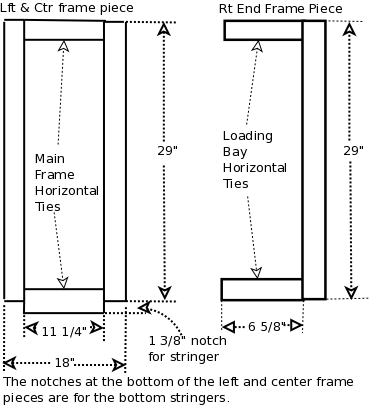
I take 1/16" off each side (2 cuts of 1/32" off each side), reducing the width and thickness by 1/8", so I have to increase the lengths of the horizontal braces in the vertical frame pieces by 1/4" to compensate.
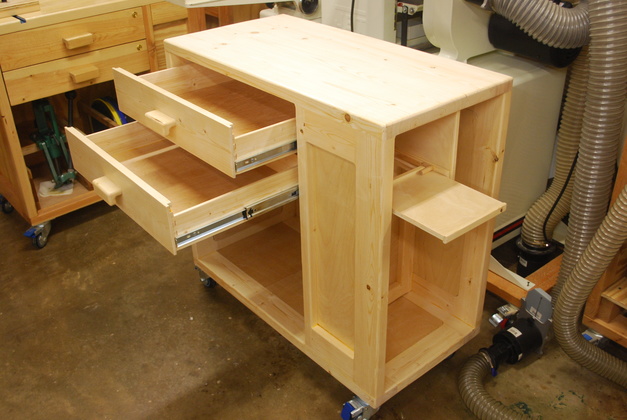
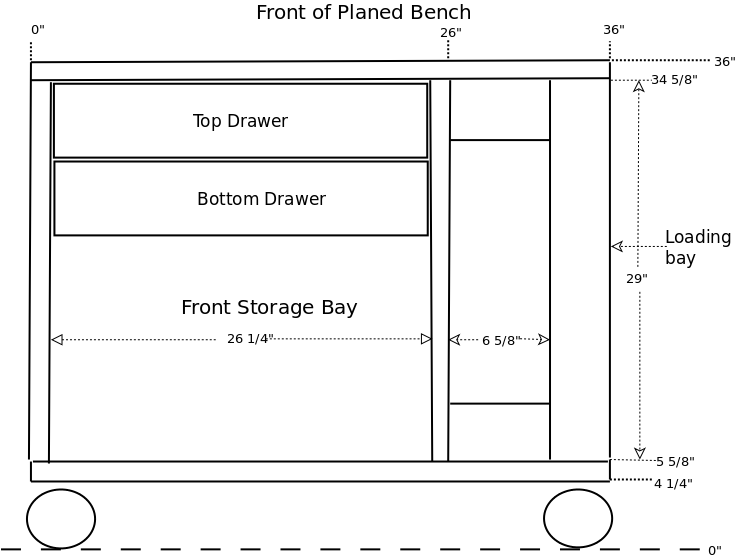
Drawers are 5" high, 16" deep, and 26 1/8" wide to fit into a 26 1/4" wide space.
The drawer front is a 1x6 cut down to 5" high, 26 1/8" wide with a 1/2" rabbet on each end to conceal the slides.
The sides and back are 1x4s resawn and joined on the sawn side leaving about 5/16" thick and sides are 16" long, back is 26 1/8" wide.
I allow 1/16" on each side of a drawer, and at least 1/8" vertical clearance between drawers, and top drawer and frame.
If you are not careful with measurements and cutting, you may want to allow more clearance for the drawers.
I always put the guide 1" from the bottom of the drawer, so, since each drawer is 5" high, I measure down 4 1/8" from the top, draw a horizontal line and mount the cabinet side of the drawer guide on this center line.
Then another 5 1/8" down to the next drawer guide center line (and any additional drawers I add).
Here is a link to how I make drawers and handles
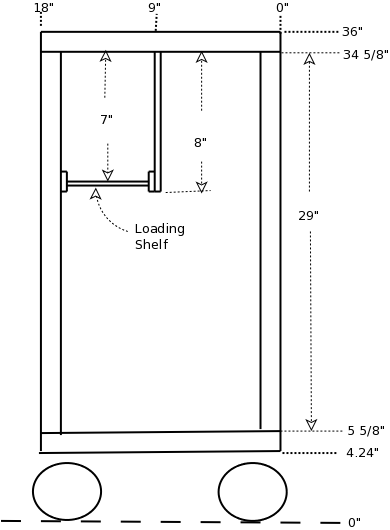
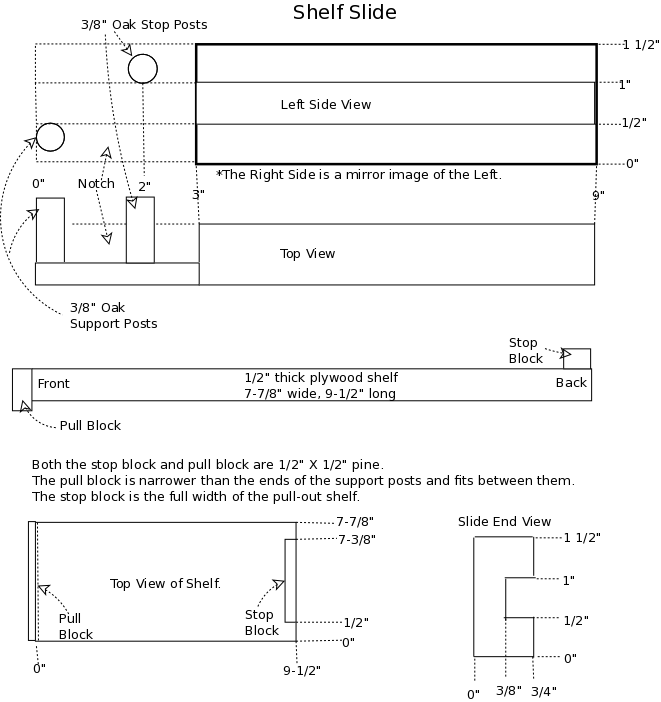
The loading shelf and the vertical frame for it is made from 1/2" plywood, usually birch.
Loading shelf and slide diagram.
Square Board Page.
Purchase List.
Depot Hardware Purchase List.
Lumber Purchase List.
Rockler Hardware Purchase List.
Cut List.
1/2" Plywood Layout.
Diagrams
All these diagrams are .png format, you can save them on your computer then display with Firefox and print them.
Or click on the image for a single page with the image on it.
|
Bottom Frame Piece (Stringers).
Click on the image for a single page with the image on it.
|