Tail Piece
| 
Main Ramp
|
|
Unloading Ramp
|
12/19/15: Page Origin.
I ordered a Jet Xacta (weight 500 Lbs) and knew I would have to unload it from my pickup.
I wanted the saw on a furniture dolly while I built a caster base for it but furniture dollys are very skittish (move every which way if you try to scoot something onto it).
So I came up with this ramp idea.
The saw without the wings, extension, and fence is between 300LB and 350Lb (way more than I want to lift).
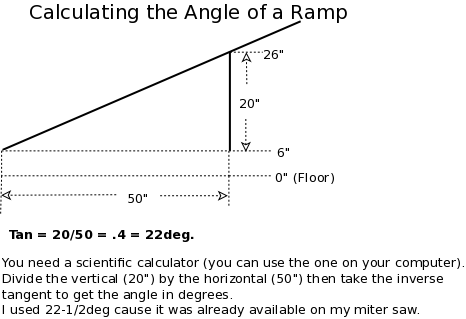
My pickup's tailgate (loaded) is 26" above the shop floor, and the top of the furniture dolly is 6".
The ramp only has to span the height difference from the pickup's tailgate to the top of the furniture dolly, or about 20".
The saw will be sitting on a pallet in the bed of my pickup.
The saw would need to make three transitions, from the pallet to the ramp on the tailgate, from the ramp on the tailgate to the down ramp and from the ramp to the dolly.
I decided to make the ramp in two pieces, the main ramp and a tail piece that would hold up the main ramp parallel with the tailgate, then be under the saw when it is on top of the furniture dolly.
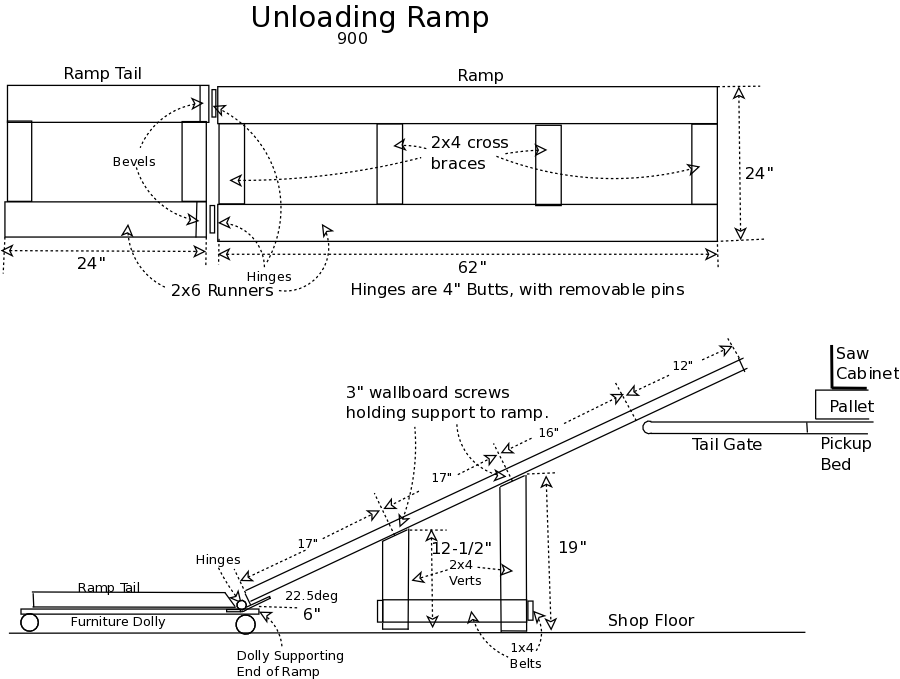
I built both pieces (main ramp and tail piece) out of two 2x6 runners, with 2x4 crossbraces.
I butt joined the crossbraces to the 2x6 runners with pocket screws on both sides (two on top and one on the bottom at each joint).
The ramp is 24" wide, the main part is 52" long, and the tail is 24" long and connected to the main ramp using two 4" butt hinges with removable pins.
The main part of the ramp is at a 22-1/2° angle with the floor, shallow engough that the saw won't just zip down.
The main ramp is supported at the upper end by the pickup tail gate, in it's center by it's pedestal, and on bottom by the furniture dolly, (see diagram).
The center pedestal is 4 vertical 2x4s banded together with 1x4s and screwed to the bottom of the main ramp.
I had to saw a diagonal 22-1/2° off the front of the ramp tail so it could hinge upward when the ramp is angled up to the tailgate and the tail is flat on top of the dolly.
Unloading Operation:
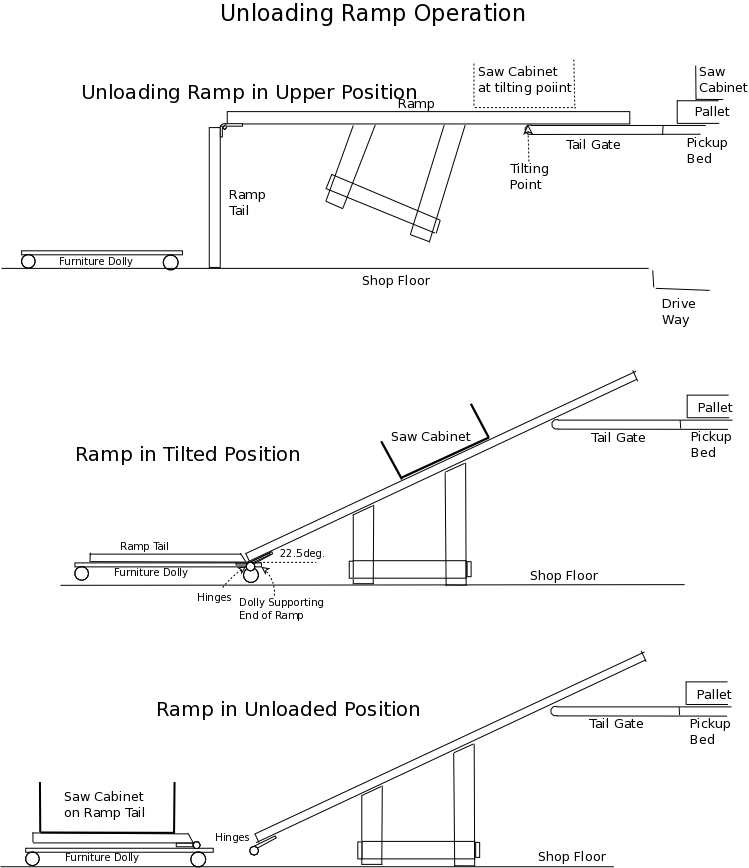
The ramp is used in two positions to ease the transition from the pallet onto the ramp then allow the saw to be walked from the ramp onto the ramp tail sitting on the furniture dolly.
The ramp tail is rotated down so the tail supports the lower end of the ramp and the tailgate suports the other end (The upper 12" of the ramp is laying flat on the tailgate see diagram).
The ramp is about horizontal at this point.
The saw is then "walked" off the pallet and down the top of the ramp until it is centered on the "tilting poit" (see diagram) or back edge of the tailgate.
The ramp tail is rotated out to horizontal the furniture dolly is moved under it and the tail is lowered onto the dolly, causing the saw to tilt forward and down.
The angle is not steep enough to cause the saw to just slide down, it still needs to be "walked" down and onto the ramp's tail on the dolly.
The pins are driven out of the hinges and the saw is now on the furniture dolly and free of the ramp.
As I said the saw (without wings etc) weighed 350 Lbs. and, with the help of my neighbor, John Theriot, we were able to unload the saw from the pickup's bed to the furniture dolly on the floor by ourselves with no strain.
BTW, the 2x6s from the main ramp were used to make the saw's caster base.
Click on Diagram for Larger Pic.
Click on Diagram for Larger Pic.
|
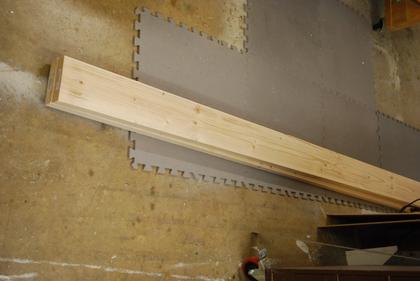
Lumber (2x6s) for the ramp and later the caster base.
|
|
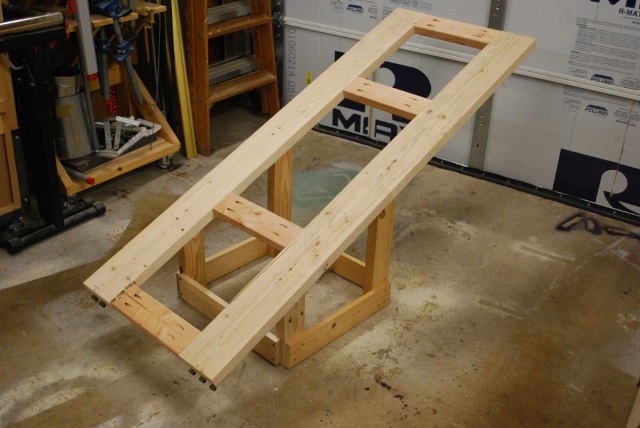
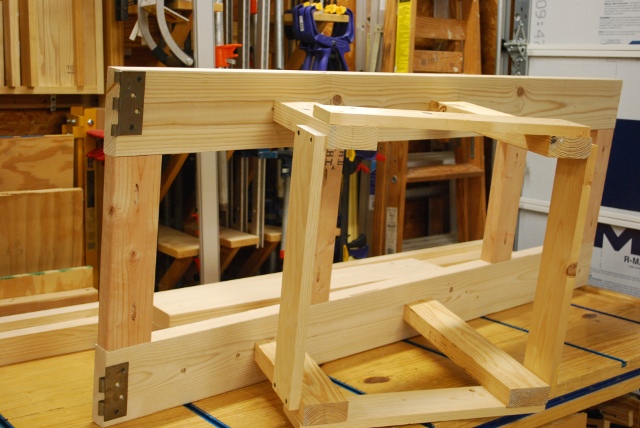
Main ramp after unloading the saw.
|
|
|
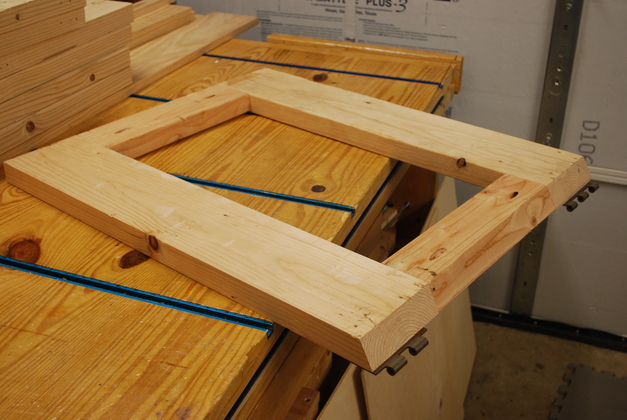
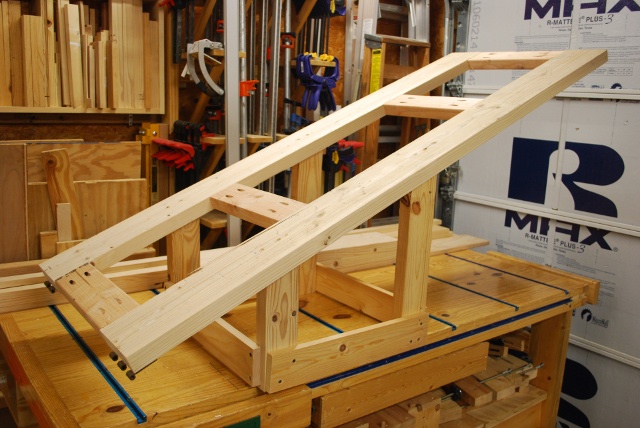
Closer look, and lower view, of ramp.
|
|
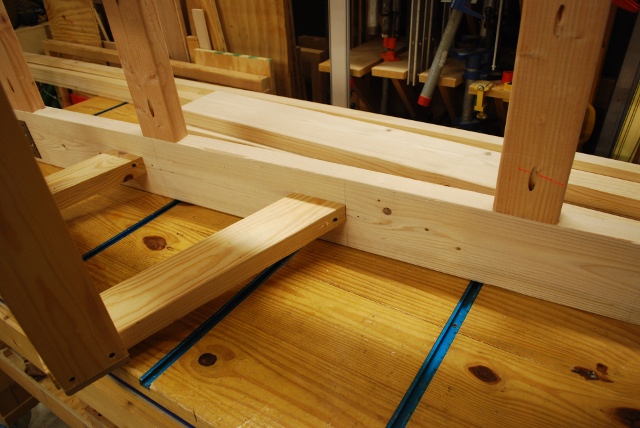
Ramp on workbench.
|
|
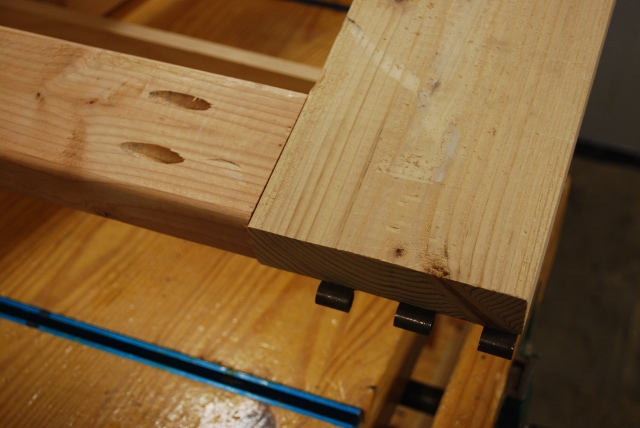
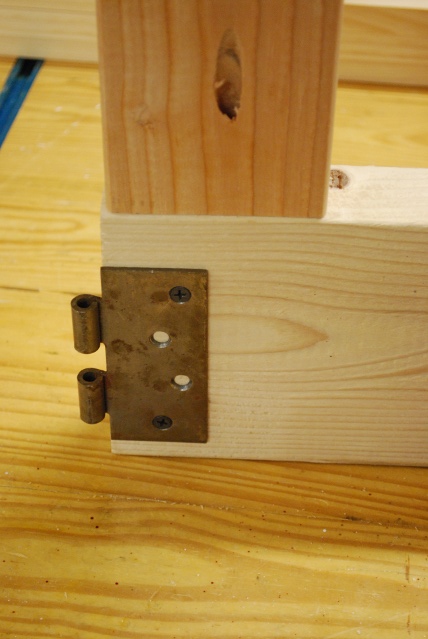
Lower end of ramp, showing pocket holes in crossbrace and hinge underneath.
|
|
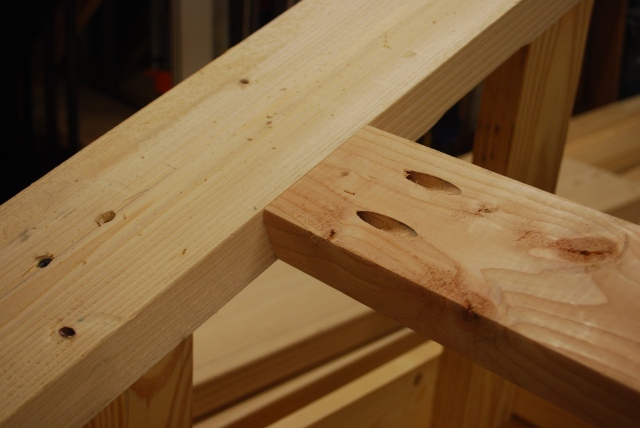
Look at one of the middle crossbraces and it's pocket holes on top.
|
|
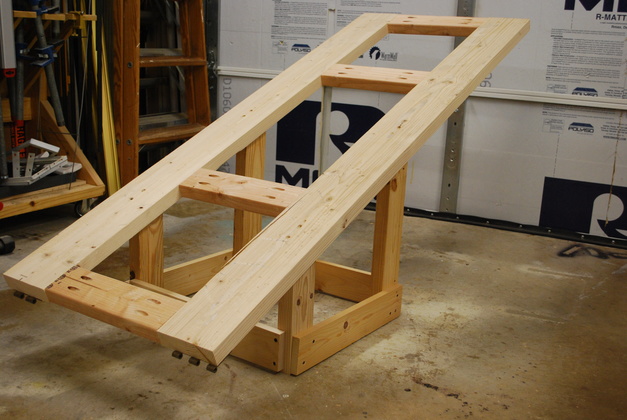
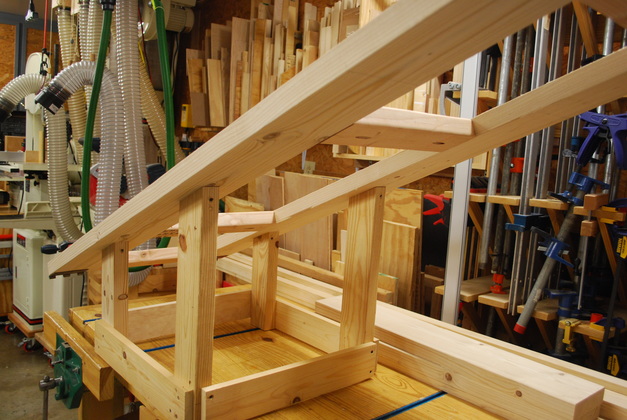
Under side of ramp showing support pedestal.
|
|
View of ramp underside, note hinges and suport pedestal.
|
|
Closer look at hinge on ramp lower end and one of the pocket hole in crossbrace.
|
|
Bottom end of supoort frame vertical showing attachment of 1x4 bands.
The side bands on the support pedestal isn't pretty but its suffucient to keep every thing aligned while "walking" the saw down the ramp to the tail.
|
|
Look at the support pedestal attached to the underside of the ramp.
|
|
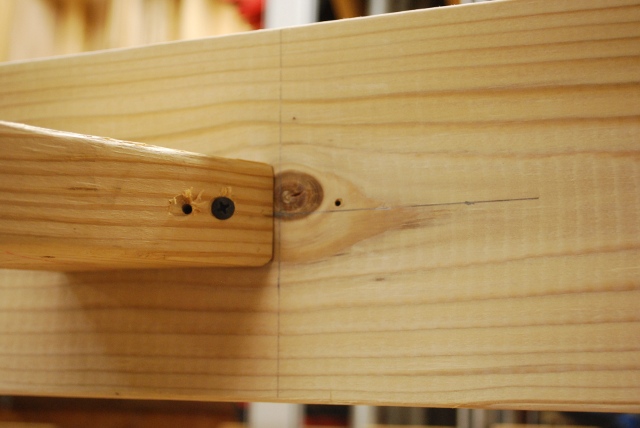
Closer look, a 1-5/8" wallboard screw holding support pedestal to underside of ramp stringer until I could get the 3" wallboard screws driven in from the top.
|
|
|
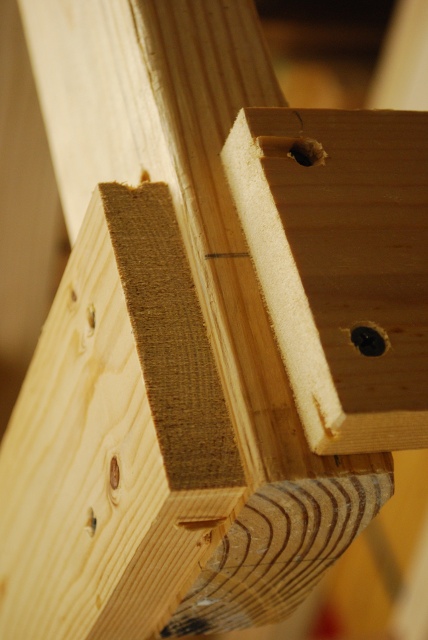
Ramp tail, you can see the bevel and hinges.
|
|
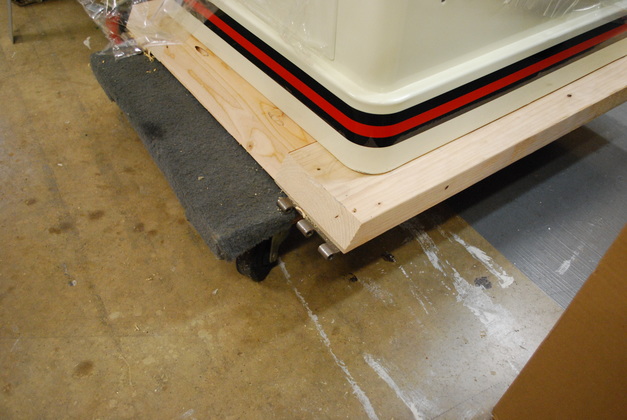
Table saw cabinet base sitting on ramp tail and furniture dolly.
Note the hinge under the ramp tail and the dolly sticking out under the hinges to support the end of the ramp while unloading the saw.
Also notice the beveled edge of the ramp tail so it could hinge upward slightly while in the unload position.
|

|
Closer look at hinge under ramp tail sitting on furniture dolly.
|
|
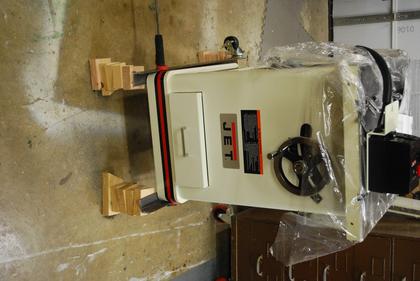
Main saw body on blocks after removing ramp tail.
John, and I slid the saw down the ramp from my pickup onto the ramp's tail.
Then I drove out the hinge pins, separating the tail from the main ramp, and rolled the saw to a convenient place in the shop.
I used a 2x4 lever and a stack of wooden blocks as a fulcrum to raise the saw enough to get 2" angles under each side supported by 2x4 blocks on each end and removed the ramp tail and furniture dolly.
The casters on the angle irons are left over from an old computer rack, I just needed the angle iron.
|
On to the caster base