08/02/16: Page Origin
After using my crosscut sled with an extension and stop block I realized, its really handy to have an extension with a stop block when sizing lumber.
The crosscut sled is a pain to use with long (8') or greater lumber, thats where a miter saw shines.
My miter saw just didn't allow for using stop blocks on pieces over about 14" and I cut a lot of lumber between 30 and 48".
My shop is tiny, so my first consideration in most tool decisions is compactness.
When sizing lumber on the miter saw, I move the lumber from right to left, so the extension will be on the left side of the miter saw and my workbench (inflow) on the right.
Due to my cramped shop, I chose to have the extension fold down on the side of the miter saw bench when not in use.
I mounted a tee track for a stop block in the center of the extension.
The extension is a 1x6, with a 1x2 on the back side as a fence (and rigidity).
I started out with a hinged 1 x 2 diagonal folding stiffleg for support, but soon changed it to a 3/4" plywood, fold out, Ext support.
I will use a 1-1/2" thick stop block with a tee bolt running in the tee track on top of the extension.
The tricky part of making and mounting this is to get it flat and level with the miter saw table and make sure it would still fold flat.
I checked my miter saw table and made sure the left side was square to the saw's table with a framing square.
I laid the extended extension on my workbench and clamped it square (base board to extension) using a framing square.
Then I moved the stiff leg, unfolded, so that both ends were the same distance from the pivot point.
Next I marked the attachment points for each end and screwed them down.
It helps if the center hinge has a removable pin, to screw the hinge on each end down.
I unclamped and folded the extension against the back board to make sure it worked then moved it to the miter saw bench.
I clamped a 2 x 4 to the saw's table and to the exetension.
Then made sure the base board was vertical and the extension was flush with the saws table and screwed the base board to the side of the bench.
BTW, if you don't have a 6' workbench handy for inflow to the saw, you could make a folding extension on both sides, or build a roll-aournd cart.
If you have questions or comments about this please email me at  .
Sorry, our webserver doesn't accept connections from outside the US and some domestic spam generating networks.
.
Sorry, our webserver doesn't accept connections from outside the US and some domestic spam generating networks.

|
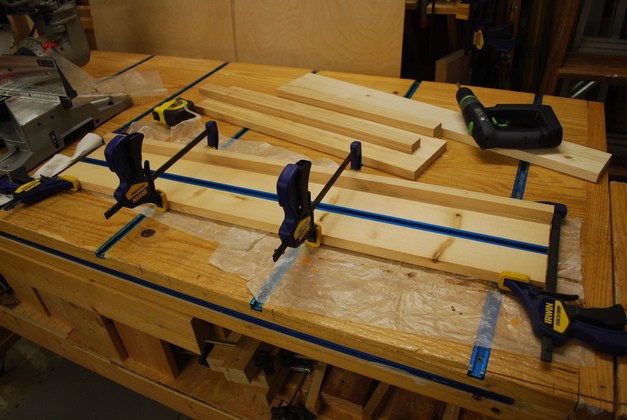
Gluing the fence/stiffener to the extension.
Note the tee track is in place.
Also note I am using a 1x6 extension, I decided it would be better to use the wider board.
|
|
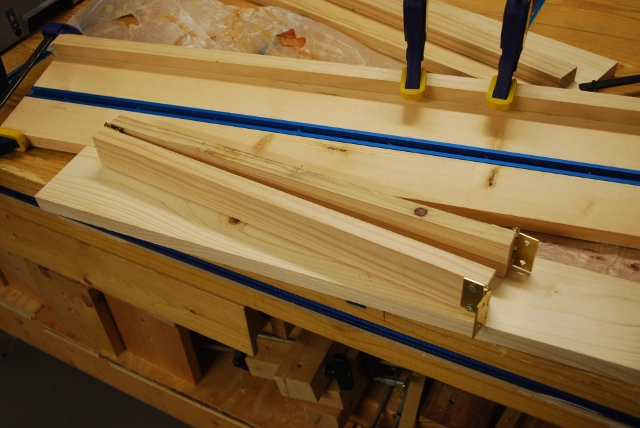
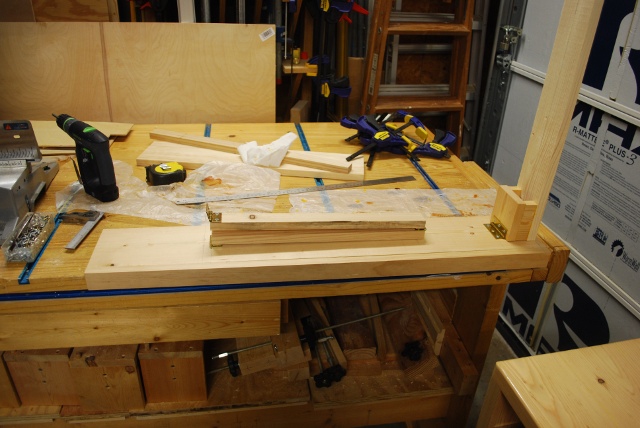
Stiffleg on top of the base board with extension in the back.
|
|
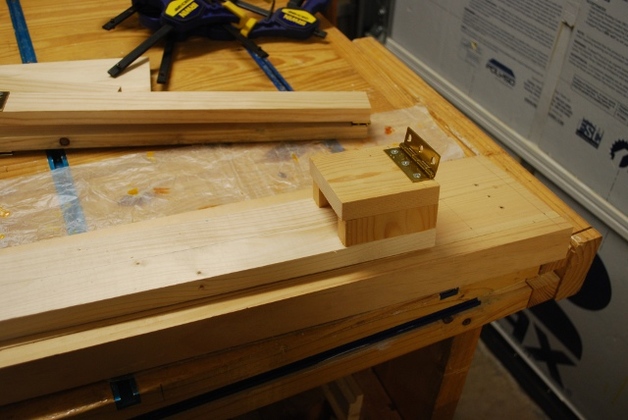
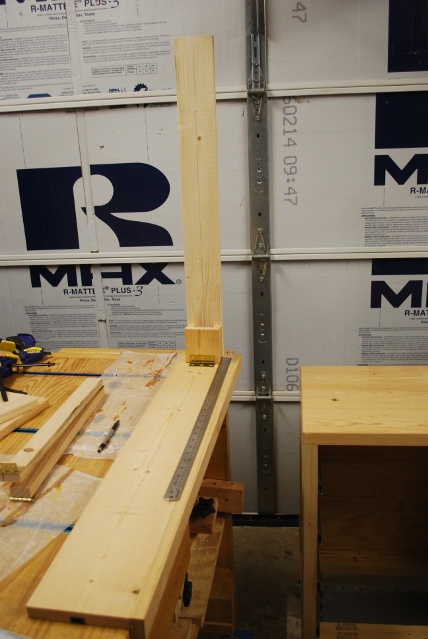
Pivot assembly glued onto the base board and hinge attached.
|
|
Upside down extension with pivot assembly and base board attached.
|
|
Stiffleg in place but not attached.
The difficult part of doing something like this is making sure the extension is level and flush with the saw's table and making sure the two pieces are mounted at the same distance from the 3" hinge so it will fold flat.
|
|
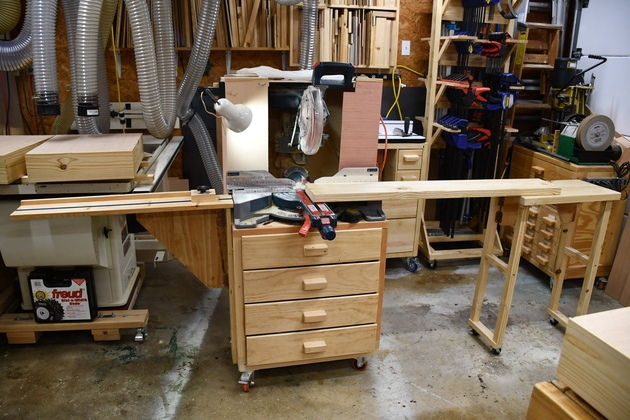
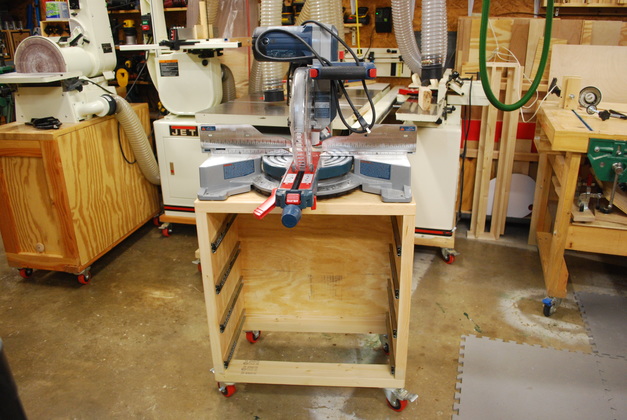
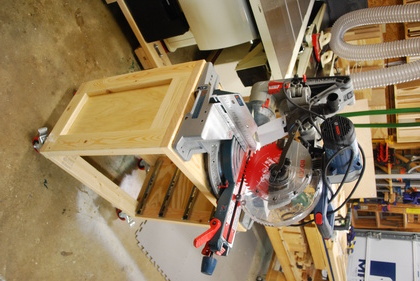
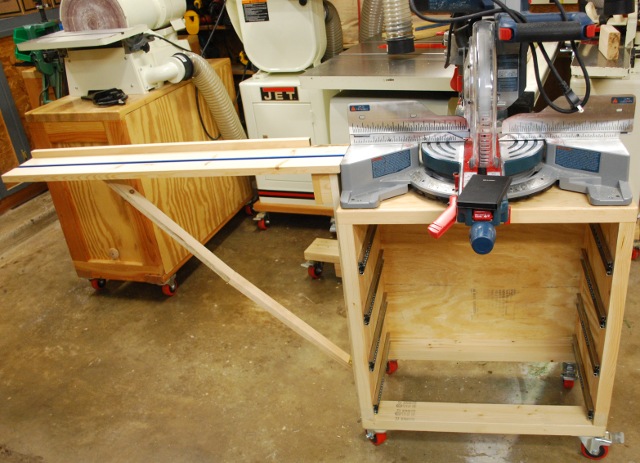
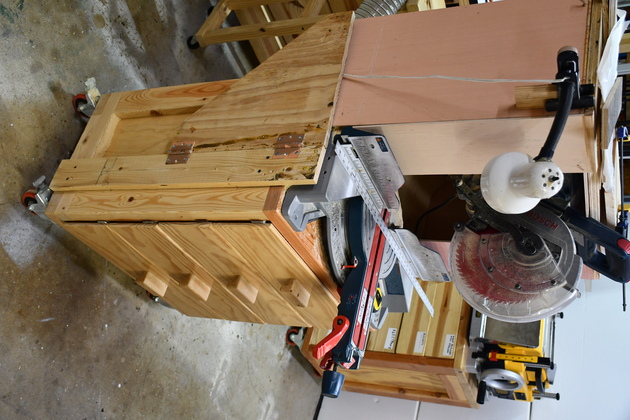
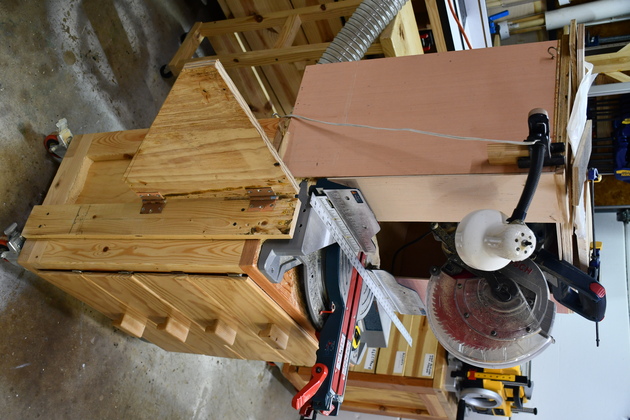
Saw mounted on the new bench.
|
|
Left side.
|
|
You can see the left side of the saw's table is almost flush with the side of the bench.
|
|
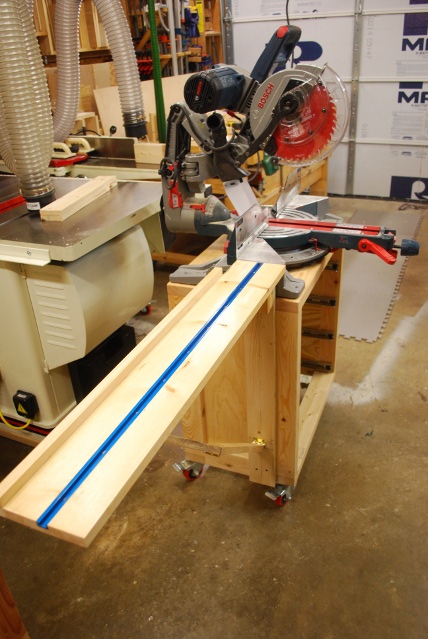
Extension mounted on bench in the extended position (supported by the folding stiffleg).
|

|
Extension is flush with the saw's table.
|
|
Extension folded.
|
|
Looking down the extension.
|
|
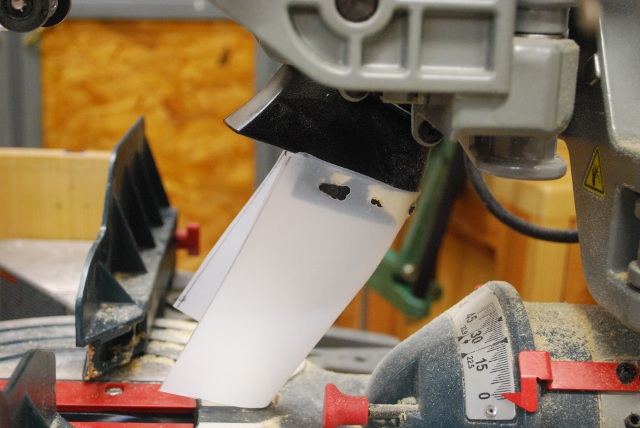
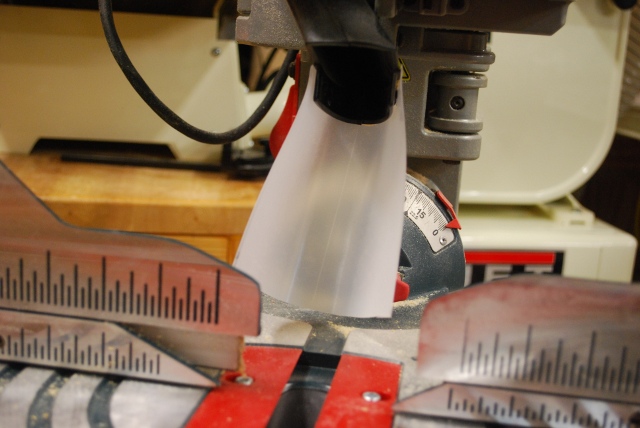
BTW, I also extended the dust shroud.
It's made from HDPE (High Density PolyEthelene), in other words a milk jug.
|
|
Looking down the blade's path.
|
|
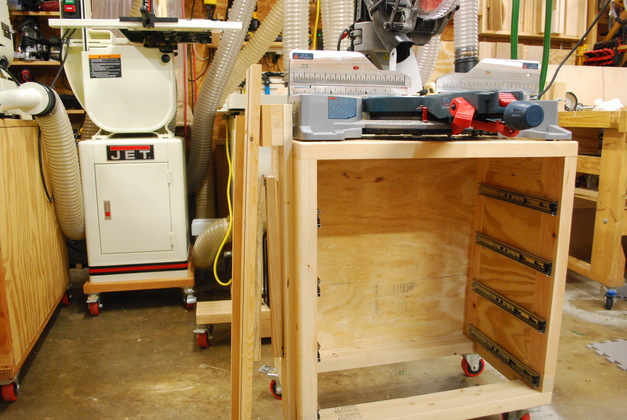
I'm replacing the extension's hinge, this shows the bench (no extension) with the extension support folded.
Originally I used a 3" butt hinge, but after a few years, it got too sloppy.
This also shows the dust shroud.
|
|
Extension support extended.
|
|
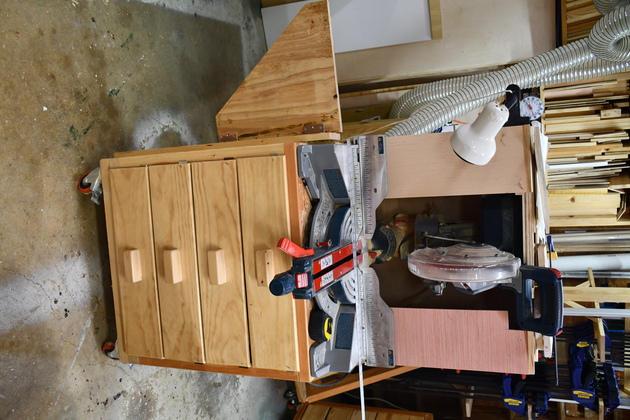
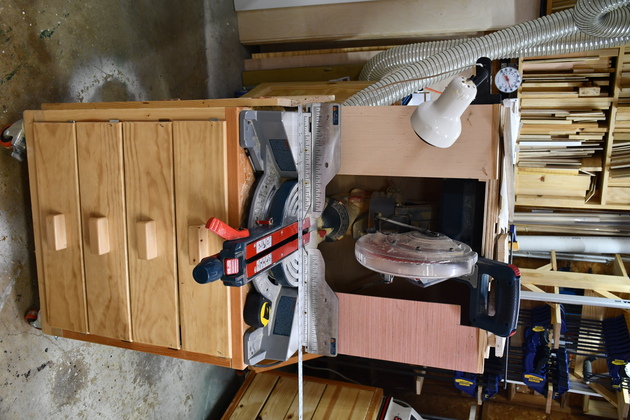
Front view with Ext support extended,
Also shows the drawers installed.
|
|
With Ext support folded.
|
|
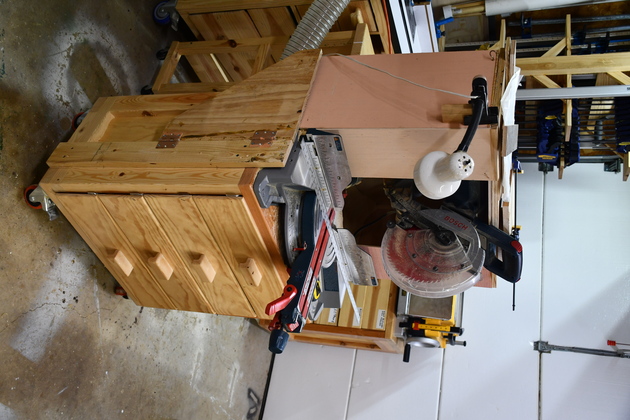
From the side with ext support folded.
|
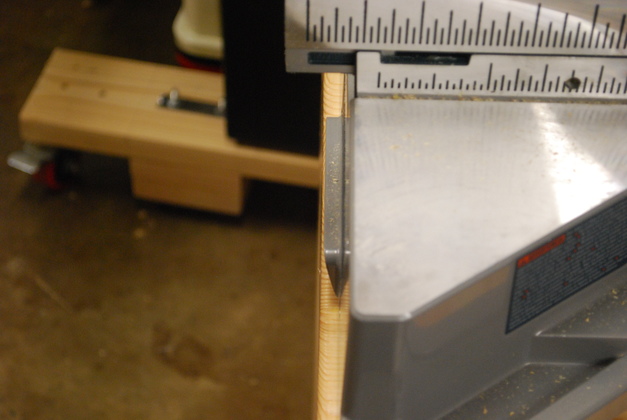
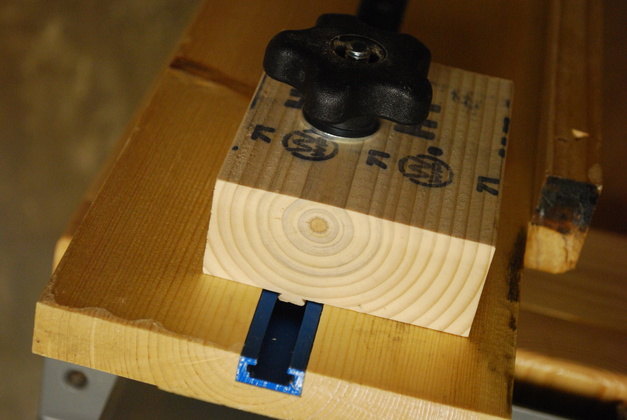
Stop Block
|
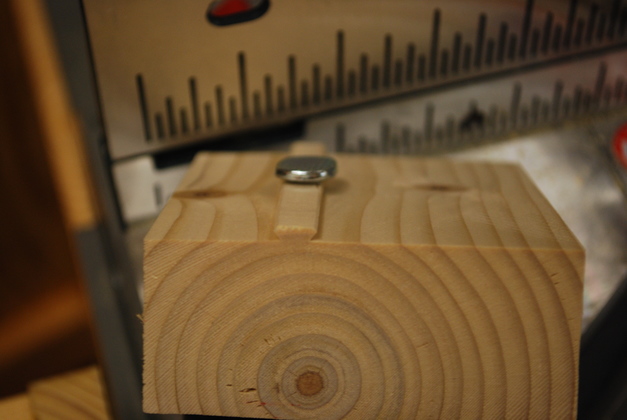
Stop block for the miter saw extension.
Normally I would use a router to make the ridge but this time I used my table saw, a cut from each side.
|
|
Here it is clamped in the tee track.
|

|
|