While rebuilding my air compressor, I needed a reliable way to set the tension of the v-belt driving the compressor so I came up with this.
I already had a digital fish scale which I use for a variety of weighty activities.
It's handy for checking calibration of my torque wrenches and measuring the force required to move something (like a dust collector valve).
01/05/2022: Page Origin
Belt Tensioner
Construction
I built this, then started modifying it, this one became a prototype.
To construct your own belt adjuster:
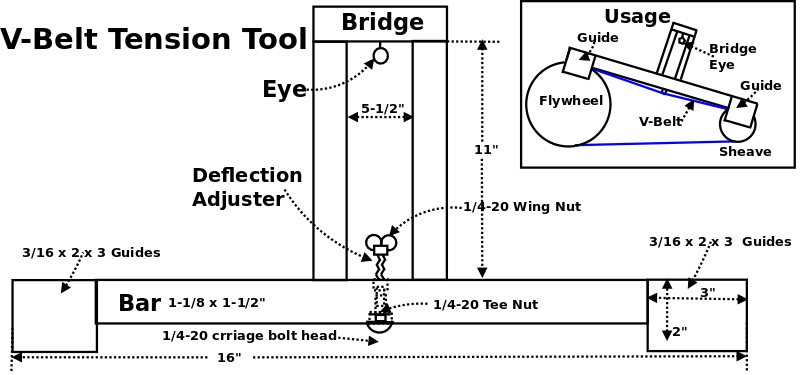
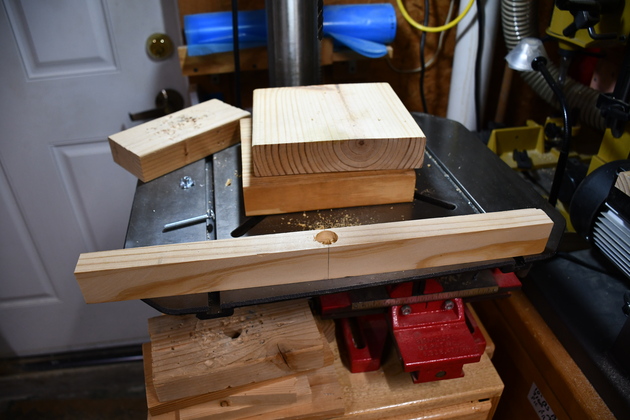
Cut a bar that is slightly wider than the flywheel, about 1-1/2" high, and 2 or 3 inches longer than the center span of the flywheel and sheave.
Cut thin (3/16") guides 1/2" taller than the bar (≅ 2").
Cut pieces for the bridge to make it a little wider than your fish scale, and 2 or 3 inches taller (leaving room for the adjuster and eye),
In my case, the hook on the fish scale was large enough to fit over the bridge top.
|
Here I'm drilling the holes and countersinks for the deflection adjuster bolt.
|
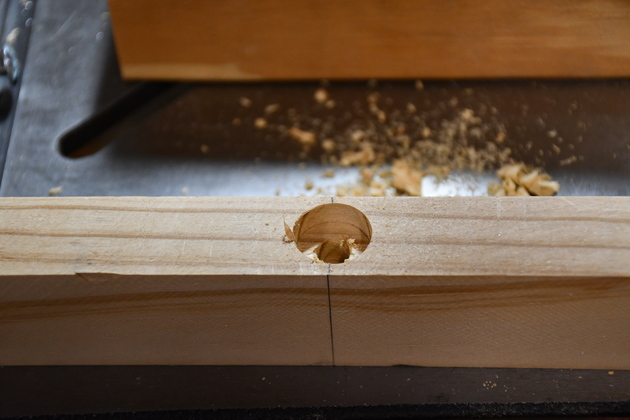
|
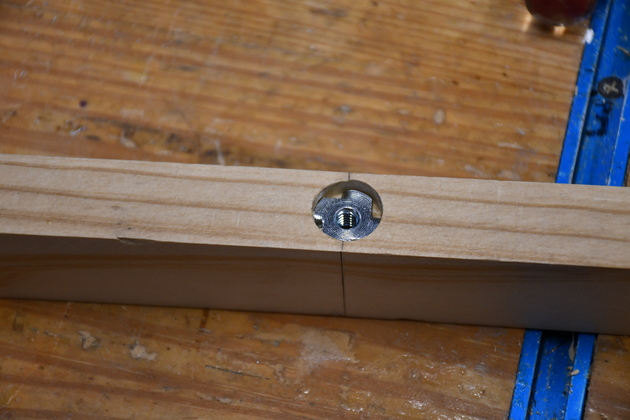
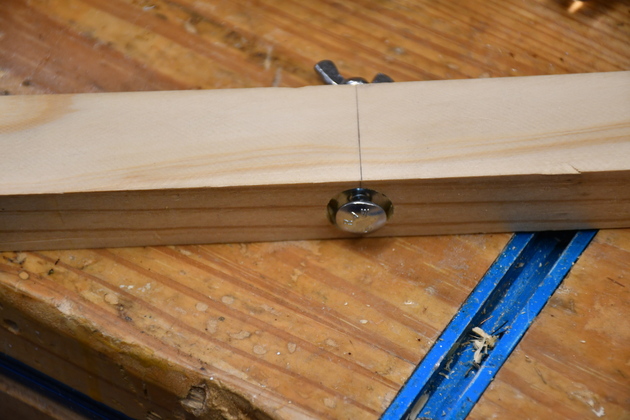
This is the countersink, on the bottom of the bar, for the 1/4-20 tee nut.
|
|
With tee nut installed.
You'll note the counter sink is deeper than required for just the tee nut's flang, it leaves room for the square shoulder of the carriage bolt, so it can measure very small deflections.
|
|
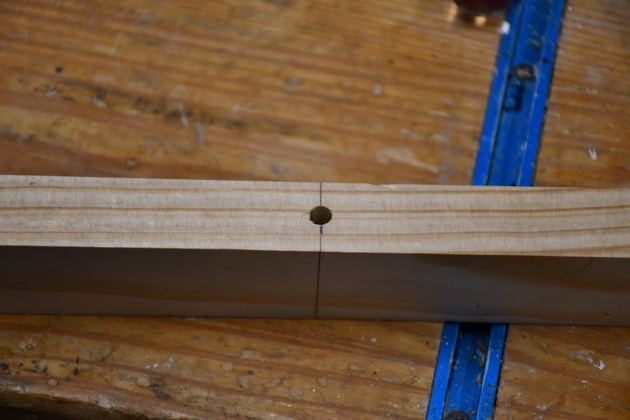
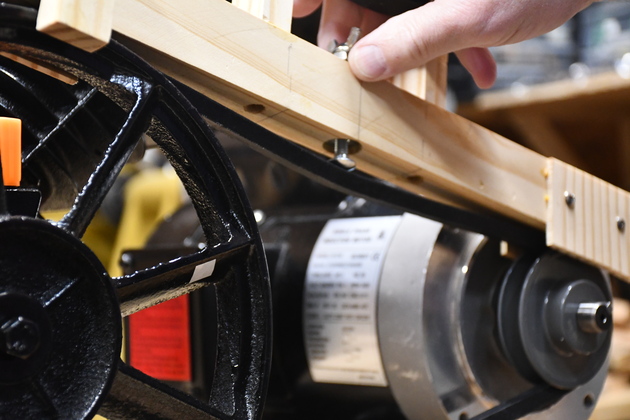
The deflection adjuster bolt hole on top of the bar.
|
|
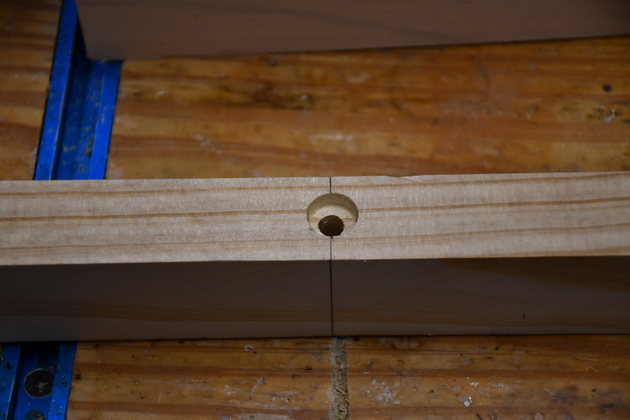
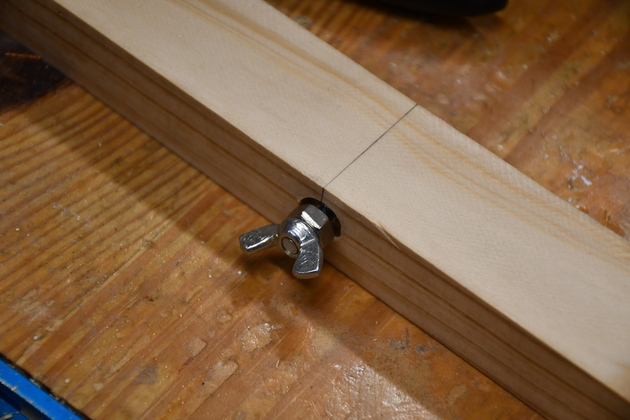
Counter sunk hole on top of the bar, for the jam nut below the wing nut.
|
|
With the deflection adjuster bolt installed.
|
|
Deflection bolt Wing nut on top of the bar.
|
|
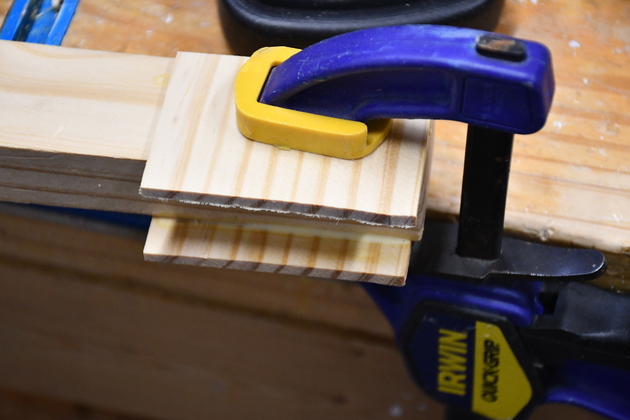
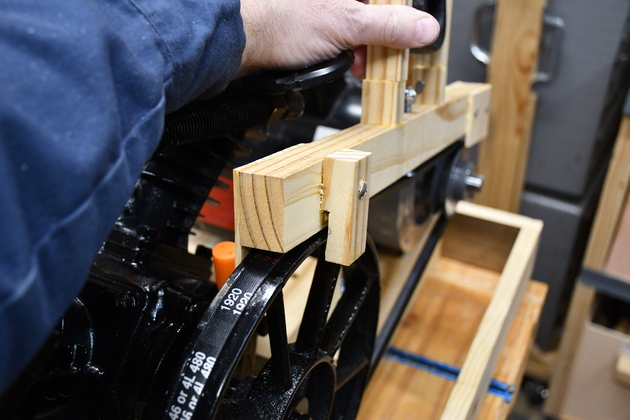
Gluing on the guides.
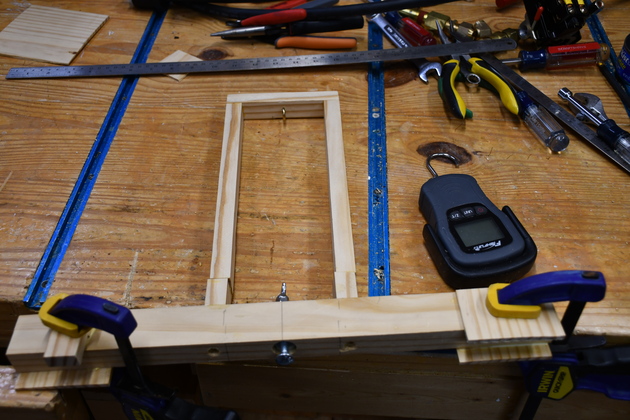
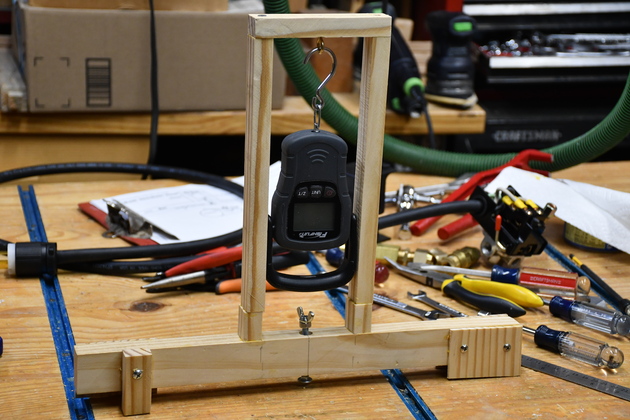
You can also see the bridge with it's eye at the top.
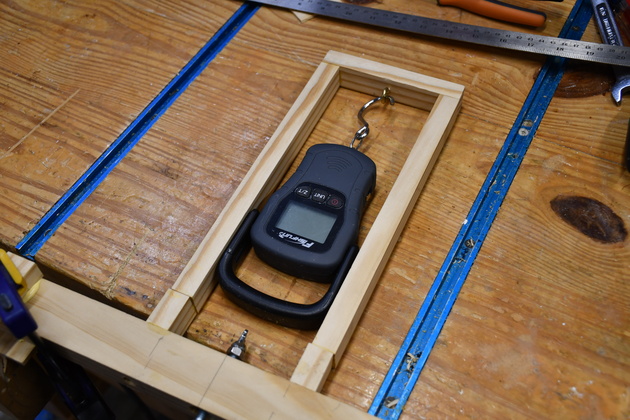
If you build one of these, you might prefer a hook at the top rather than an eye, depending on your fish scale.
|
|
You'll note the extra blocks, raising the bridge, I decided I wanted a little more clearance when pulling down on the fish scale.
|
|
Closer look at the guides being glued, I used 3/16" pine I had left over from another project.
It would probably be better to use 3/16" thick plywood (underlayment).
|
|
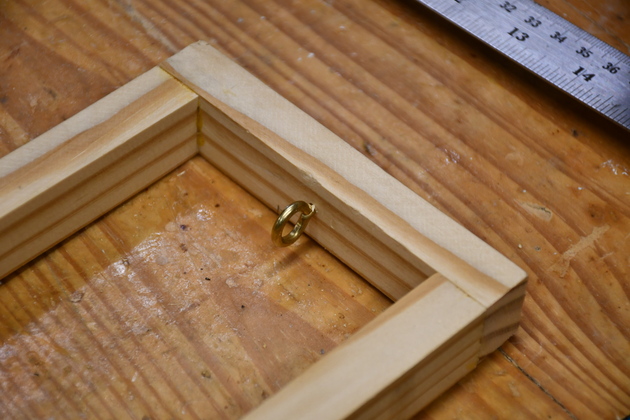
Closer look at the screw eye in the bridge top.
|
|
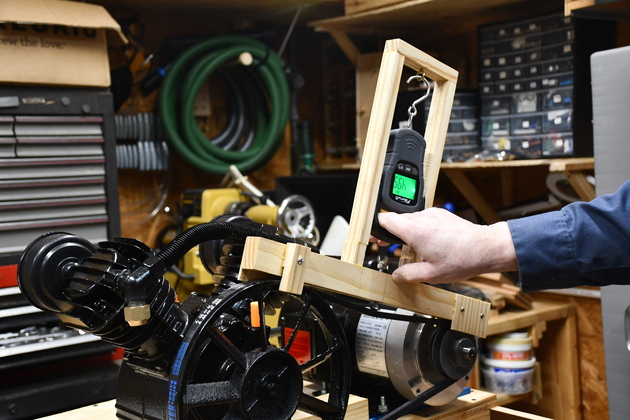
With the fish scale in place.
|
|
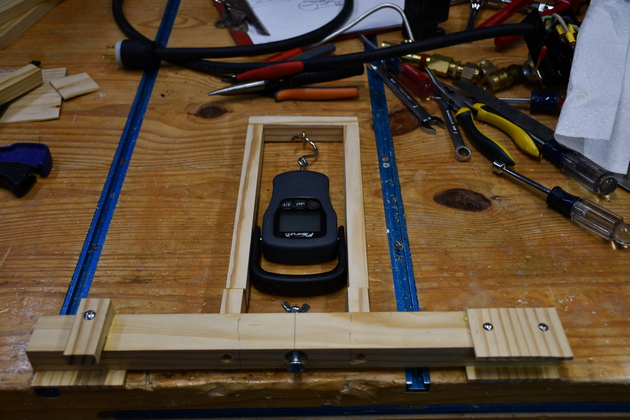
A little broader look after the guides are glued and screwed.
|
|
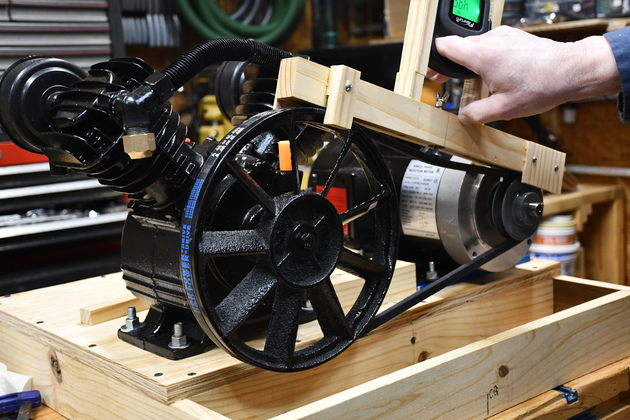
Belt tensioner vertical.
|
Using Belt Tensioner
To use the Belt Tensioner
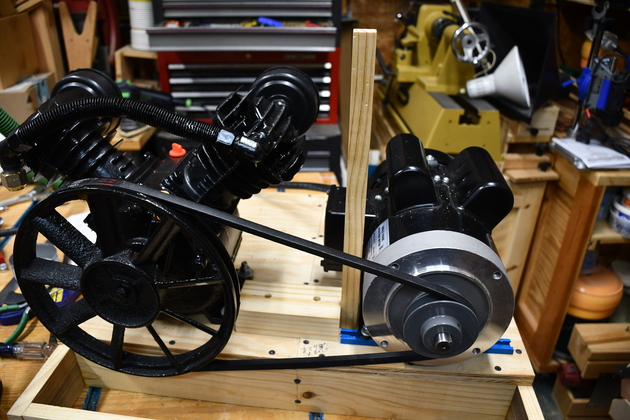
Adjust the deflection adjuster so it sticks out under the bar by 1/2", then place it in the center of the span between flywheel and sheave (make sure the bar guides are astraddle the flywheel and sheave).
Using a fish scale, pull down on the bridge hook until either the bar touches the belt at both the flywheel and sheave or till the scale reads 5Lb.
Adjust the belt tension until both ends of the bar are touching the belt on the flywheel and sheave with a 5 LB pull.
|
I made a belt tensioning helper.
|
|
Closer look at the belt tensioning helper.
|
|
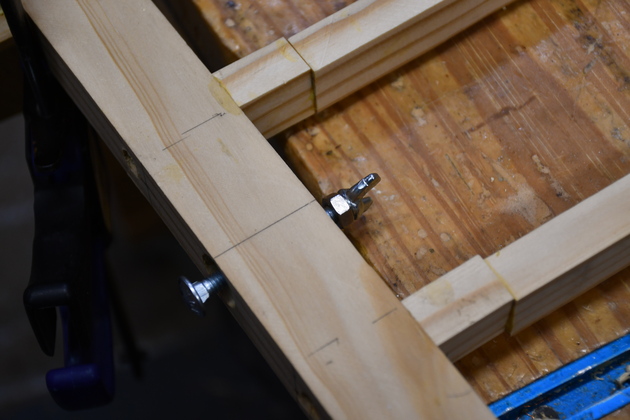
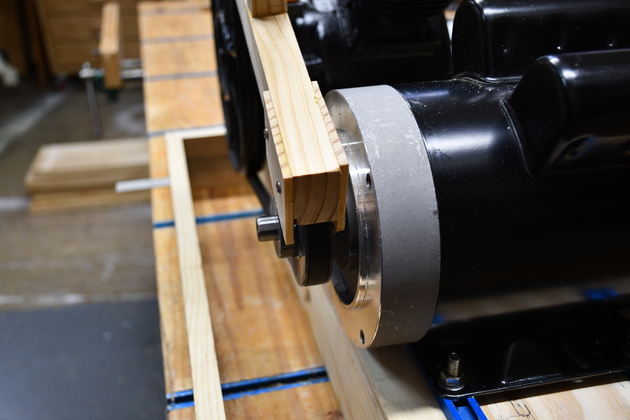
Belt tensioner guide astraddle of the sheave.
|
|
And the same for the flywheel end.
|
|
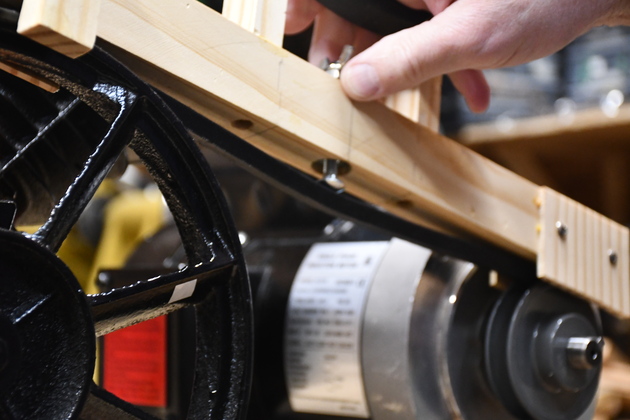
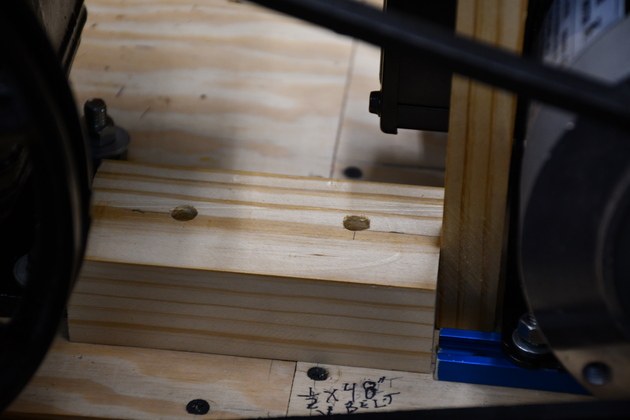
This is how it looks when you check belt tension.
You can see the deflection bolt head below the tensioner.
|
|
Better look at the deflection.
|