Betty decided she needed a pair of boots, so we went looking (initially on the internet, then local stores to try one on).
I have always been a Justin fan so I leaned that way.
After looking at all the near by stores (none had her size) we went to the Justin Discount store in Justin Texas (which isn't owned by Justin and the boots are not even made in Justin), but they have a great selection at decent prices.
Justin Discount Boots: 111 N FM 156, Justin, TX 76259 (817) 430-8084.
When we got home I realized we didn't have a boot jack, and whats more I hadn't made one in over 25 years.
So I looked around on the internet for ideas and then did a little experimenting.
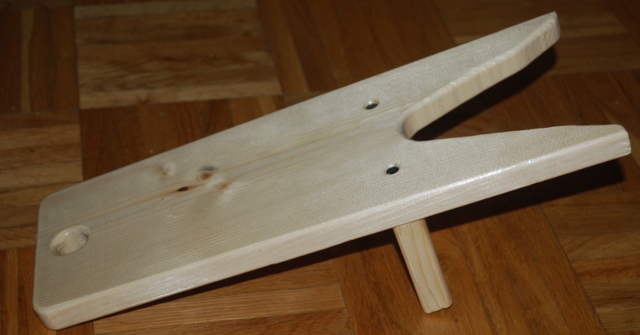
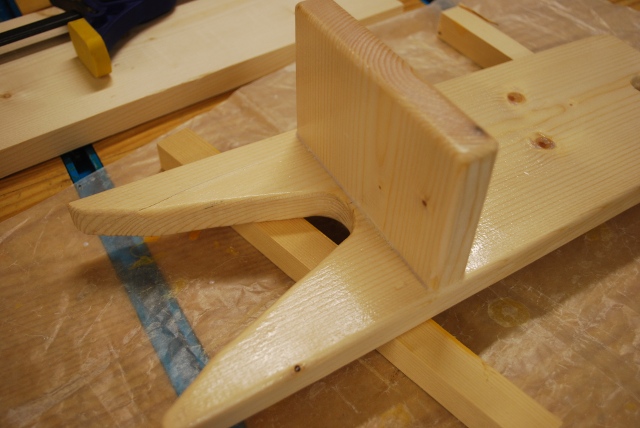
I started taking pics after the prototype was assembled and being painted, but you can see what it looks like.
I have a number of ideas for improvements which I'll try out later (and get pics).
Betty thinks these'll make good Christmas presents since a lot of folks in the family wear boots.
If you need some help with this please email me at  and I'll be tickled to help (sorry our web server doesn't accept connections from outside the US).
Making the Boot Jack
Cut a piece of 1x6 14" long for the main board and a 3" long piece for the vertical support.
Trim the width of the 3" long piece so its 1/2" narrower than the main board (it'll look better when you taper and round the edges of the main board).
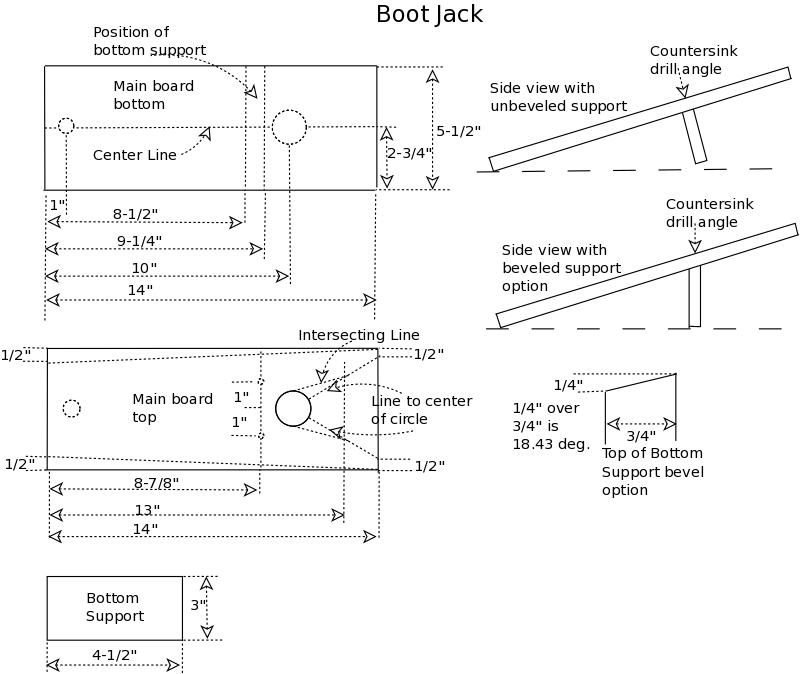
Draw a center line down the bottom center of the main board (2-3/4" from the edge).
All 1x6s aren't created equal, they can be from 5-1/2" to 5-1/4" wide so adjust the center line accordingly.
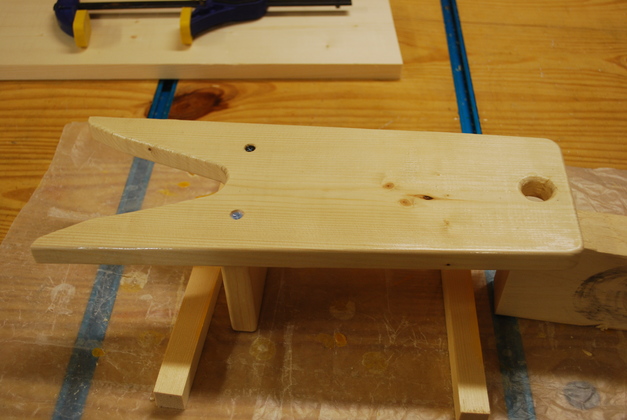
On the center line, make a mark 4" from the right end and draw a 1-1/4" circle centered on that mark.
Mark a spot 1" from the left, on the centerline, for the "hanging hole".
Using a square draw a transverse line across the bottom of the main board, 8-1/2" from the left end and another 9-1/4" from the left end, these will mark the position of the bottom support.
On the right end of the board make marks 1/2" from the top and bottom edges.
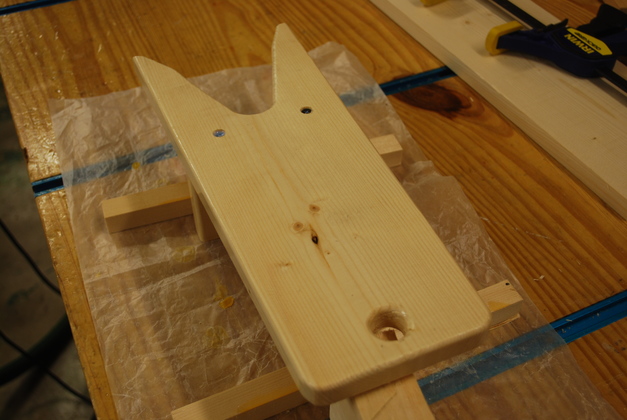
From each of these marks, draw a line to the center of the 1-1/4" circle then, sarting at the edge of the 1-1/4" circle, draw lines that intersect the last two lines 1" from the right edge (see pic), this will form the boot heel grabber.
On the left end of the board make marks 1/2" from the top and bottom edges.
From these marks draw lines to the same corner on the right end, these will give the tapered shape to the main board.
On top of the board, and using a square, draw a transverse line 8-7/8" from the left end (hanging hole end), and mark two screw holes 1" on each side of the center line, (these will mark screw holes to hold the bottom support.
Drill the 1-1/4" and 3/4" holes.
Saw the dotted lines for the boot heel grabber (using a bandsaw, jigsaw, or even a coping saw).
Using a 1/4" round off bit, round all edges on both sides of the main board (including the inside of the holes and boot grabber) and the bottom support except the top edge of the bottom support (goes against the main board).
Drill and counter sink the two screw holes down into the support matching it's angle.
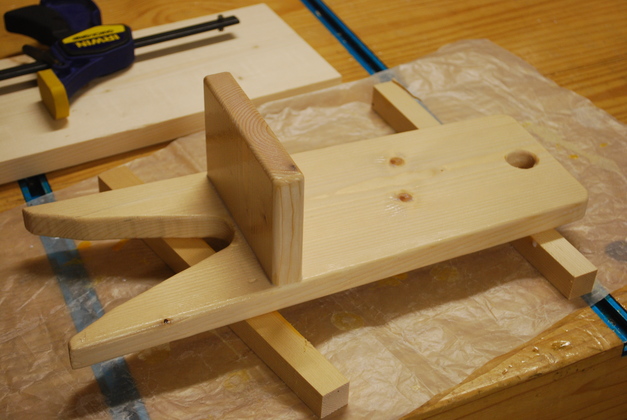
Glue and screw the bottom support to the main board, I clamp the bottom support while drilling and screwing it on to hold it in place.
Sand and paint.
Options:
- Bevel the top of the bottom support so the support stands straight up and down (see diagram).
You must drill the countersink holes straight into the support.
-
Route or plough a 1/8" deep dado in the bottom of the main board for the bottom support.
It must be at least 4/5" wide.
-
Glue and tack a leather strip in the mouth of the boot heel grabber.
-
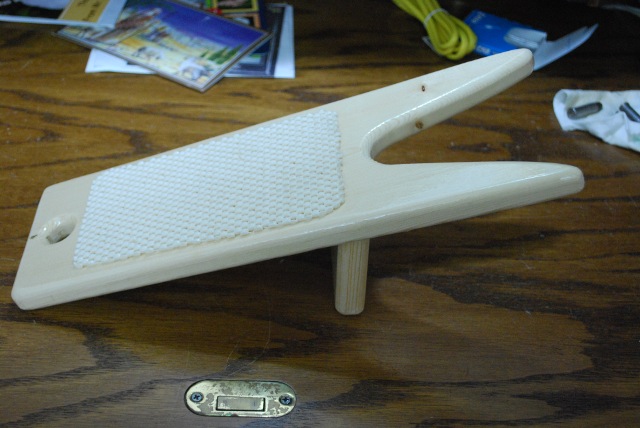
Glue a piece of sandpaper (or leather) to the top between the hanging hole and boot heel grabber so your other foot has better traction when using the boot jack.