Like everything else in handloading, each handloader has their own "druthers" as to the sequence of operations.
This is the way I do it today, for all calibers, and, as I have said elsewhere, this sequence may change tomorrow if I get a better idea.
I like to clean the cases after returning from the range.
This takes about 6 hours, most of which I can be doing other things like cleaning the firearms.
Clean cases yield several advantages:
| |
|
| 1 | easier to detect case damage (cracks or separatations etc.).
|
| 2 | protects my resizing dies from a lot of wear and potential scratches.
|
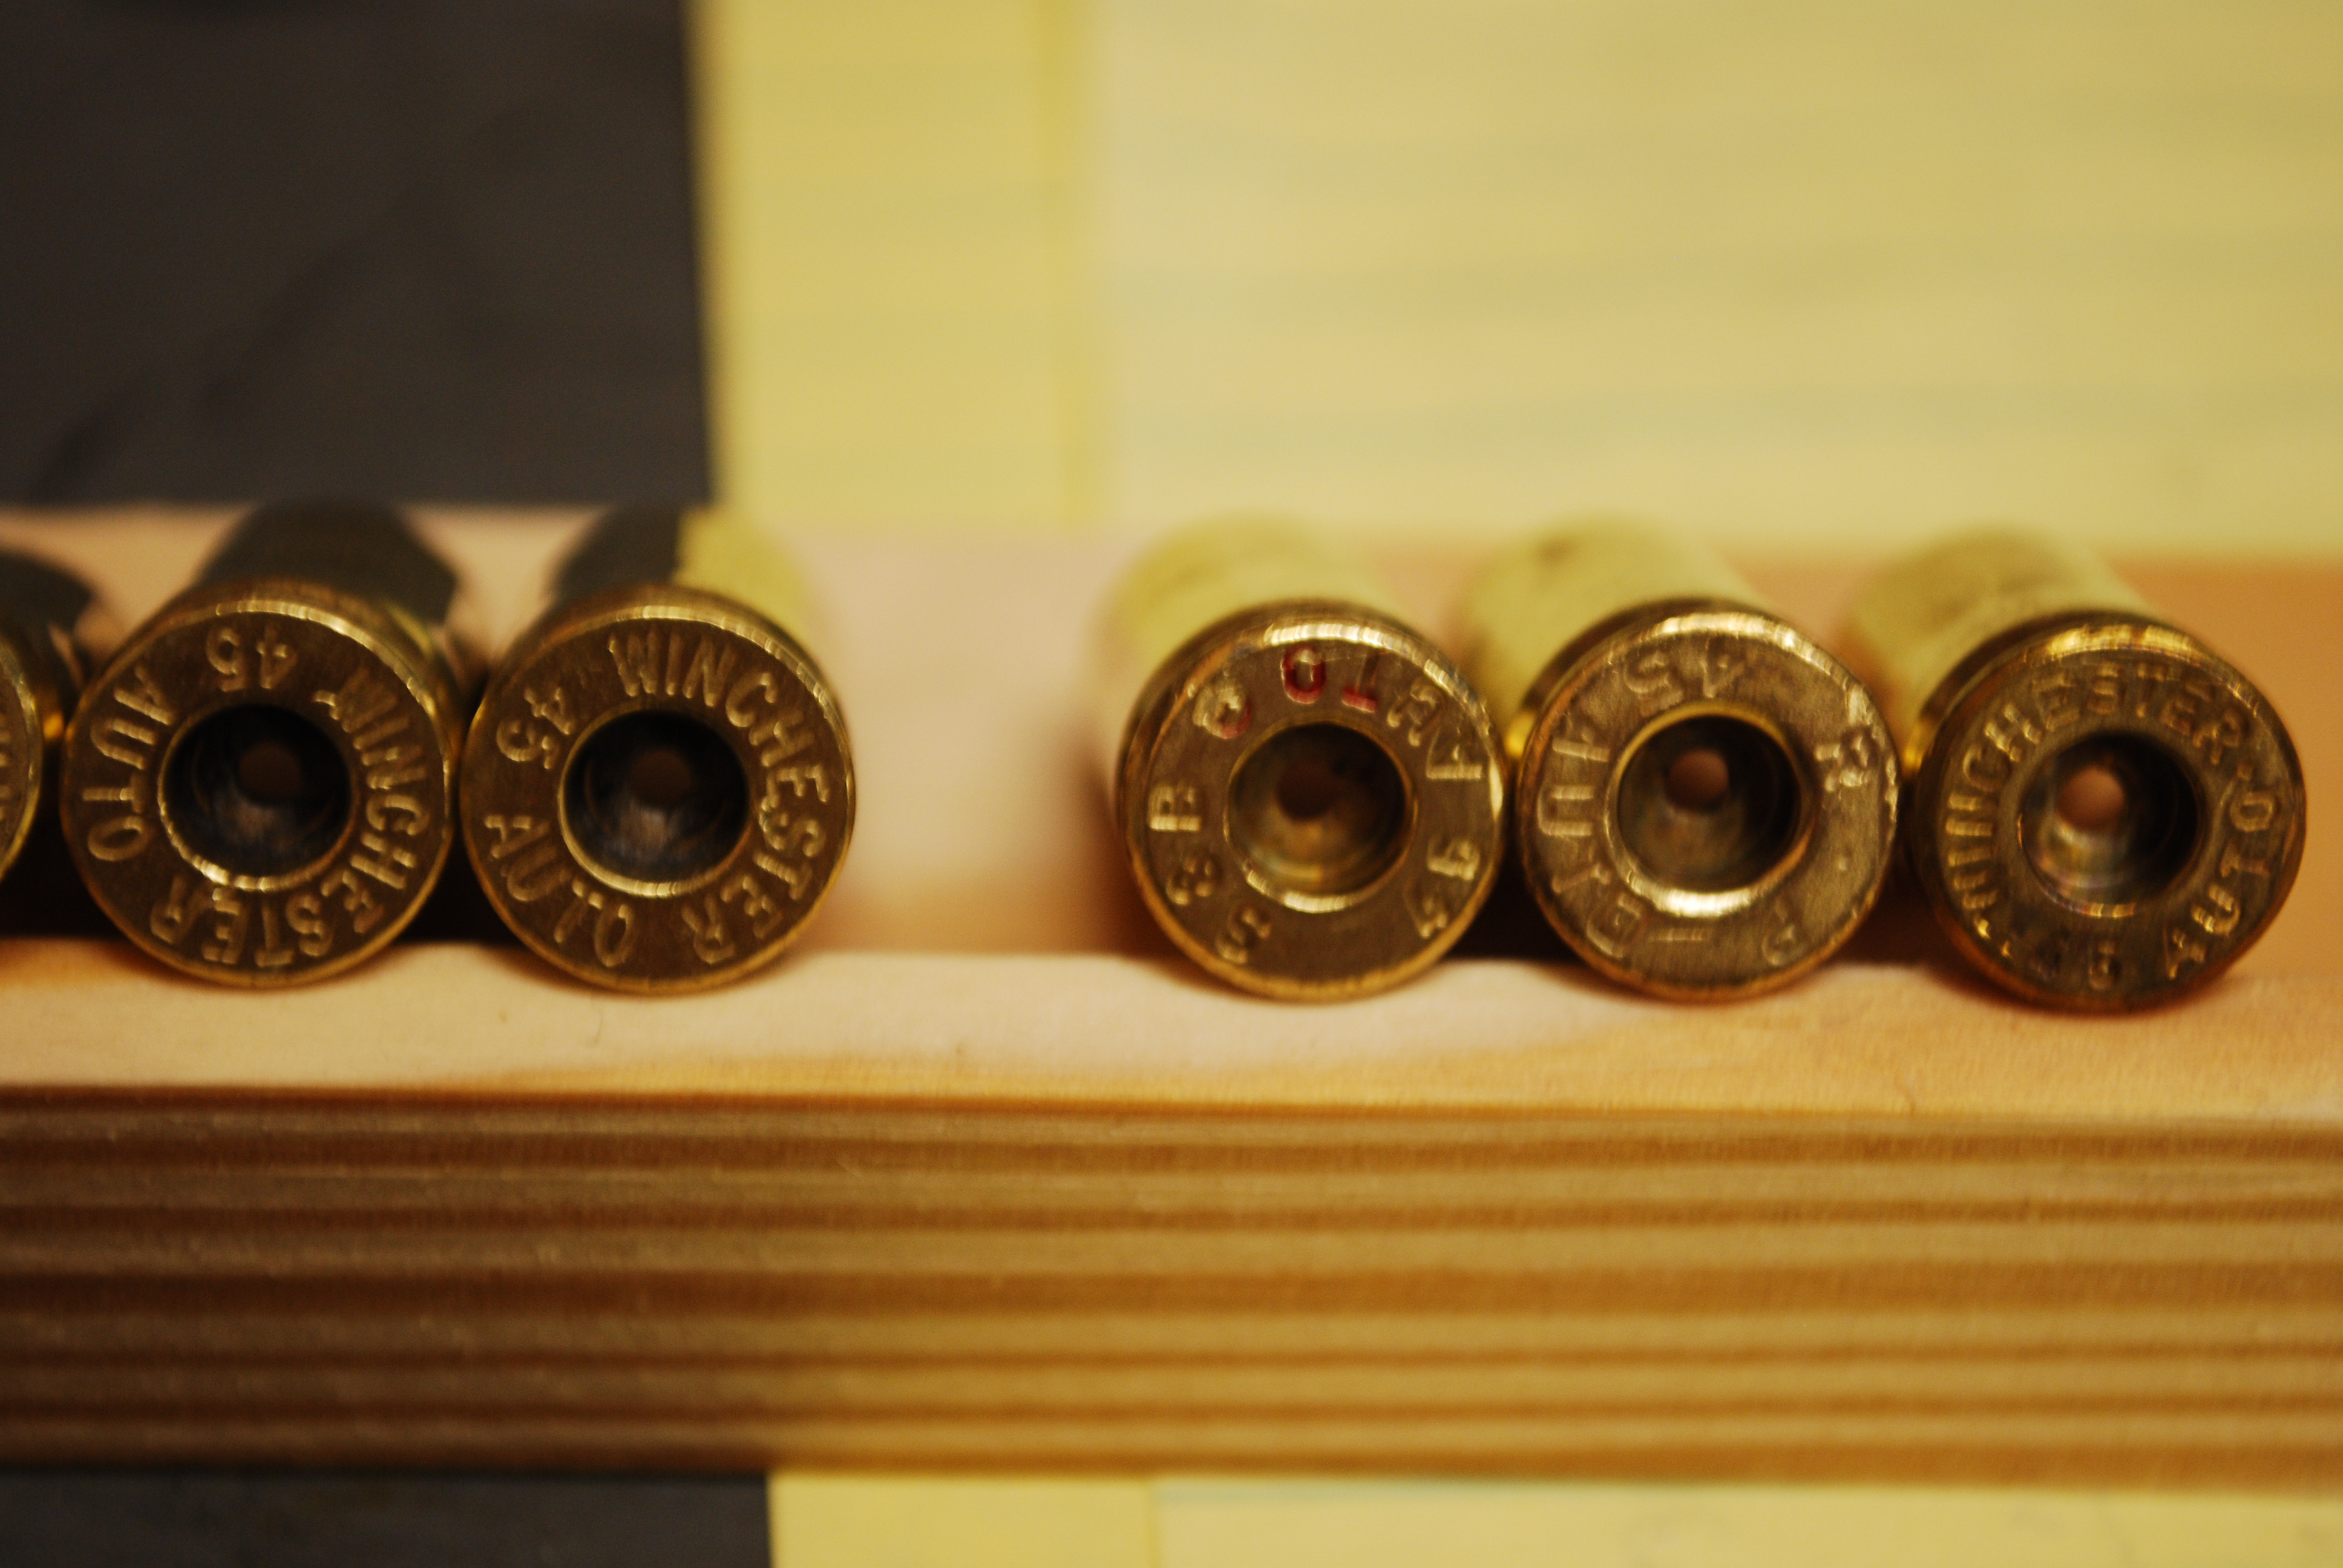
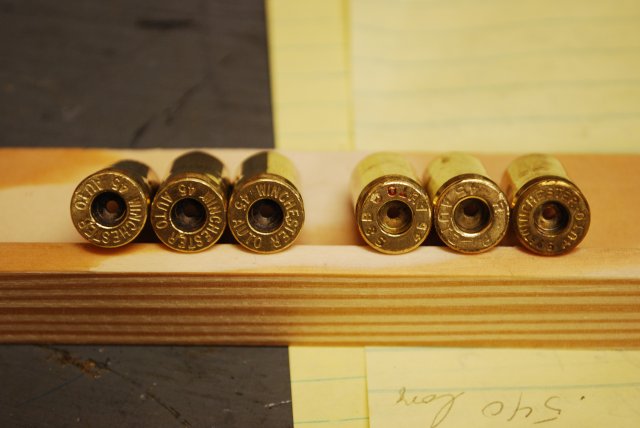
| Handfull of typical .45ACPs after case prep, note the polished look from the ultrasonic cleaning.
These have been fired many times.
This 9mm case went through the tumbler partially inside a .40 cal case, you can see the benefit of tumbling, you can spot cracks etc. much easier when the case is clean.
|
If you ever tumble after decaping, be prepared to spend a lot of time cleaning out the flash holes, at the bottom of the primer pocket, to remove pieces of tumbling media.
Tumbling cleans the outside of the case, ultrasonic cleaning, cleans the primer pockets and removes most of the powder residue from inside the case.
I have noticed that the Lyman tumbling corn cob media appears to clean better than RCBS corn cob.
In the "emptying" pics below, notice that the "bathtub ring" in the tumbler with the Lyman cob is much darker than the one in the tumbler with the RCBS cob.
The "bathtub ring" is easily cleaned off with alcohol after each tumbling.
Identical tumblers, both brands of cob put in the same day, run the same number of times, but the Lyman ring is always darker and the cases from that tumbler are a little shinier.
Just an observation!
| |
|
|
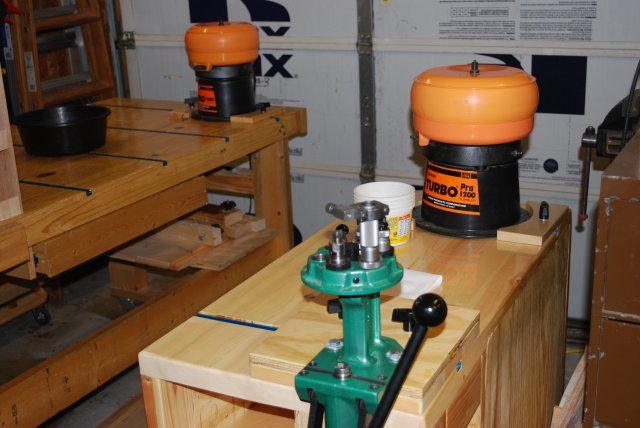
TUMBLE
|
|
Tumble the cases for about 4 hours in a lyman 1200 Turbo with Auto-Flow.
You should separate the calibers before tumbling, 9mm will get inside of .40s, .40s inside .45s, etc.
|
| Deprime Resize
|
|
This is a good time to inspect the cases, especially for over pressure on the spent primers.
I decap/resize using a Lee carbide sizer die, eliminating case lube and clean-up.
I have found the Lee carbide sizer dies do a little better job than RCBS because they seem to size a little farther down the case.
Please see the Deprime technote.
|
Ultrasonic Cleaning
|
|
An ultrasonic cleaner agitates the water about 43000 times per second with a power of about 160 Watts.
This along with solvents or abrasives in the medium (water in this case) loosens the powder and primer residue from the inside and outside of the case.
Ultrasonic cleaning using the 2.5 liter UC (ultrasonic cleaner) from Harbor Freight (Chicago Electric Power Tools, $75 Harbor Freight# 95563).
Its an industrial strength unit and doesn't need cooling off between 8 minute cycles.
Harbor Freight also has a smaller Chicago Electric 1 Pint (2 Cups) cleaner for $29.99 (Harbor Freight# 3305), I use the larger cleaner since we fire about 500 rounds per week.
I use a Pyrex bowl inside my ultrasonic cleaner to hold the actual cleaning solution.
It doesn't take quite as much cleaning solution and the solution doesn't actually touch the ultrasonic cleaner's stainless bowl, hence, the ultrasonic cleaner stays bright and shiny.
Depending on batch size, I use either one or two pyrex serial bowls (2 Cups Each) or a 5 Cup loaf pyrex dish Cleaner With All Bowls.
Either container surrounded by water in the UC (ultrasonic cleaner) up to the level of water in the pyrex not to exceed the "MAX" mark on the UC.
I use a recipe for inexpensive ultrasonic cleaning (mostly white vinegar) I found on the web at 6mmbr.com.
Or in case they take the page down heres a copy (see excerpt below).
Heres another link to accurateshooter.com about ultrasonic cleaning.
Be careful about timing in the sequence, if you leave the cases in the acid wash (white vinegar) or let the cases set too long before the neutralizing rinse (baking soda or Birchwood Casey) you will get some pink spots on the cases.
I've not found this to be a major problem, but you can easily avoid it by being timely with the rinses.
In other words, don't put the cases in the acid wash then leave for an hour.
|
| Dry and Inspect Cases
|
|
This is another very good opportunity to inspect the cases.
I used to dry the cases by laying them out, on paper towels, under a small fan for about $15 (Walmart has one too), with case mouth toward fan, for an hour or two, rolling them half over about half way into the drying.
OR
Now I use a food dehydrator which is a lot faster and less work.
You don't have to lay the cases in nice orderly rows (to insure each gets dried) you just dump them in, spread them out, and turn it on.
In any case, no spots or stains other than a few burn marks that I can't get completely off.
|
Picture Index (Multiple pics)
This guy did a whole lot of research and experimentation to come up with this formula.
Excerpt From Jason Baney's Research Article at accurateshooter.com (Link above):
ULTRASONIC CLEANING - Baney's Best Recipes
My ultimate solution resulted in shiny brass that was 100% devoid of carbon, inside and out. Even the carbon deposits on the neck and the primer pockets were completely removed! My objective had been accomplished! Dirty old black brass came out like new inside and out, I was amazed. Not only did my protocol work well, but it was the least expensive option in the whole test! For "Cheap and Clean," this is the procedure I settled on:
CHEAP and CLEAN - The way I do it!
480 seconds - (8 Min.) 50% White Vinegar + 1 Drop Dish Soap per 8 ounces water
480 seconds - (8 Min.) Baking Soda (BS) in water (1 grain BS per ounce of water)
480 seconds - (8 Min.) Hot Water
480 seconds - (8 Min.) Distilled Water
Total: 32 minutes
Cost: Less than $2.00 per gallon
Caveat: don't leave the cases in the vinegar solution more than the 8 minutes
listed (vinegar is an acid) move it asap to the baking soda solution.
The baking soda neutralizes the acid (white viengar).
And for a Super Shiny and FASTER End Result, Add BC Solution
Since the BC solution had worked so well to shine up the cases earlier, I attempted to work it in with the white vinegar procedure to streamline it even more and give even better looking brass. So for a couple dollars more, you can have 100% clean cases, which are even shinier than the "Cheap and Clean" procedure above. So this procedure I'll call "Clean and Shiny."
CLEAN and SHINY
24 minutes - 50% White Vinegar + 1 Drop Dish Soap per 8 ounces water
380 seconds - Birchwood Casey (BC) Case Cleaner
380 seconds - Hot Water
380 seconds - Distilled Water
Total: 43 minutes
Cost: $2.00 per gallon for the White Vinegar and $4.00 per gallon for BC Cleaner.
This "Clean and Shiny" procedure gave me the best combination of carbon removal, case luster, speed, and economy. The "Clean and Shiny" regimen also eliminates the neutralization step, as the BC cleaner acts as a neutralizer. Even though it contains a few acids, they must rinse off more readily than white vinegar. Regular household white vinegar is 5% acetic acid (2.5% when diluted) and the BC cleaner contains 3 different acids, one of which is phosphoric (the same found in pepsi). It starts at over 50% acid as a concentrate, and a little over 3% when diluted.
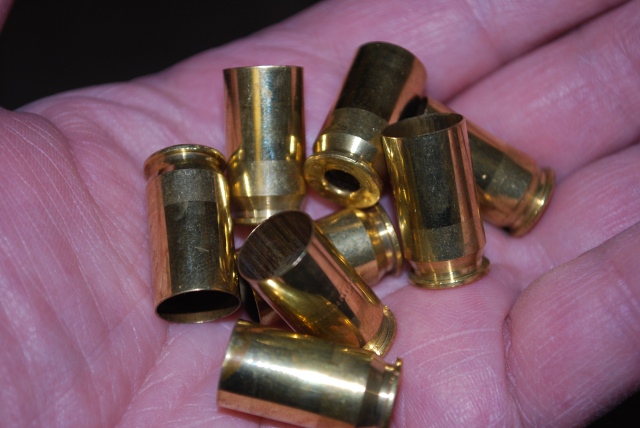
Case Preparation Pictures
|
Case interior before and after ultrasonic cleaning (Cheap & Clean Method)
I didn't brush them out or anything, just ran them through the ultrasonic cleaner.
|
|
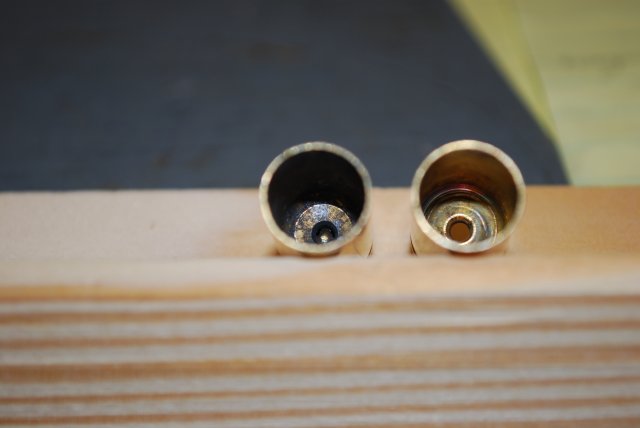
Primer pockets before and after ultrasonic cleaning (Cheap & Clean Method)
|
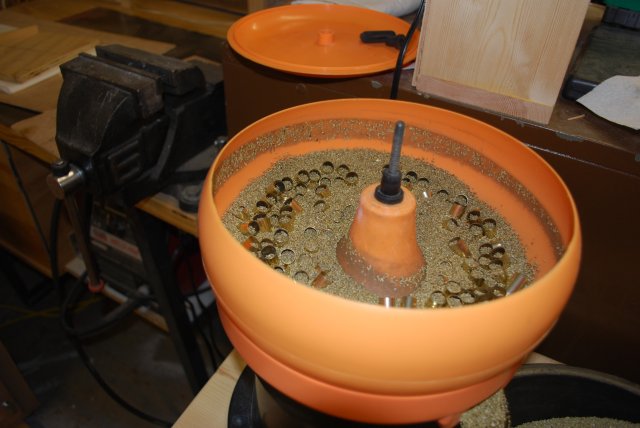
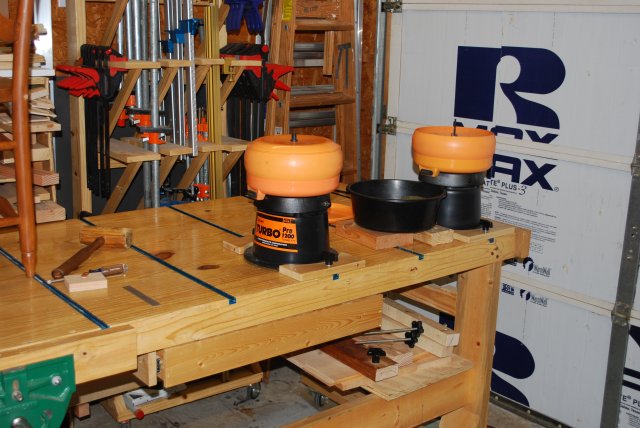
Tumblers
|
Tumblers at work after a trip to the range.
|
|
|
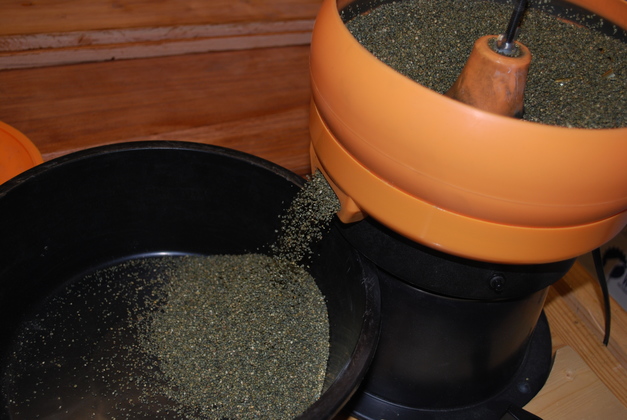
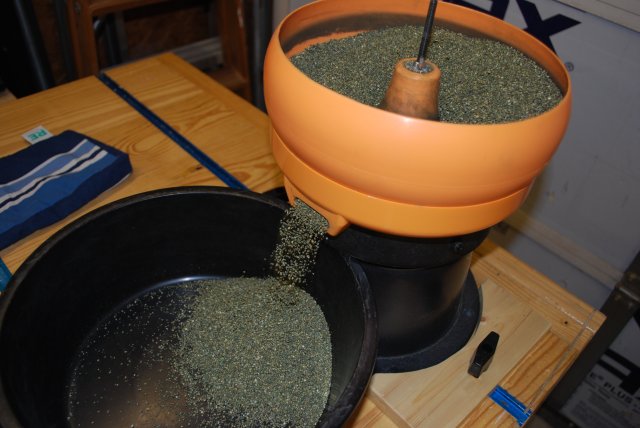
Emptying the Ez-Flow Lyman tumbler
This one has treated Lyman corn cob in it, the other has RCBS corn cob.
|
|
|
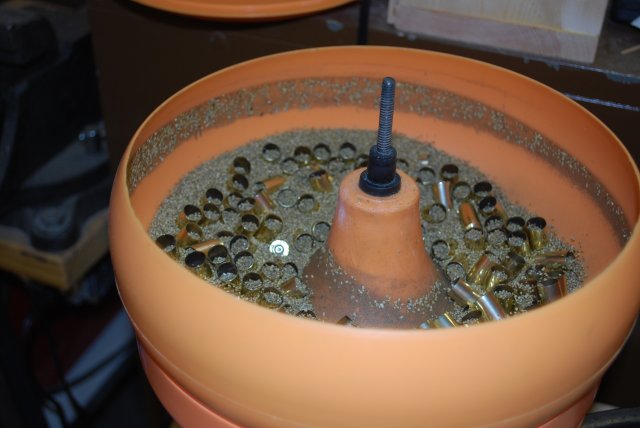
You can see the cases starting to surface.
Note how much lighter color the RCBS cob is than the Lyman above, its that way from the box.
|
|
|
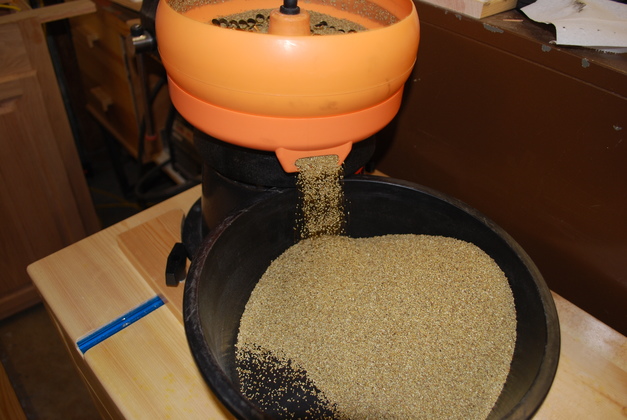
The cob gets lower.
Note the "bathtub ring" of dirt around the top of where the cob was, it is the dirt and powder residue from the cases.
It seems to me the Lyman corn cob leaves more dirt in the "bathtub ring" than RCBS, I wonder if the brass isn't as clean or the dirt is still in the RCBS cob?
I clean this off with alcohol after each tumbling.
|
|
|
You can start to see the dirt left on the center and bottom of the tumbler's tub.
|
|
|
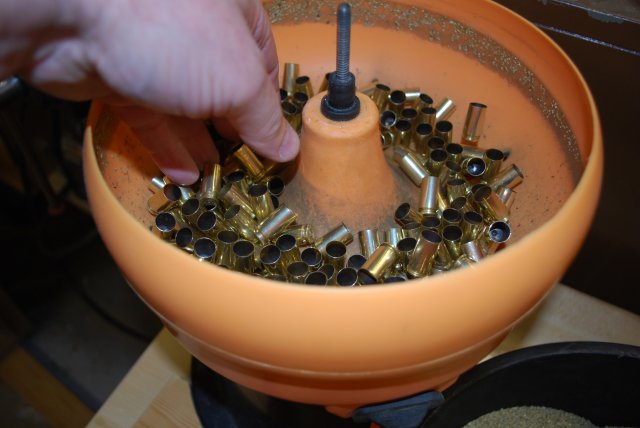
When the media is almost gone and with the tumbler still running, you'll have to pick up hands full of cases and drop them back into the tub (shown here) to get the media out of the cases.
When the cob is emptied into the pan and the cases are empty, replace the plug, stop the tumbler, and remove the cases for depriming.
|
|
|
The Lyman cob, see how much darker the "bathtub ring" is.
The Lyman cob is much coarser than the RCBS, and I think does a better job of removing dirt.
I also think that since most of the dirt gets deposited on the inside of the tumbler, the cob lasts longer, but time will tell that.
Note the difference between this and the pic direcly above (RCBS cob), see how much darker the dirt ring is in the Lyman cob tumbler.
|
|
|
Both tumblers on the work bench.
Because of the way I mount these, I can use them anywhere I have tee track.
|
|
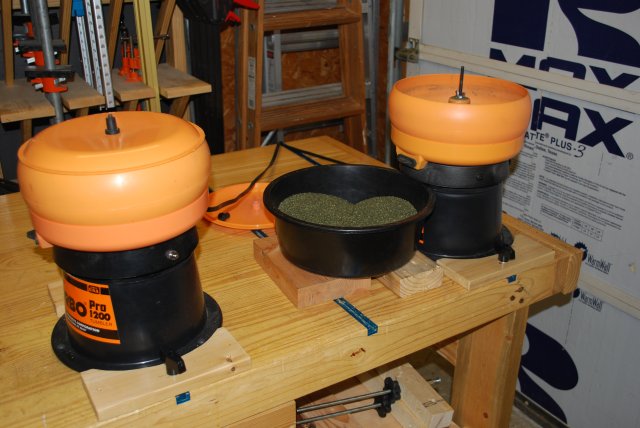
|
Close up of the two, one was just emptied.
|
|
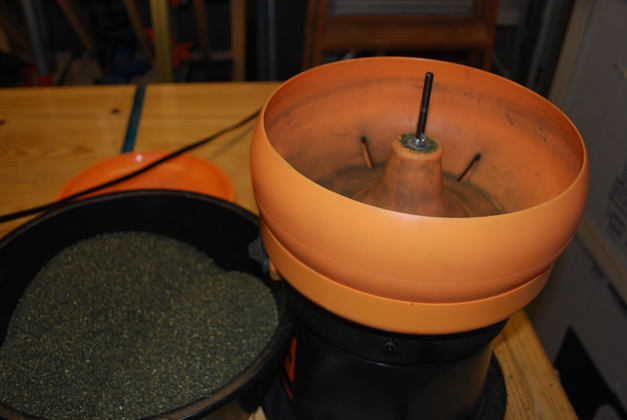
|
Close look inside one of my Lyman tumblers after it is wiped down with alcohol.
This one has been used once per week for a couple of years and still wipes out relatively clean.
|
|
|
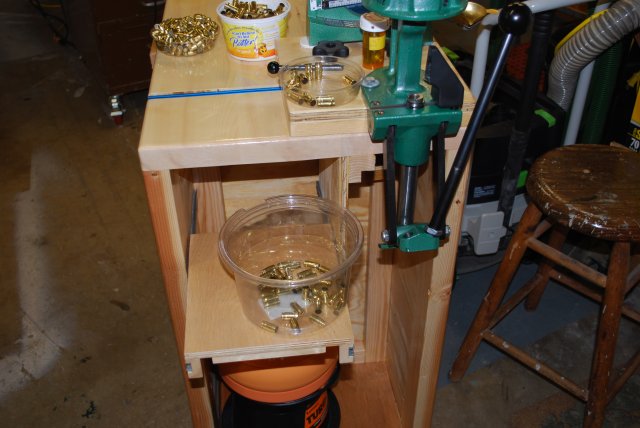
Bench set up for depriming step.
Please click on Deprime to see more details on how I deprime.
The tumbled cases are on top near the press, the deprimed cases in the tub on the loading shelf below.
|
Ultrasonic Cleaner
|
|
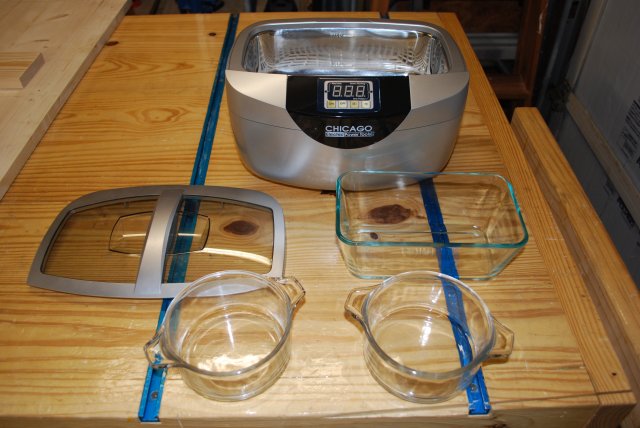
Cleaner with All Bowls.
I use the bowls to save cleaning materials: white vinegar, dish soap, baking soda or Birchwood Casey and they make it easier to flush the dirty water and soap out of the cases.
|
|
|
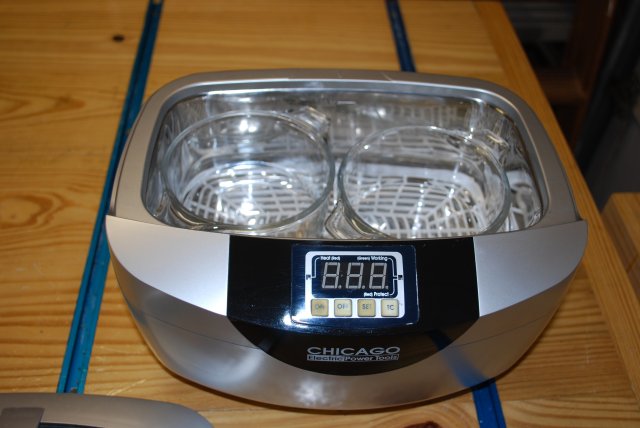
Cleaner with 2 Small Bowls (2 Cups each).
|
|
|
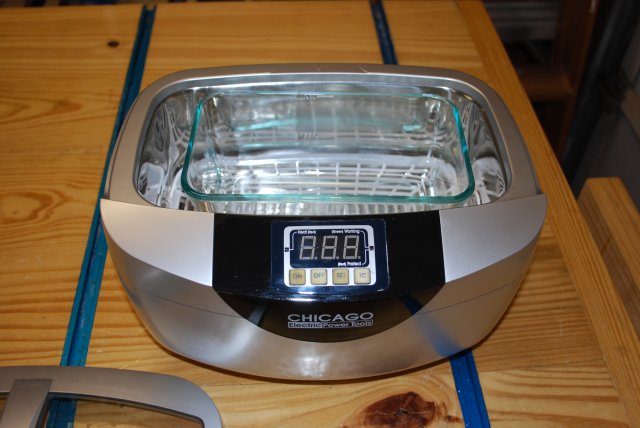
Cleaner with Large Bowl (5 Cups).
|
|
|
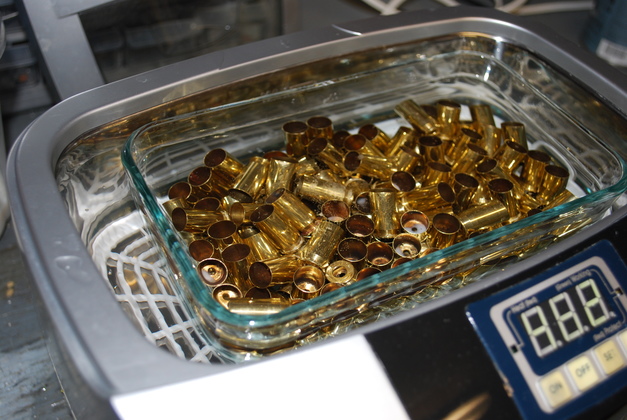
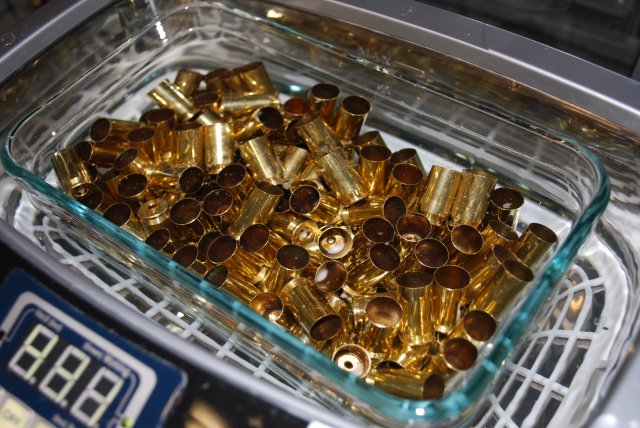
Cleaning about 160 cases of .45 ACP in the large (5 QT.) bowl.
The water level in the ultrasonic cleaner should be at least as high as the water in the bowl but not higher than the "Max" mark on the cleaner.
Note you can see baking soda in some of these cases, we're in the alkaline rinse step.
|
|
|
Another shot of the .45 ACPs cleaning.
This is the first rinse cycle (you can see some baking soda in the cases).
Note the lack of powder residue inside the cases, clean primer pockets and general "shinyness" of the cases (Cheap and Clean method, these were fired this morning).
|
Drying
|
|
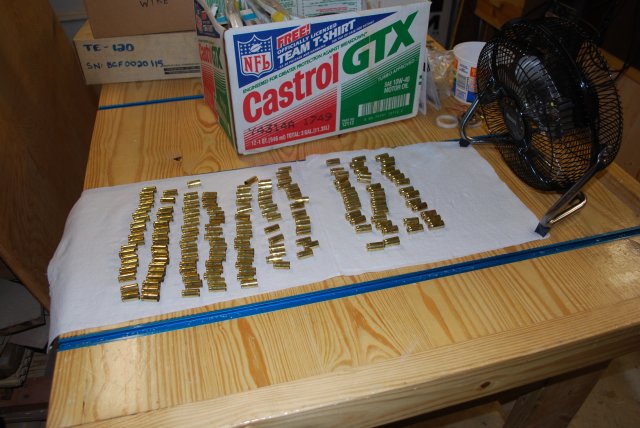
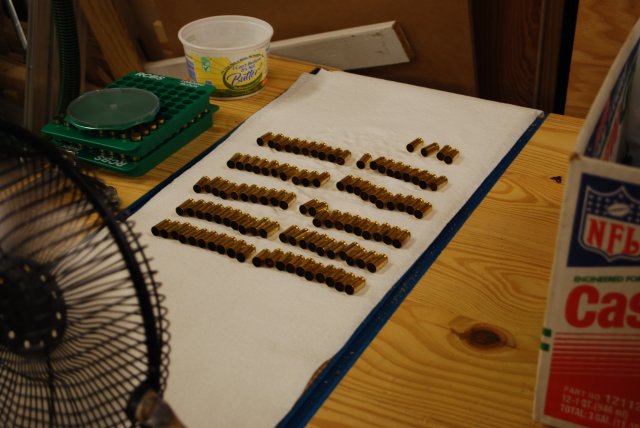
Drying under the small walmart fan.
|
|
Note Case Mouths Toward Fan.
I roll them half over about 30 min. into the drying cycle.
|
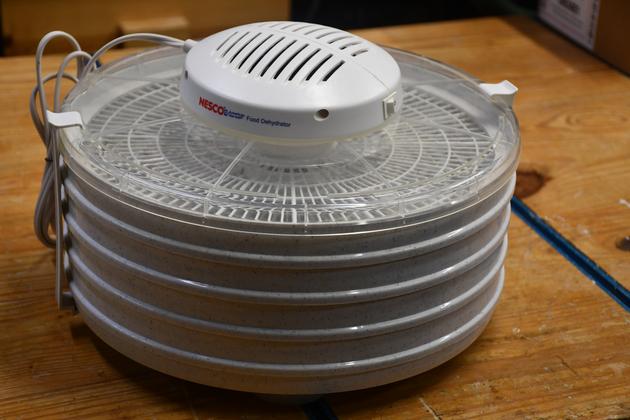
Dehydrator Drying
|
Nesco food dehydrator. I bought this at Amazone
|

|
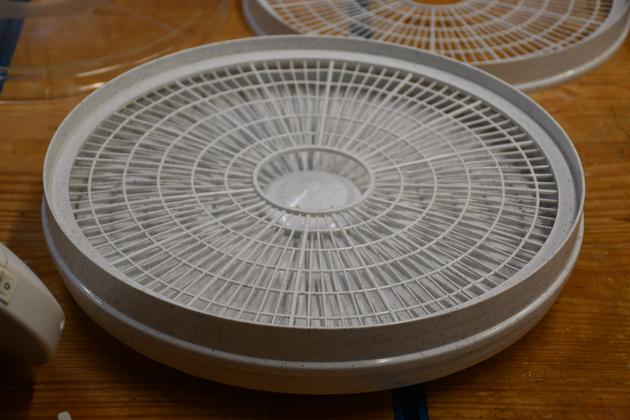
Here it is disassembled.  Note the bottom piece and 4 trays.
Each tray can be loaded with wet cases.
You only need to load it once and it drys faster than
the small fan I used to use.
|
|
With the bottomtray installed.
|
|
And two more.  You can leave some empty if you aren't
drying too many cases.
|

|
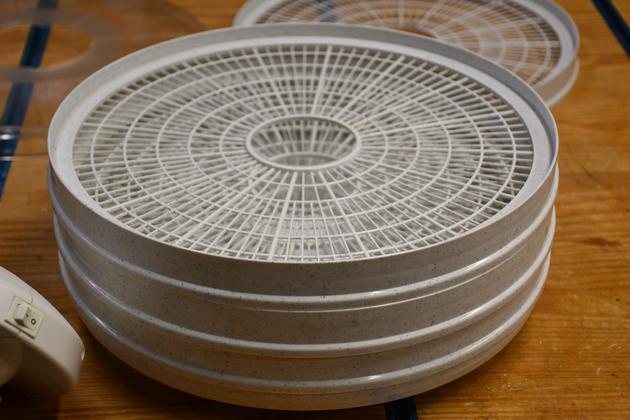
All 4 trays stacked.
|
|
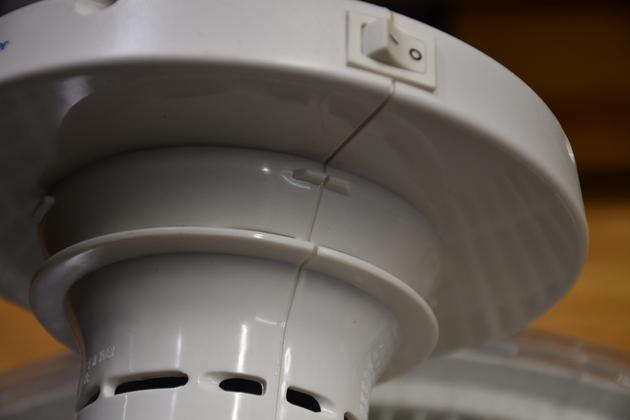
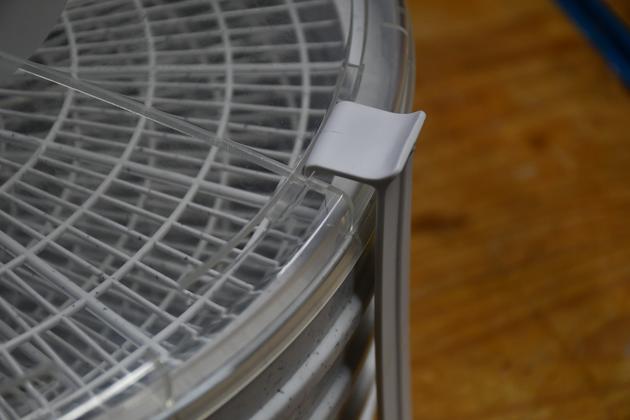
Blower housing.
Note the little plastic tab, it engages the top so the fan
won't blow it off.
|
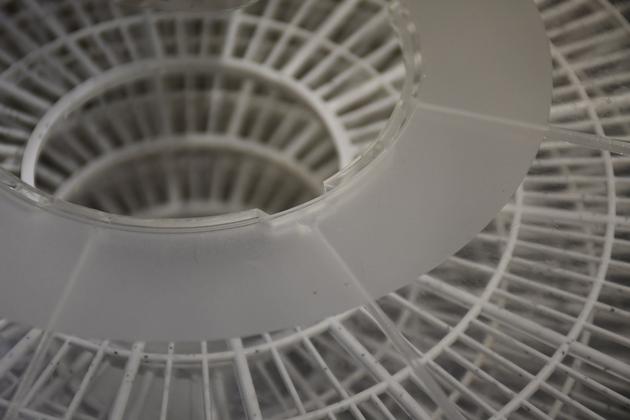
|
You can see the notch, thats part of the engagement system
for the blower.
|

|
The tray and top latches.
|
|
They hook into another slot in the lid, and under the bottom.
|
|